Categories
Maki Recipes

Mango Salsa Sushi

[HDR-IMG]

A week ago we were visiting Son’s parents, and his mother sent a couple of mangoes back with us. Now I have had mango pudding and mango ice cream before, but I don’t think I have ever had an actual raw mango! Yum! They were some really good mangoes, so we decided to make some sushi with it. Recently I keep hearing about mango salsa, and it sounds really good… so I figure why not make a sushi version? Eating this was like having a party in your mouth! It starts out smooth and sweet because of the mangoes and avocado on the outside, then a contrasting salty crunchy taste of the shrimp and red onion kicks in. Plus the cilantro adds an interesting small and gives a kick to the sushi.

Our regular readers might have noticed a bit of a change in the site. We now have nutrition facts for our sushi! These are by no means exact… they have been calculated based on the individual ingredients so some of the rolls (especially the fried ones) may not be exactly right since I haven’t been able to completely compensate for the cooking methods. Some of the recipes don’t have the nutrition facts calculated yet since I haven’t been able to find the nutrition facts for all the ingredients. One of these days I’m going to have to walk around the grocery store with a camera, taking pictures of all the ingredients that I have used in my sushi! Eventually they will all be up though, so if your favorite sushi doesn’t have the nutrition facts up yet, don’t worry! They will be up soon!

Makes 6 rolls, or 36-48 slices.

Ingredients
  • 6 sheets of nori
  • 3 cups sumeshi
  • 1 medium avocado
  • 1 medium mango
  • 1 small red onion
  • precooked shrimp
  • cilantro
Cooking Directions
  1. Cook sushi rice.
  2. Cut the avocados in half, discarding the pit.
  3. Cut off the hard skin and discard.
  4. Slice the avocados into very thin (but still thick enough so they don’t tear when you put them on your sushi) slices.
  5. Remove the skin from the mangos.
  6. Slice the mangos into very thin slices, similar to how you sliced the avocado.
  7. Cut the red onion into slices.
  8. Using shrimp, red onion and cilantro as your fillings, roll the sushi inside-out.
  9. Place alternating thin strips of avocado and mango across the top of the roll, and squeeze them into the roll with the rolling mat so they stick.
  10. Serve with wasabi, shoyu, and ginger (if desired). Enjoy!

Serving Size: 1 roll

  • Calories: 229
  • Fat: 5g, 8% DV
  • Saturated Fat: 1g, 4% DV
  • Cholesterol: 43mg, 14% DV
  • Sodium: 586mg 24% DV
  • Total Carbohydrates: 38g, 13% DV
  • Dietary Fiber: 2g, 9% DV
  • Sugars: 23g
  • Protein: 8g, 15% DV
  • Vitamin A: 14%
  • Vitamin C: 32%
  • Calcium: 3%
  • Iron: 7%
  • Magnesium: 7%
  • Potassium: 9%

Percent Daily Values are based on a 2000 calorie diet. These values are only estimates based on the individual ingredients, and not meant to replace the advice of a medical professional.

More Pictures
Categories
Maki Recipes

Shrimp n’ Apple Roll

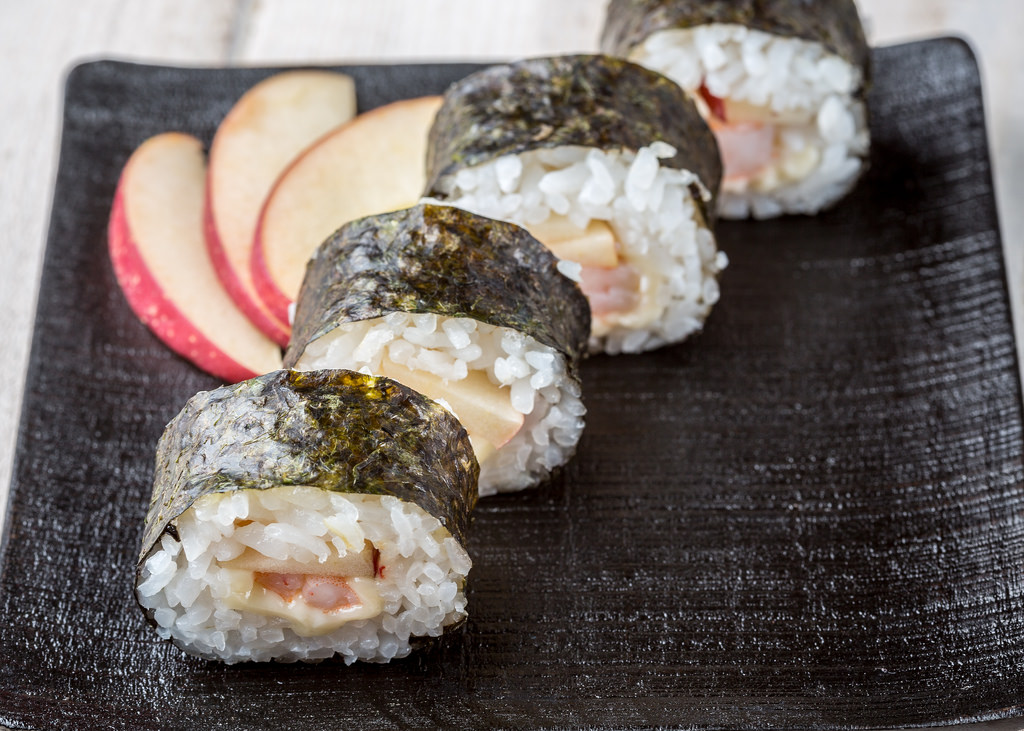
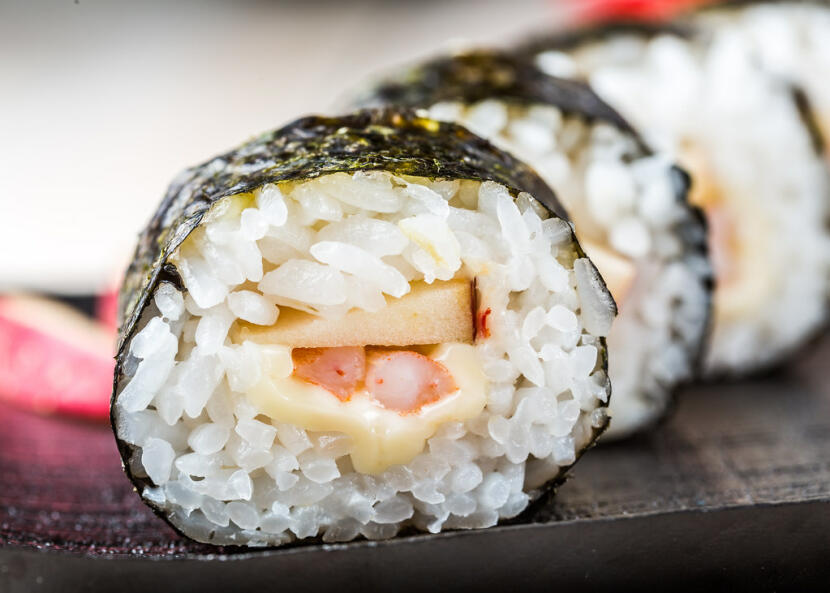
Several people have told us that we should try making sushi using apples and shrimp, so finally we have! I know everyone always says to use Fuji apples for their sweetness… but I didn’t have any so I just made do with what I had! These apples were sweet too though, so I figure it’s fine! 🙂 The cheese definitely helped, as it was sweet but a little bland without the saltiness and spice of the cheese.

So this is random… but I am completely and totally addicted to So You Think You Can Dance. I get so emotionally attached to the dancers… I’m always mad when a dancer I really liked gets voted off! (Like when Jessi was voted off by the judges because she had been sick the day before, or when Hok got voted off last week!) Yes yes, I am a dork, I know. 😛 I suppose part of the reason is because I was a dancer for most of my life, and only recently stopped dancing so I still fantasize about being on that show, working with all of those amazing choreographers! Wouldn’t that be a dream come true! Haha not a chance of that, but I can dream, right? Oh, and I’ll give you a hint about one of the new projects that Son and I are working on… it has to do with dance! The blog related to the project will be up soon, so I’ll have a link to it if anyone is interested in reading it.

Also, I was recently looking at Karianne’s web site (if you haven’t seen it, you should check it out!), and saw a post about a Sushi Competition! Hehe it sounds like a lot of fun… if any of you are in London or are lucky enough to be able to go, please please PLEASE let me know how it goes! (I have school 😛 and I can’t exactly get to London anyways!) I would love to hear about all the awesome sushi creations that they have there!

shrimp and apple roll

Ingredients
  • 6 sheets nori
  • 3 cups sumeshi
  • 2 red apples
  • 6 slices pepperjack cheese
  • 1.5 cups mini shrimp, peeled, deveined and cooked
Cooking Directions
  1. Cook sushi rice.
  2. Core the apples, cut each apple into 9 slices.
  3. Cut each slice of cheese into thirds.
  4. Roll the sushi, using 3 slices of apple, one slice worth of cheese, and 1/4 cup mini shrimp as your fillings.
  5. Serve and enjoy!

Categories
Maki Recipes

“Beef” and Broccoli Maki

[HDR-IMG]

Recently, a good friend of ours decided to be a vegetarian. We go out to eat with him a lot, so it’s been a little difficult to find restaurants with good vegetarian options that don’t taste like cardboard to the rest of us. Son and I love our meat, so we were amazed to find a vegetarian restaurant that we all loved! (If you are ever in Irvine and want some good vegetarian food, you have to go to Thai Vegetarian Cuisine on Culver between the 5 and Walnut. It is soooo good!) This place had the best pad see you ever!! They used some sort of tofu in place of the beef… and it actually tasted like beef! Oh it was sooo good. If I could eat like that every day, I would have no problem going vegetarian!! (and believe me, I love my meat!)

This is my interpretation of the “beef” that is used in the vegetarian pad see ew (I love pad see ew! 😀 ). Ours doesn’t taste exactly like beef, but it’s still really good! We overcooked the broccoli just a tad bit (which is why it is all black and looks dead) but it still tasted fantastic! This is a great way to make sushi for your vegetarian friends or to get your kids to eat a vegetarian dish! Yum!

Sorry I have pretty much been absent lately. Son and I have been really busy working on a couple of websites that we are trying to get out, so we haven’t had any time to make sushi. I can’t tell you anything about them yet, but I will definitely let everyone know when I can, in case any of you are interested in using them! 🙂

Makes 6 rolls, or 36-48 slices.

Ingredients
  • 6 sheets nori
  • 3 cups sumeshi
  • 2 large heads of broccoli
  • 6-8 pieces oagesan agè (unseasoned aburaáge)
  • 1/2 cup sugar
  • 1/4 cup water
  • 1/4 cup shoyu
  • pepper
  • sesame or peanut oil
Cooking Directions
  1. Cook sushi rice.
  2. Combine sugar, shoyu and water in a medium bowl.
  3. Rinse oagesan agè in hot water to remove the oil.
  4. Slice aburaáge into 1″ wide slices.
  5. Marinate oagesan agè in the shoyu mix.
  6. Meanwhile, cut broccoli into bite-sized pieces. Place in a bowl with 3-4 tbsp water.
  7. Microwave broccoli on HIGH for 2 minutes, or until it begins to soften. (If you would like, you could steam the broccoli instead)
  8. Put peanut or sesame oil in a wok, heat on high heat until oil begins to smoke.
  9. Place marinated oagesan agè in wok, season with pepper.
  10. If you would like, you can add a little of the marinade into the wok, but this will make it sweeter so it’s up to you.
  11. Cook until the sesame oil has been reduced by half.
  12. Add broccoli, cook until the sauce becomes gooey.
  13. Roll the sushi, using the oagesan agè and broccoli as your fillings.
  14. Serve and enjoy!

Coming Soon!

More Pictures
Categories
Maki Recipes

Tuna Temaki

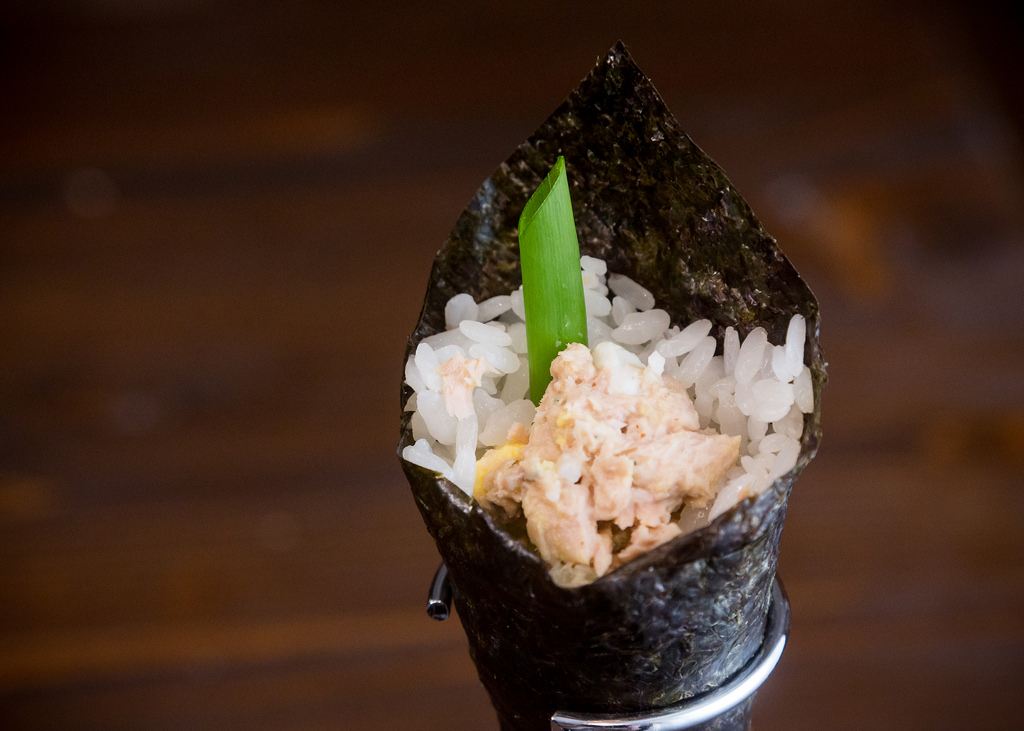
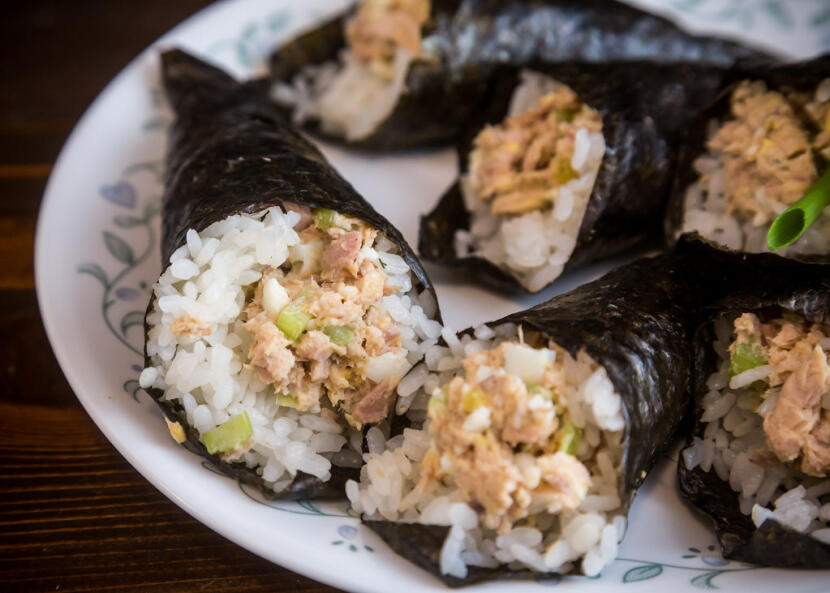
A few weeks ago, Yvo posted a recipe for tuna salad on her blog, The Feisty Foodie. Since I am almost as faithful a reader of her blog as she is of mine (her reviews of New York restaurants always make me want to pack my bags and catch a flight out to New York), I read her post and by the end really wanted some tuna salad. I finally got around to making some (I didn’t have any eggs in the fridge, so I couldn’t make any for a while), and it is definitely kick er… butt! Yummmm… this recipe is definitely a keeper! When you are making the tuna temaki, don’t put too much wasabi in it (omit the wasabi if you don’t like spicy foods). I accidentally put too much wasabi on one, which resulted in Son looking like he was crying (Okay, so his eyes were just watering 😛 ). Hehe too much even for him! 😛

Tuna Temaki

So how are your summers going? I hear that some of you have pretty bad weather where you are… I hope you are managing alright! Here in SoCal, it’s not too bad. A little hot sometimes, but nothing a fan and a little AC can’t solve. Hope things are going great for you all!

Makes 12 cones.

Ingredients
  • 6 sheets nori
  • 3 cups sumeshi
  • 2 cans of tuna, drained
  • 2 hard boiled eggs, chopped
  • 2 ribs of celery, chopped
  • 1 tbsp pickle relish
  • 1/4 tsp dried dill
  • 1 tbsp dijon mustard
  • 2 tbsp mayonnaise
  • 6 green onions, green portion
  • wasabi
Cooking Directions
  1. Cook sushi rice.
  2. Mix the tuna, hard boiled eggs, celery, relish, dill, mustard, and mayonnaise together. Season to taste with salt and pepper.
  3. When you are rolling the temaki, put a line of wasabi on the rice before you put the ingredients down. Then roll the temaki sushi, using about 1/4 cup of tuna salad and one green onion, broken in half, as your fillings.
  4. Enjoy!

Categories
Maki Recipes

“I Scream” Cone

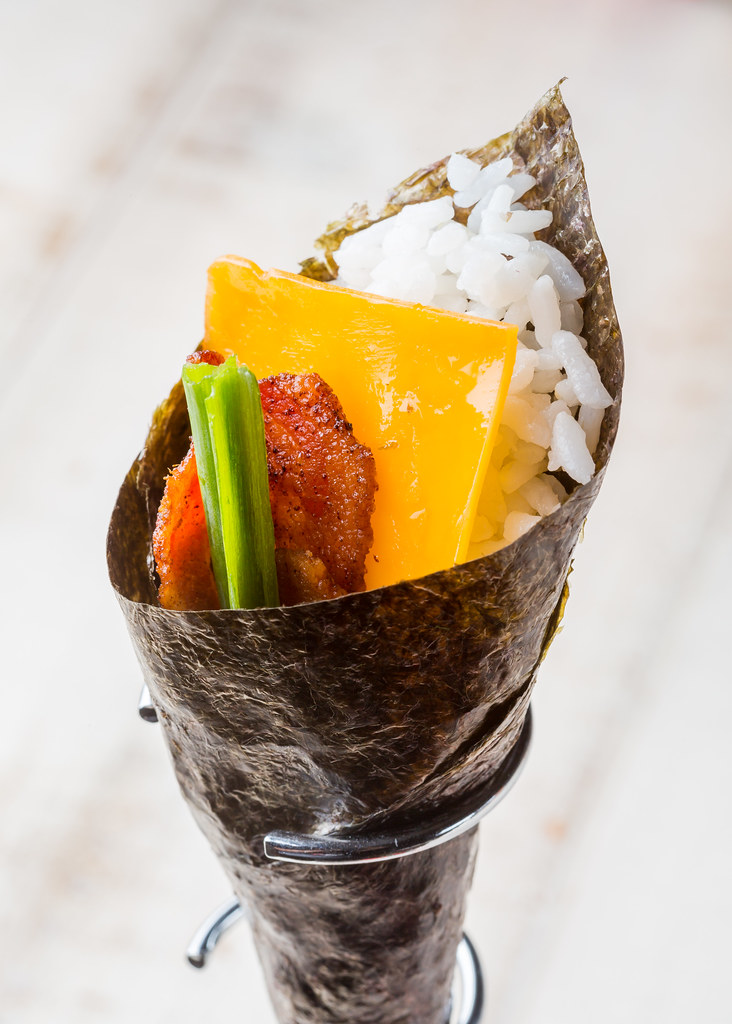
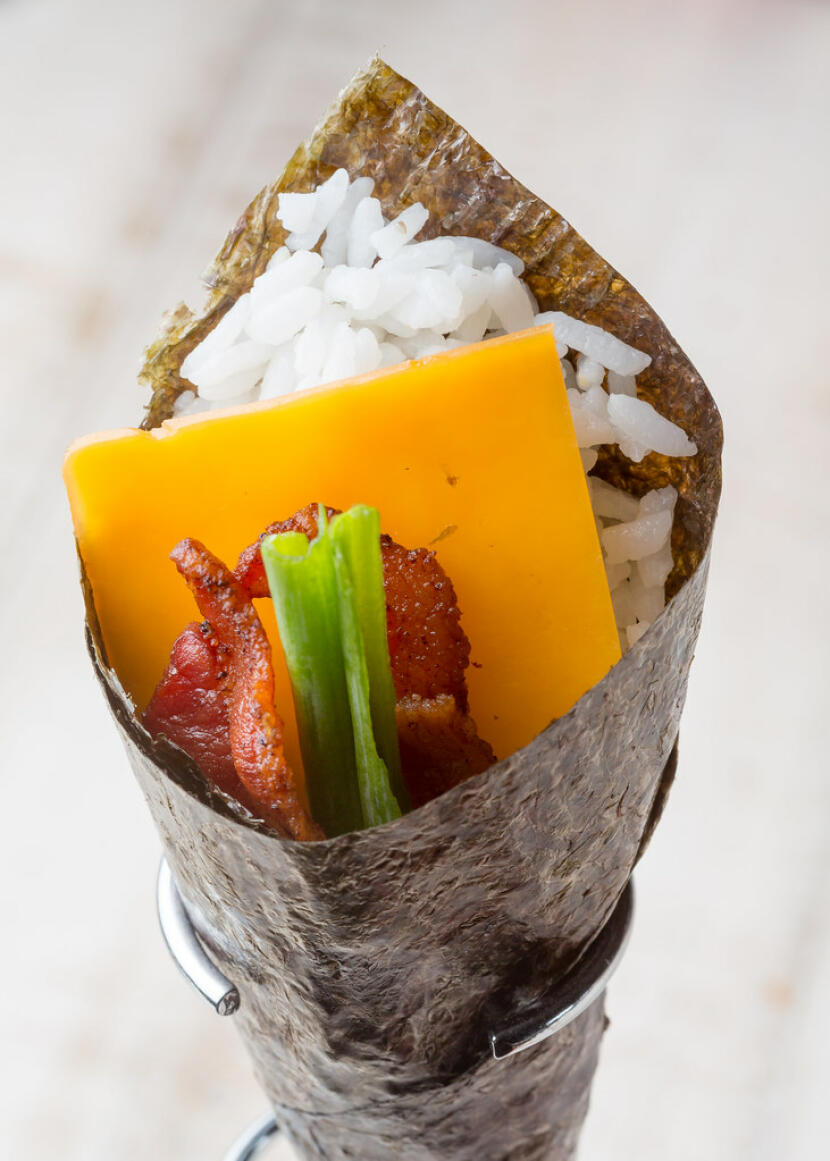
The last post showed you how to make temaki sushi. This post gives you the recipe for the temaki sushi shown in the how-to post! This one is soooooo good. I didn’t think bacon, green onion and cheese would be anything really special. Quite frankly I had forgotten to get ingredients for this post and just used what was in my fridge at the time! Surprisingly, this one is amazingly good! Bacon goes with just about everything, of course, and the green onion brightened it up a bit. Add a bit of creamy cheddar cheese, and BAM! you have got an amazing temaki sushi! Believe me, you will *scream* “Yum!” when you try this one!

I Scream cone

Makes 12 cones.

Ingredients
  • 6 sheets nori
  • 3 cups sumeshi
  • 12 slices of bacon
  • 12 sticks green onion
  • 6 1 inch by 2 inch slices of cheddar cheese
Cooking Directions
  1. Cook sushi rice.
  2. Cook bacon in frying pan or microwave bacon, until it is as crispy as you like it. Break each slice in half.
  3. Wash the green onion, cut the long green stalks off of the white bulb-like things. Discard (or pickle) the white bulbs. Break each stalk in half.
  4. Quarter each slice of cheese.
  5. Roll the temaki sushi, using two green onion halves, two bacon halves, and four cheese sticks as your fillings.
  6. Enjoy!
Categories
Maki Recipes

How to Make Temaki Sushi

[HDR-IMG]

Temaki is a super easy type of sushi to make. It is similar to maki sushi and tastes pretty much the same, but is so much easier to make! This would probably be great for sushi parties – you don’t need a bamboo rolling mat to make it, and if you have all your ingredients and the nori cut up before you start, you don’t even need a knife! (Which makes this great to make with kids!) This can be made with most of the same ingredients you make maki sushi with, so go crazy and let me know what you come up with!

Rolling the Temaki
  1. Cut each piece of nori in half, horizontally.
  2. Lay a half-piece of nori on your preparation surface (I used a cutting board), shiny side down.
  3. Place about 1/4-1/3 cup of sumeshi on the nori.
  4. Wet your hands with water so the rice won’t stick to your hands. I find it’s useful to have a small bowl of water sitting next to my work area so I don’t have to keep running between the sink and my work area to keep my hands wet.
  5. Spread the rice over the right half the nori with your hands, leaving the left half of the nori uncovered.
  6. Place your desired fillings diagonally on the sumeshi-covered part of the nori, so that they are pointing towards the top right corner of the nori.How to make temaki
  7. Roll the nori into a cone, with the center of the bottom of the nori as your point. Start by rolling the bottom right corner over the fillings, then continue rolling it into a cone by wrapping the left side of the nori all the way around. Use some water or a piece of rice to close the last corner of the cone.How to make temakiHow to make temaki
  8. Repeat with the remaining nori and fillings. Enjoy!How to make temaki
Categories
Other Recipes

Independence Day Sushi Parfait

[HDR-IMG]

Happy Independence Day! I hope everyone is having a fun Fourth of July celebration! Well, my American readers anyways. Sorry everyone else. 🙁

Now don’t get mad at me, because I know this isn’t really sushi, or even that close, but I’m going to post it anyways! Because I can. 😀 It’s only real claim to sushi is the rice pudding, (yeah, I didn’t even use sumeshi!!!) but if you don’t like rice pudding then it’s completely not sushi, just another (yummy!) dessert. It’s certainly festive though, and nice and cool on a hot summer day like today (well, for us anyways).

I’ll be over at my parent’s house most of today, because the city where they live allows fireworks, and the city where I’m living doesn’t. Unfortunately this year there are a bunch of restrictions because we are already having so many fires in CA because of the drought we are in this year. It sucks, but at least they haven’t banned fireworks completely yet! Plus my parents are having a BBQ, which gives me even more reason to go over there! Hamburgers, pasta salad, corn on the cob, deviled eggs, spinach dip, chocolate banana cream pie and chocolate torte. Yum! 😀 Have a great Fourth of July!

Makes 6 servings.

Ingredients
  • 3 cups Berry Blue Jell-O
  • 3 cups Strawberry (or some other red flavor) Jell-O
  • 6 cups rice pudding
  • 6 strawberries
  • 18 blueberries
Cooking Directions
  1. You can buy the Jell-O pre-made in the little cups or buy the little boxes of powder and make it as directed on the package. I bought my strawberry Jell-o pre-made, and made the Berry Blue Jell-O from the package, since they didn’t have any pre-made at the store.
  2. You can also buy the rice pudding pre-made like I did, if you have a whole lot of cooking to do that day, or you can make it from scratch. I reccomend this recipe, omitting the raisins. If for some reason you don’t like rice pudding, you can substitute it with vanilla pudding. If you don’t like that either, then you’re on your own because I can’t think of anything else to substitute it with. 😉
  3. Wash the blueberries and strawberries.
  4. Slice up the strawberries.
  5. Mash the blue Jell-O with a cutting motion, using a spoon or a knife. Scoop about 1/2 cup of the blue Jell-O into each of six parfait glasses.
  6. Gently scoop about 1/2 cup of rice pudding into each glass on top of the blue Jell-O, making sure not to mix it with the Jell-O.
  7. Mash the red Jell-O with a cutting motion, using a spoon or a knife. Scoop about 1/2 cup of the red Jell-O into each glasses on top of the rice pudding.
  8. Gently scoop about 1/2 cup of rice pudding into each glass on top of the red Jell-O, making sure not to mix it with the Jell-O.
  9. Garnish each glass with 3 blueberries and one sliced strawberry. Store in the fridge until ready to serve. Enjoy!

Coming Soon!

More Pictures
Categories
Maki Recipes

Cha-Shu Sushi

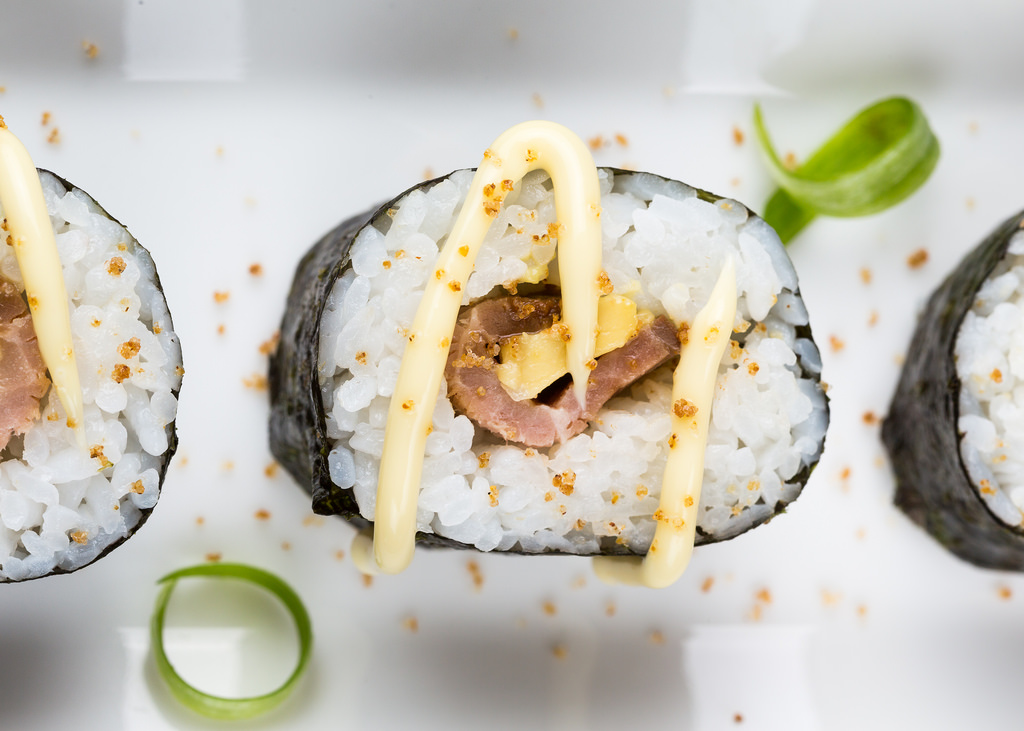
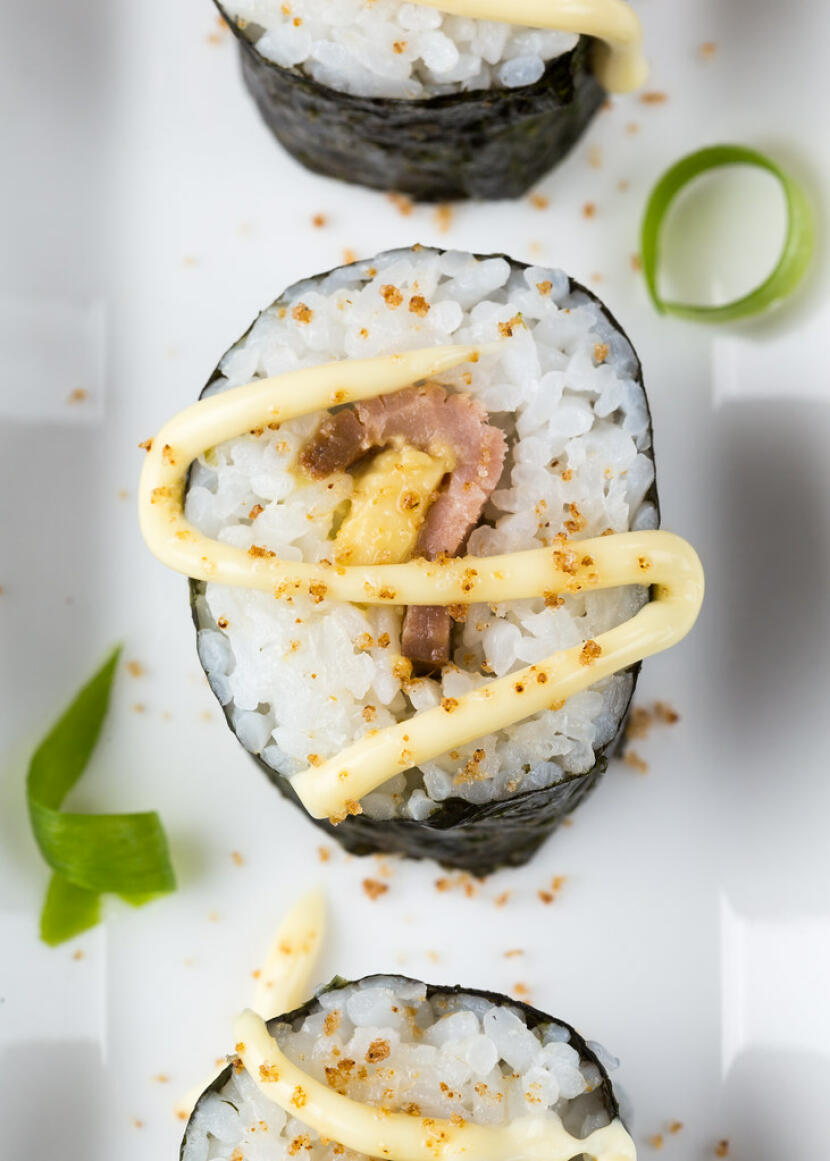
I grew up with my mom making cha-shu. She would make a big batch for dinner one night and we would eat it with ramen, and then eat it in sandwiches the rest of the week. It wasn’t until I met Son that I ever heard it referred to by the Chinese name – char siu? Or something like that? The way Son says it sounds like sa-siew, so now I’m completely confused. Don’t blame me, I’m Japanese! Hehe maybe some of my Chinese readers can help me out here? Anyways, after making the beef teriyaki for the Banh Mi Sushi and being rather successful with one of my mom’s dishes, I decided to make another dish that I grew up with, and it turned out pretty good too! (Of course it wasn’t as good as mom’s… it’s never as good as mom’s!)

Now you may think I’m silly, but if you are in the mood to go see a movie, and an animated one at that, you should really go see Ratatouille. You know, the movie with the cooking rat! Hehe Son and I just got back from seeing it, and it was fantastic! Now if only I could cook like that… maybe someday! 😀

Makes 6 rolls, or 36-48 slices.

Chashu Roll

Ingredients
  • 6 sheets nori
  • 3 cups sumeshi
  • 2 lbs boneless center cut pork loin
  • 2 tbsp hoisin sauce
  • 2 tbsp shoyu
  • 1.5 tbsp rice wine (NOT rice vinegar!)
  • 2.5 tbsp sugar
  • 1 tsp salt
  • 1 tbsp ketchup
  • 1/5 tbsp minced garlic
  • 1 avocado
  • mayonnaise
  • seasoning salt
Cooking Directions
  1. Remove most of the fat and gristle from pork loin and discard.
  2. Cut meat with grain into strips about 3 inches thick.
  3. Combine hoisin sauce, shoyu, rice wine, sugar, salt, ketchup and garlic in a bowl.
  4. Add meat. Coat well.
  5. Marinate at least 4 hours, or overnight
  6. Preheat the oven to 375 degrees Fahrenheit.
  7. Arrange the pork on a rack (I used a cookie cooling rack) in a roasting pan (or on a cookie sheet). If you want to reduce the mess, line the cookie sheet with foil and also put foil on the rack, using a knife to cut through the foil where the openings in the rack are so the juices and marinade can drip through onto the pan. It’s not guaranteed to be entirely mess free, but it should reduce the mess significantly.
  8. Roast for 45 minutes or until the meat is cooked through and the outside is brown.
  9. Cook sushi rice.
  10. Slice a piece of the cooked meat into strips, about 1 inch thick.
  11. Cut the avocado in half, discard the pit, slice into thin slices while still in the tough skin, then discard the skin.
  12. Roll the sushi, using one cha-shu stick, a few avocado sticks and mayonnaise as your fillings.
  13. Sprinkle with seasoning salt. Enjoy!

Categories
Other Recipes

Inari Con Gambas Al Ajillo

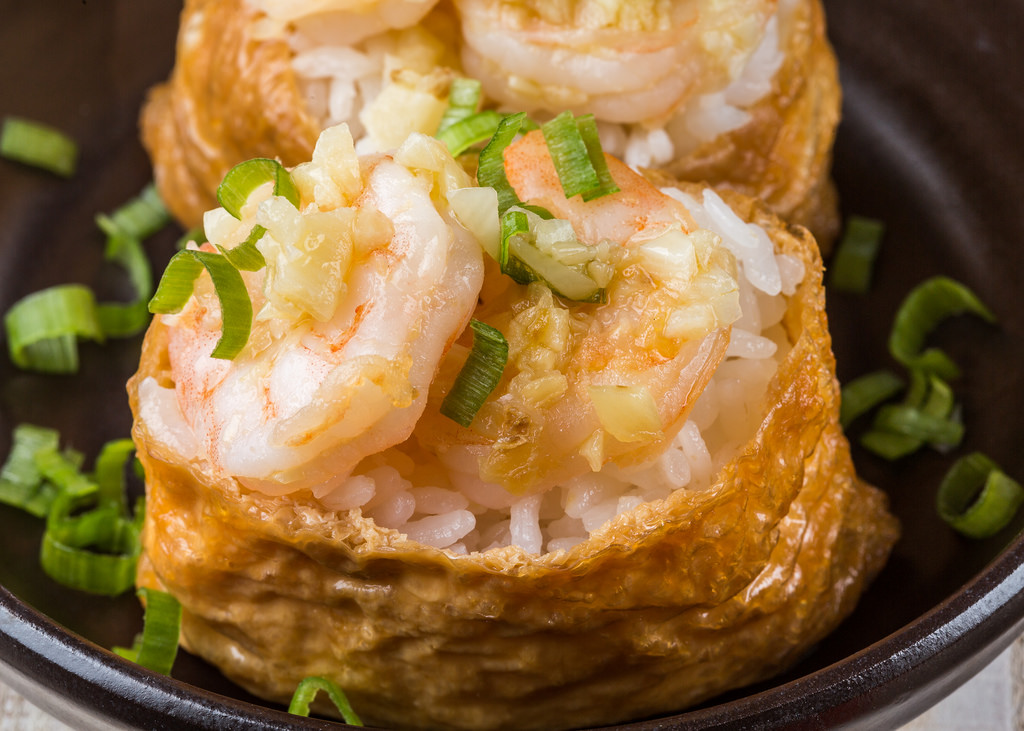
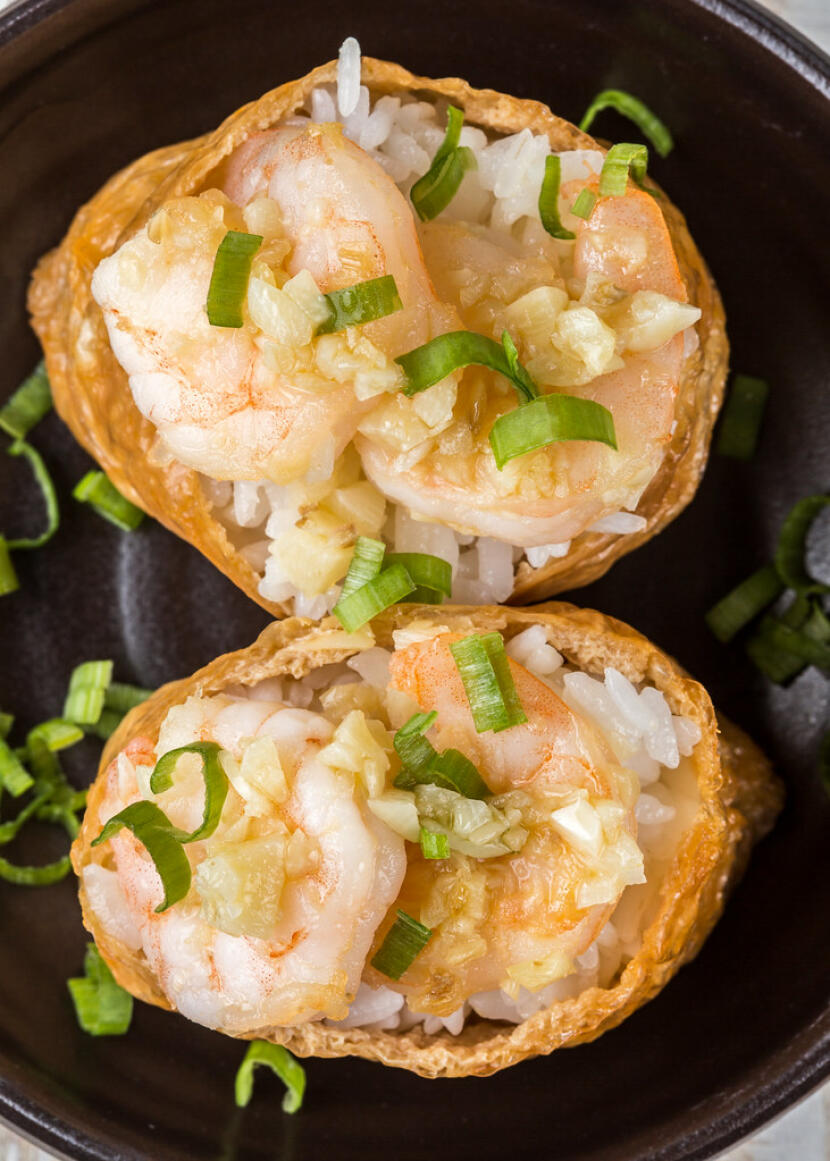
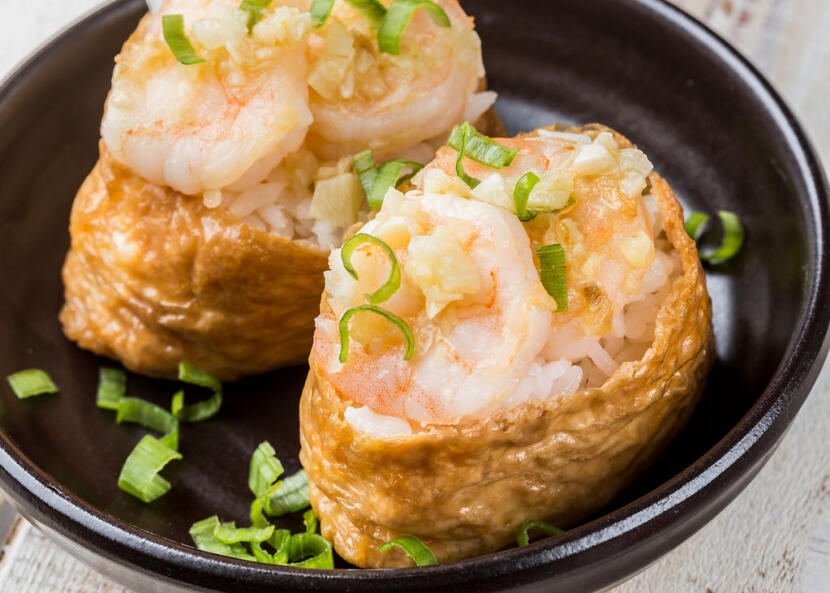
On Father’s Day, after I was finished making the sushi, my mom made tapas. My sister always requests them, because she went to Spain over spring break on a trip with some of her teachers and classmates from her high school. She’s such the world traveller… plus she got to go to Kenya in middle school!!! Lucky girl. Hehe I haven’t been out of the U.S. 48 continental states! Anyways, she loved the food when she was in Spain, so my mom tried making some and they came out great! So since I had just finished making Inari-Zushi I figured why not mix them! And let me tell you, it came out great! The tapas have a lot of spices and were very salty, which balances extremely nicely with the sweetness of the inari-zushi.

Inari Con Gambas Al Ajillo

The tapas recipe that my mom used (and that I used here) is from GroupRecipes.com.

Inari Con Gambas Al Ajillo

Makes 12 pieces

Ingredients
  • Inari-Zushi
  • 1/2 – 3/4 pound small shrimp, shelled
  • coarse salt
  • 8 tablespoons olive oil
  • 3 large cloves garlic, peeled and very coarsely chopped
  • 1/2 teaspoon paprika
  • 1 tablespoon minced parsley
Cooking Directions
  1. Dry the shrimp well.
  2. Sprinkle salt on both sides.
  3. Let sit at room temperature for 10 minutes.
  4. Heat the oil over medium heat, then add the garlic.
  5. When the garlic starts to turn golden add the shrimp.
  6. Stir for about 2 minutes or until the shrimp are just done.
  7. Sprinkle in the paprika and parsley.
  8. Make the Inari-Zushi.
  9. Place four to six pieces of shrimp on the inari, and eat!