I’ve always loved seeing the cool layer cakes that all the amazing bakers across the internet make. On instagram and tiktok and food blogs, it’s my favorite thing to see some cool cake design, and imagine how that cake might taste.
But I’ve never made one myself.
I was always too intimidated by the idea – plus, we’re not huge dessert people here, and only have a few family members in the area (who will only take a slice or two each?!) so cake baking is definitely not a long-term hobby I can support around here.
I need to make more friends.

Off-handedly, I mentioned a few months ago that I had always wanted to decorate a layer cake, thinking nothing of it.
But then my sister-in-law jokingly suggested that I make a half-birthday cake for my brother.
Of course, I totally missed his half-birthday, but the idea was planted in my brain.
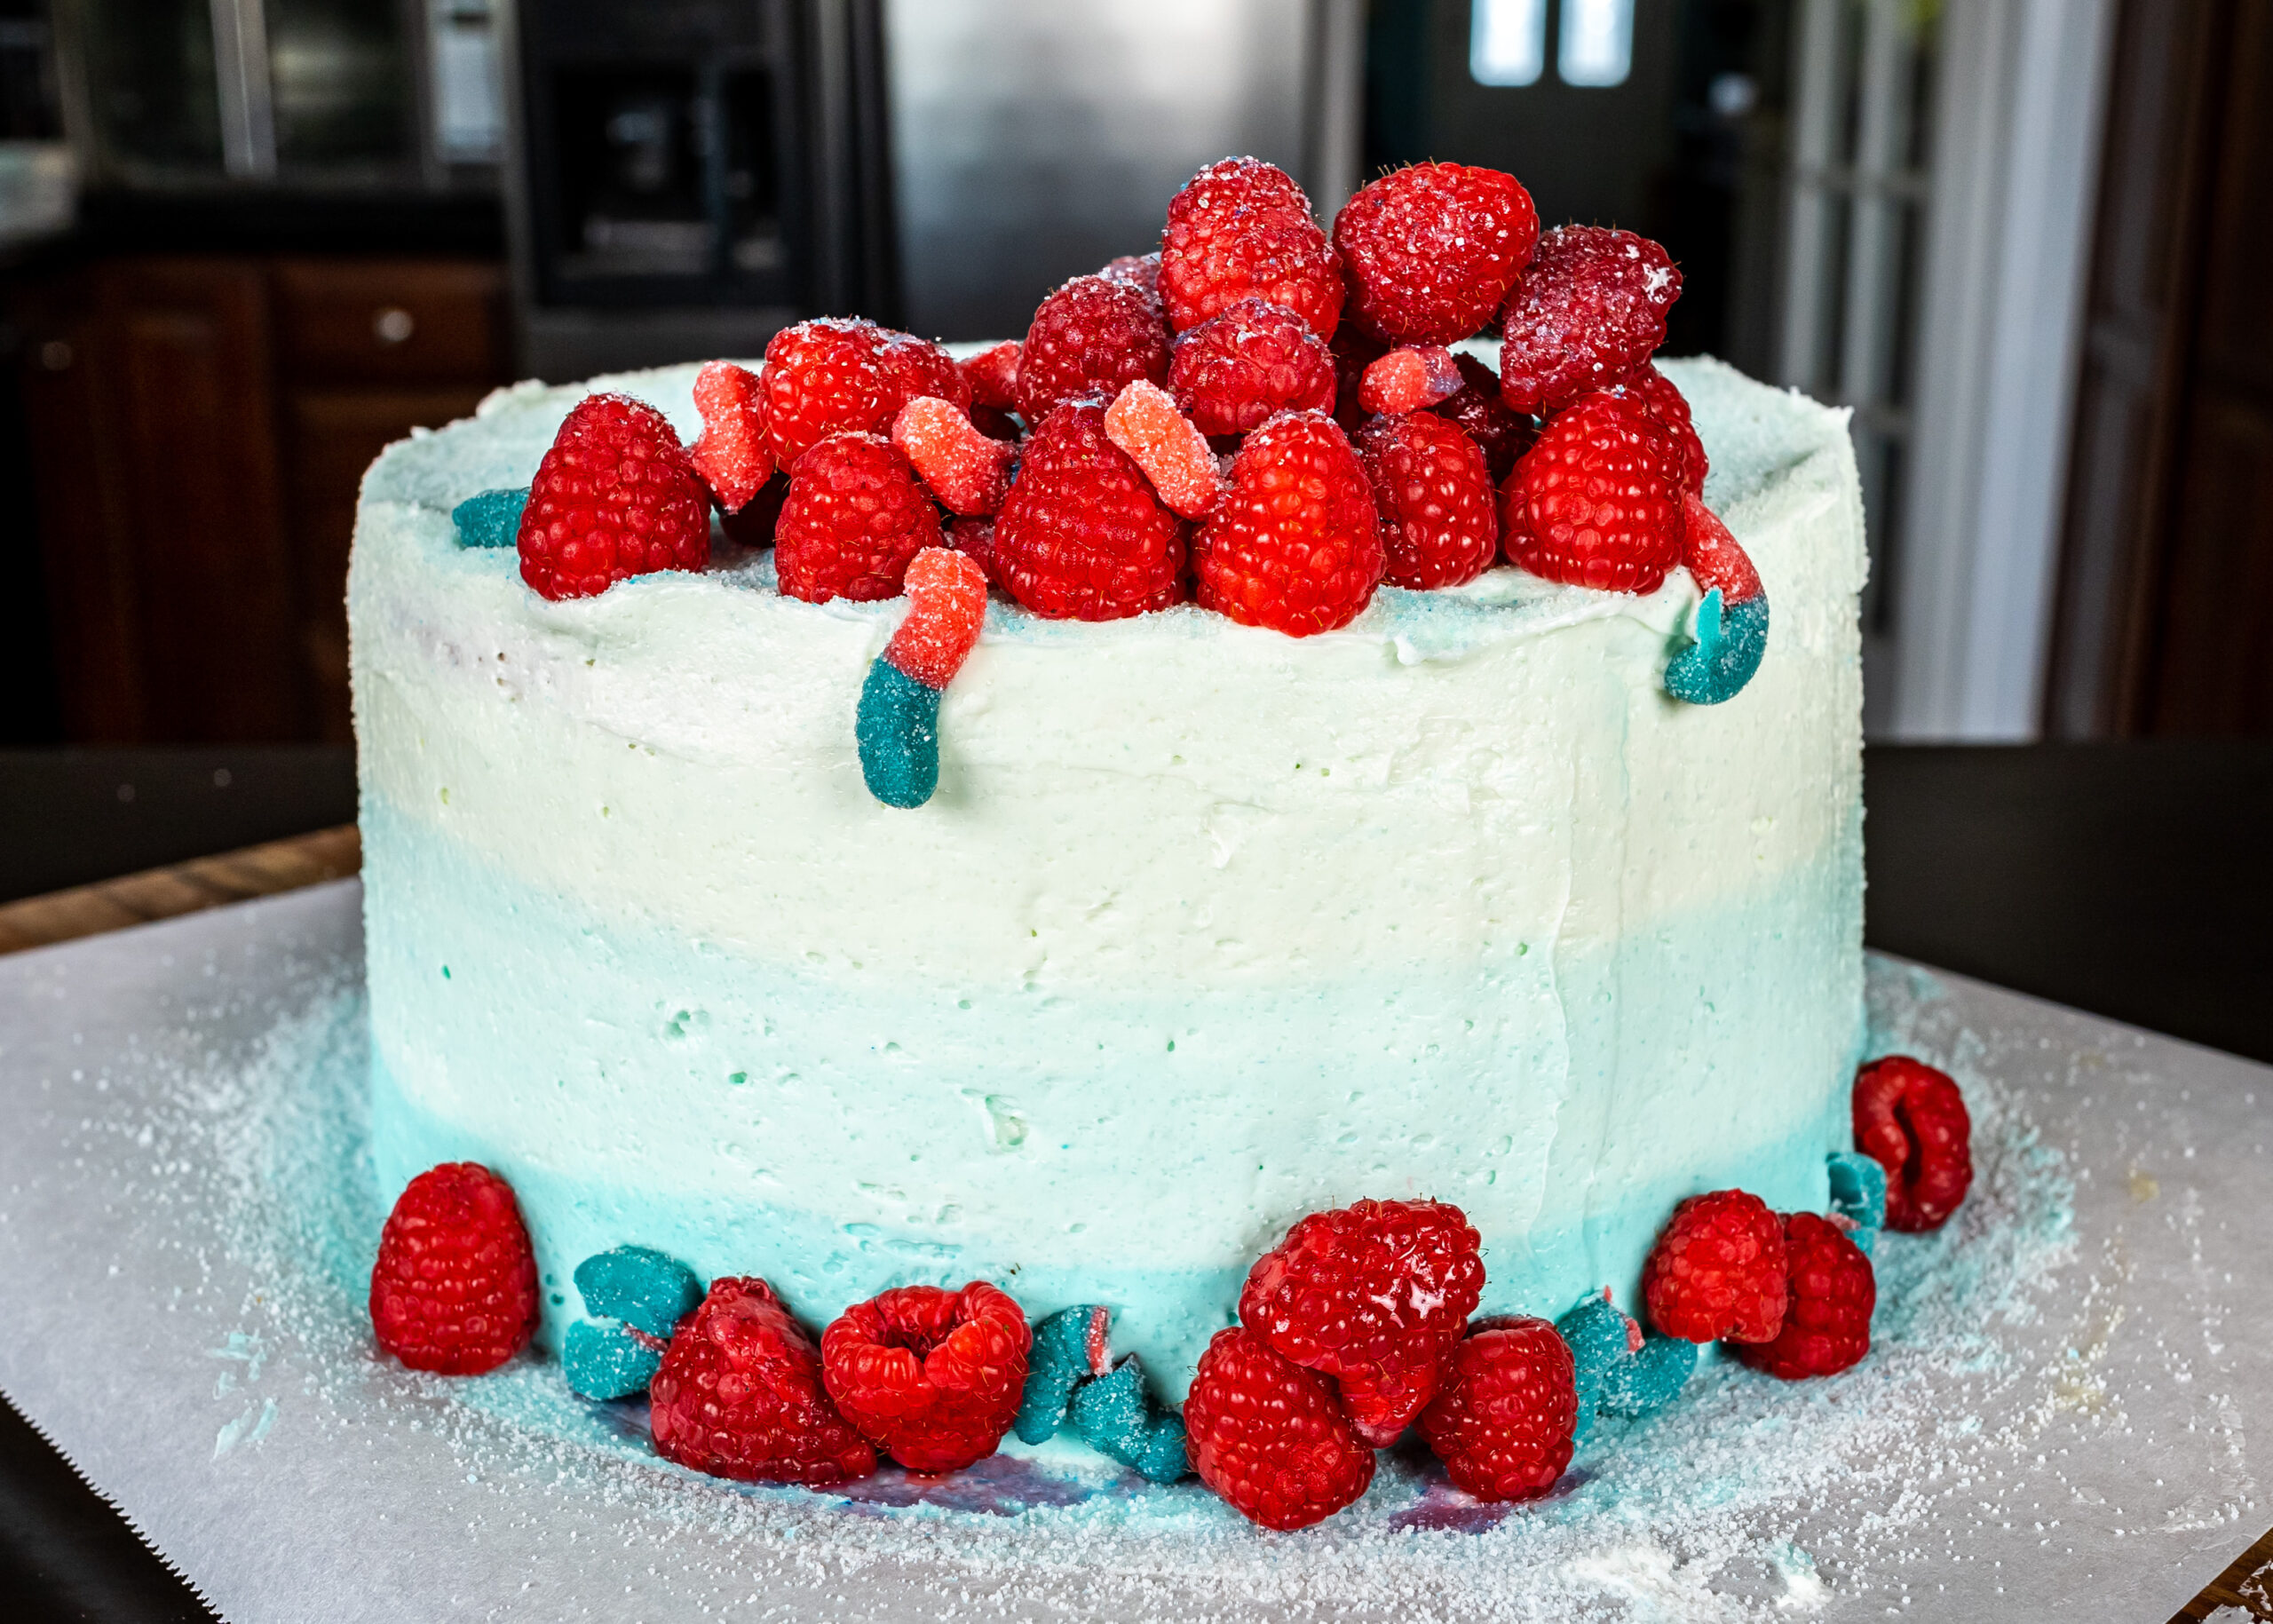
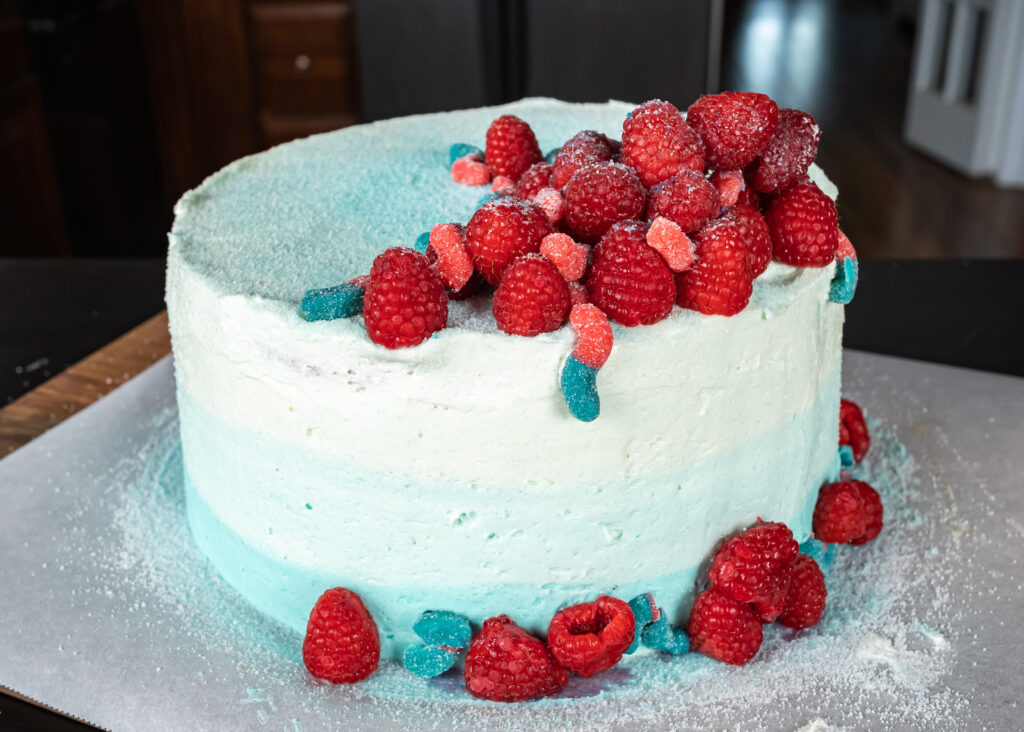
I always love doing something different and interesting with food, so I decided to bake a cake based on his favorite candy – blue raspberry sour candy.
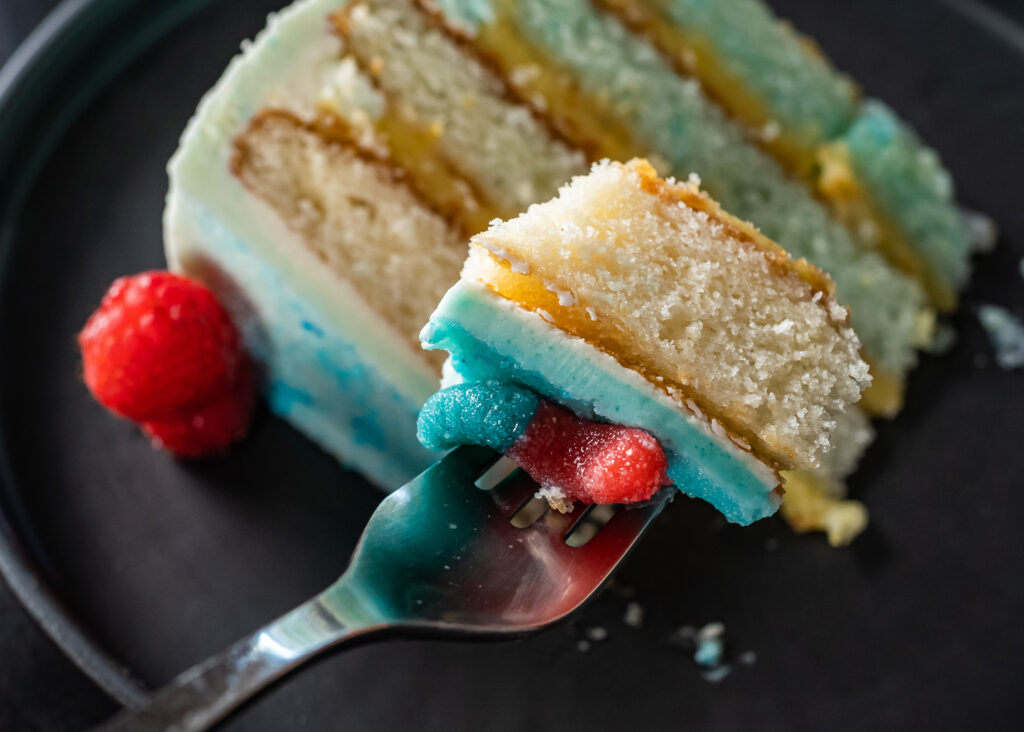
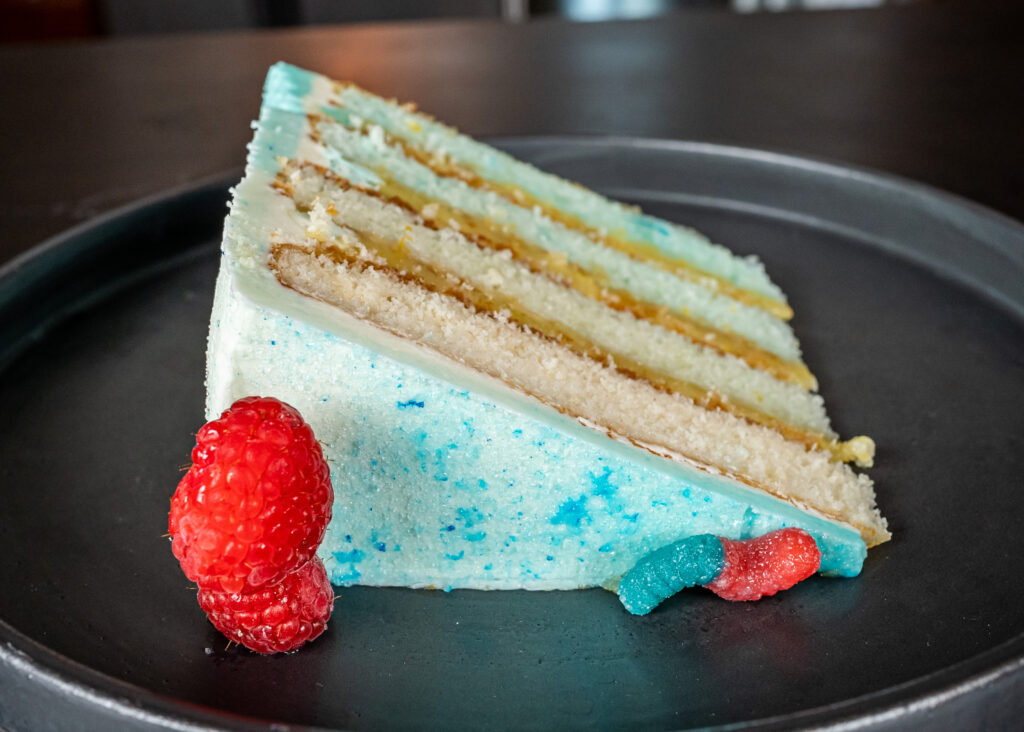
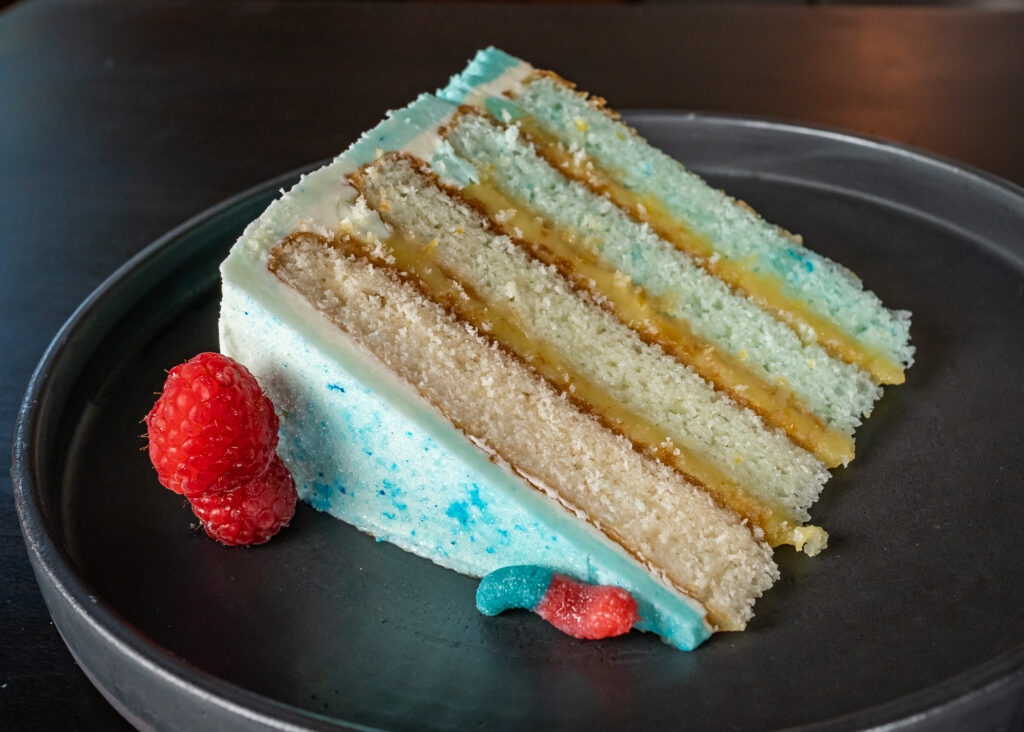
Since I am NOT a cake baker, I used SugarHero’s white cake/buttercream frosting as my base.
I happened to have some lemon curd that I had just made from all the egg yolks leftover from making angel food cake, so that would be my filling.
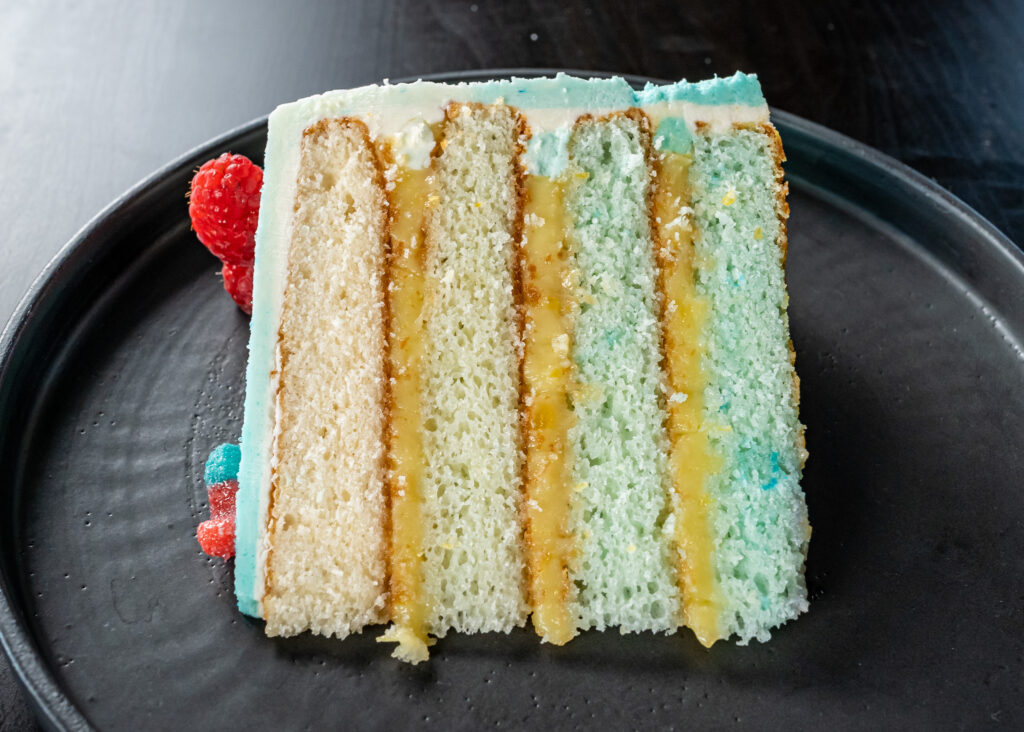
And blue raspberry lemonade-flavored Kool Aid was going to be my source of flavor.
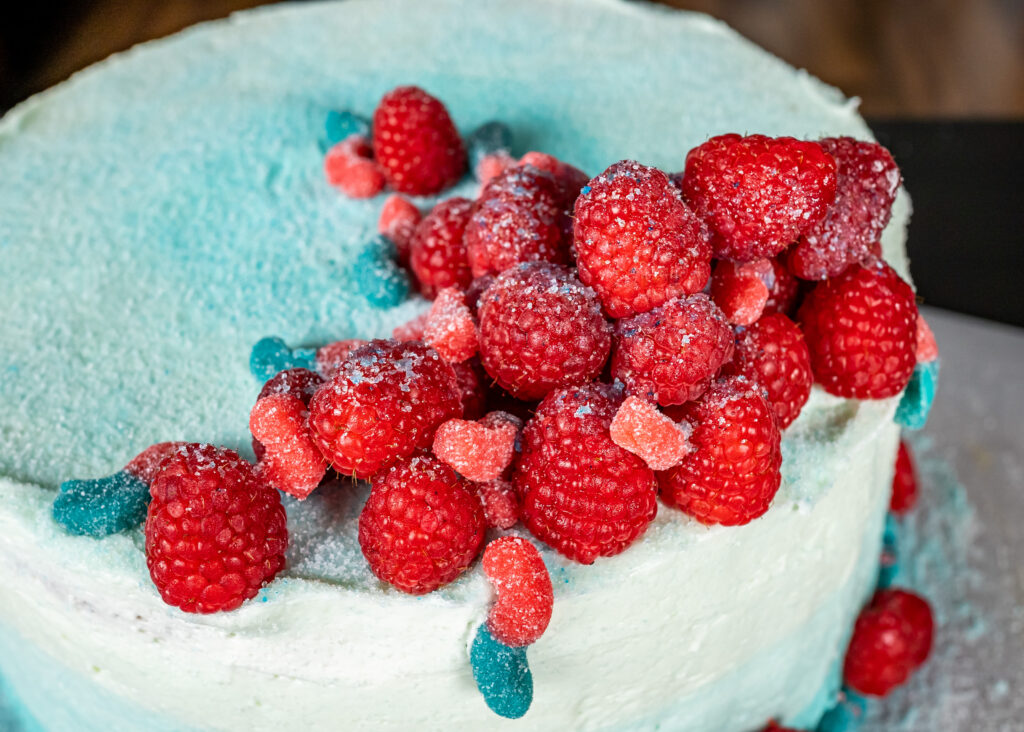
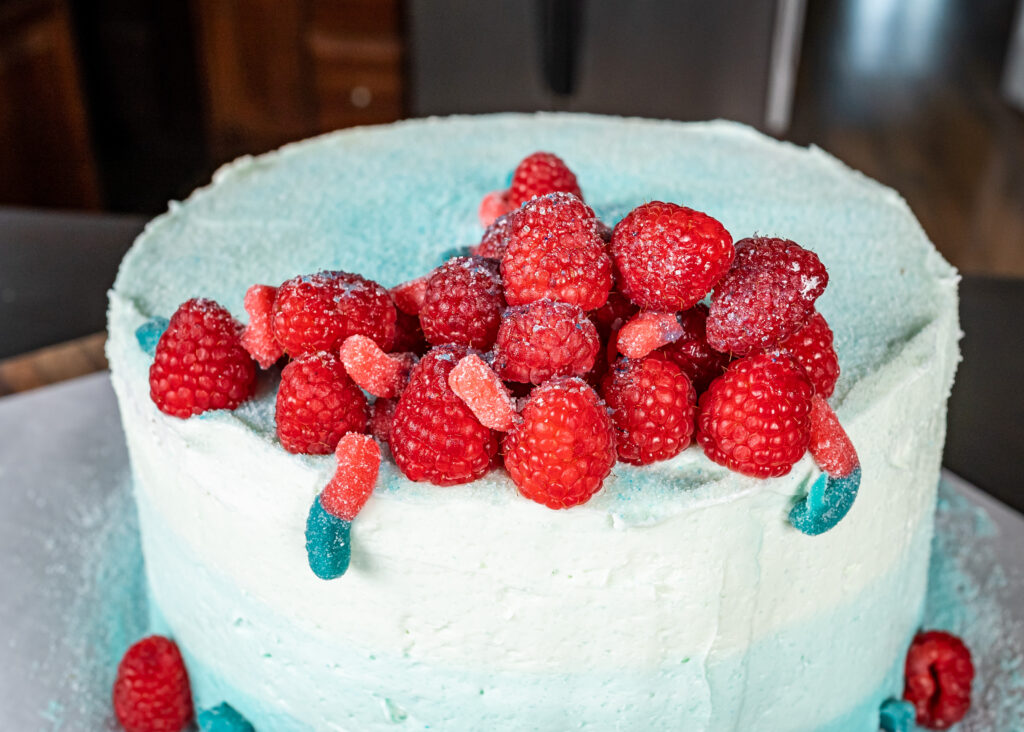
Top it off with more Kool-Aid powder, fresh raspberries, and sour gummy worms… and my sour candy layer cake was complete!
Crookedness aside (I’m working with none of the right tools here), I was pretty happy with how the ombre cake design and decorative toppings turned out. I was very worried that it was going to end up looking like something a five-year-old made, but ultimately I loved how it turned out!
Taste-wise, it’s not my favorite type of cake (it’s definitely on the heavy/sweet side, and I prefer lighter, less-sweet cakes) – but for what it is, it’s delicious.
The cake + frosting turned out super sweet, and the lemon curd is super tart, but when you eat it all together, it all balances out quite nicely.
And now that I’ve finally baked and decorated a layer cake? Well… I’ll probably never make another (or, only rarely), because that curiosity has been satisfied. What should I try making next?
Blue Raspberry Layer Cake
adapted from SugarHero
Ingredients
Cake
- 16 oz (2 1/4 cups) granulated sugar
- 16 oz (4 cups) cake flour
- 2 tbsp baking powder
- 1 1/4 tsp salt
- 6 fl oz egg whites (from about 6 eggs)
- 1 1/2 cups milk
- 1 tbsp vanilla extract
- 9 oz unsalted butter, at room temperature
- 6 tbsp Blue Raspberry Lemonade Kool-Aid powdered drink mix, divided
Frosting
- 8 fl oz (1 cup) pasteurized liquid egg whites
- 32 oz (8 cups) powdered sugar
- 1 tsp salt
- 32 oz unsalted butter, at room temperature
- 2 tbsp vanilla extract
- 3 tbsp Blue Raspberry Lemonade Kool-Aid powdered drink mix, divided
- teal gel food coloring
To finish
- 4-6 cups lemon curd
- fresh raspberries
- sour gummy worms
- Blue Raspberry Lemonade Kool-Aid powdered drink mix
Cooking Directions
Cake
- Preheat the oven to 350F. Line one or more 8-inch cake pans with parchment rounds, and spray the parchment and pan sides with nonstick cooking spray.
- Combine the sugar, cake flour, baking powder, and salt in the bowl of the stand mixer fitted with a paddle attachment. Mix on low speed for about a minute to combine the dry ingredients.
- Lightly whisk together the egg whites, about a quarter of the milk, and the vanilla extract; set aside.
- Add the remaining milk and the softened butter to the large mixing bowl and mix on low speed until the dry ingredients are moistened. Turn the mixer to medium speed and mix for a minute and a half.
- Add the egg white mixture in three batches, mixing for 20-30 seconds after each addition, until you have a smooth batter. Scrape the bottom and sides of the bowl with a rubber spatula, and give the batter a few more stirs to make sure everything is incorporated. Divide the batter evenly between four bowls (each bowl should contain 15oz of batter).
- Leave one bowl plain, and mix the other three bowls of batter with 1, 2, and 3 tablespoons of Kool Aid powder, respectively. Pour batter into separate cake pans – if, like me, you only have one pan, then bake each color one at a time.
- Bake the cakes at 350F for 15-20 minutes, until the sides just start pulling away from the pan, and a toothpick inserted into the center comes out clean. If the sides have completely pulled away from the pan, the cakes are probably overbaked.
- Let the cakes cool on a wire rack for 10 minutes, then gently turn them out and let them cool completely. Then wrap them with plastic wrap and put them in the freezer for at least 30 minutes, until they are firm but not frozen all the way through. If you are making these in advance, they can stay in the freezer for up to several weeks. Let them partially defrost, until they are firm but not rock-hard, before assembling.
Frosting
- Combine the whites, powdered sugar, and salt in the bowl of a large stand mixer fitted with a paddle attachment. Mix everything together on low speed, until the sugar is moistened and no dry patches remain. Turn off the mixer, scrape down the sides and bottom of the bowl with a spatula, then turn the mixer to medium speed. Beat on medium for 5 minutes.
- After 5 minutes, turn the mixer to medium-low and start adding the softened room temperature butter, 1-2 tablespoons at a time. Once all of the butter is incorporated, add the vanilla extract and mix it in. Stop the mixer and scrape down the bottom and sides once more. Turn the speed to medium and beat the buttercream for 10 minutes. It can be used right away, or stored in the refrigerator for up to two weeks, or the freezer for up to two months. If you have chilled the frosting, let it come to room temperature COMPLETELY and then beat it for several minutes to smooth it out and restore its texture before using it.
- To color the frosting, separate out three 2-cup portions; leave the rest white. Mix one of the 2-cup portions with 1 tablespoon of Kool-Aid powder. Mix the second with 1 tablespoon of Kool-Aid powder and 1 drop of teal gel food coloring. Mix the last portion with 1 tablespoon of Kool-Aid powder and 3 drops of teal gel food coloring.
Assembly
- Unwrap the darkest cake and place it on a cake cardboard if you have it, or parchment paper on a flat dish or board if you don’t. (Don’t use a plate with a curved edge, as that will make it difficult to both frost and serve.) If you have a cake turntable, put the cardboard/dish on top of that.
- Fill a piping bag with the darkest color frosting, and pipe a thick line of frosting on top of the outer edge of the cake.
- Spoon lemon curd inside the line of frosting, spreading it to the edges of the frosting. Make sure you don’t add so much that it will overflow when you add the next layer of cake on top.
- Continue this process with the next two lightest colors of cake/frosting, then top the stack with the uncolored layer of cake.
- Cover the top and sides of the cake with a very thin layer of white frosting—this is the crumb coat, which locks crumbs into the frosting and also provides some stability to the cake. If you can, refrigerate the cake for 30-45 minutes, until the crumb coat is set and the cake feels firm and stable. I skipped the refrigeration and it turned out okay, if a little unsteady.
- Pipe a super thick layer of the darkest icing around the bottom of the cake, up to where the second cake layer starts. Repeat with the second darkest color of icing in the middle, and the lightest colored frosting at the top.
- Using a bench scraper, apply pressure while turning the cake to smooth out the icing on the sides, and create an ombre pattern.
- If you’d like, you can use the leftover frosting from your bench scraper, or pipe more of each color frosting on the top, to create a reverse ombre ring – darkest in the middle, lightest around the outside.
- Once your frosting is smooth, it’s time to decorate. Using a small sifter, sprinkle more Kool-Aid powder all over the top and sides of the cake, to mimic the sour sugar on the outside of sour candies.
- Arrange fresh raspberries and sour worms on the top and side of the cake, and then sprinkle with more Kool-Aid powder.
- The cake can be enjoyed immediately, but it cuts far better if you chill it first, so the frosting and lemon curd sets. If chilled, bring to room temperature before eating. Cake will keep, well-wrapped, in the refrigerator for several days.
- Enjoy!
Sub to my YouTube channel and follow me on TikTok or Instagram to get notified whenever we have new videos!
Links in this post may be affiliate posts. If you buy an item through an affiliate link, I get a small fee, which helps support this blog!