Categories
Maki Recipes

Flank Steak Sushi

[HDR-IMG]

This flank steak recipe is one that my mom has used for ages, and I have always loved it! I used to always ask my mom to make it for dinner, but now that I’m all grown up I don’t get her home cooked dinners anymore! I have my own kitchen of course, but making it myself seemed a little daunting. Hehe let’s just say it never comes out as good as mom makes it… but it’s still so good! So of course I was excited to try one of my favorite meals as sushi! And might I say yum yum YUM!! (Yeah, I know I’m tooting my own horn but it’s so GOOD!)

Makes 6 rolls, or 36-48 pieces.

Ingredients
  • 6 sheets nori
  • 3 cups sumeshi
  • 1 1.5 pound flank steak
  • 1 clove garlic, halved
  • salt, pepper, garlic powder
  • 1/4 cup butter
  • 3 cups sliced mushrooms
  • 6 stalks green onion
Cooking Directions
  1. Cook sumeshi.
  2. Trim any excess fat from the flank steak.
  3. Pat the surface of the flank steak dry with a paper towel, then rub with the cut side of the clove of garlic. Season with salt, pepper, and garlic powder.
  4. Melt 1 tablespoon of butter in a skillet that is big enough to hold the flank steak. Put the flank steak in the skillet, and cook over medium-high heat until it is browned on the outside but still pink in the center.
  5. Remove the flank steak from the skillet and cover loosely with foil.
  6. Melt the remaining 3 tablespoons of butter in the pan drippings. Saute the mushrooms until they have shrunk to about 2/3 their original size.
  7. Slice the flank steak across the grain.
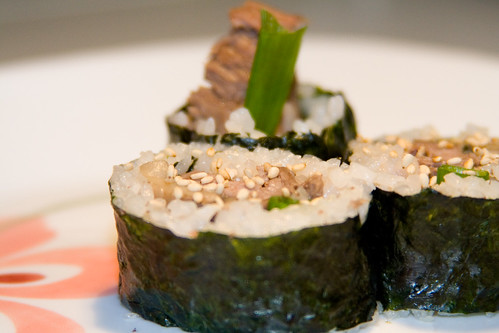
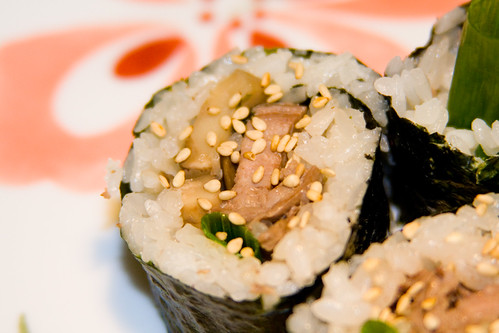
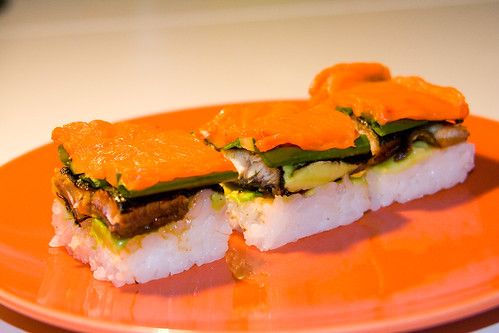
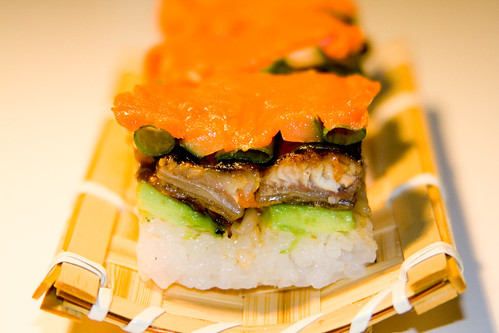
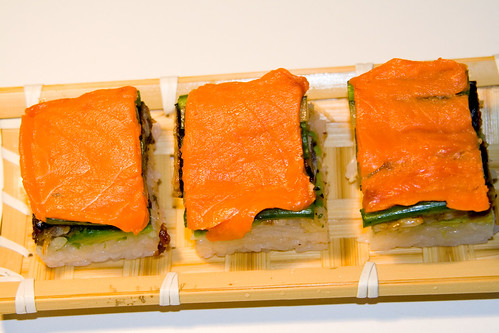
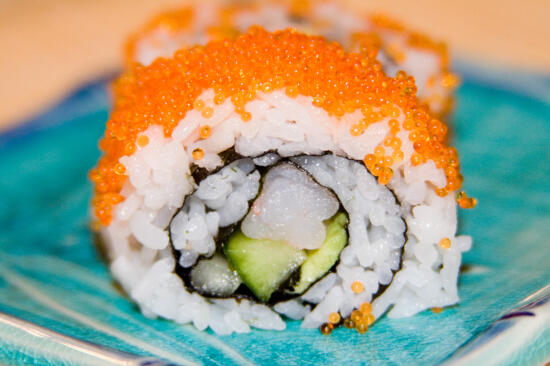
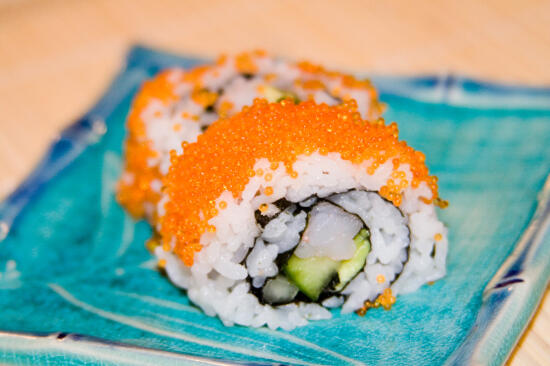
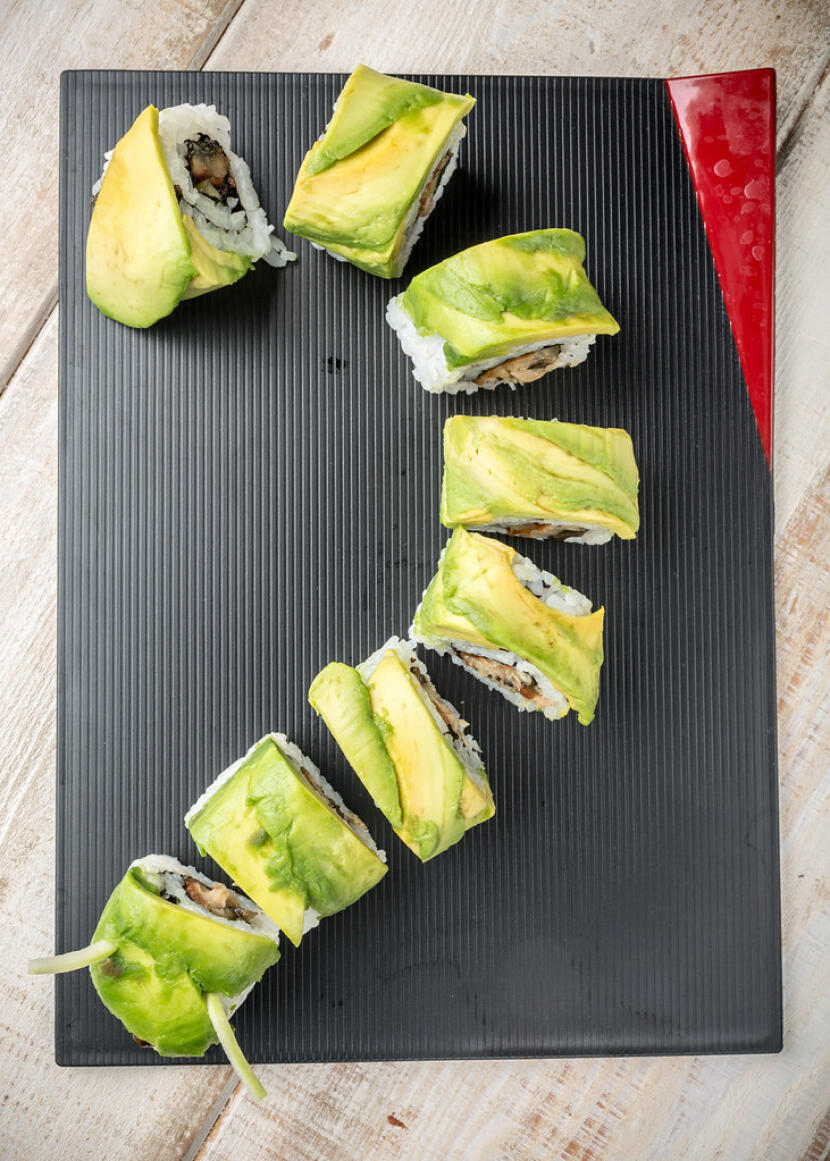
  8. Roll the sushi, using a couple of strips of flank steak, mushrooms, and a stalk of green onion as your fillings.
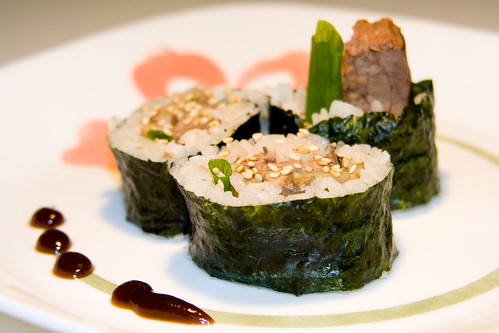
  9. Serve with hoisin sauce. Enjoy!

Coming Soon!

More Pictures
Categories
Other Recipes

Plenty of Oshizushi

[HDR-IMG]

So now that you know how to make oshizushi, it’s time to make some! You can use most ingredients in oshizushi, although squishier ingredients work better since they can compress very nicely. Here are some of the creations we tried:

Island Oshizushi

For one oshizushi (4-6 pieces, depending on how you cut it), use about 1 cup sumeshi, a 7″x2″ piece of pineapple, and a 7″x2″ piece of unagi. Be careful, because the pineapple will leak juice into the rice so the rice falls apart if it isn’t packed tightly enough!! (For directions for making oshizushi, click here)

Son’s Fun Oshizushi

This is the oshizushi shown in the How To post. This one has a little bit of everything in it. We used smoked salmon, liverwurst, avocado, and tobiko, then tied it in a green onion stalk. We were being a little random with this one! 😀

Frisky Oshizushi

This is similar to the Frisky Roll. Once you have compressed the sumeshi, place a long slice of cucumber on top of the sumeshi, and try to compress it as much as possible. It probably won’t compress much, since it’s a pretty hard ingredient. Then place alternating strips of avocado and unagi on top of this similar to how it was done in the Frisky Roll recipe.

A Little Bit of Everything Oshizushi

This is another oshizushi that has a bit of everything in it. First after the sumeshi is compressed, put down a layer of avocado and compress it. Next is a layer of unagi, then green onion. Compress these, then add a layer of smoked salmon on top. Compress it all, then eat it! (It tastes better than it sounds!)

Categories
Other Recipes

How to make Oshizushi

[HDR-IMG]Oshizushi is a type of sushi that uses a small wooden box to press the sushi into little rectangles. It’s a lot of fun to press the sushi, especially since there are so many different combinations you can make (As you will see, we went a little overboard 😉 ).

  1. When you get your box, you will see there are three pieces that make up the box. There should be one box-like piece with vertical slits on the side, and two flatter pieces with wooden feet.Oshizushi box
  2. One of these flat pieces should have feet that extend beyond the edges of the flat piece of wood. Place this on your workspace, flat side up.
  3. Place the box on top of this flat piece, with the vertical slits opening upwards.
  4. Place a large piece of plastic wrap in this, pressing it to the bottom and sides so the entire inside surface is covered. The plastic wrap should extend an inch or two over the edges of the box.
  5. Wrap the second flat piece of wood in plastic wrap. This will keep it from getting too dirty.
  6. Fill the plastic wrap-covered box about 2/3 full with sumeshi.Oshizushi
  7. Press the plastic wrap-covered flat piece of wood flat side down in the box to compress the rice.OshizushiOshizushi
  8. Place your ingredients, one layer at a time, into the box. Compress with the piece of wood between each layer. If you are small and/or not one with much arm strength (like me!), it helps to have someone heavier or stronger (or both) to help compress it for you. If not its fine, it’s just that when it’s compressed more it sticks together better when you are eating it. I used Son for all my sushi pressing!Oshizushi
  9. Once all of your ingredients have been placed on the sushi and compressed, use a sharp knife to cut the sushi through each of the vertical slits in the box. Also cut through the plastic wrap.Oshizushi
  10. Using the plastic wrap that you had put in the box, lift out the sushi. I prefer to do it this way, just because it keeps the box from getting too dirty.OshizushiOshizushi
  11. Replace the plastic wrap in the box with a new sheet before you make another batch.
  12. Eat your freshly pressed oshizushi!
Categories
Maki Recipes

BLT Maki

This roll is my sushi version of the classic BLT sandwich. I used to love BLT sandwiches, except that I don’t like tomato – so mine always ended up being BL_ sandwiches. 😛 This roll turned out tasting pretty darn good! I think it’s even better tasting than the sandwich… but then of course, I’m also a bit biased. 😉

By the way, if you haven’t voted yet, head on over to the Well Fed Network and vote for SushiDay! Thanks to everyone who has already voted – I really appreciate it! 😀

Makes 6 rolls, or 36-48 slices.

Ingredients
  • 6 sheets nori
  • 3 cups sumeshi
  • 12 strips uncooked bacon
  • 1 head lettuce
  • 1 medium tomato
Cooking Directions
  1. Cook sushi rice.
  2. Slice the uncooked bacon in half, so the strips are half as long as they originally were. This makes the bacon easier to cook, but if you prefer to cook whole slices of bacon, that’s fine too.
  3. Fry the bacon. You don’t need to use any oil or butter or anything, because the fat in the bacon is more than enough to fry the bacon. I prefer to fry my bacon until it’s really crispy, but that of course, is completely up to you! 🙂
  4. Place the cooked bacon on some paper towels to soak up the remaining grease.
  5. Wash the lettuce.
  6. Separate 6 or so leaves from the head of lettuce.
  7. Cut the tomato into thin strips
  8. Roll the sushi. For your fillings, place a lettuce leaf on the sumeshi-covered nori, then place the tomato strips and about 4 pieces of bacon on top of the lettuce – then roll the sushi as you normally would.
  9. Serve with mayonnaise. Enjoy!

Categories
Maki Recipes

Frisky Roll

How was everyone’s New Year Celebration? Mine was pretty quiet – I spent New Year’s Eve with my family eating lots and lots of food like we do everywhere (I’m not much of a party girl… I prefer to stay home… and eat! 🙂 ) We stayed up late eating (spinach dip, shrimp, stuffed mushrooms, bacon wrapped asparagus – my mom made all this from scratch! My amazing mom 🙂 ) and drinking Martinelli’s sparkling cider.

Unfortunately, I had to get up early the next day to make sushi for our New Year’s celebration before we headed to my uncle’s house. You might remember me writing about this earlier, but if not, here’s a quick recap: Every year it is a tradition for us as a somewhat Japanese family to eat sushi on New Year’s. Typically, we buy all of our sushi, but this year, since the creation of SushiDay, it was a little different. We still bought California Rolls, Inari-Zushi and Futomaki (a vegetarian roll), but my family also requested that I make a few rolls.

Frisky roll

I ended up making 9 of the Crunchy Shrimp Rolls (about 72 pieces) and 5 of the Kappa Maki Rolls (about 40 pieces). The Crunchy Shrimp Rolls were a HUGE hit with my extended family – they ate as much as they possibly could and then took the rest home for the next day’s lunch! I was very happy about that. 😀

This roll is amazingly delicious! I love tempura shrimp, avocado, and unagi, and together they taste so good! In addition, the roll ends up looking very nice, so it seems even more mouth watering. 🙂 I’m really not sure how the roll got its name, and I have never before heard of the roll, but according to the Sushi Chart, this is another of the popular rolls (that nobody really knows about 😉 )!

Frisky roll

Makes 6 rolls, or 36-48 slices.

Ingredients
Cooking Directions
  1. Cook sushi rice.
  2. Bake tempura shrimp as directed on the package. (I haven’t had time to make homemade tempura shrimp so I can get you a good recipe for that… don’t worry, it will come as soon as I can try it!) You can also fry the tempura shrimp if you choose, but baking it is healthier, and you can prepare other things (such as the sumeshi) while it’s baking.
  3. Cut tails off the tempura shrimp.
  4. Cook the unagi as directed on the package.
  5. Cut the unagi into 1-1.5 inch wide by 2.5 inch long slices.
  6. Cut the avocados in half, discarding the pit.
  7. Cut off the hard skin and discard.
  8. Slice the first avocado into thin sticks.
  9. Slice the second avocado into thin slices, although not so thin that they easily tear if you try to pick them up.
  10. Cut the cucumber into thin strips.
  11. Roll the sushi inside-out, using several avocado sticks, 2 pieces of tempura shrimp and a stick of cucumber as your fillings.
  12. Lay alternating pieces of unagi and avocado on top of the inside-out roll.
  13. Use your plastic wrap-covered rolling mat to squeeze the unagi and avocado into the roll so they won’t fall off.
  14. Carefully cut the roll, trying to keep the toppings from falling off the sushi.
  15. Serve with shoyu, wasabi, and ginger if desired. Enjoy!
Categories
Other Sushi Randomness

Happy New Year!

Happy New Year everyone! I hope everyone has a safe and happy New Year’s celebration!

My SushiDay New Year’s resolution is to make lots of new and different sushi, and to try to prepare and use some raw fish in my sushi this year! My personal resolutions are to do really well in school and get back in shape. 🙂

So what are your New Year’s resolutions? Hopefully they include eating and making a lot of sushi! 😀

Categories
Maki Recipes

Boston Roll


Boston Roll

This roll is similar to the California Roll, using shrimp instead of imitation crab. It’s really good, and the tobiko adds a nice splash of color to the roll.


Boston Roll

By the way: If you have never eaten tobiko before, beware! Son had the most fantastic expression on his face when he bit into it and the tobiko started popping in his mouth (I should have gotten a picture! 🙂 ). Hehe they do pop in your mouth, so don’t be too surprised!! 😀


Boston Roll

Look for your sushi ideas posted soon (I’m making them tomorrow! 🙂 ) Happy Holidays everyone!!

I got this roll from the Sushi Chart.

Makes 6 rolls, or 36-48 pieces.

Ingredients
  • 6 sheets nori
  • 3 cups sumeshi
  • 1 small avocado
  • 1 small cucumber
  • 36 small shrimp, with the tails cut off
  • 1 cup tobiko (tiny orange flying fish eggs)
Cooking Directions
  1. Cook sushi rice.
  2. Slice the avocado and cucumber into long, thin slices.
  3. Roll the sushi inside-out, using avocado, cucumber, and shrimp as your fillings.
  4. Before cutting the sushi into pieces, spoon the masago over the sushi roll to coat (you can use more or less masago depending on your preference). Now cut the sushi into 6 or 8 pieces.
  5. Serve with shoyu, wasabi, and ginger if desired.
Categories
Other Sushi Randomness

Happy Holidays!

I hope everyone is having a wonderful holiday season (and not stressing out too much!) I had a fantastic Christmas a couple of days ago. Son and I spent Christmas Eve with his family and had an absolutely wonderful dinner there (his father is an amazing cook!!!!) and then spent Christmas Day with my family. We ate waaaaaaaaayyyyyy too much (of course) and pretty much spent the day eating and sleeping (hehe).

I was thinking it would be nice to do a Christmas Roll just like I did the Thanksgiving Rolls… the only problem is that my family’s Christmas dinner consists of pretty much exactly the same food as is in our Thanksgiving dinner! So maybe you all could help me out? Leave your suggestions for what I can do for a Christmas (or Chanukah or Kwanzaa or any other holiday you might celebrate – I don’t want to leave anybody out! 🙂 ) Roll, and I’ll try to use them for next year’s holidays. 🙂

In other news…. Son gave me 4 new sushi books for Christmas!!! I was very excited. 🙂 You can look for reviews on “The Complete Book of Sushi” by Hideo Dekura, Brigid Treloar, and Ryuichi Yoshii, “Sushi: Tastes and Techniques” by Kimiko Barber, Hiroki Takemura, and Ian O’Leary, “Sushi American Style” by Tracy Griffith, and “Encyclopedia of Sushi Rolls” by Ken Kawasumi coming to SushiDay soon! 🙂 I am very excited about these books… they will be a wonderful reference (I know I’ll be referring to them a lot to make sure my posts are as correct as I can make them!) 🙂

This is my free week, so I’ll be trying to make as many of your suggestions as I can! …and if you have a suggestion for me but haven’t told me yet, then let me know!! (It’s never too late… I’m always open to your suggestions! 🙂 )

Have a safe and happy rest of the holiday season!!

Categories
Maki Recipes

Caterpillar Roll

This is one of the more well known rolls which can be found in a lot of sushi restaurants.

This roll is very similar to the Unagi Roll. It’s so tasty! I absolutely love this roll. This (along with the Crunchy Shrimp Roll) is one of my favorite rolls that I have made thus far.

Caterpillar roll

Don’t worry if your rolls don’t turn out looking very good. Believe me, my first few rolls had rice and avocado falling off of the rolls and making a HUGE mess! It takes some practice, but it’s worth it as the end result turns out looking absolutely beautiful. 🙂 So just keep trying and let me know how it turns out!

Caterpillar roll

Makes 6 rolls, or 36-48 pieces.

Ingredients
Cooking Directions
  1. Cook sushi rice.
  2. Cook the unagi according to the package.
  3. Wash the cucumber and slice into long thin strips.
  4. Slice the avocado into very thin (but still thick enough so they don’t tear when you put them on your sushi) slices.
  5. Slice the unagi into long thin strips.
  6. Roll the sushi inside-out, using cucumber and unagi as your fillings.
  7. Place the avocado slices overlapping on the sushi as described in the How to Roll Inside-Out Maki post.
  8. Serve with shoyu, wasabi, and ginger if desired. Enjoy!