Categories
Other Recipes

Orange-Flavored Mochi

[HDR-IMG]

Lately, I’ve really been wanting to participate in more food blogging events, but I’ve refrained because the don’t fit into the theme of Sushi Day, and I don’t want too much non-sushi randomness on here. I would love to cook and bake more but, well, I’ll save that for when I have a more general food blog. (Which is hopefully coming soon!) However, when I saw the theme for this month’s Sugar High Friday, hosted by Tartelette, I realized that this was something that I could relate to Sushi Day! Although my recipe isn’t sushi (sorry guys) it is a Japanese dessert!

I have been wanting to make mochi (sweet rice cakes) ever since I began cooking. I have had a life-long love affair with the dessert. Since I was young, my mother would take us to each get a piece of mochi whenever we went to the Japanese part of town. So you would think that now that I have discovered a love for cooking, that would be the first thing I make! Unfortunately, I was always so intimidated by it, so I never actually made it until now. What a mistake that was! This is the quickest, easiest recipe ever… and it turns out with the same taste and consistency as the mochi I bought as a child!

You can replace the orange extract with any flavor you would like, for different flavor mochi. Same goes for the food coloring… the mochi can be any color you want, or even multiple colors! ๐Ÿ˜› Considering I’ve only made this once, I might edit the recipe in the future if I find anything that makes it easier or better.

Ingredients
  • 1 cup mochiko
  • 1 cup water
  • 1/3 cup sugar
  • 2 drops red food coloring
  • 4 drops yellow food coloring
  • 1/2 tsp orange extract
  • corn starch or potato starch
Cooking Directions
  1. Mix all the ingredients.
  2. Pour into a microwave-safe container.
  3. Cover with plastic wrap.
  4. Microwave on HIGH for 4 minutes.
  5. Let cool for 1-2 minutes.
  6. Form into your desired shapes. (BEWARE: It will be hot and sticky! Don’t burn yourself. If you wish to cut it, use a plastic knife and dip it in corn starch in between cuts- it sticks less that way.)
  7. Dust with corn starch.
  8. Eat!

Nutrition data coming soon!
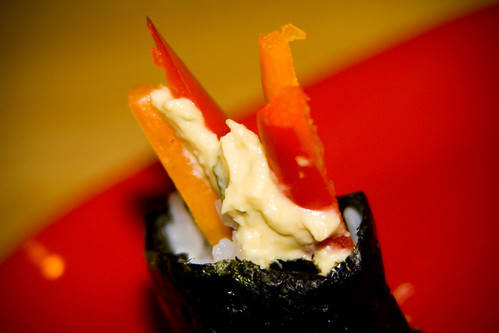
More Pictures
Categories
Maki Recipes

Queen of the Tom Tom Roll

I haven’t the slightest idea how this roll got it’s name. I did a search for “Queen of the Tom Tom”, and the only results I got were my pictures of the roll on flickr, and the restaurant menu where the roll originated. To me, it sounds like the name of either a ship or a rock n’ roll band, but neither of those came up in my search so for all I know, it’s a made-up name! Not that I’m complaining. The roll is delicious!

We all know I love tempura shrimp, seeing how many tempura shrimp sushi recipes I have! And I have recently developed a slight (okay, more than slight) addiction to spicy mayonnaise (where have you been all my life?!?!) So put them together, add some cream cheese, avocado, cucumber, and tobiko, and oh baby you have got an awesome roll! Whoever thought this one up is a genius. ๐Ÿ˜€

Queen of the Tom Tom Roll

This roll is originally from Tex Wasabi’s, a sushi and BBQ restaurant found in Northern California.

Ingredients
  • 6 sheets nori
  • 3 cups sumeshi
  • 12 tempura shrimp
  • 3 oz cream cheese
  • 1 avocado
  • 1 small cucumber
  • 1 oz tobiko
  • 1/2 cup mayonnaise
  • 2 tbsp Sriracha sauce
Cooking Directions
  1. Cook sushi rice.
  2. Bake or fry tempura shrimp, according to instructions on the package.
  3. Cut the avocado in half, discarding the pit.
  4. Cut off the hard skin and discard.
  5. Slice the avocado into thin sticks.
  6. Mix the mayonnaise and Sriracha sauce.
  7. Cut cucumber into sticks.
  8. Roll the sushi, using a couple of tempura shrimp, cream cheese, avocado, cucumber, and the spicy mayo as your fillings.
  9. Sprinkle some tobiko on top of each slice.
  10. Enjoy!

Categories
Maki Recipes

Baja California Roll

I’ve lived in Southern California all my life. So you would think that I might have driven a few hours south to go party it up at Tiajuana or something. Nope. Never ever in my entire life have I crossed an international border! Kind of sad, if you think about it… all the different regional foods I’m missing out on. I rarely even go out of California! ๐Ÿ™ Time for a road trip!

I have always wanted to travel, but even more so now that I have fallen in love with food! Vietnam, France, Japan, Italy, Mexico… those are just a few of the places I would love to visit! Of course, now that I have found out there is one of these in Baja California, all the more reason to visit! It might be a while before that happens, so meanwhile I’ll just live vicariously through my food. ๐Ÿ˜€

The California Roll is arguably one of the most popular types of sushi known to man. Both fish-lovers and people who are more than a little “ick” at the thought of eating raw fish love the California Roll. But if that’s the only type of roll you like, eating it all the time can get an itty bit boring. Taking the flavor a little bit south and adding Sriracha sauce to the roll really livens it up, and may just be my new favorite way to eat California Rolls! Or, if you want a different twist to your California Roll, you can try one of the four other types of California Rolls I have on Sushi Day: the New Zealand Roll, the American Roll, the Crazy California Roll and the Super California Roll.

Baja California Roll

Ingredients
  • 6 sheets nori
  • 3 cups sumeshi
  • 1 cup imitation crab
  • 1 avocado
  • 1 cucumber
  • 1/2 cup mayonnaise
  • 2 tsp Sriracha sauce
Cooking Directions
  1. Cook sushi rice.
  2. Cut the avocado in half, discarding the pit.
  3. Cut off the hard skin and discard.
  4. Slice the avocado into thin sticks.
  5. Mix the imitation crab, mayonnaise and Sriracha sauce.
  6. Cut cucumber into sticks.
  7. Roll the sushi, using the imitation crab mix, avocado and cucumber as your fillings.
  8. Enjoy!

Categories
Maki Recipes

Hummus Maki

[HDR-IMG]

Back when I was still living at my parents’ house, my sister decided she liked hummus. So, of course, she had my parents go to Trader Joe’s and buy her some. At the time I tried some, and I hated it. I thought that was it for me and hummus.

A few months ago, Son and I went to Costco. Now, everyone knows that the best part about Costco (aside from the great prices and $1.50 hot dog and drink combo) are the samples! One of the samples they were offering that day was hummus. On a whim, I tried some, and it was really good! We ended up not buying any that day, which was disappointing.

Later that week, I went to my local farmer’s market. It’s a five-minute walk from my apartment, so it’s super easy for me to get there, as long as I can get up before noon on a Saturday morning! (Which, for me, is quite a feat indeed!) As I explored the different offerings, lo and behold, they had not one, but two hummus stands there! I tried a sample from one of the stands, and I was sold. Almost every week since then, I have been buying their garlic and chives hummus, along with some garlic and herb pita chips to go along with them. (Can you tell we like garlic? ๐Ÿ˜€ )

And then, a couple of weeks ago, I had a stroke of genius. Okay fine, so it wasn’t my stroke of genius, but I’ve looked everywhere and can’t for the life of me remember who told me about this. Anyways, the stroke of genius was… hummus in sushi! More specifically, red and orange bell peppers and hummus in sushi. Which is amazing. Er, amazingly delicious! If you like hummus, and bell peppers, I definitely recommend making this! It’s especially great for vegetarians (and I believe it’s also vegan, but that might depend on the type of hummus you use? I’m not entirely sure.) plus it’s not one of those bland, I’m-trying-to-make-something-for-vegetarians-but-failing-miserably dishes.

Ingredients
  • 6 sheets nori
  • 3 cups sumeshi
  • 1 cup hummus
  • 2 bell peppers, any color
Cooking Directions
  1. Cook sushi rice.
  2. Wash bell peppers.
  3. Remove stem, ribs, and seeds from the bell peppers.
  4. Slice the bell peppers into strips.
  5. Roll the sushi, using about a tablespoon of hummus and a few strips of bell pepper as your fillings.

Serving Size: 1 roll Hummus Maki

  • Calories: 153
  • Fat: 2g, 2% DV
  • Saturated Fat: 0g, 1% DV
  • Cholesterol: 0mg, 0% DV
  • Sodium: 587mg, 24% DV
  • Total Carbohydrates: 31g, 10% DV
  • Dietary Fiber: 3g, 11% DV
  • Sugars: 18g
  • Protein: 4g, 7% DV
  • Vitamin A: 40%
  • Vitamin C: 120%
  • Calcium: 1%
  • Iron: 6%
  • Magnesium: 4%
  • Potassium: 4%

Percent Daily Values are based on a 2000 calorie diet. These values are only estimates based on the individual ingredients, and not meant to replace the advice of a medical professional.

More Pictures
Categories
Other Recipes

Spicy Hamachi Gunkan Maki

I love yellowtail. We all know that. You might also know that I love the mayonnaise mix that I used in the Maguro Karakuchi Spicy Tuna Roll. (I put it in tuna salad, and I’m seriously considering hard-boiling some eggs and putting it in egg salad!) So of course, I had to see what happened when I put both together! However, since I like to mix things up a little, I couldn’t do exactly the same roll, just with yellowtail instead of tuna! (Well, I could, but how interesting would that really be?) Lucky for me, I’ve got awesome-as-can-be readers. One of my awesome readers, Kevin, commented saying that he had made something similar to my Maguro Karakuchi Spicy Tuna, except he made it gunkan-style with the sauce on the top, instead of as a roll. Genius! Pure genius! Thus the natural thing for me to do is to steal… er… borrow his idea and make it with yellowtail!

It was delicious. I will be making it again. Kevin, you win the Awesome Sushi Day Reader Award! ๐Ÿ˜€

spicy hamachi gunkan maki

Ingredients
  • 4 sheets nori
  • 3 cups sumeshi
  • 6 oz sashimi-grade yellowtail
  • 1 cup mayonnaise
  • 2 tbsp Sriracha sauce
  • 1 oz tobiko
  • 6 stalks green onion
Cooking Directions
  1. Cook sushi rice.
  2. Form a small ball of rice with your hands or use a round cookie cutter to make a small circular rice shape about 1รขโ‚ฌยณ tall and 2 inches in diameter.
  3. Cut the nori into 2รขโ‚ฌยณ strips. Wrap a strip of nori around the circumference of each rice ball.
  4. Wash the green onion, cut the long green stalks off of the white bulb-like things. Discard the white bulbs.
  5. Chop the green onion.
  6. Mix the mayonnaise, Sriracha sauce, tobiko and green onion.
  7. Slice yellowtail into 1 cm diameter slices.
  8. Curl each strip of yellowtail into a circle, fit on top of the rice into the nori.
  9. Top the yellowtail with some of the mayonnaise mix.

Categories
Maki Recipes

Cinco de Mayo Roll

Okay, so technically this isn’t a very *Mexican* roll. But work with me here – it does use red pepper powder, and technically yellowtail is mostly found in Baja California (at least in North America), which is part of Mexico! Plus it’s all pretty and colorful, and today is May 5th! So there. ๐Ÿ˜€

Of course, neither of us really celebrates Cinco de Mayo. Neither Son nor myself are the least bit Hispanic, plus we don’t really party or drink at all. Not to mention I have school and he has to work, so Cinco de Mayo isn’t much of a special day for us.

Since I’ve never really celebrated Cinco de Mayo, I’m curious… what do you do for Cinco de Mayo? Go out and party? Stay home and ponder the historical significance of the day? ๐Ÿ˜€ I would love to hear your stories!

Cinco de Mayo Roll

Note: This roll was originally called the Spicy Jamie Roll, but I didn’t find it at all spicy, and I don’t know who Jamie is, so I decided to change the name to something a little more relevant. ๐Ÿ™‚

Ingredients
  • 6 sheets nori
  • 3 cups sumeshi
  • 6 oz sashimi-grade yellowtail
  • 1 avocado
  • 3 stalks green onion
  • 1 oz tobiko
  • 1/2 cup mayonnaise
  • 1 tsp red pepper powder
Cooking Directions
  1. Cook sushi rice.
  2. Cut the avocado in half, discarding the pit.
  3. Cut off the hard skin and discard.
  4. Slice the avocado into thin sticks.
  5. Wash the green onion, cut the long green stalks off of the white bulb-like things. Discard the white bulbs.
  6. Chop the green onion.
  7. Slice yellowtail into 1/2 inch by 1/2 inch by 2-3 inch sticks, against the grain.
  8. Mix the mayonnaise and red pepper powder.
  9. Roll the sushi inside-out, using avocado, yellowtail, and the mayonnaise mix as your fillings.
  10. Sprinkle the chopped green onion, tobiko, and additional red pepper powder on top of the roll.
  11. Enjoy!

Categories
Nigiri Recipes

Yellowtail Nigiri

I first tried yellowtail sashimi late last year, and it was love at first bite. Now, if you held a gun to my head and forced me to choose (please don’t, by the way) yellowtail would be my sashimi of choice, even over tuna and salmon! It has such light flavor and just melts between your teeth – it’s not chewy at all! There’s nothing not to love about yellowtail!

A little background information about yellowtail: A lot of people think that yellowtail is a type of tuna. This is a huge misconception… Yellowtail is actually a type of Jack Fish, but is also called yellowtail kingfish in Australia and New Zealand. It’s called yellowtail because… you guessed it – it’s tail is yellow! The yellowtail is a super duper powerful swimmer and has a very aerodynamic… er… aquadynamic? (edit: one of my readers, Lodewijk, has informed me it’s actually hydrodynamic ๐Ÿ˜€ ) body, shaped like a torpedo. This makes it very fast and a popular game fish. It is one of the top three game fish in Southern California – I’ve even found it at my farmers market! It is generally found in the tropical waters of the Southern Hemisphere and in the northern Pacific. (California, Baja California, Japan!)

yellowtail nigiri

Ingredients
  • 1 cup sumeshi
  • 1 oz yellowtail sashimi
Cooking Directions
  1. Cook sushi rice.
  2. Using either your hands or a rice mold, form the rice into 5 or 6 small oblong balls.
  3. Cut the yellowtail into slices larger than your rice balls.
  4. Place each slice of yellowtail on top of a rice ball. You may place a small dab of wasabi on the underside of the yellowtail if you wish.
  5. Serve with shoyu, wasabi, and ginger if desired.