Categories
TikTok YouTube

Deviled Ramen Eggs

@sushidaytv

turning ramen eggs into deviled eggs? A GENIUS IDEA IF I DO SAY SO MYSELF ? #BestSeatInTheHouse #foodie #cookingtiktok #foodOnTikTok #ramen

? Taste It – TELL YOUR STORY music by Ikson™

If the above video doesn’t load for you, click here to see it on TikTok!

I’m half-Japanese. I grew up eating a ton of Top Ramen and Cup Noodles, but I never had real ramen until I was an adult.

It was on our first big trip together.

I had just graduated from college, and Son and I had been together for a little over three years by then. And we decided, since I finally had time to travel, that we wanted to go to Hawaii.

In retrospect you could say this was the most honeymoon-like trip we’ve ever taken, since we never actually took a honeymoon after we finally got married (speaking of which, today’s our four-year wedding anniversary!)

We had no idea how to travel, and we were only just starting to get into food at the time, since we had been poor college students for most of our relationship up until then.

But we dutifully made an entire list of restaurants we wanted to try.

We ate well that trip – macadamia nut pancakes, lobster sashimi, poke, curry, mochi ice cream… and, of course, ramen.

It may have been our first ramen, but it definitely was not our last.

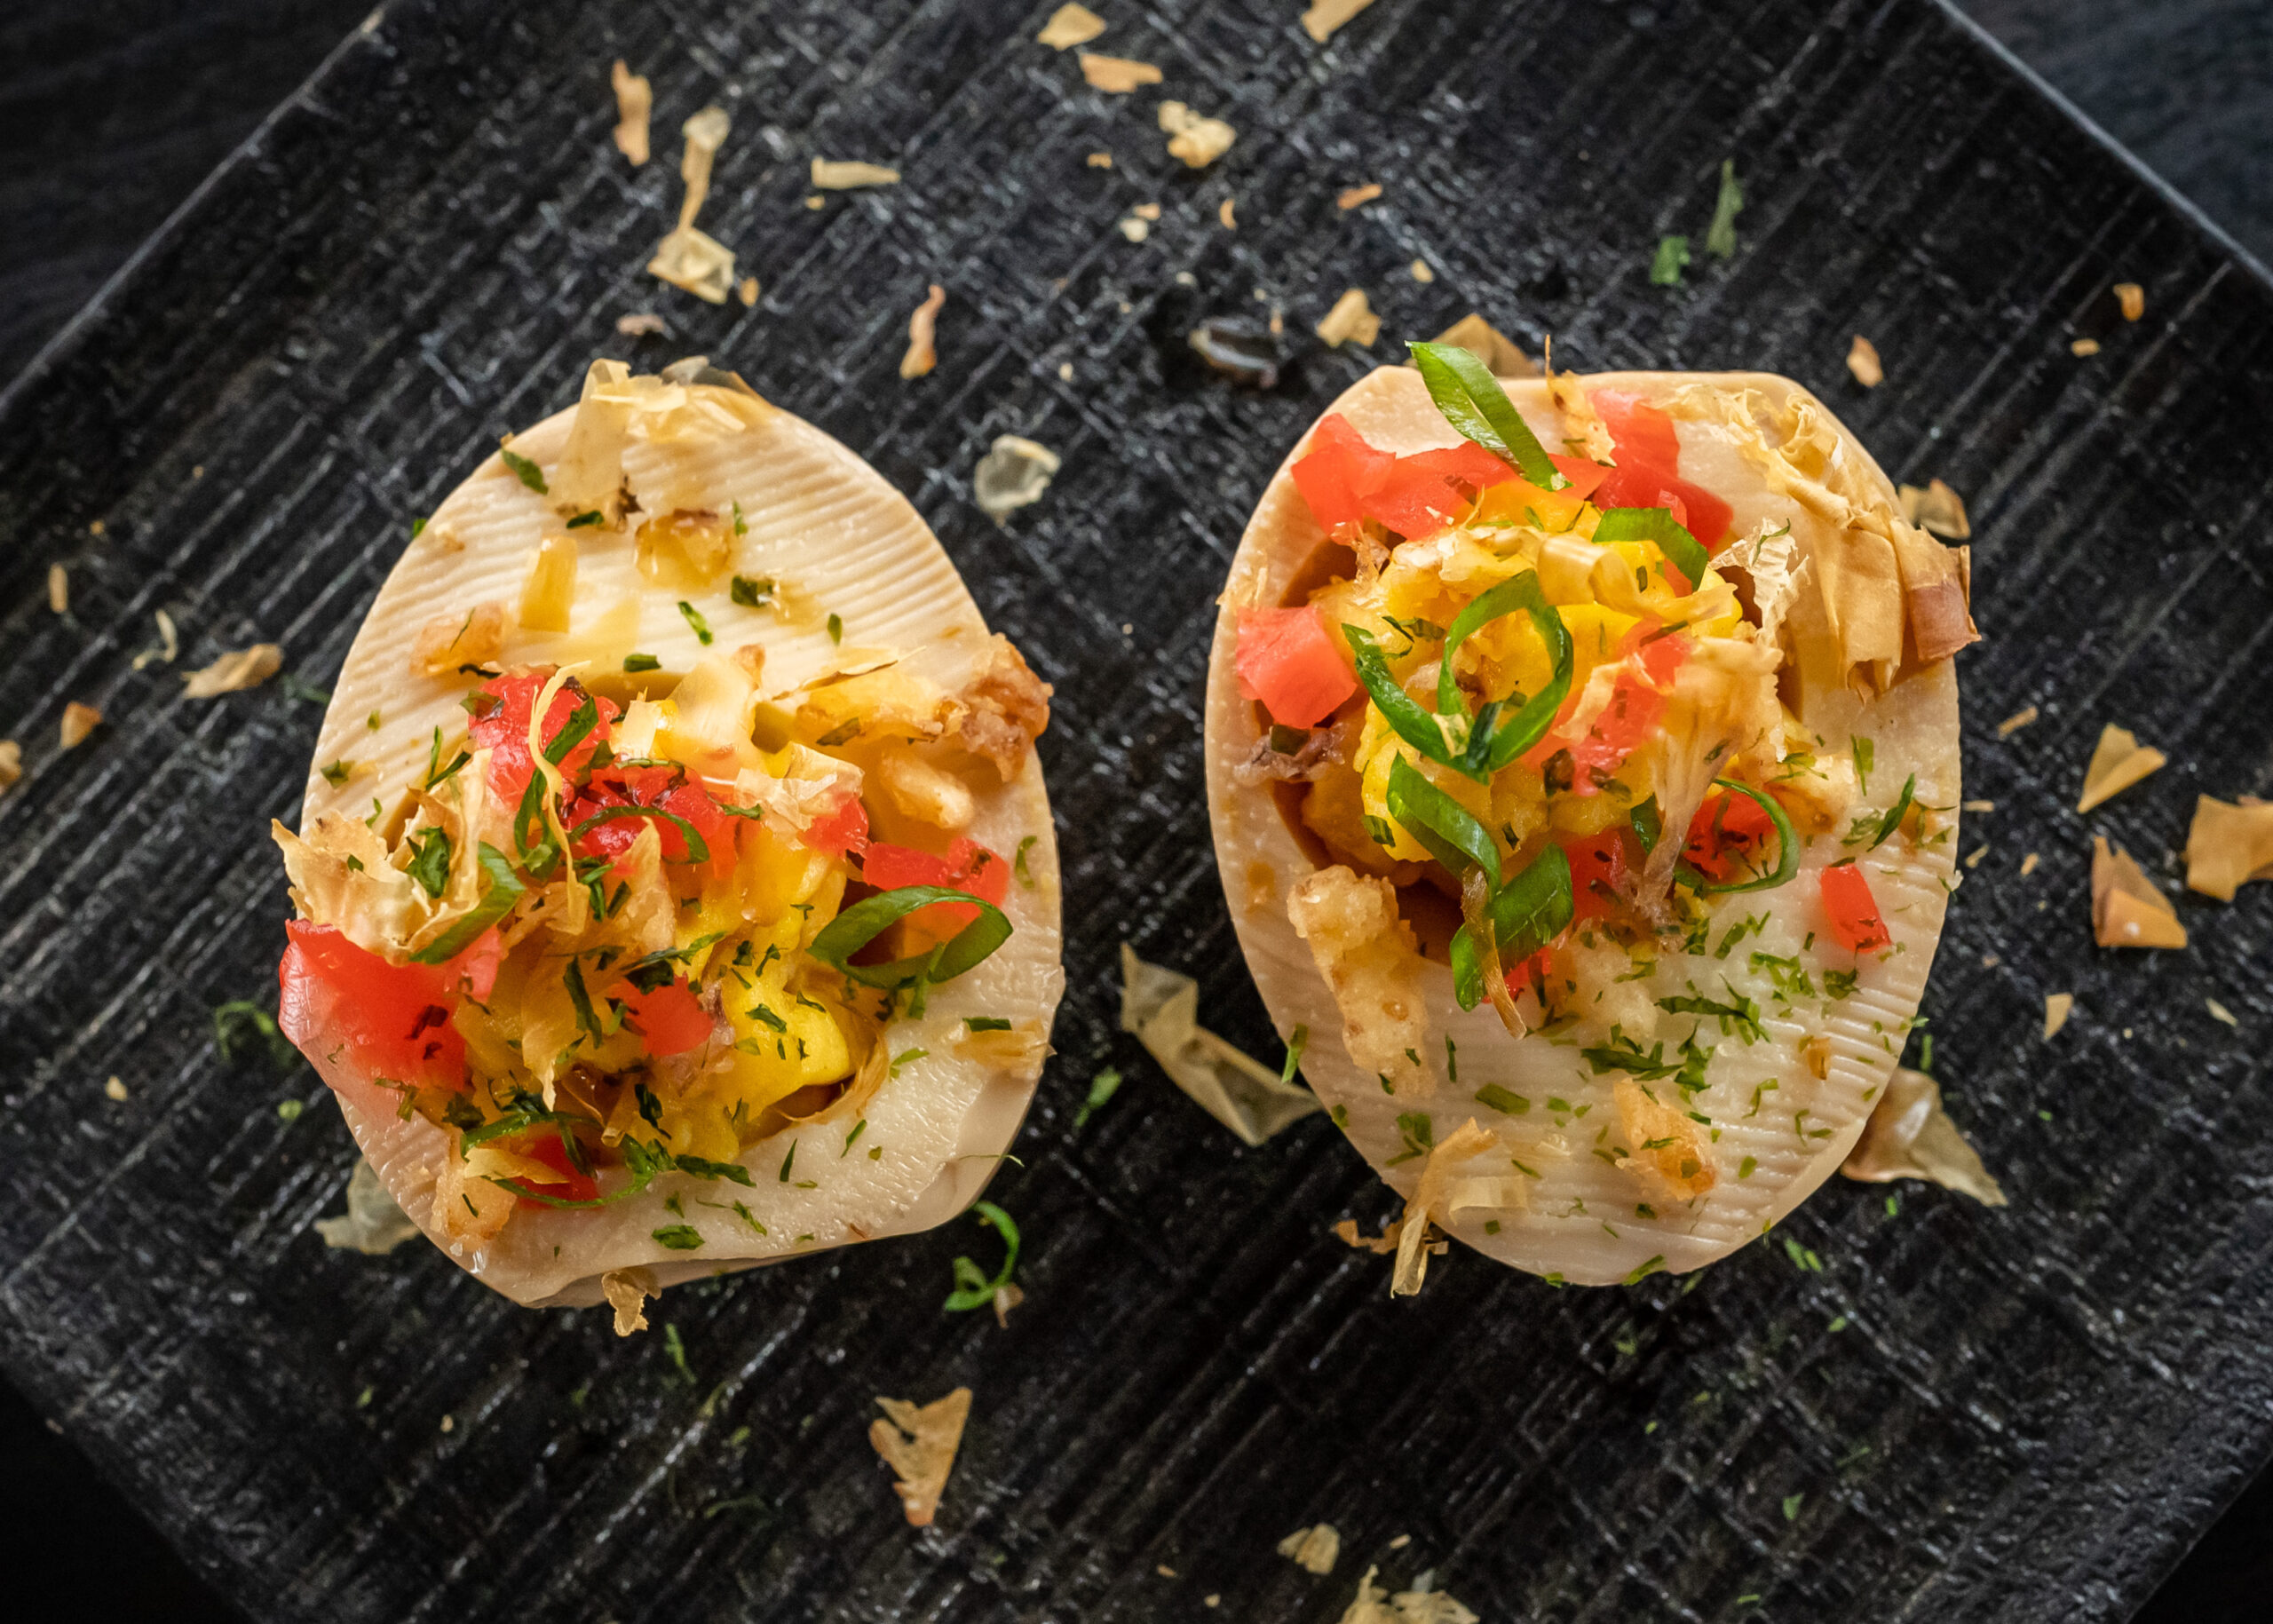
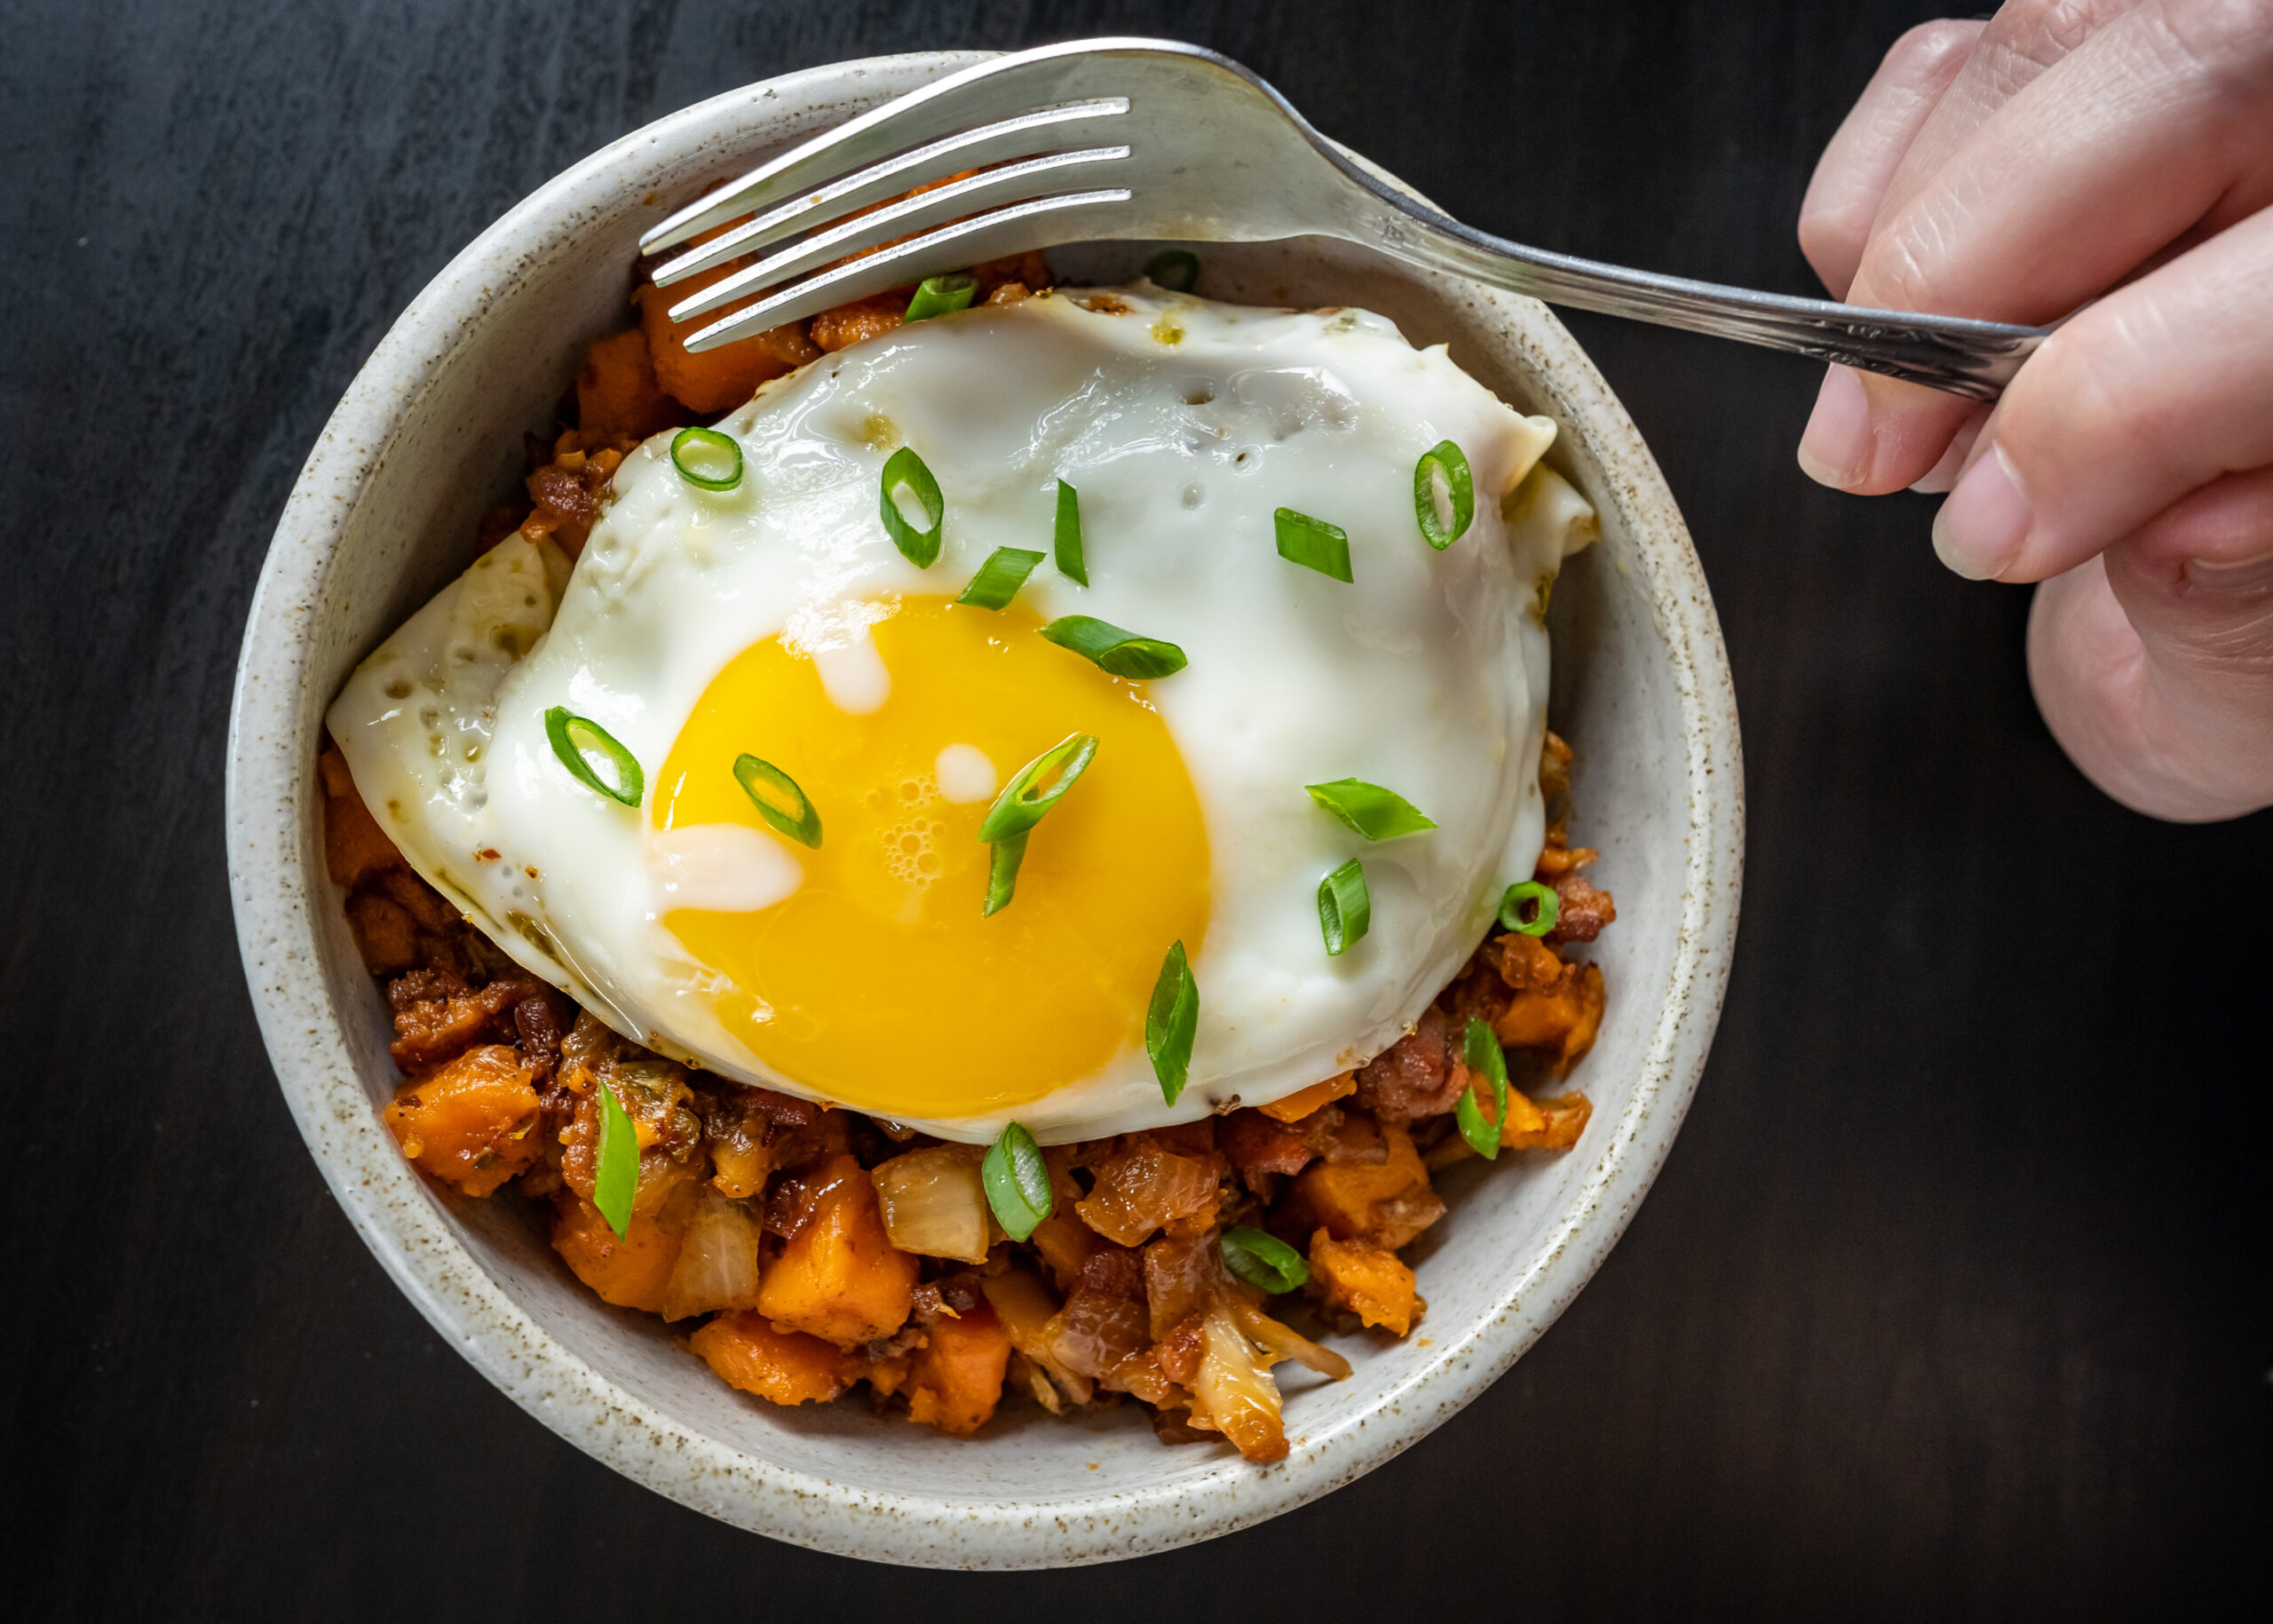
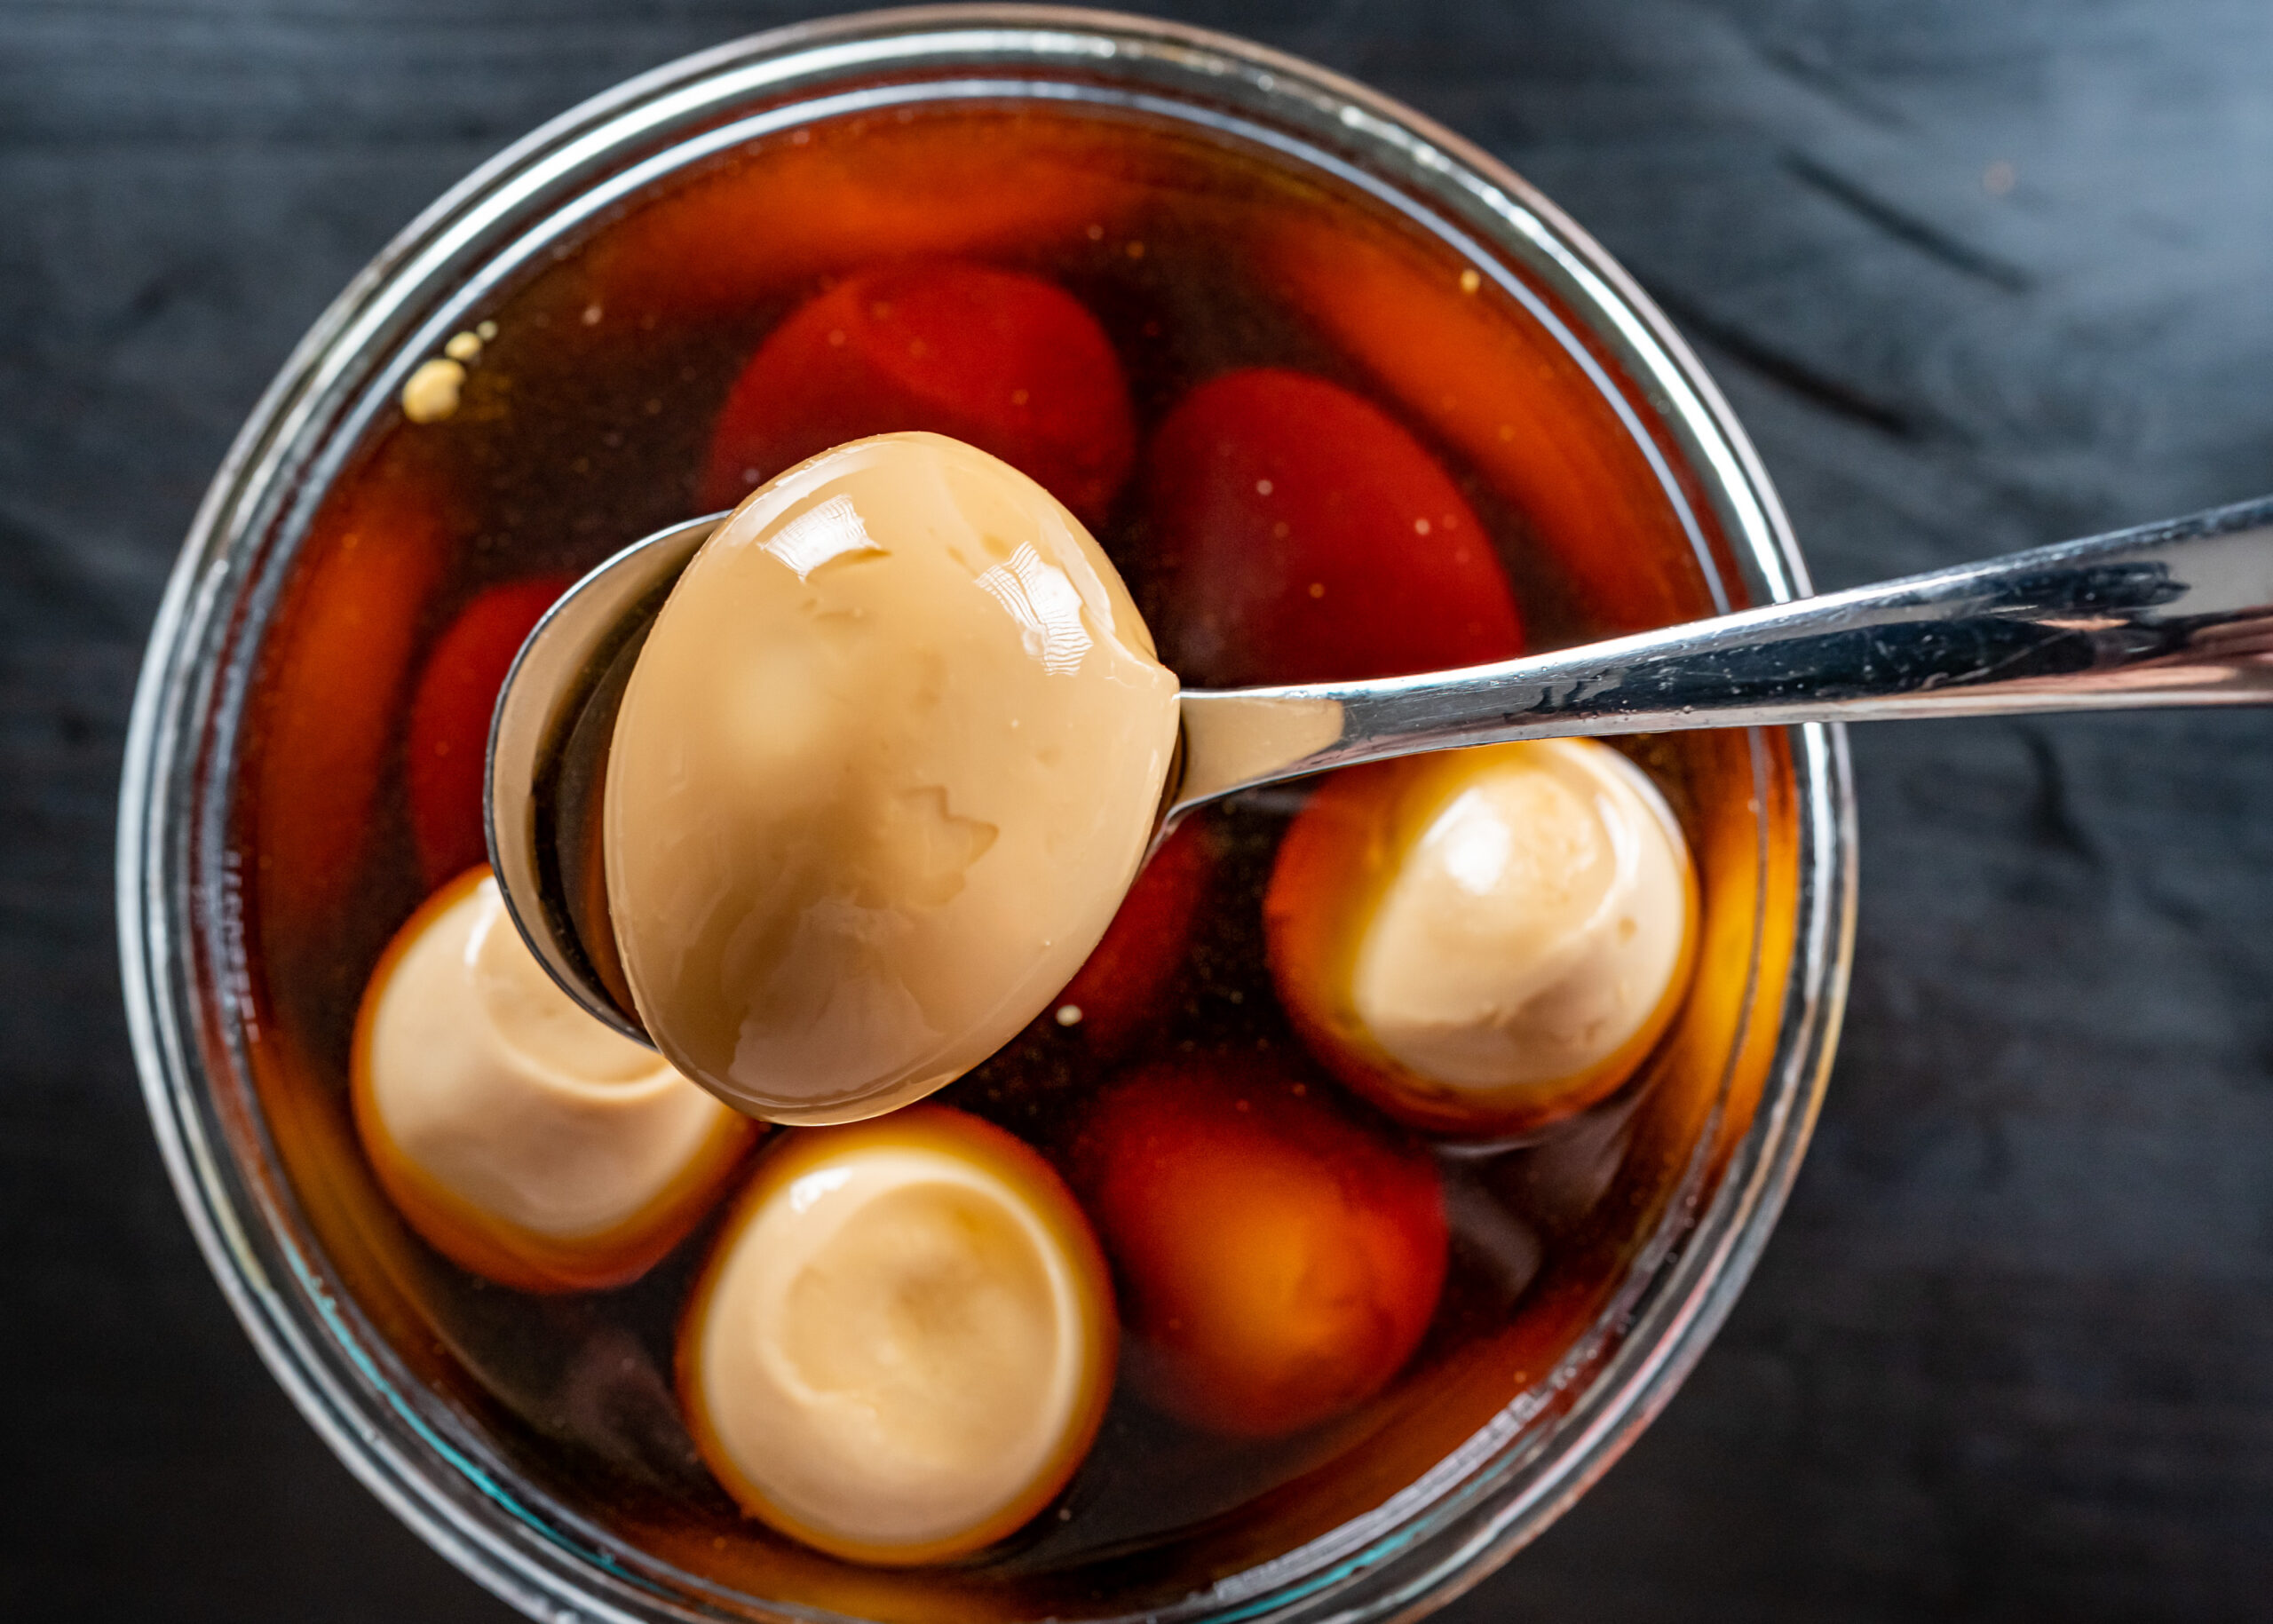
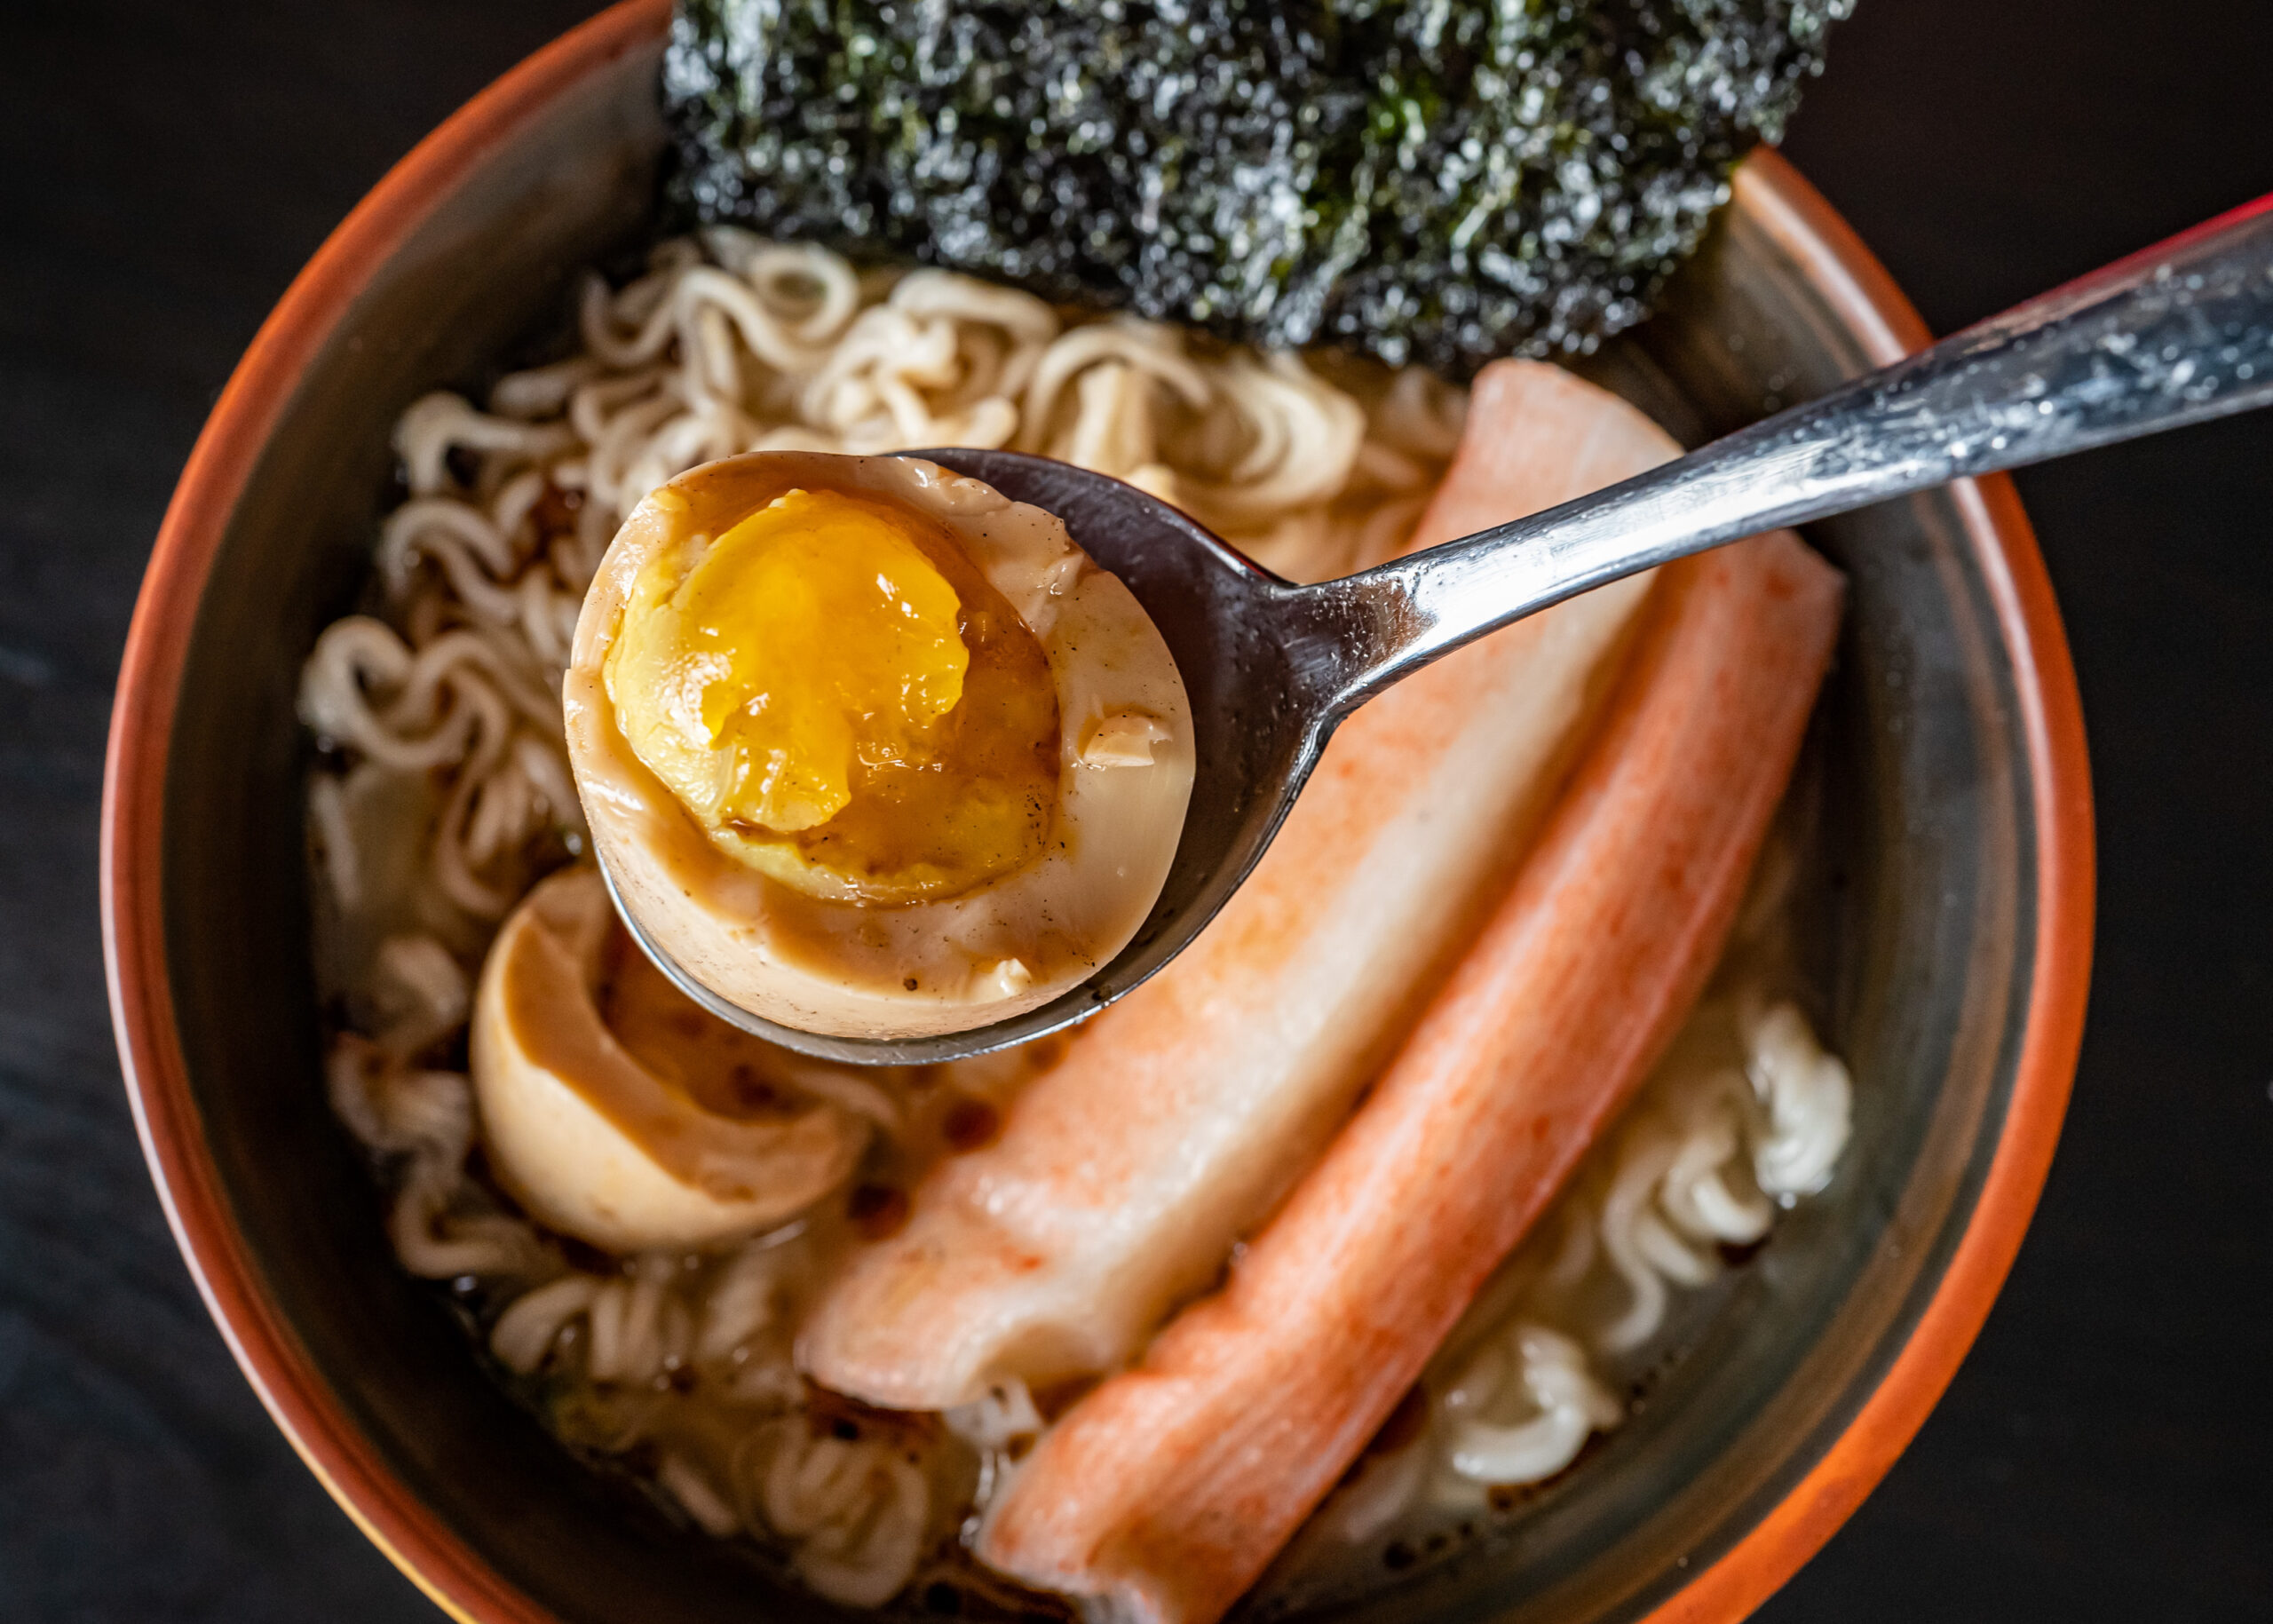
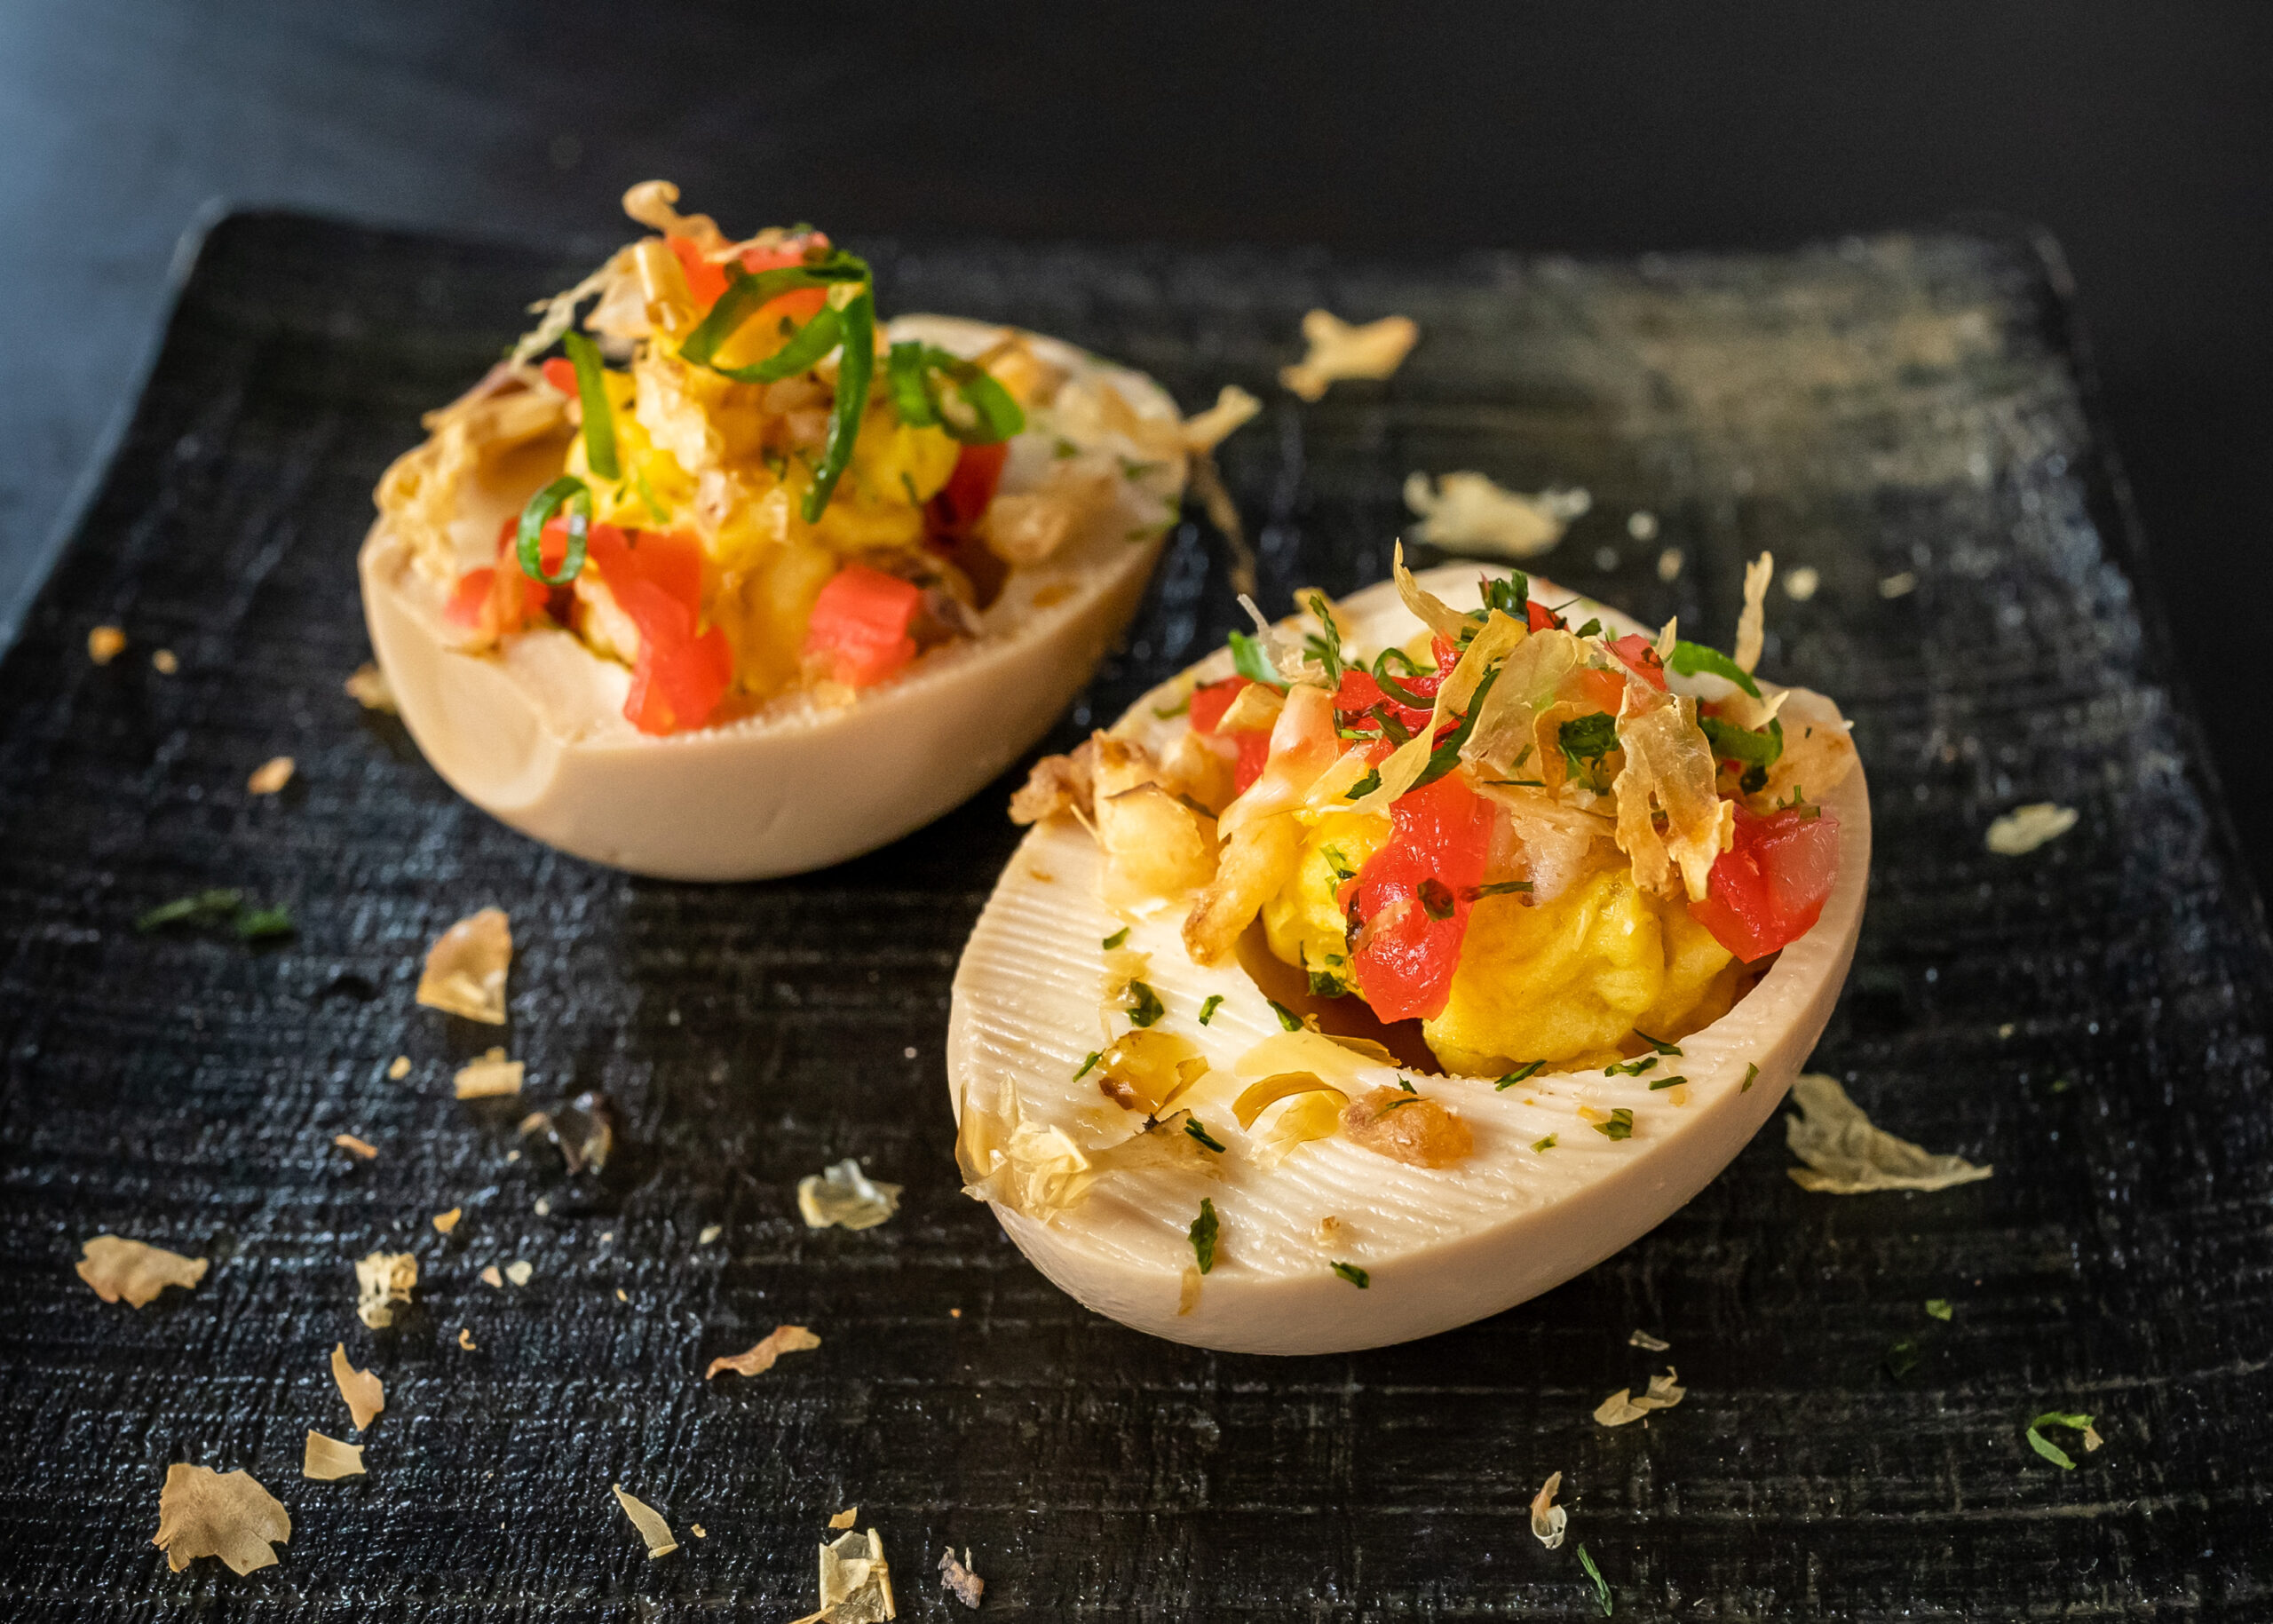
I got the idea to do these deviled ramen eggs after I made some ajitsuke tamago (ramen eggs) and had some leftovers sitting in the fridge.

They are RICH so having the beni shoga (pickled ginger) and green onions to cut the heaviness is a necessity.

But they are oh so good. These would make a fantastic party appetizer!
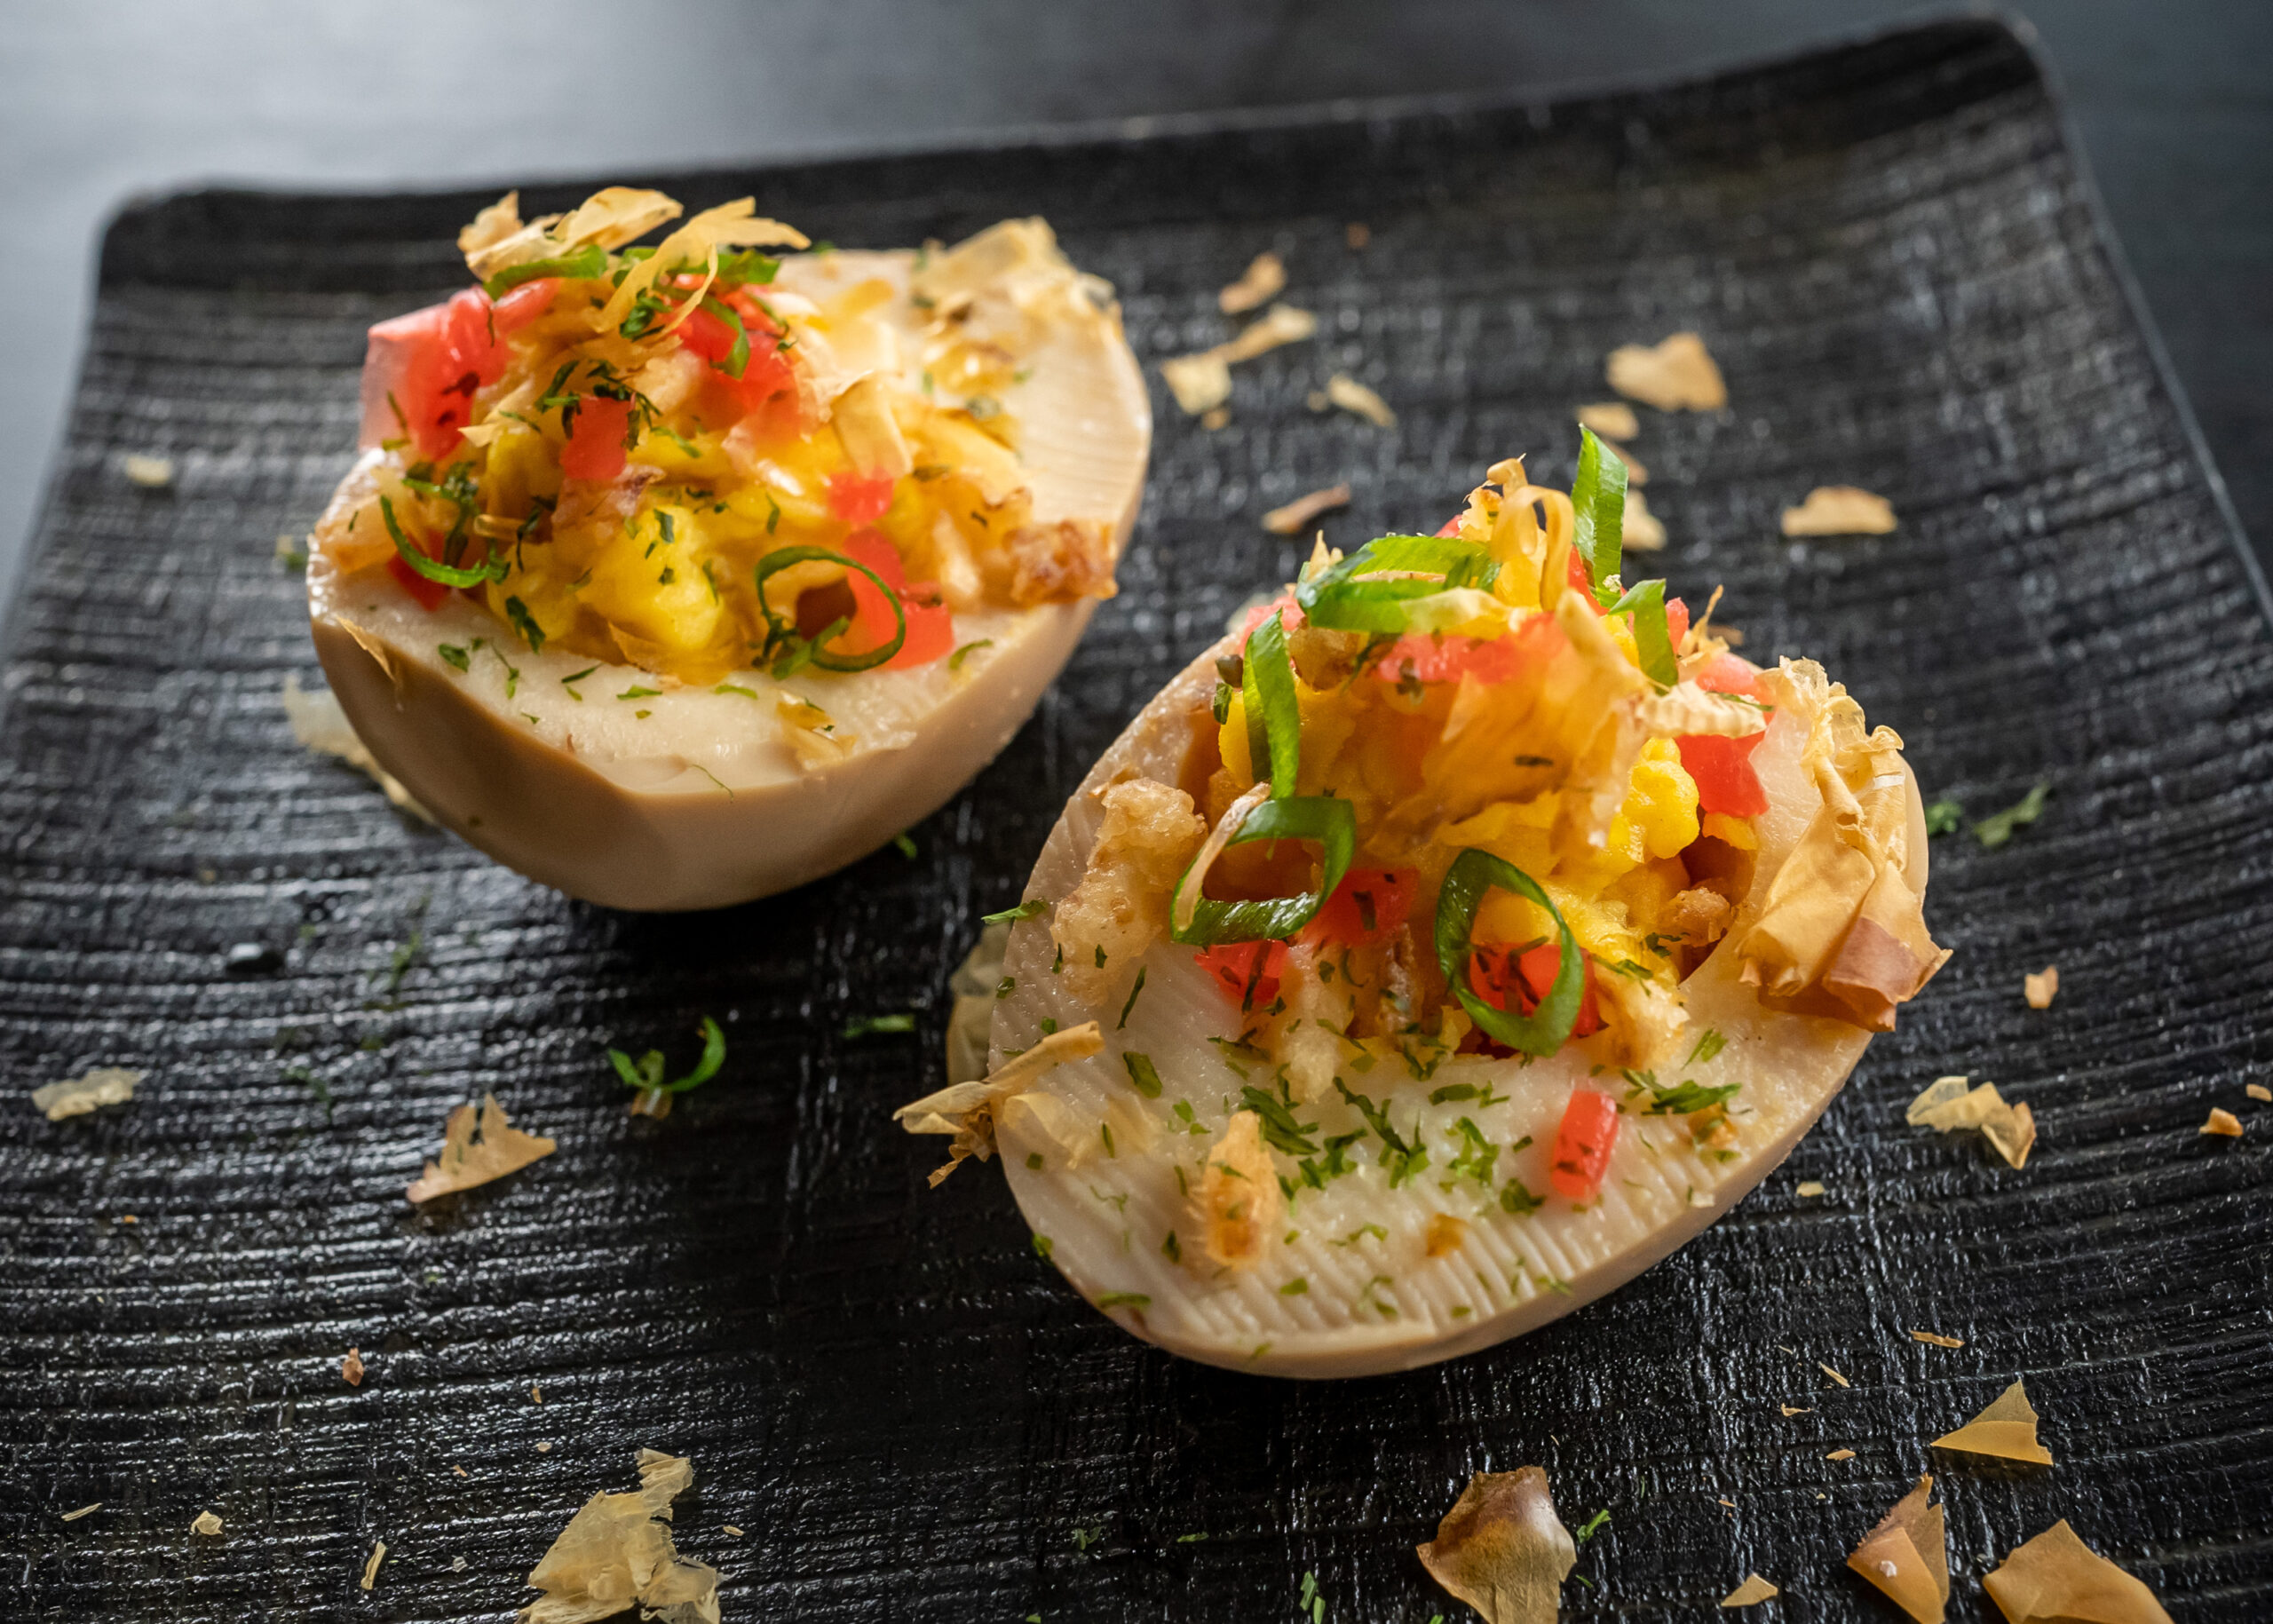
Deviled Ramen Eggs

Ingredients
  • 1 ajitsuke tamago (ramen egg)
  • 1/4 tsp takoyaki or okonomi sauce
  • 1/2 tsp kewpie mayo
  • fried onions or tempura bits
  • beni shoga
  • green onions
  • bonito flakes
  • aonori
Cooking Directions
  1. Slice the ramen egg in half, place yolks in a bowl. Add takoyaki sauce and kewpie mayo, mash until smooth. Spoon or pipe back into the egg whites.
  2. Garnish with fried onions, beni shoga, green onions, bonito flakes, and aonori.
  3. Enjoy!

Sub to my YouTube channel and follow me on TikTok or Instagram to get notified whenever we have new videos!

Links in this post may be affiliate posts. If you buy an item through an affiliate link, I get a small fee, which helps support this blog!

Categories
TikTok

Apple Crumble

@sushidaytv

I miss him a whole bunch, he would have LOVED this apple crumble ? #foodOnTikTok #foodie #foodTikTok #dessert

? Pieces (Solo Piano Version) – Danilo Stankovic

If the above video doesn’t load for you, click here to see it on TikTok!

I’ve always found myself to be really lucky that none of the important men in my life have ever been particularly weirded out by anything to do with that time of the month.

I was in high school, freshman year, when puberty hit. And it hit hard.

I was in math class, and started to feel really unwell. I took out my retainer, put it in its case, and then walked over to my teacher’s desk and asked if I could go to the nurse’s office.

I didn’t even wait for him to write a note – the moment he said yes, I ran out of the room.

Halfway to the nurse’s office, I ended up barfing into a trash can.

A security guard – the strict one everyone was scared of – saw me, and I was afraid I was going to be in trouble, but she was just like, oh you poor baby, and walked me the rest of the way to the nurse.

I ended up curled in the fetal position on the floor of the bathroom of the nurse’s office, until my dad came and picked me up.

And he just took it all in stride – we’ve got Sprite, we’ve got Advil, we’ve got heat pads, he even, a few times, took a rolling pin to my quads or massaged my lower back and belly when I had debilitating cramps.

I’m a huge fan of this apple crisp recipe.

It’s easy to make, and OH SO good.

I definitely recommend using a mix of apple types, if you can. We only had Fuji apples in the house, so it turned out just a tad sweeter than we would have preferred.

The original recipe used bourbon in place of the lemon juice, but I don’t tend to keep any on hand, so I just used a commenter’s suggestion of lemon juice and that worked perfectly fine (I’m sure it would be great with the bourbon though!)

Some people in the comments were questioning leaving the skin on, but it softened up and worked wonderfully for me – plus it’s way easier to not have to peel the apples ahead of time.

The original recipe was a little heavy on the nutmeg, so I reduced it in my version.

But I absolutely, 10/10 would make this again. And again, and again, and again.

Apple Crumble

very slightly adapted from Serious Eats

Ingredients
  • 100g all-purpose flour
  • 165g turbinado sugar
  • 1 tbsp freshly grated lemon zest
  • 1 tsp freshly grated nutmeg
  • 1 tsp kosher salt
  • 100g toasted pecans
  • 10 tbsp unsalted butter, cut into small cubes
  • 4 apples, skin on, cored and diced
  • 3 tbsp sugar
  • 1 tbsp cornstarch
  • 1/2 tsp kosher salt
  • 2 tbsp lemon juice
Cooking Directions
  1. Preheat oven to 375°F.
  2. In a food processor, pulse flour, raw sugar, lemon zest, nutmeg, and salt until well combined.
  3. Add pecans and pulse just until pecans start to break apart, 2 to 3 pulses. Some whole pecans should still be visible.
  4. Add butter and pulse until mixture resembles a coarse meal, with pea-sized chunks. Transfer to a bowl and chill in refrigerator or freezer until ready to bake.
  5. Toss apples, sugar, cornstarch, salt, and whiskey in a large mixing bowl until evenly combined. Transfer to a 2-quart (8×8″) baking dish and cover with crisp topping, spreading it into an even layer across the dish. Do not pack topping down with your hands. Bake until topping is darker in color, sandy, dry, and firm to the touch, about 45 minutes. Let crisp cool for at least 15 minutes before serving. Serve with ice cream.

Sub to my YouTube channel and follow me on TikTok or Instagram to get notified whenever we have new videos!

Links in this post may be affiliate posts. If you buy an item through an affiliate link, I get a small fee, which helps support this blog!

Categories
TikTok

Lava Cakes with Raspberry Sauce

If the above video doesn’t load for you, click here to see it on TikTok!

Someone on TikTok recently asked, “When is your birthday and what’s your favorite memory of one of your birthdays?””

I was never allowed to have the kind of birthday party my friends had, growing up. My parents never let me have a sleepover, I never had a jump house, never played laser tag, never went to Chuck-E-Cheese…

But none of that mattered, because I had the BEST birthday parties.

And I’m not just saying that – I had so many friends tell me YEARS after the fact that I had the coolest birthday parties… which is saying a lot, because by no stretch of the imagination was I ever a cool kid.

Every year for my birthday party, my dad would spend the days leading up to it putting together an epic treasure hunt.

It was nothing fancy – my parents would buy knicknacks – erasers, stickers, that sort of thing – as the prizes, but it was so much fun.

They’d split us into two teams. Each team would get a puzzle or riddle to start, and once we solved it, the answer would tell us where around the house or backyard to find the next clue. Every clue would have a little container of prizes with it – one for each team – so we’d be collecting little goodies as we went along. And – importantly – our clues were in different orders so we couldn’t just follow whichever team solved the clue first.

I don’t know if there was actually any extra prize for finishing first aside from bragging rights, but we always raced to solve all the clues as fast as we could. Even when I was on the losing team, everyone always had so much fun with it.

As for when my birthday is, yesterday was actually my half-birthday… so I’ll let you do the math.

My mom requests these lava cakes with raspberry sauce for her birthday or Mother’s Day every year, so these are a family favorite!

They’re SUPER easy to make – these days, I make them ahead, and she bakes them herself so she can have some hot, tasty lava cakes whenever she wants.

Lava Cakes

from Martha’s Baking Addiction

Ingredients
  • 4 oz (115g) dark chocolate, coarsely chopped
  • 1/2 cup unsalted butter
  • 2 large eggs + 2 large egg yolks
  • 1 tsp vanilla extract
  • 1 cup powdered sugar
  • 1/2 cup all-purpose flour
Cooking Directions
  1. Preheat the oven to 425F. Grease four 4oz ramekins, and place them on a baking tray.
  2. Place the chocolate and butter in a large microwave-safe bowl and heat in 20 second intervals, stirring after each one, until melted and smooth.
  3. Add the eggs, egg yolks, and vanilla, and whisk until combined. Add the powdered sugar and flour, and whisk until smooth and combined.
  4. Divide the mixture between the prepared ramekins. If you’d like to prepare ahead of time, you can cover these with saran wrap and refrigerate until ready to bake.
  5. When ready to serve, remove plastic wrap and bake at 425F for 12-15 minutes, or until the sides of the cakes are firm and the centers are still soft and gooey.
  6. Carefully run a knife around the edges of each cake, then turn them out onto serving plates. Serve warm with a scoop of ice cream, raspberry sauce, and fresh raspberries.

Raspberry Sauce

from Ginger with Spice

Ingredients
  • 500g (18 oz) raspberries
  • 30g sugar
Cooking Directions
  1. Place raspberries and sugar in a saucepan, over medium high heat. Stir occasionally, mashing, until it comes to a simmer.
  2. Continue cooking, stirring occasionally, until the sauce reaches your desired thickness, then remove from heat. If desired, strain to remove the seeds.

Sub to my YouTube channel and follow me on TikTok or Instagram to get notified whenever we have new videos!

Links in this post may be affiliate posts. If you buy an item through an affiliate link, I get a small fee, which helps support this blog!

Categories
TikTok YouTube

Sweet Potato Kimchi Hash

If the above video doesn’t load for you, click here to see it on TikTok!

I love kimchi. I love Korean banchan dishes. But somehow, I have the worst of luck when it comes to making them.

A few years ago, I made a big batch of kimchi. I set it out to ferment… and a couple days later came down with the worst case of the flu I’ve ever had. This was pre-Covid, and luckily I’ve never had to roll those dice, but I was bedridden, and completely out for several days.

I remember thinking, in one of my few moments of consciousness, that I need to tell my husband to put away the kimchi… but unfortunately that thought never quite made it out of my brain, and he was too busy taking care of me to remember the kimchi containers hanging out on the dining room table.

So the poor kimchi sat there… fermenting away… for DAYS.

We finally rescued it, but by then it was so overfermented that we struggled to eat it all… and then it molded before we got through it.

And this is why we never leave out our kimchi to ferment anymore. WE’VE BEEN BURNED.

This was a totally spur-of-the-moment breakfast hash, because I found a bag of cubed sweet potatoes in the freezer. We also had some homemade kimchi on hand, so that kicked things up a notch.

This is a super satisfying, slightly spicy start to your day! I love anything where I can get some veggies in with breakfast, and the probiotics from the kimchi is an added bonus. And we all know I can never turn down bacon!

Sweet Potato Kimchi Hash

serves 4

Ingredients
  • 1 lb bacon, diced
  • 1 onion, diced
  • 1 cup kimchi, drained, chopped
  • 1.5 lb sweet potatoes, peeled and cubed (frozen is fine)
  • white or brown rice, to serve (optional, but we preferred it because the kimchi was spicy!)
  • 4 fried eggs
  • sliced green onions, to garnish
Cooking Directions
  1. Cook bacon in a skillet until starting to brown. Add in onions, cook until softening and browning. Add kimchi, and continue to cook until kimchi starts to caramelize. Remove from pan, keeping any rendered bacon fat in the pan.
  2. Add sweet potatoes to pan. Cook until fork-tender and browning. Add bacon mixture back to the pan, and toss to combine.
  3. Serve over rice, if using, and topped with fried eggs and green onions.

Sub to my YouTube channel and follow me on TikTok or Instagram to get notified whenever we have new videos!

Links in this post may be affiliate posts. If you buy an item through an affiliate link, I get a small fee, which helps support this blog!

Categories
TikTok YouTube

Ajitsuke Tamago (Ramen Eggs)

If the above video doesn’t load for you, click here to see it on TikTok!

“Do you watch anime and if so what’s your favorite one?”

(aka, in which I discover that an easy way to get a TON of engagement on TikTok is to ask them about anime)

So the thing is, these days I don’t watch much TV. I’m always pretty busy, and I’m generally more of a book reader than a TV-watcher.

That being said, I absolutely did grow up watching a little anime, and have watched a bit as an adult as well.

As a kid, Sailor Moon, Pokemon, Digimon, Dragon Ball Z, Yu-Gi-Oh… like all the shows that would be on Cartoon Network after school in the 90s. And, of course, all things Ghibli.

In the early years back when I started dating Son, we watched a ton of One Piece together, as well as HunterXHunter, a little Naruto, some Food Wars.

But I think out of all the anime we’ve ever watched, Sword Art Online is the only show we ever totally finished. Definitely never even got close to watching all thousand episodes of One Piece, although we did get pretty far in, and was just a little put off by the “meat juice!!!” in Food Wars, so we only got through a few episodes.

Do I enjoy anime? Yes! Do I get overwhelmed by ALL THE OPTIONS? Also yes! So if you’re an anime fan, tell me – what anime do you love, and what should I watch?

Ajitsuke Tamago (Ramen Eggs)

slightly adapted from Closet Cooking

Ingredients
  • 1 cup dashi
  • 1/2 cup shoyu
  • 1/2 cup sake
  • 1/2 cup mirin
  • 1/4 cup sugar
  • 12 soft-boiled eggs, peeled
Cooking Directions
  1. Heat the dashi, shoyu, sake, mirin, and sugar in a sauce pan until the sugar has dissolved. Cool completely.
  2. Place the eggs and cooled marinade in an airtight container, making sure the eggs are fully submerged. Refrigerate overnight.
  3. Enjoy in your favorite ramen, over rice, as deviled eggs

Sub to my YouTube channel and follow me on TikTok or Instagram to get notified whenever we have new videos!

Links in this post may be affiliate posts. If you buy an item through an affiliate link, I get a small fee, which helps support this blog!

Categories
TikTok

“OMG” Garlic Bread

I am of the opinion that you can never go wrong with garlic bread. Never. All garlic bread is good garlic bread, there is no such thing as bad garlic bread.

However, all that being said… some garlic breads are better than others.

And this recipe? Is BY FAR my absolute favorite.

I came across this recipe a few years ago on a blog called Kitchen Konfidence (with a K).

It is a garlic-lover’s DREAM.

Imagine the lusciousness of roasted garlic – except instead of roasting the garlic, you’re making a garlic confit in butter – so instead of just roasted garlic, you’ve got roasted garlic AND garlicky butter.

Then mix that with plenty of cheese, a little basil – Thai basil also works wonderfully here – lemon zest, and red pepper flakes. You may be tempted to skip the lemon zest or red pepper flakes but LET ME TELL YOU, they are the je ne sais quois that take this garlic bread from average to amazing.

Bring out the good bread for this one, and if you can get some fancy three-cheese bread? I couldn’t find any this time, but trust me, get the cheesy bread.

And all that, altogether, you can quote me on this, will be the best garlic bread you have ever in your life had. Ever.b

“OMG” Garlic Bread

slightly adapted from Kitchen Konfidence

Ingredients
  • 1 cup garlic cloves
  • 1/2 cup unsalted butter
  • 1/2 cup grated parmesan cheese
  • 1 tbsp chopped fresh basil (Thai basil also works)
  • 1 tsp grated lemon zest
  • 1/2 tsp red pepper flakes
  • kosher salt
  • 6 thick slices artisan bread
Cooking Directions
  1. Place garlic and butter in a small saucepan over medium-low heat, and cook until garlic is tender and golden-brown (15-18 minutes). If you notice the garlic is turning brown, but the cloves are not softening, turn heat down and continue cooking. Pour garlic and butter into a medium bowl, and let cool.
  2. To the bowl with the garlic and butter, add parmesan cheese, basil, lemon zest, red pepper flakes, and pinch of kosher salt. Using a fork, mash the ingredients to combine. Season to taste with additional kosher salt. Let sit for 5 minutes.
  3. Preheat a broiler to high. Place bread on a baking sheet, and toast under the broiler until golden (about 2 minutes). Flip the slices, and broil the other side until golden (another 2 minutes). Remove the baking sheet from under the broiler, and let the bread cool slightly. Once cool enough to handle, slather the top of each slice of bread with the garlic-butter mixture, and return underneath the broiler. Cook until the cheese is golden and bubbling (about 2 minutes). Let cool for a moment then enjoy!

Sub to my YouTube channel and follow me on TikTok or Instagram to get notified whenever we have new videos!

Links in this post may be affiliate posts. If you buy an item through an affiliate link, I get a small fee, which helps support this blog!

Categories
TikTok

Carrot Cake Bran Muffins

I have a problem, and it’s called buying in bulk.

It’s sooo much cheaper to buy a bunch all at once… and now I have five bags of wheat bran AND WHAT THE HECK AM I GOING TO DO WITH FIVE BAGS OF WHEAT BRAN?

Luckily, I found this muffin recipe.

I’ve made bran muffins before – I mean, what else are you gonna do with wheat bran? – but it’s always been kind of hit or miss. A lot of the times they’re just… really dense. And not always particularly flavorful.

Like, I try to eat healthy most of the time, but I draw the line at cardboard.

These muffins, however… are really freaking good. Like, I’ve already made a second batch because I liked them so much, that’s how good they are.

The original recipe is vegan, because I’ve been trying to find ways to use up all the aquafaba that I have leftover from making that spinach and chickpeas dish a whole bunch. But, if you’re not vegan, you can totally use regular ingredients instead of the vegan ones.

In my endless quest to use up random ingredients, I also subbed in 1/4 cup of oat flour for 1/4 cup of the all-purpose flour, and mixed in some chopped pecans as well.

It all worked out wonderfully – if you’re looking for some healthy, hearty, and most importantly, tasty breakfast muffins? I highly recommend you try these.

Carrot Cake Bran Muffins

slightly adapted from Simply CeeCee

Ingredients
  • 1 1/2 cups wheat bran
  • 1 cup buttermilk, or vegan buttermilk replacement
  • 1 egg, or vegan egg replacement (I used 3 tbsp aquafaba)
  • 1 tsp vanilla
  • 1/2 cup brown sugar
  • 1/3 cup neutral oil
  • 1 cup all-purpose flour (I replaced 1/4 cup of this with oat flour)
  • 1 tsp baking soda
  • 1 tsp baking powder
  • 2 tsp cinnamon
  • 1/2 tsp salt
  • 1 cup carrots, grated
  • 1/2 cup raisins, more to taste
  • 1 cup walnuts or pecans, chopped
Cooking Directions
  1. Preheat oven to 400F. Line muffin tins with paper liners.
  2. Add bran to buttermilk, and let it soak. Meanwhile, beat together egg, vanilla, sugar, and oil. Stir in the bran-milk mixture. Add the dry ingredients and mix together. Add carrots, raisins, and nuts. Spoon into prepared muffin tins.
  3. Bake in preheated oven for 15-20 minutes, until tops are nicely golden-brown.
  4. Serve warm, with butter!

Sub to my YouTube channel and follow me on TikTok or Instagram to get notified whenever we have new videos!

Links in this post may be affiliate posts. If you buy an item through an affiliate link, I get a small fee, which helps support this blog!

Categories
TikTok

Beet Tostadas

Did any of you – particularly those of you who live in drier climates – ever carry around a coin to diffuse static charges?

This is something I always associated with my grandparents on my dad’s side. This wasn’t usually an issue in Southern California, where I grew up, but they live in a desert region, and had a house filled with carpet.

Of course, socks on carpet in dry air, you’re absolutely going to build up a static charge and then get zapped when you touch a doorknob.

So I remember when we were really, really little, my dad taught us to always carry around a coin when we were visiting our grandparents. Touch the coin to the doorknob (or any other metal things you needed to touch), and voila! Now you can open the door without an unpleasant shock.

What little life lessons did your parents teach you as kids?

I didn’t used to be a huge beet fan, but about a year ago I happened to have some beets on hand that I needed to use up.

I tried out this recipe on my old Twitch stream, and I’ve been craving it again ever since.

The earthiness of the beets go perfectly with the chorizo flavorings, and add a crunchy tostada, fried egg, and all the toppings and it is SO addictively good.

Plus, it’s vegetarian (vegan if you skip the egg), and filled with vegetables, so it’s absolutely one of those super healthy things that doesn’t taste healthy at all.

In fact, I’m already craving it again…

Beet Tostadas with Fried Eggs

slightly adapted from Bon Appetit

Ingredients
  • 1 1/2 lb red beets (about 2 large), peeled, cut into 1/4″ pieces
  • 2 garlic cloves, finely grated
  • 2 tbsp ancho chile powder
  • 1 tsp crushed dried oregano, preferably Mexican
  • 1 tsp paprika
  • 3/4 tsp ground cumin
  • 1/2 tsp freshly ground black pepper
  • 1 tbsp Diamond Crystal or 1 1/2 tsp Morton kosher salt, plus more
  • 2 1/3 cups plus 3 tbsp vegetable oil, divided
  • 1 large white onion, halved through root end, sliced 1/4″ thick
  • 6 medium serrano chiles, quartered lengthwise, leaving stems and seeds intact
  • 1/3 cup sage leaves
  • 6 6″-diameter corn tortillas
  • 6 large eggs
  • salsa, to serve
Cooking Directions
  1. Place a rack in middle of oven; preheat to 350°. Toss beets, garlic, chile powder, oregano, paprika, cumin, pepper, kosher salt, and 1/3 cup oil in a medium bowl until beets are coated. Scrape onto a foil-lined rimmed baking sheet; bake, tossing every 15 minutes, until beets are tender and spices are very fragrant and smell slightly toasted, 35–45 minutes.
  2. Meanwhile, heat 2 cups oil in a large saucepan over high until oil bubbles immediately when the edge of a tortilla touches the surface. Carefully fry onion, adding a little bit at time to avoid too much spattering and reducing heat as needed, until tender and beginning to brown, about 5 minutes. Transfer to a paper-towel-lined baking sheet. Repeat process with chiles, about 5 minutes. Transfer to same baking sheet. Fry sage leaves until crisp, about 30 seconds. Transfer to baking sheet. Working one at a time, fry tortillas, turning once, until crisp, puffed in places, and deep golden brown, about 1 minute per side. Transfer tostadas to baking sheet.
  3. Heat remaining 3 tbsp oil in a large nonstick skillet over medium-high. Crack eggs into skillet, leaving space around each one, and cook until whites are set and edges are crisp, about 4 minutes. Season with salt.
  4. Spoon beet mixture onto tostadas, dividing evenly, and top each with an egg, then fried onion, chiles, sage, and salsa.

Sub to my YouTube channel and follow me on TikTok or Instagram to get notified whenever we have new videos!

Links in this post may be affiliate posts. If you buy an item through an affiliate link, I get a small fee, which helps support this blog!

Categories
TikTok

Curry Beef

I know it’s completely impractical and there are lots of things I wouldn’t want on film, but.

Sometimes, I wish there were a way to magically have video recordings of any point in your life.

I’m sure a lot of people would love this for sentimental reasons, or to prove something happened, but…

Y’all, I just want it for the blooper reel. I mentioned recently that I’m super clumsy. I have had some of the most spectacular, ridiculous falls, and I just wish I could show you all a video of them.

There was the time I literally bellyflopped HARD on stage, then got up and finished the dance, and ended up with the most flamboyant bruise I have ever seen.

Or the time I overbalanced doing a backbend with my leg in the air, and a friend’s mom told me it was the most graceful fall she’d ever seen because my leg stayed straight up the entire time I was falling.

Then there was the time I was wearing heels and jazz pants at an event where I was performing, caught my heel in my pants going down the stairs, and nearly took out a bunch of rich people like a bougie bowling ball.

I’ve fallen down stairs.

I’ve fallen up stairs.

Moral of the story is, I pretty much need to be put in a bubble, for my own safety and everyone else’s.

This curry beef is one of those meals that came about because, “I have ground beef that’s been sitting in the fridge too long, and potatoes that are starting to go green around the edges, what can I make to use that all up?”

I happened to have this curry beef recipe bookmarked from The Woks of Life, and man is it good.

I doubled the potatoes and peas (more veggies is never a bad thing) and the spice level will vary depending on what curry powder you use – we used Vietnamese curry powder, so it was definitely on the spicy side.

This is a hearty, delicious, total comfort food kind of meal. I absolutely would make this again!

Curry Beef

slightly adapted from The Woks of Life

Ingredients
  • 3 tbsp oil
  • 1 large onion, finely diced
  • 2 cloves garlic, minced
  • 2 large russet potatoes, cut into a 1/2-inch dice
  • 1 lb ground beef
  • 2 tbsp curry powder
  • 1 1/2 tsp turmeric
  • 1/2 tsp cumin
  • 1/4 tsp sugar
  • 1/4 tsp black pepper
  • 1 tsp salt
  • 1 1/2 cups beef broth
  • 1 tbsp cornstarch
  • 2 cups peas (optional)
Cooking Directions
  1. In a skillet or wok, heat the oil over medium high heat. Add the onions and garlic and cook until translucent and just slightly caramelized. Add the potatoes. Let cook for 10 minutes, turning the heat down if the potatoes are crisping too much.
  2. Add the ground beef, breaking it up with a spatula, and cook the beef until browned. Next, add the curry powder, turmeric, cumin, sugar, black pepper, and salt. Stir to combine.
  3. Make a cornstarch slurry by mixing the beef broth with 1 tablespoon of cornstarch. Add it to the beef mixture and bring to a boil. Simmer for a few minutes until the entire mixture has thickened. You’ll know it’s ready when there’s no more pooling liquid––just a very viscous curry beef!
  4. Add the peas (if using). Let the entire mixture simmer, covered, for 10-15 minutes, until the potatoes are fork tender. Season with additional salt to taste, if necessary. Spoon over a bed of rice to serve!

Sub to my YouTube channel and follow me on TikTok or Instagram to get notified whenever we have new videos!

Links in this post may be affiliate posts. If you buy an item through an affiliate link, I get a small fee, which helps support this blog!