We’re starting to really get into the groove of cooking and filming videos for our YouTube channel, and I’m having a lot of fun with it!
Is there anything you’d like to see me cook?
Coming up very soon… something spicy with black sesame seeds. I promise I’m not diseased, even though it looks like it.
I possibly need to clean the oven windoor.
Behind the scenes. I swear, these days Weekly Wanderings is gonna be nothing but sneak peeks at what videos are coming up next, because all we do these days is film!
My eating gets out of whack on filming days, sometimes I get to midnight and realize I’ve barely eaten all day. Cereal to the rescue!
Finally found time to paint my nails again. What colors are catching your eye?
Went with a subtle (but glittery – always gotta be glittery) nude this week. Easing back into the idea of having my nails painted.
Blueberries! With vanilla coconut cream and granola. My new favorite healthy dessert.
Gettin’ figgy with it.
Fig tarts! Coming up… in a week or so. We’re doing a good job of building up a backlog.
More behind the scenes.
LOOK AT THAT PRETTY MACRO SHOT.
Negatives.
That’s it for this week! I really need to get out more, but I’ve been avoiding it thanks to COVID. This virus is gonna make a hermit out of me yet…
Golden egg curry… sounds like something straight out of a fable, right?
This recipe is from the Burma cookbook, at the request of another one of our community members – TheBardVyune!
You start with the most important ingredient – the eggs!
Hard boil them, then stick ’em in an ice bath to cool. Once they’re cool enough to handle, peel the eggs.
So far, these are just plain old white hard-boiled eggs. But what makes them golden?
The next step is frying the hard-boiled eggs, so they get browned and bubbly on the outside. But to make them even more golden, you add turmeric to the oil.
Once your eggs are fully golden – make sure to get the tips too! – set them aside, and drain off half of the oil.
Now it’s time for the curry portion of the dish!
Start with some diced shallots and minced garlic.
Once those are transparent but not browning too much, add in some diced tomatoes and chili powder.
Let those stew for ten minutes or so, until the tomatoes are nice and broken down.
Next, fish sauce for that hit of umami, and a bit of salt.
Sliced peppers, for a bit of floral fruitiness and heat – the recipe calls for green cayenne peppers, so if you can get that and you like heat, then go for it! We were only able to buy poblano peppers, which are hardly spicy at all – but still quite delicious.
Lastly – slice the golden eggs in half, and nestle them cut-side-down among the veggies. Let that cook just a little more, and then your golden egg curry is ready to eat!
Serve with rice, and chili garlic sauce if you have it.
The eggs were really tasty, but in our opinion the real winner of this dish was the veggie portion.
In fact, since we loved it so much AND I just happened to have a bunch of all the ingredients leftover, I made an extra triple batch of the veggies after I finished cooking the original recipe!
It’s earthy and umami and so incredibly flavorful. I LOVED the poblanos that I used since we couldn’t get cayenne peppers, especially because it was all the flavor with none of the spice.
But if you can get cayenne peppers (or even jalapenos), and you like spice, then definitely go for that!
2 or 3 green cayenne chiles, seeded and sliced lengthwise into 3 or 4 strips each
Cooking Directions
Place the eggs in a saucepan, add cold water to cover, bring to a boil, and cook at medium boil for 8 minutes. Drain the eggs and cool in cold water. When the eggs are cool enough to handle, peel them.
Heat the oil in a wide heavy skillet over medium-high heat. Add the turmeric and stir to dissolve it. When the oil is hot enough to sizzle when a drop of water is dropped into it, add the peeled eggs and fry until golden and a little blistered all over; cook on each side in turn, then try to balance the eggs on their ends to cook the tips. With a slotted spoon, lift the eggs out of the hot oil and onto a plate. Cut them lengthwise in half and set aside.
Pour off all but 2 to 3 tbsp of the oil. Heat the oil remaining in the pan over medium heat, add the shallots and garlic, and fry briefly, until translucent. Add the chile powder and tomatoes and, stirring frequently to prevent sticking, cook at a strong simmer until the tomatoes have broken down into a softened mass, about 10 minutes.
Stir in the fish sauce and salt, then taste and adjust the seasoning if you wish. Raise the heat to medium-high, add the chile strips, and stir. Place the eggs cut side down in the sauce and cook until the oil sizzles, about 3 minutes. Serve hot or at room temperature.
Sub to my YouTube channel to get notified whenever we have new videos!
Links in this post may be affiliate posts. If you buy an item through an affiliate link, I get a small fee, which helps support this blog!
Today we are cooking from Matt Armendariz’s cookbook, On A Stick, at the request of a viewer from our Twitch community, busdriv3r!
A lot of times, I think the assumption with a cookbook like this is that it would be a bit gimmicky. But he’s got a ton of amazing-sounding recipes – from Japanese tofu dango, to chicken and waffles, and even bo la lot, which is a Vietnamese dish Son and I love!
The recipe I chose from On A Stick is Matt’s bacon-wrapped shrimp with a honey mustard dipping sauce.
Because you can’t go wrong with
bacon
shrimp
or honey mustard.
drools
First thing first, soak your cocktail picks. Toothpicks work fine if you don’t have cocktail picks, especially if your shrimp are on the smaller side.
Next, start the honey mustard sauce. This will need to rest in the fridge for an hour, so it can hang out while you make the shrimp.
The base of the sauce is mayonnaise. I always loved honey mustard sauce at restaurants, but could never get it right at home – because I always tried to mix just honey and mustard! The mayonnaise is what makes the sauce.
Next we’re adding some spicy brown mustard. It gives it a little kick, and adds the right flavors to the honey mustard sauce.
Of course, we’ve got to have the honey – wouldn’t be honey mustard without it!
And then a dash of cayenne for spice, a pinch of kosher salt, and a little fluff of white pepper, for a less-spicy, more earthy flavor than black pepper.
Mix it all together, and let it sit in the fridge while you prepare the shrimp.
Matt’s recipe calls for tiger shrimp, but I’m using some 40-50 shrimp I happened to have in the freezer. Make sure they’re mostly defrosted.
Zest a lime, making sure not to get too much of the bitter white pith.
And then squeeze the lime juice into your shrimp.
Chili powder for spice.
A pinch of salt, and black pepper this time.
And then a bit of olive oil to bring it all together.
Mix all that, and let the shrimp marinate in the fridge for 15 minutes or so.
Cut 6 strips of bacon in half (or, in my case, 12 – I made a double-batch). Once your shrimp is done marinating, wrap each piece of shrimp in a half-slice of bacon, and secure with one of your soaked cocktail picks.
Lay the wrapped shrimp on a pan that’s been lined with aluminum foil and then sprayed with cooking oil. At this point, take your honey mustard sauce out of the fridge so it’s not too cold when you eat it.
Bake at 375F for 20 minutes, flipping your shrimp halfway through. Mine released a bunch of liquid, so I drained the pan at the 10 minute mark before flipping my shrimp, so they had a better chance of crisping up.
At the end of your baking time, broil for 5 minutes to get the bacon nice and crispy.
Serve hot, with that honey mustard dipping sauce!
I’m SO happy with the honey mustard sauce. My absolute favorite honey mustard is the one from KFC, and this tastes SO similar. I’ve been searching my whole life for this!
The shrimp? Oh my gosh. I would never in a million years have thought that honey mustard would go well with bacon-wrapped shrimp, but we couldn’t get enough. The lime zest adds a bright pop of flavor, and the chili powder adds complexity without too much spice.
This is such a flavorful, morish dish, and it would be such a perfect party appetizer. It’s rather easy to make (and you could totally make the sauce ahead of time), and absolutely the kind of thing that your guests wouldn’t be able to get enough of. (It’s a good thing I doubled the recipe, because otherwise we wouldn’t have had any left for the video!)
And since I know we all want to have parties again, and soon! – then let’s all wear our masks, be safe, social distance as much as you possibly can, and beat that damn virus! And then once the virus is beaten, we can all have parties again and serve these shrimp, and tell me (and Matt!) how much all your friends loved them. Deal? Deal.
Make the sauce: Whisk the mayonnaise, mustard, honey, cayenne, salt, and white pepper in a small mixing bowl until blended. Cover and chill at least 1 hour. Before serving, let sauce rest at room temperature 20 minutes to allow flavors to meld.
Preheat oven to 375F. Line a baking sheet with aluminum foil and coat lightly with nonstick oil spray; set aside.
Place shrimp, lime zest and juice, chili powder, salt, pepper, and oil in a bowl and toss gently. Cover and refrigerate at least 15 minutes and up to 1 hour. Remove cocktail picks from water.
Wrap each shrimp with half a slice of bacon and secure with a cocktail pick. Place skewers on prepared baking sheet and bake 20 minutes, turning skewers after 10 minutes. Broil 5 minutes. Serve hot.
Sub to my YouTube channel to get notified whenever we have new videos!
Links in this post may be affiliate posts. If you buy an item through an affiliate link, I get a small fee, which helps support this blog!
After quite a hiatus AND a blog switch… I’m back with more Weekly Wanderings!
I always love getting a peek into other bloggers’ lives with their weekly photo posts, and I’m hoping some of you might have fun seeing mine as well.
Enjoy!
Summertime is champaca season! My very favorite flower scent (closely followed by jacaranda), and we have a few planted in our yard so I get to smell them every summer.
I’m extremely mature, why do you ask?
Weekly veggie roasting. Because contrary to popular belief, I don’t actually eat nothing but sushi (or all the goodies from our YouTube channel) all the time!
I know you’re not supposed to plant mint in the ground.
But.
Son’s a rebel.
And I get dragged along with it.
Salmon with a creamy dill sauce, brown rice, the aforementioned roasted veggies, and arugula.
Attempts at healthy.
Trying to write more, blog more, tweet more, share my thoughts more…
Mushrooms are healthy, right?
*adds half a stick of butter*
Tooootally healthy, right?
Tortilla pizza! With tomato sauce, mozzarella, pepperoni, mushrooms, red onion, and avocado.
And then topped with a crapton of arugula, with olive oil, salt, and pepper. YUM.
I got attacked by a light.
… you’ll see in our next video.
Honey mustard smiles.
Surprise tomatoes!
“What a weird weed that is, growing in our yard. It kinda looks like a tomato plant.”
A few days later… WHAT THE HECK IT IS A TOMATO PLANT.
The avocado tree that we cut waaaaay down 9 months ago is going NUTS.
Today we’re making misoyaki butterfish from the Aloha Kitchen Cookbook! This is another redemption from a member of our Twitch community, this time from Blacklash.
You’ll probably be seeing a lot of recipes from this cookbook – not only because everything looks delicious, but because there’s also a lot of overlap between the recipes in this book, and the Japanese-American recipes I grew up with.
Beef teriyaki, somen salad, manju… all foods from my childhood, and as far as I can tell, all very similar to my family’s recipes!
But today, we’re making something that I didn’t grow up with.
Back when Son and I were practically babies (we’ve been together for over 15 years – so anything from the first few years of our relationship feels like a lifetime ago!), the first big trip we ever took together was to Hawaii, right after I graduated from college, three years into our relationship.
It was our first big foodie trip – first time eating poke, first time we ever had real ramen, first time dressing up and going to fancy(ish) restaurants.
A couple of the nicer restaurants we went to had misoyaki butterfish on the menu.
We tried it, and were in love – but never quite realized what butterfish was.
Years later, I made miso black cod at home a few times – but still never realized what butterfish was.
Then I read misoyaki butterfish recipe, which calls for black cod, as “butterfish” is not actually a type of fish, and… HOLY SHIT I’VE BEEN MAKING MISOYAKI BUTTERFISH ALL THIS TIME?!?!
I’m observant, I swear.
This misoyaki butterfish recipe is super easy to make! The most time-consuming hands-on part of the recipe is the sauce.
Start with brown sugar, for a bit more depth than white sugar, but not so opinionated of a flavor as honey or maple syrup would give.
Next miso – a paste made of fermented soybeans, salt, and koji, a type of fungi.
I’ve run out of normal cooking sake and we haven’t been daring/desperate enough to venture out to the Japanese supermarket quite yet. But we just happened to have this bottle of sake which has been sitting in our fridge for ages… and we don’t really drink alcohol… so I’m being a little fancy. But ordinarily, cheap cooking sake is totally fine.
Aji-mirin, another type of rice wine. It has a higher sugar content than sake, and is often added for sweetness.
A little rice vinegar, to add some tang.
A bit of shoyu (Japanese soy sauce).
Lastly, peel a piece of fresh ginger (I like to use a spoon – the skin peels off easily, and you don’t waste as much ginger as you would if you use a knife or peeler!) and grate it into the pot, then simmer it all together for an hour.
Marinate the black cod in the sauce and refrigerate it for a couple of days, turning occasionally so it’s evenly marinated. I like to put the ziplock in a study container, so there’s no risk of it accidentally spilling all over my fridge.
After all that – all you have to do is broil it! Wipe off most of the marinade and place on an aluminum foil-lined baking sheet, then broil until the fish just starts to blacken at the edges.
Serve it over rice, with steamed veggies and that furikake we made a few days ago.
In a small saucepan, whisk together the miso paste, brown sugar, sake mirin, rice vinegar, soy sauce, and ginger. Bring to a simmer over medium heat, whisking occasionally. Turn the heat to low and simmer until the mixture has thickened and reduced by a quarter or so, 45 minutes to 1 hour. Let cool completely.
Place the fillets in a gallon-size ziplock bag and pour the cooled sauce over them. Seal and transfer the bag to the fridge to marinate for 2 to 3 days, turning the bag every 24 hours.
Remove the bag from the refrigerator and let it sit at room temperature for 30 minutes.
Preheat the broiler and raise your oven rack to the top spot; it should be 6 to 8 inches from the coils. Line a rimmed baking sheet with aluminum foil, dull side up.
Wipe off any excess sauce from the top of the fillets and arrange them, skin side down, on the foil-lined baking sheet. Broil until the fish flesh is almost opaque, 8 to 10 minutes. Broil for a minute or two to caramelize the top of the fish; it’s done when the outer edges start to blacken. Serve with steamed rice and furikake.
Sub to my YouTube channel to get notified whenever we have new videos!
Links in this post may be affiliate posts. If you buy an item through an affiliate link, I get a small fee, which helps support this blog!
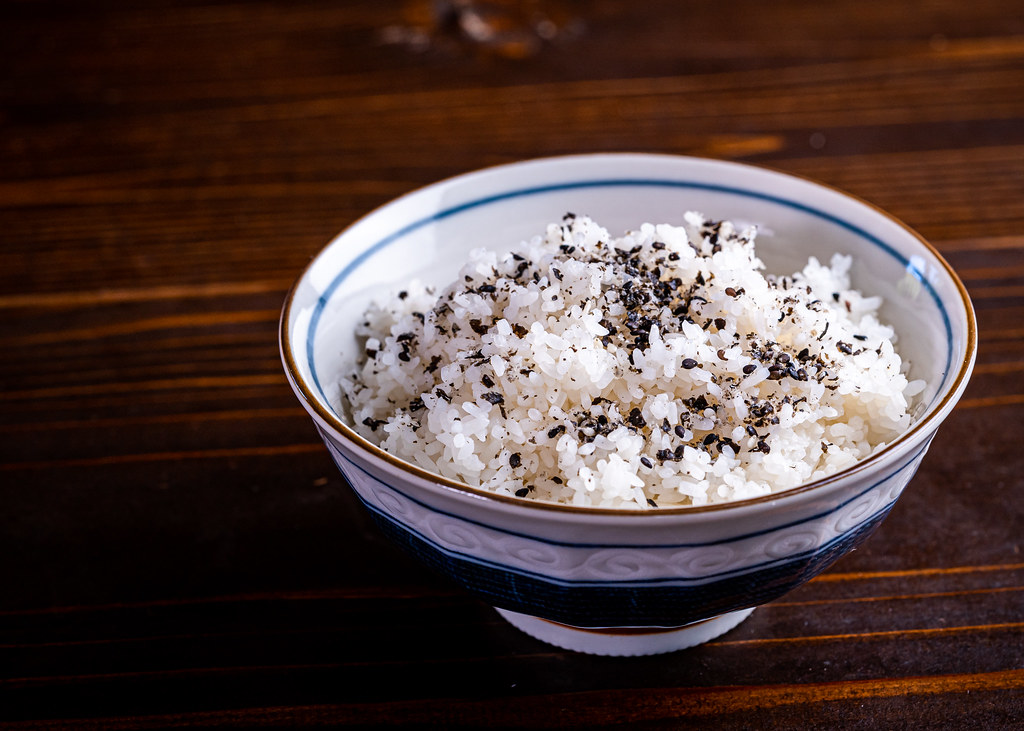
Furikake is to the Japanese what everything bagel seasoning is to American Millennials.
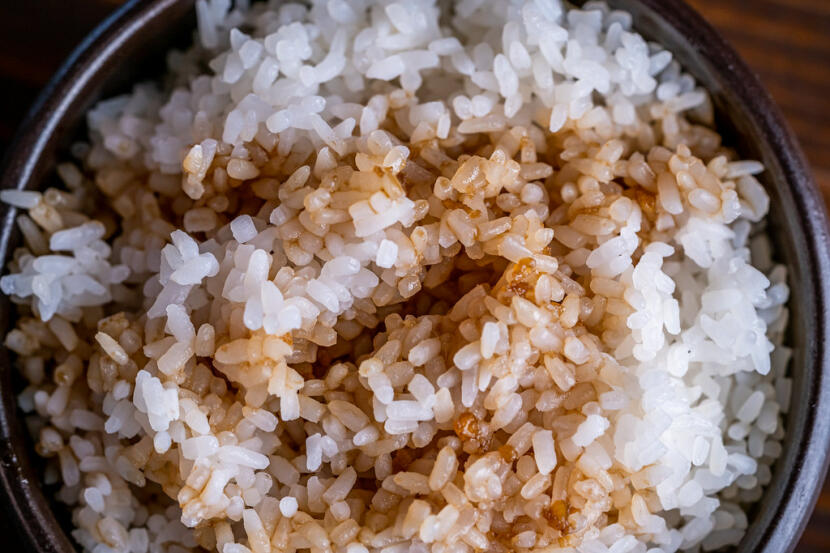
Furikake is a Japanese seasoning that is often sprinkled over rice, which is rather fitting because the word “furikake” comes from the phrase “furi kakeru”, which means “to sprinkle over” in Japanese.
At its base, it’s often just salt, sugar, sesame seeds, and nori.
However, many different versions of furikake exist, with all sorts of other dried ingredients mixed in.
Bonito flakes, shiso, salmon, egg, wasabi… if you look at the furikake section in a Japanese supermarket, you’ll see a bunch of different types. The possibilities are endless – and delicious!
The version we’re making today is on the simpler side of things.
We’re starting with sesame seeds – both black and white. Dry-toast them in a skillet, until they’re nutty and fragrant.
A little salt and sugar to round out the flavors.
And nori for umami.
If your nori is maaaybe just a little old like mine is (you can tell because it’s no longer crisp), you can refresh it by toasting it ever so lightly over a flame. Be careful, and use caution! Just gently sweep it back and forth, keeping your fingers well away from the flame, until it’s crisp again.
You can use a knife to cut the nori into strips if you’d like, but if you have a food processor, it’s much easier to just dump everything in and blend it into small pieces.
Sprinkle over rice, eggs, fish, chex mix, popcorn, rice krispie treats… the possibilities are endless!
On our Twitch cooking stream, we had a loyalty point system called fishcoins. If a viewer gathered enough fishcoins, they could redeem them to help choose something for me to make on stream.
Many of the redemptions were cookbooks or countries – you could pick one, and then I’d choose a recipe to cook from it.
However, if you really racked up your fishcoins, you could choose a specific recipe, and I’d have to cook it.
Since we’ve wrapped up our Twitch stream to make time for other ventures (such as our YouTube channels, more dev projects, our podcast, blogging… the list goes on), I told all our viewers that they could still redeem their fishcoins, and I’d just do the redemptions on YouTube instead.
Today’s recipe choice came from busdriv3r, who by far had the most fishcoins of any of our viewers. You’ll be seeing his name a lot, because he used up all his fishcoins for a bunch of redemptions!
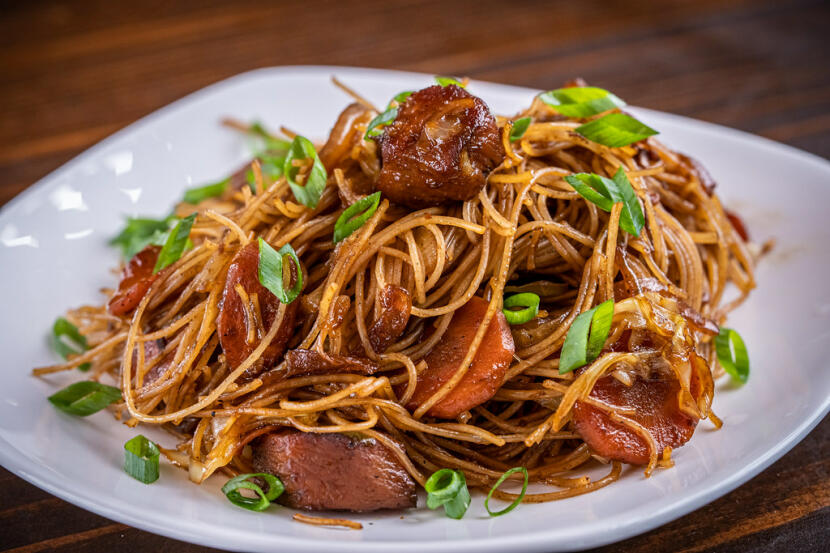
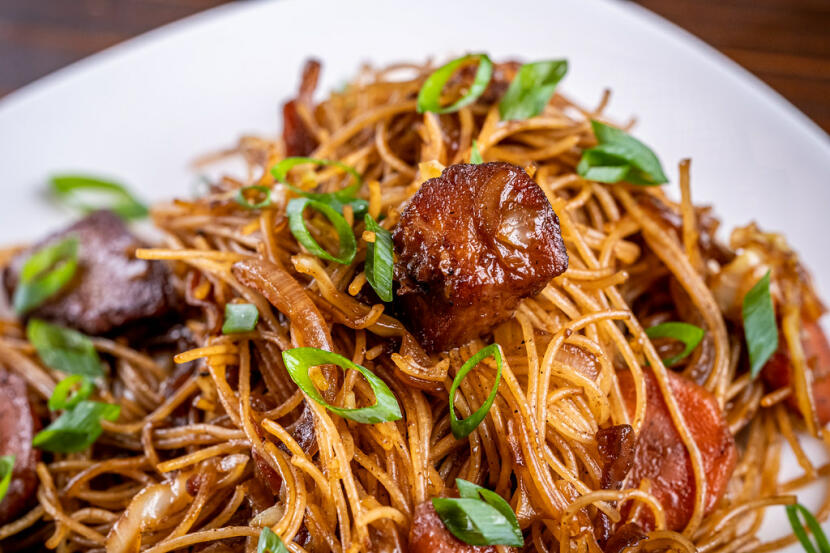
We had a lot of Filipino viewers on Twitch, and one dish that they repeatedly mentioned but we still had never tried was pancit.
It sounds delicious – a rice noodle, meat, and veggie stir-fry… what’s not to love? But somehow we just never got around to making it.
However, thanks to busdriv3r, we can’t inadvertently avoid it any longer! He used 10k fishcoins to redeem this pancit recipe.
It starts with chicken breast, marinated overnight in the teriyaki sauce that we made in our last video, and garlic.
Then, the ingredient that is most important to pancit, the noodles. I’ve seen pancit recipes using different types of noodles, but rice noodles tend to be the most common.
Soak the rice noodles in warm water – this will soften them, so you can stir-fry them without getting inedible, burnt noodles.
Brown the marinated chicken, and then set it aside.
Next, it’s veggie time. Garlic (with a dash of msg!), carrots, cabbage, onions.
Soy sauce for more umami, and then the chicken joins everything.
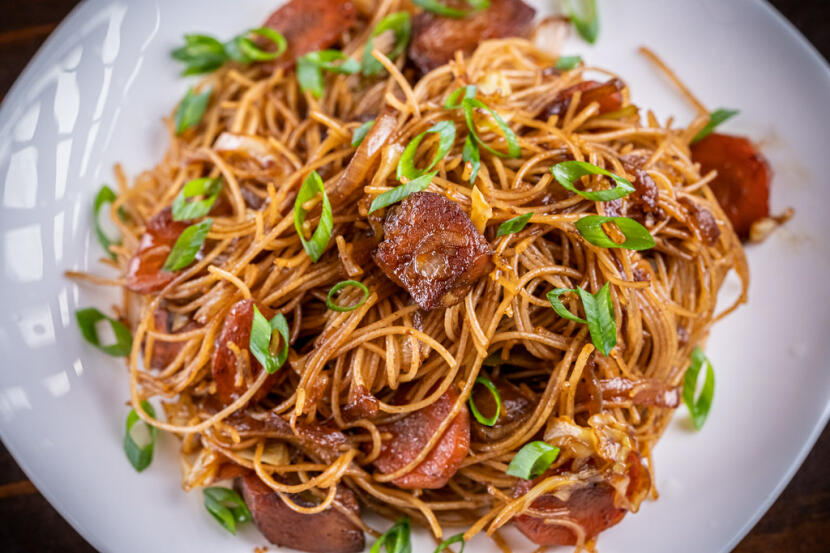
Lastly, the noodles, and a bit more soy sauce, stir-fried all together with everything until the noodles are tender.
Serve with green onions and lemon juice, and there you have it – pancit!
Marinate the cubed chicken breast with the teriyaki sauce and 2 cloves of minced garlic in the refrigerator overnight.
The next day, soak the rice noodles in warm water for 15-30 minutes, then drain.
Drain the marinated chicken and discard the marinade.
Heat 1 tbsp of oil in a wok or skillet over medium high heat and cook the chicken flipping occasionally, until browned on all sides. Set chicken aside.
Heat 2 tbsp of oil over medium high heat and stir-fry the remaining minced garlic for 30 seconds.
Add the carrots and stir-fry for about 5 minutes.
Add the cabbage, onions, and 1 tbsp of soy sauce and stir-fry until the vegetables are tender.
Add the browned chicken to the vegetables and continue stir-frying.
Add the drained noodles, along with 1/8 cup of oil and 1/4 cup of soy sauce. Mix well.
Continue stir-frying until the noodles are tender and cooked thoroughly.
Serve with the green onions and lemon slices.
Sub to my YouTube channel to get notified whenever we have new videos!
Links in this post may be affiliate posts. If you buy an item through an affiliate link, I get a small fee, which helps support this blog!
Here in the US, ‘teriyaki’ has come to refer to the sauce that uses the same flavors as the Japanese teriyaki, rather than to the specific cooking method.
Shoyu and sugar always make up the base, and mirin is traditional as well, although it is often adapted depending on ingredient availability.
Since an upcoming recipe had “teriyaki sauce” as one of its ingredients, I figured I’d do a separate video just about teriyaki sauce.
Today we’re making my grandma’s recipe! She uses this for her teriyaki chicken, which is breaded and fried, then sauced and baked.
It’s one of my favorite things ever, but I rarely make it because it’s a lot of work… aaaand now I’m craving it, so that may have to happen very soon.
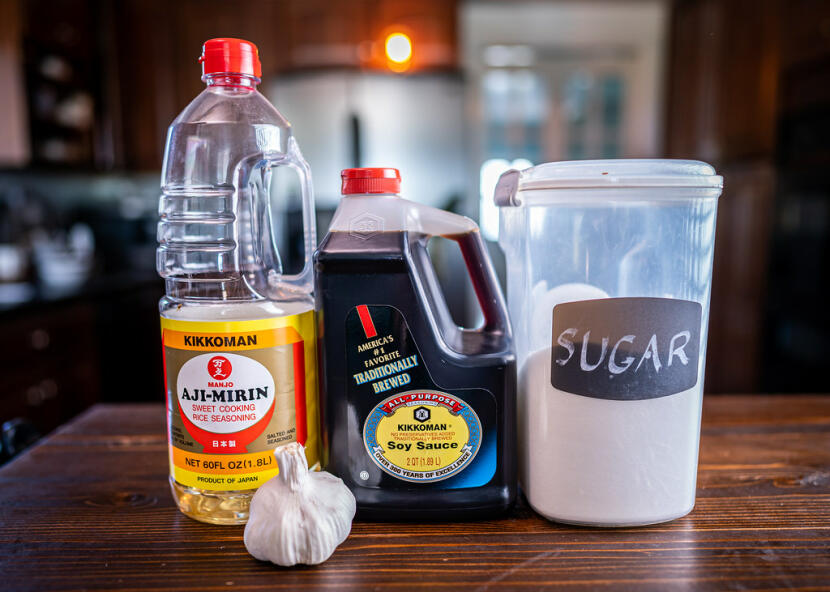
It starts with a base of shoyu, which is the Japanese word for soy sauce, and water.
Then comes sugar, because teriyaki sauce – especially in the US – is always fairly sweet!
A bit of mirin, which is a Japanese rice wine used for cooking. It has a higher sugar content than sake, and is often added for sweetness.
Then, a bit of crushed garlic and ginger. These are a more American addition, as garlic isn’t particularly common in Japanese cooking.
Teriyaki Sauce
My grandmother’s recipe
Makes 2 cups
Ingredients
1/2 cup shoyu
1/2 cup water
1 cup sugar
1 tbsp mirin
2 tsp crushed garlic (optional)
1 tsp grated ginger (optional)
Cooking Directions
Mix the first four ingredients in a saucepan. Bring to a boil, then simmer until thickened. Mix in the garlic and ginger, if using.
Sub to my YouTube channel to get notified whenever we have new videos!
Links in this post may be affiliate posts. If you buy an item through an affiliate link, I get a small fee, which helps support this blog!