Would you believe me if I told you these pretty, swirly taro mooncakes are WAY easier than they look?
No really. They are.

The hardest thing about making taro mooncakes is acquiring the taro.
If you have an asian supermarket near you, you might be able to find it fresh in the vegetable section, or frozen.
But – before we even get to the store, you’re probably wondering – what is taro?
A lot of people think that taro and ube and purple sweet potato are all the same thing.
But they’re not! These are three completely different root vegetables!
Ube is a type of yam, and it is similar to – but not the same as – okinawan purple sweet potatoes. Both pretty much look like sweet potatoes, typically with fairly vibrantly purple flesh on the inside.
Taro, on the other hand, looks NOTHING like a potato.
They’ve got this brown, sort of hairy skin on the outside, and can be quite a bit larger than your typical potato. And then once you peel the skin away, you find a mostly white flesh, that’s just lightly flecked with purple.
Totally different.
Okay – now that we know what taro is, and have our taro peeled, it’s time to make some mooncakes!
First off, we’re going to make the taro paste that will be the filling for the mooncake.
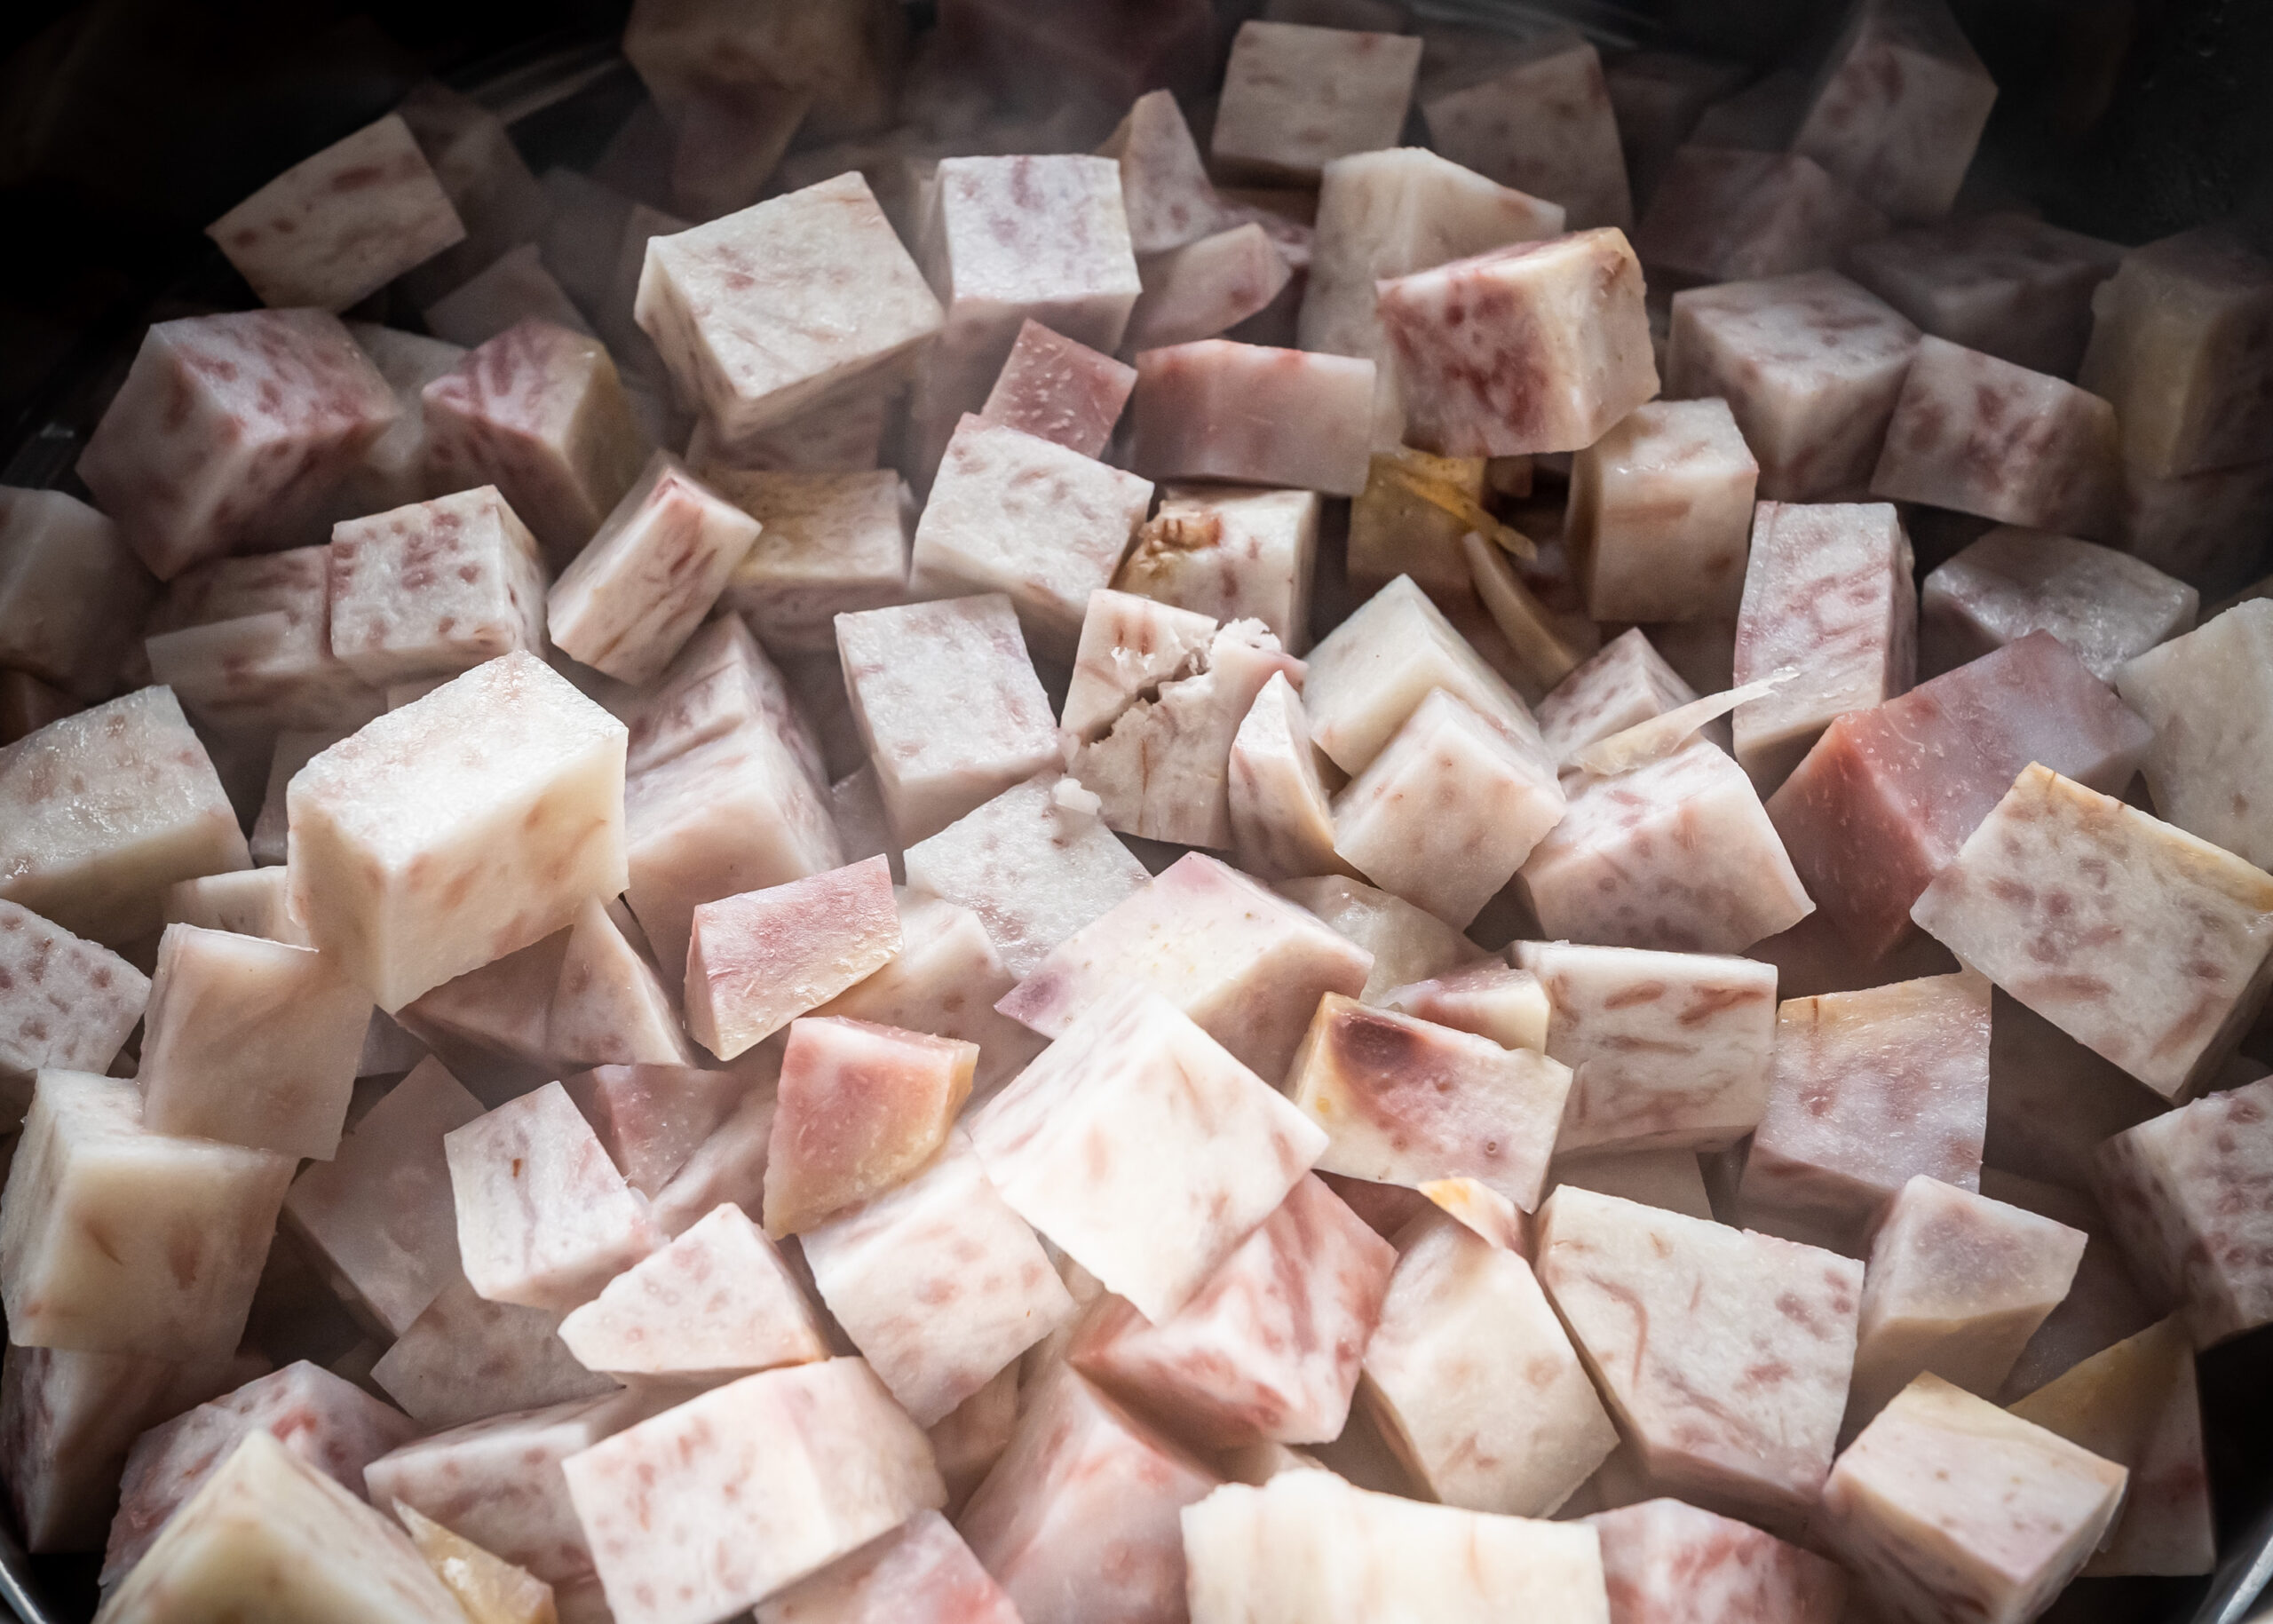
Peel and cube your taro – you’re looking to end up with about 2 pounds.
Then steam it for about 40 minutes – by the end, it should be so tender that it practically falls apart when you stick a fork in it.
To make the paste, add 1 teaspoon of salt, three-quarters of a cup of sugar, and one-quarter of a cup of coconut oil, and just mash it all together until it’s a smooth paste.
I told you it’s easier than it looks. That’s all there is to the filling, so stick that in the fridge until it’s totally cool.
On to the wrappers!
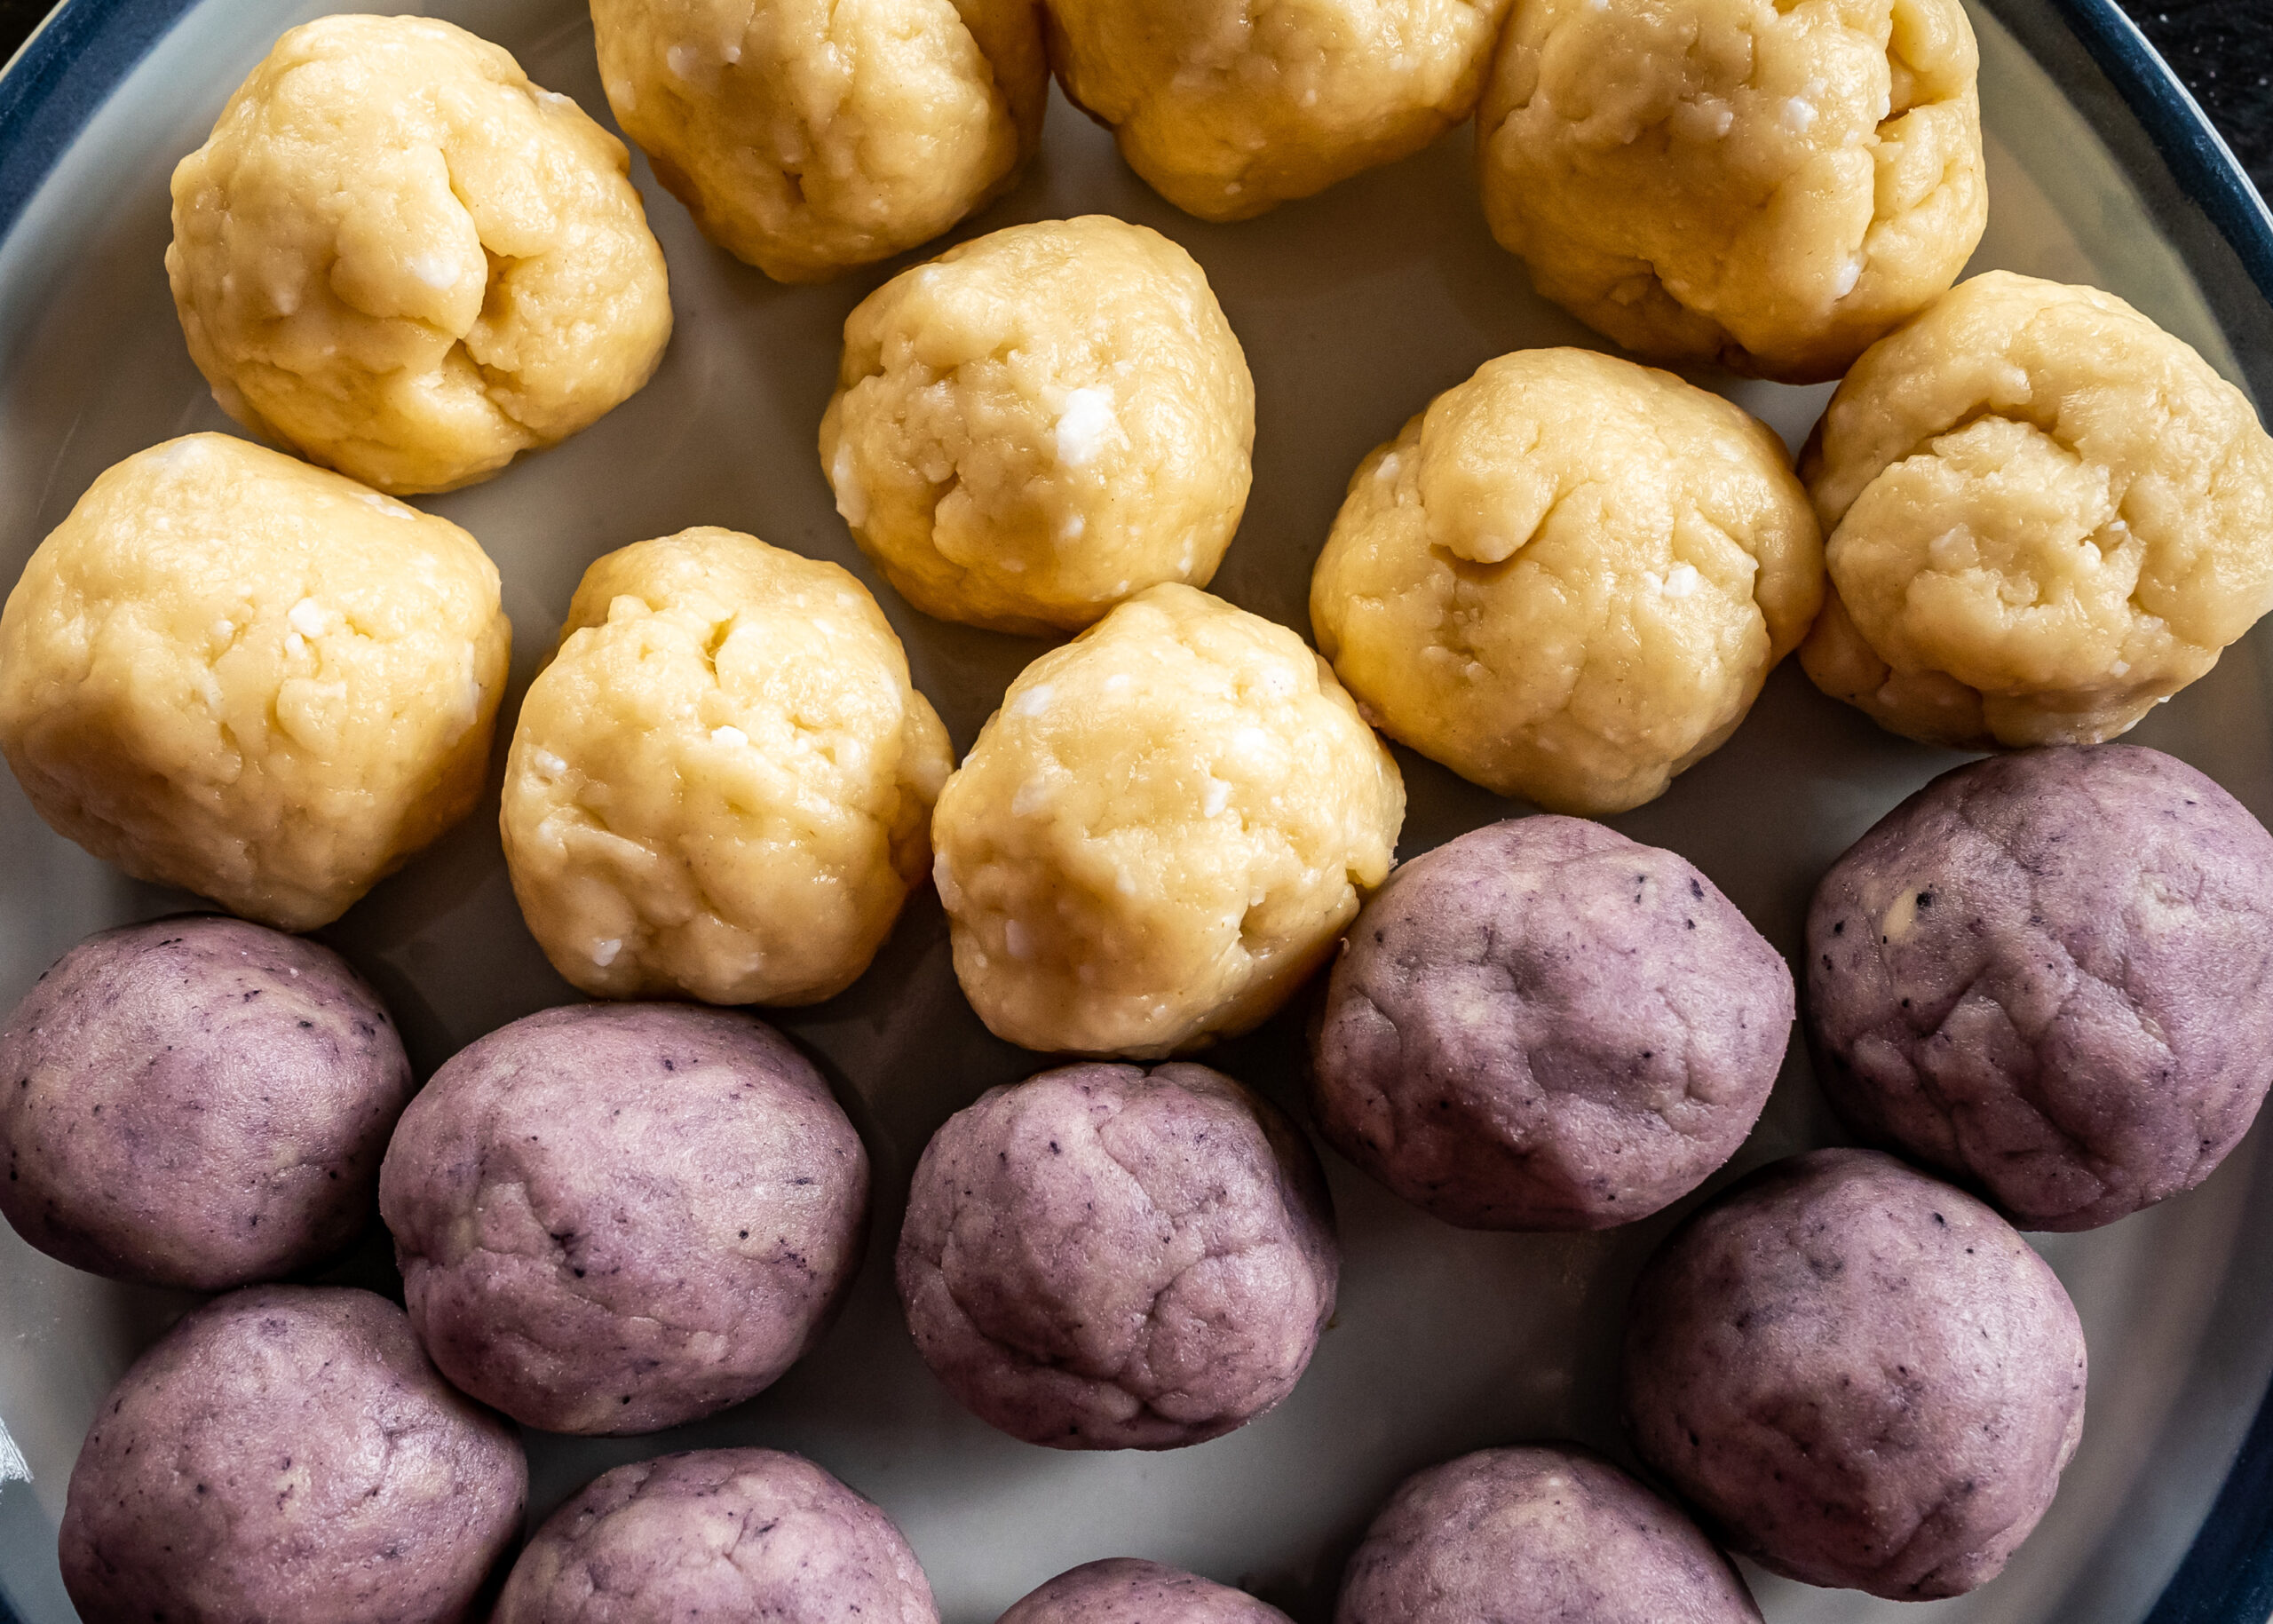
We are going to make some white dough, and some purple dough, which will combine to give us that pretty swirly pattern.
For the white dough, mix 1 3/4 cups of flour, 1/4 cup of powdered sugar, 1/2 teaspoon of kosher salt, 6 tablespoons of coconut oil, and 1/4 cup water
The thing with coconut oil is that its melting point is 78F.
So depending on how hot it is in your kitchen, it may or may not be liquid.
The recipe I used just said coconut oil, so I made the mistake of just putting it straight in, which would work GREAT… in the summer.
But if you’re a weirdo like me and you’re making mooncakes in the middle of winter, instead of during the moon festival in late summer? You really should melt it first.
I don’t think it affected the final product too much, but I definitely ended up with sharp little lumps of coconut oil in my dough. [facepalm]
Knead that until it’s nice and smooth, and then it’s time for your purple dough!
Mix together 1 1/2 cups of flour, 1/2 teaspoon of kosher salt, and 7 tablespoons vegetable or canola oil.
Then add just a little bit of food coloring. I used this purple ube flavoring, because you really can’t go wrong with a little ube in your taro. But normal purple food coloring is fine too. Add a few drops at a time and knead it in – you want a distinctly purple color, but it doesn’t need to be too dark.
Knead this one until it’s smooth too – it will have a totally different texture from the white dough, and that is perfectly fine.
Separate your two doughs into 10 balls each, and stick that in the fridge for about 20 minutes.
And then – it’s time to make your mooncakes!
Start by rolling out a white ball into a small circle. Place a purple ball in the center, and fully wrap the white dough around it.
Roll that out into a long oval, and then roll it up. It’s totally okay if the doughs tear a little.
Turn the roll 90 degrees, so one open end is pointing towards you, and then roll it out into a long oval and roll it up again.
Cut crosswise down the center, so you get two little spirals. This will make two mooncakes.
For each mooncake, set the dough cut-side down, and press it down with your hand. Then roll it out into a circle.
Place a ball of taro paste in the center, and carefully wrap the dough around the ball. It’s okay if it doesn’t seal fully.
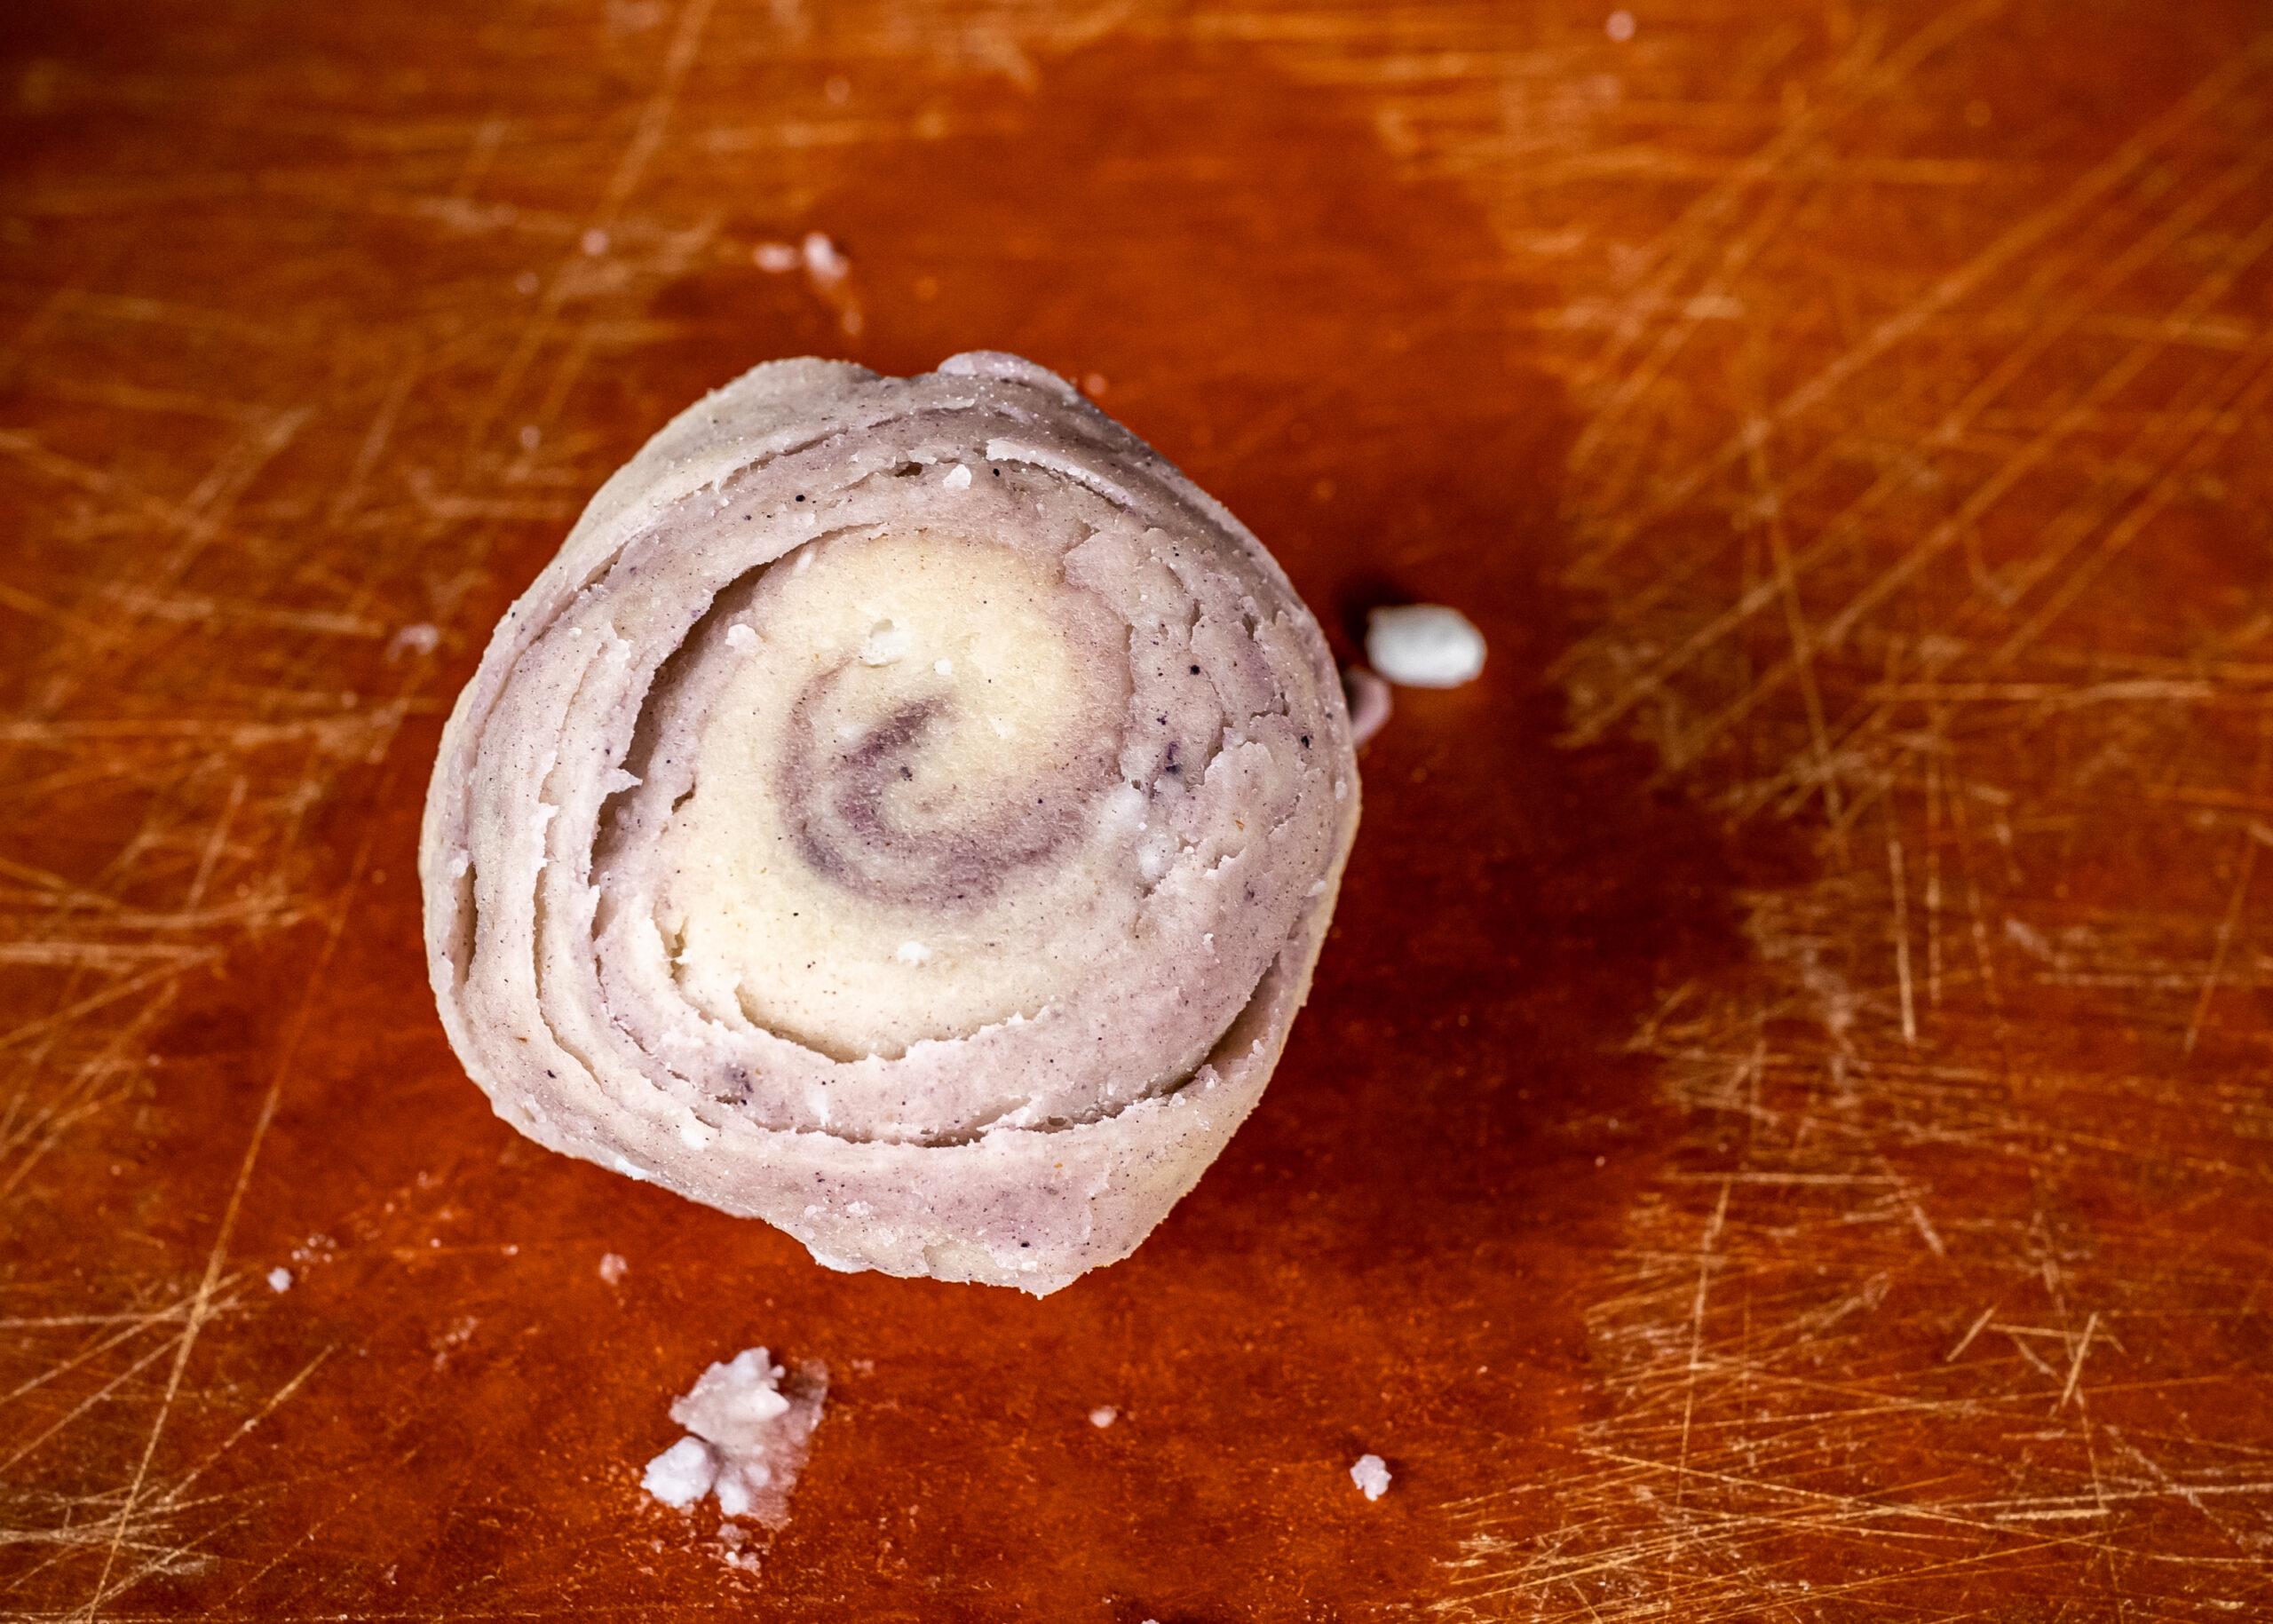
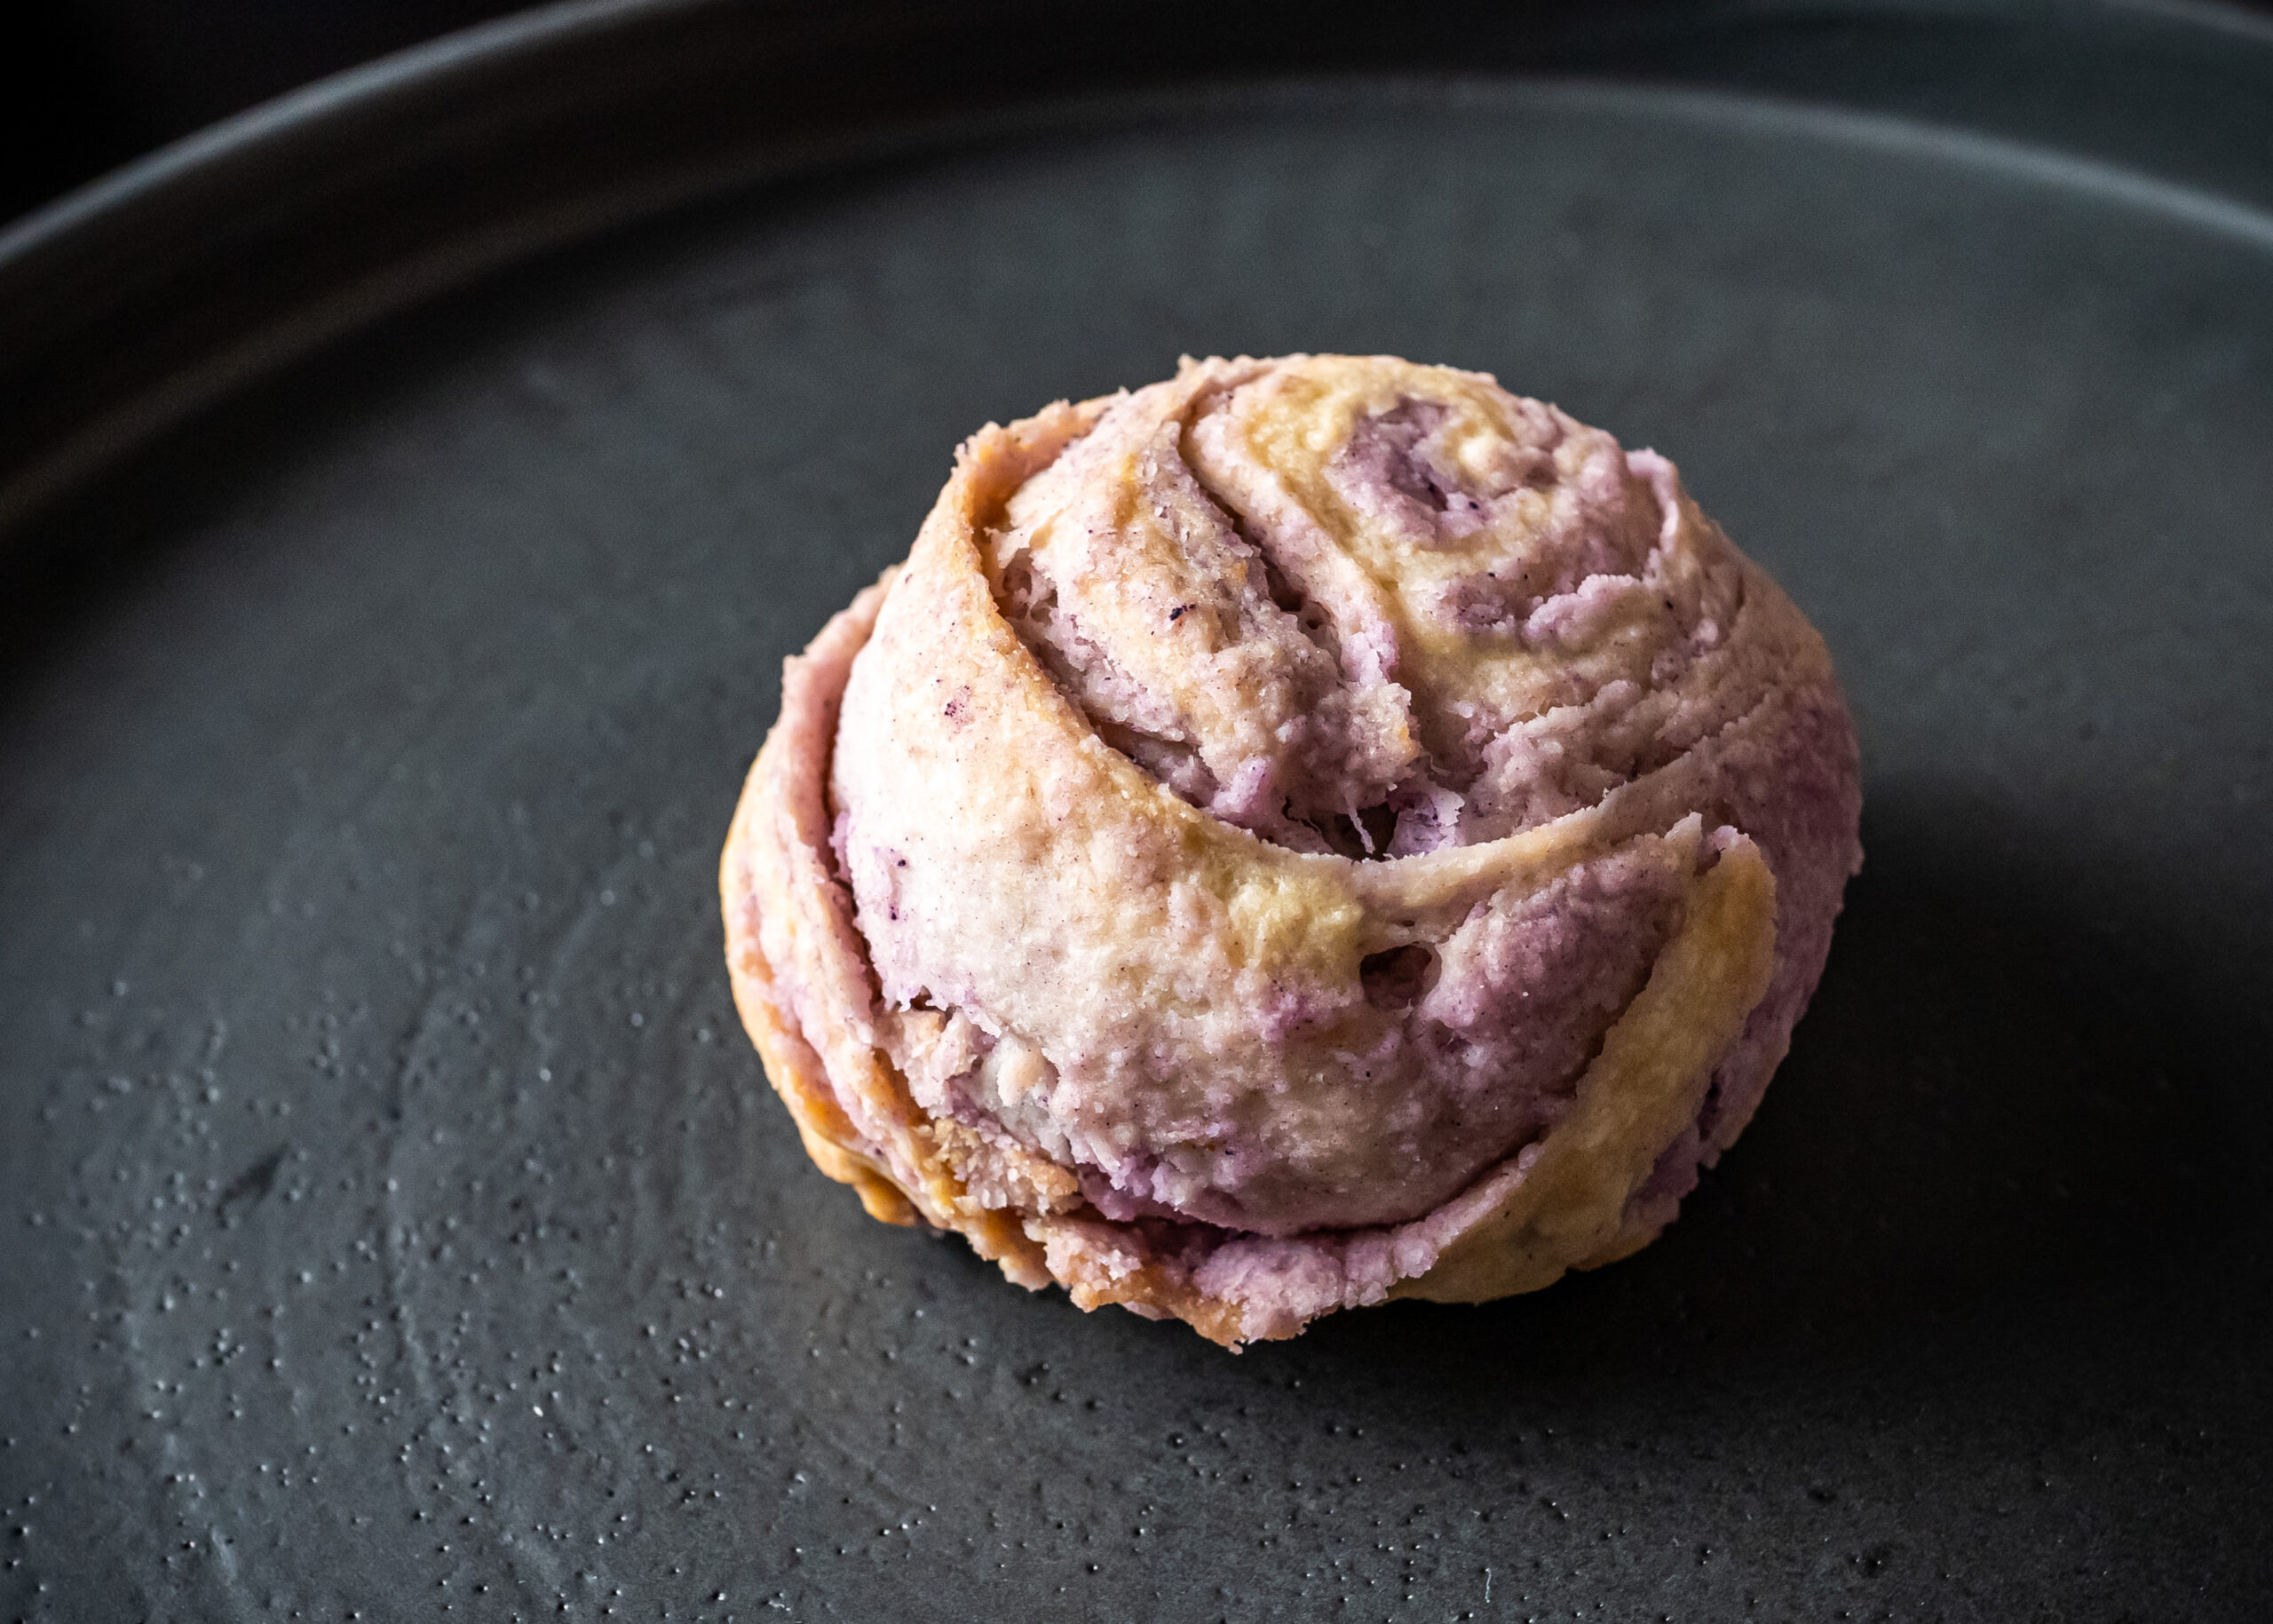
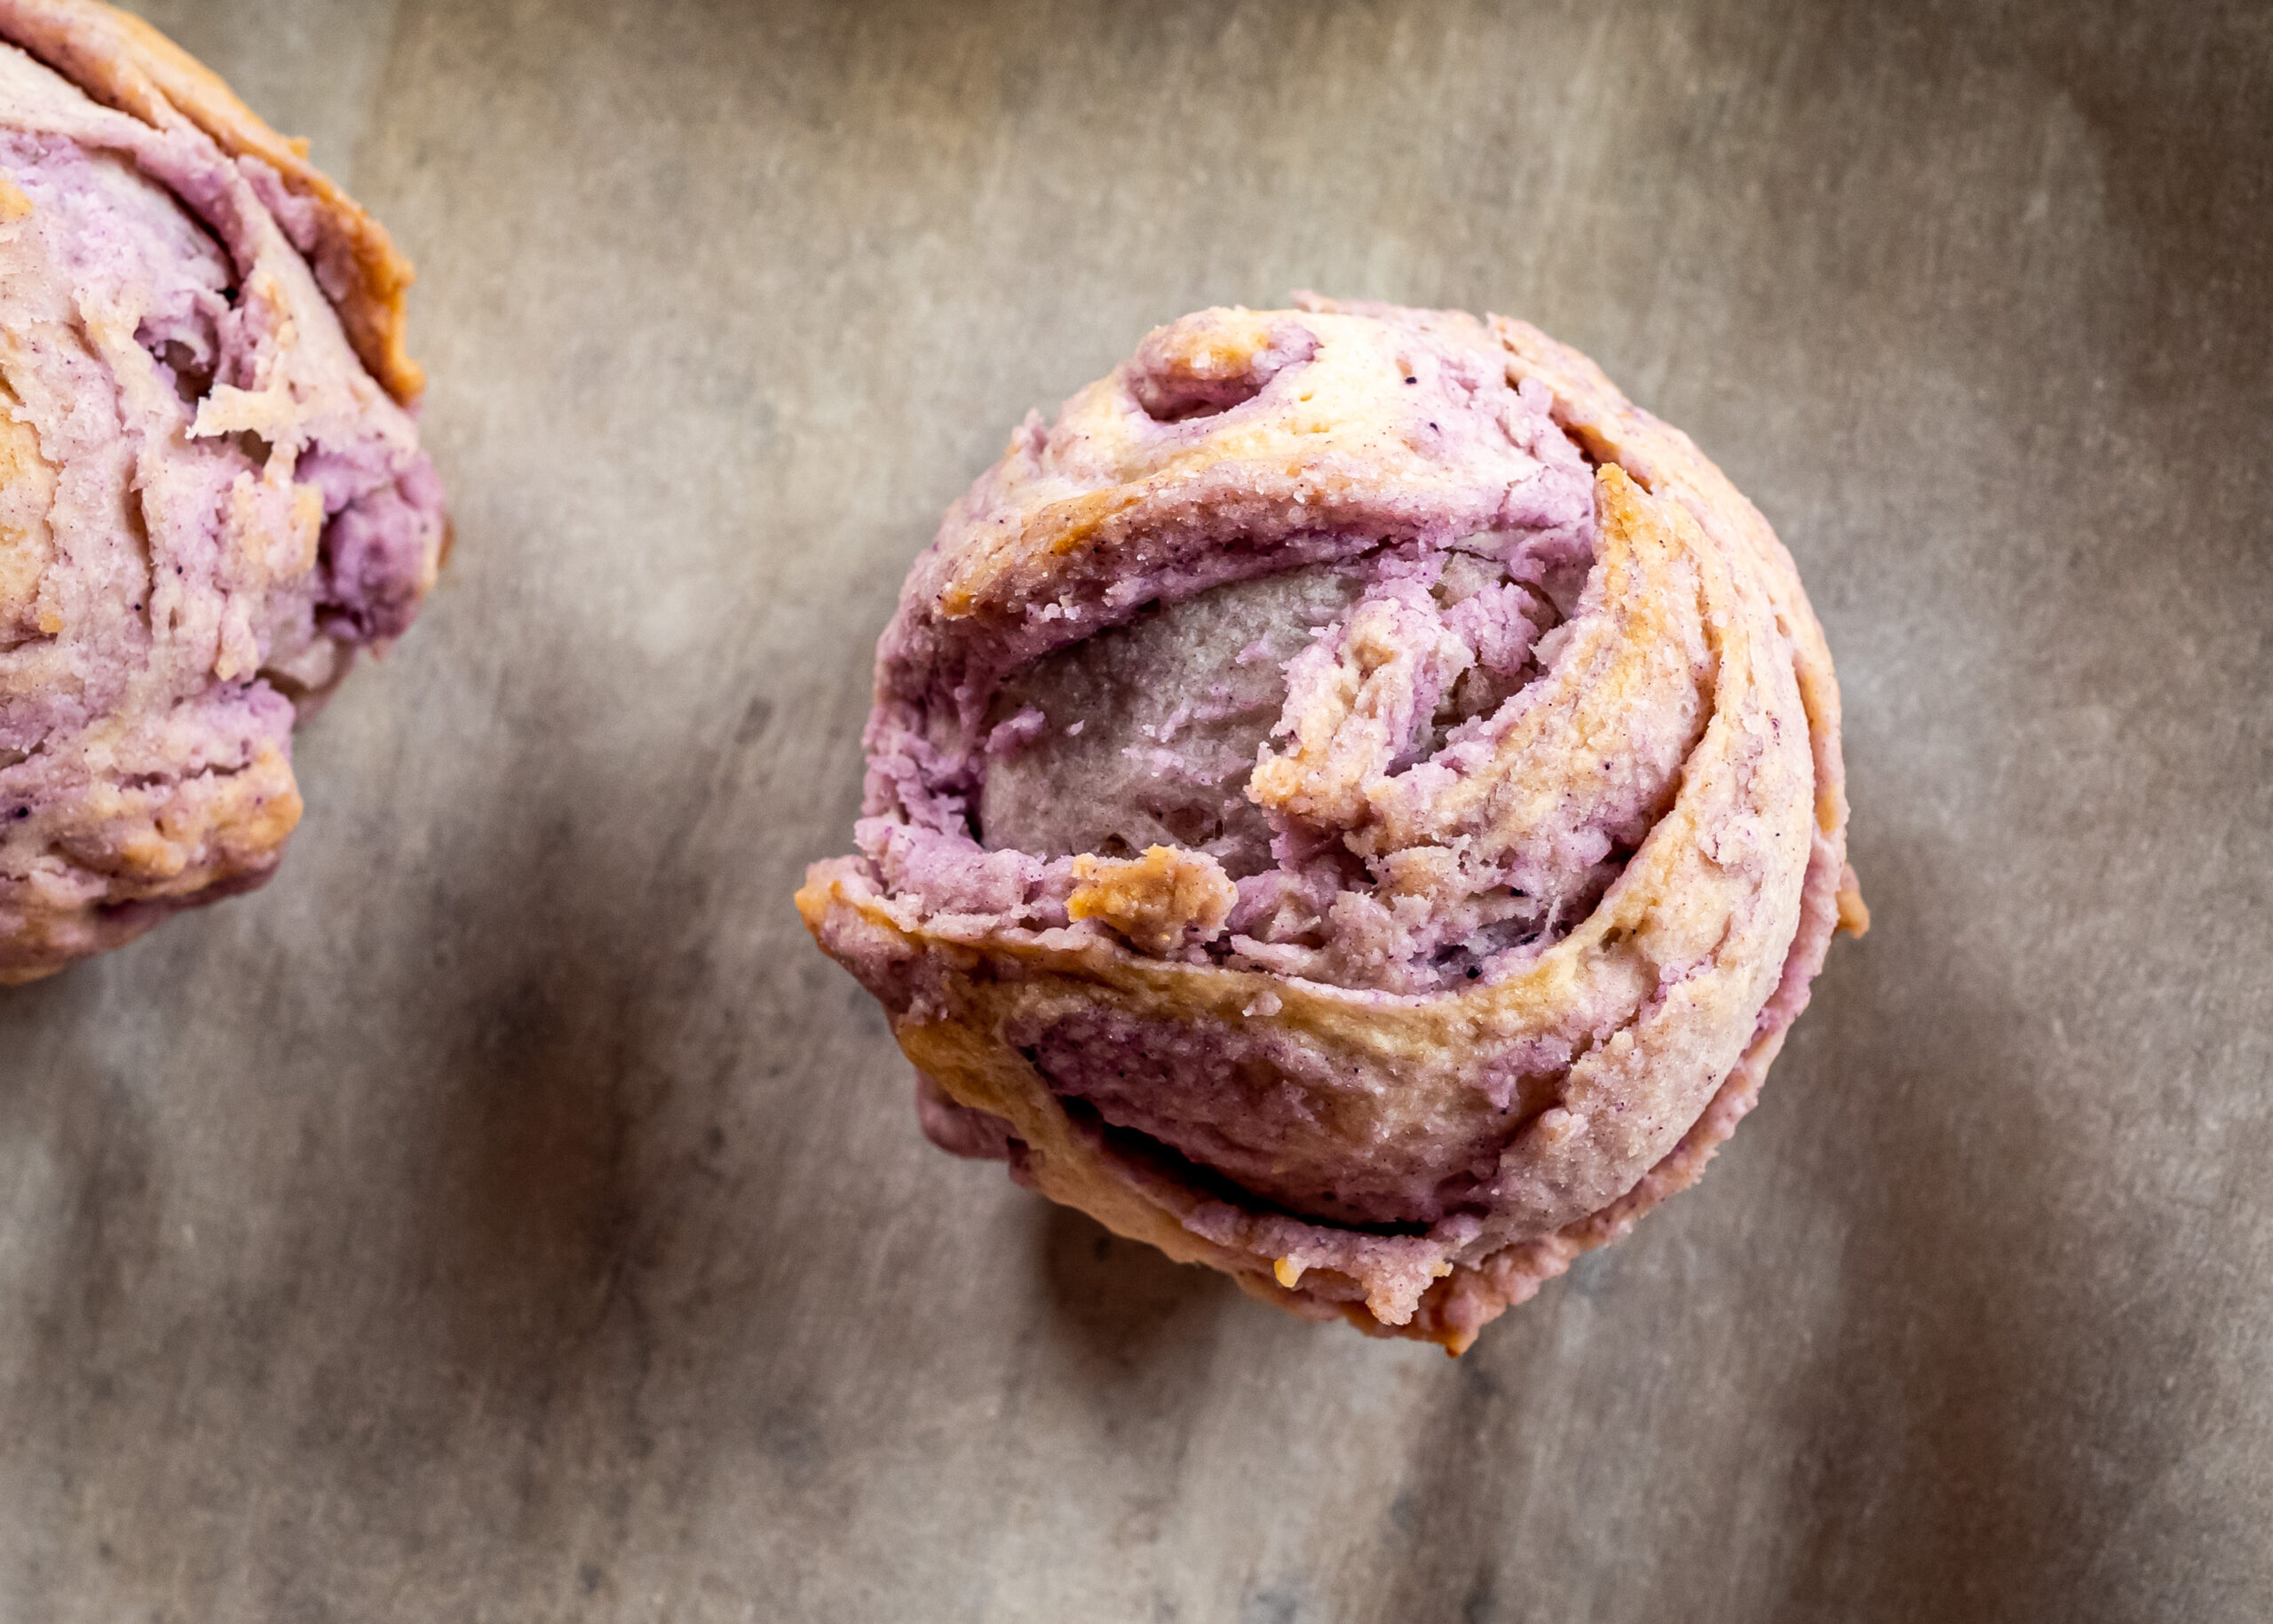
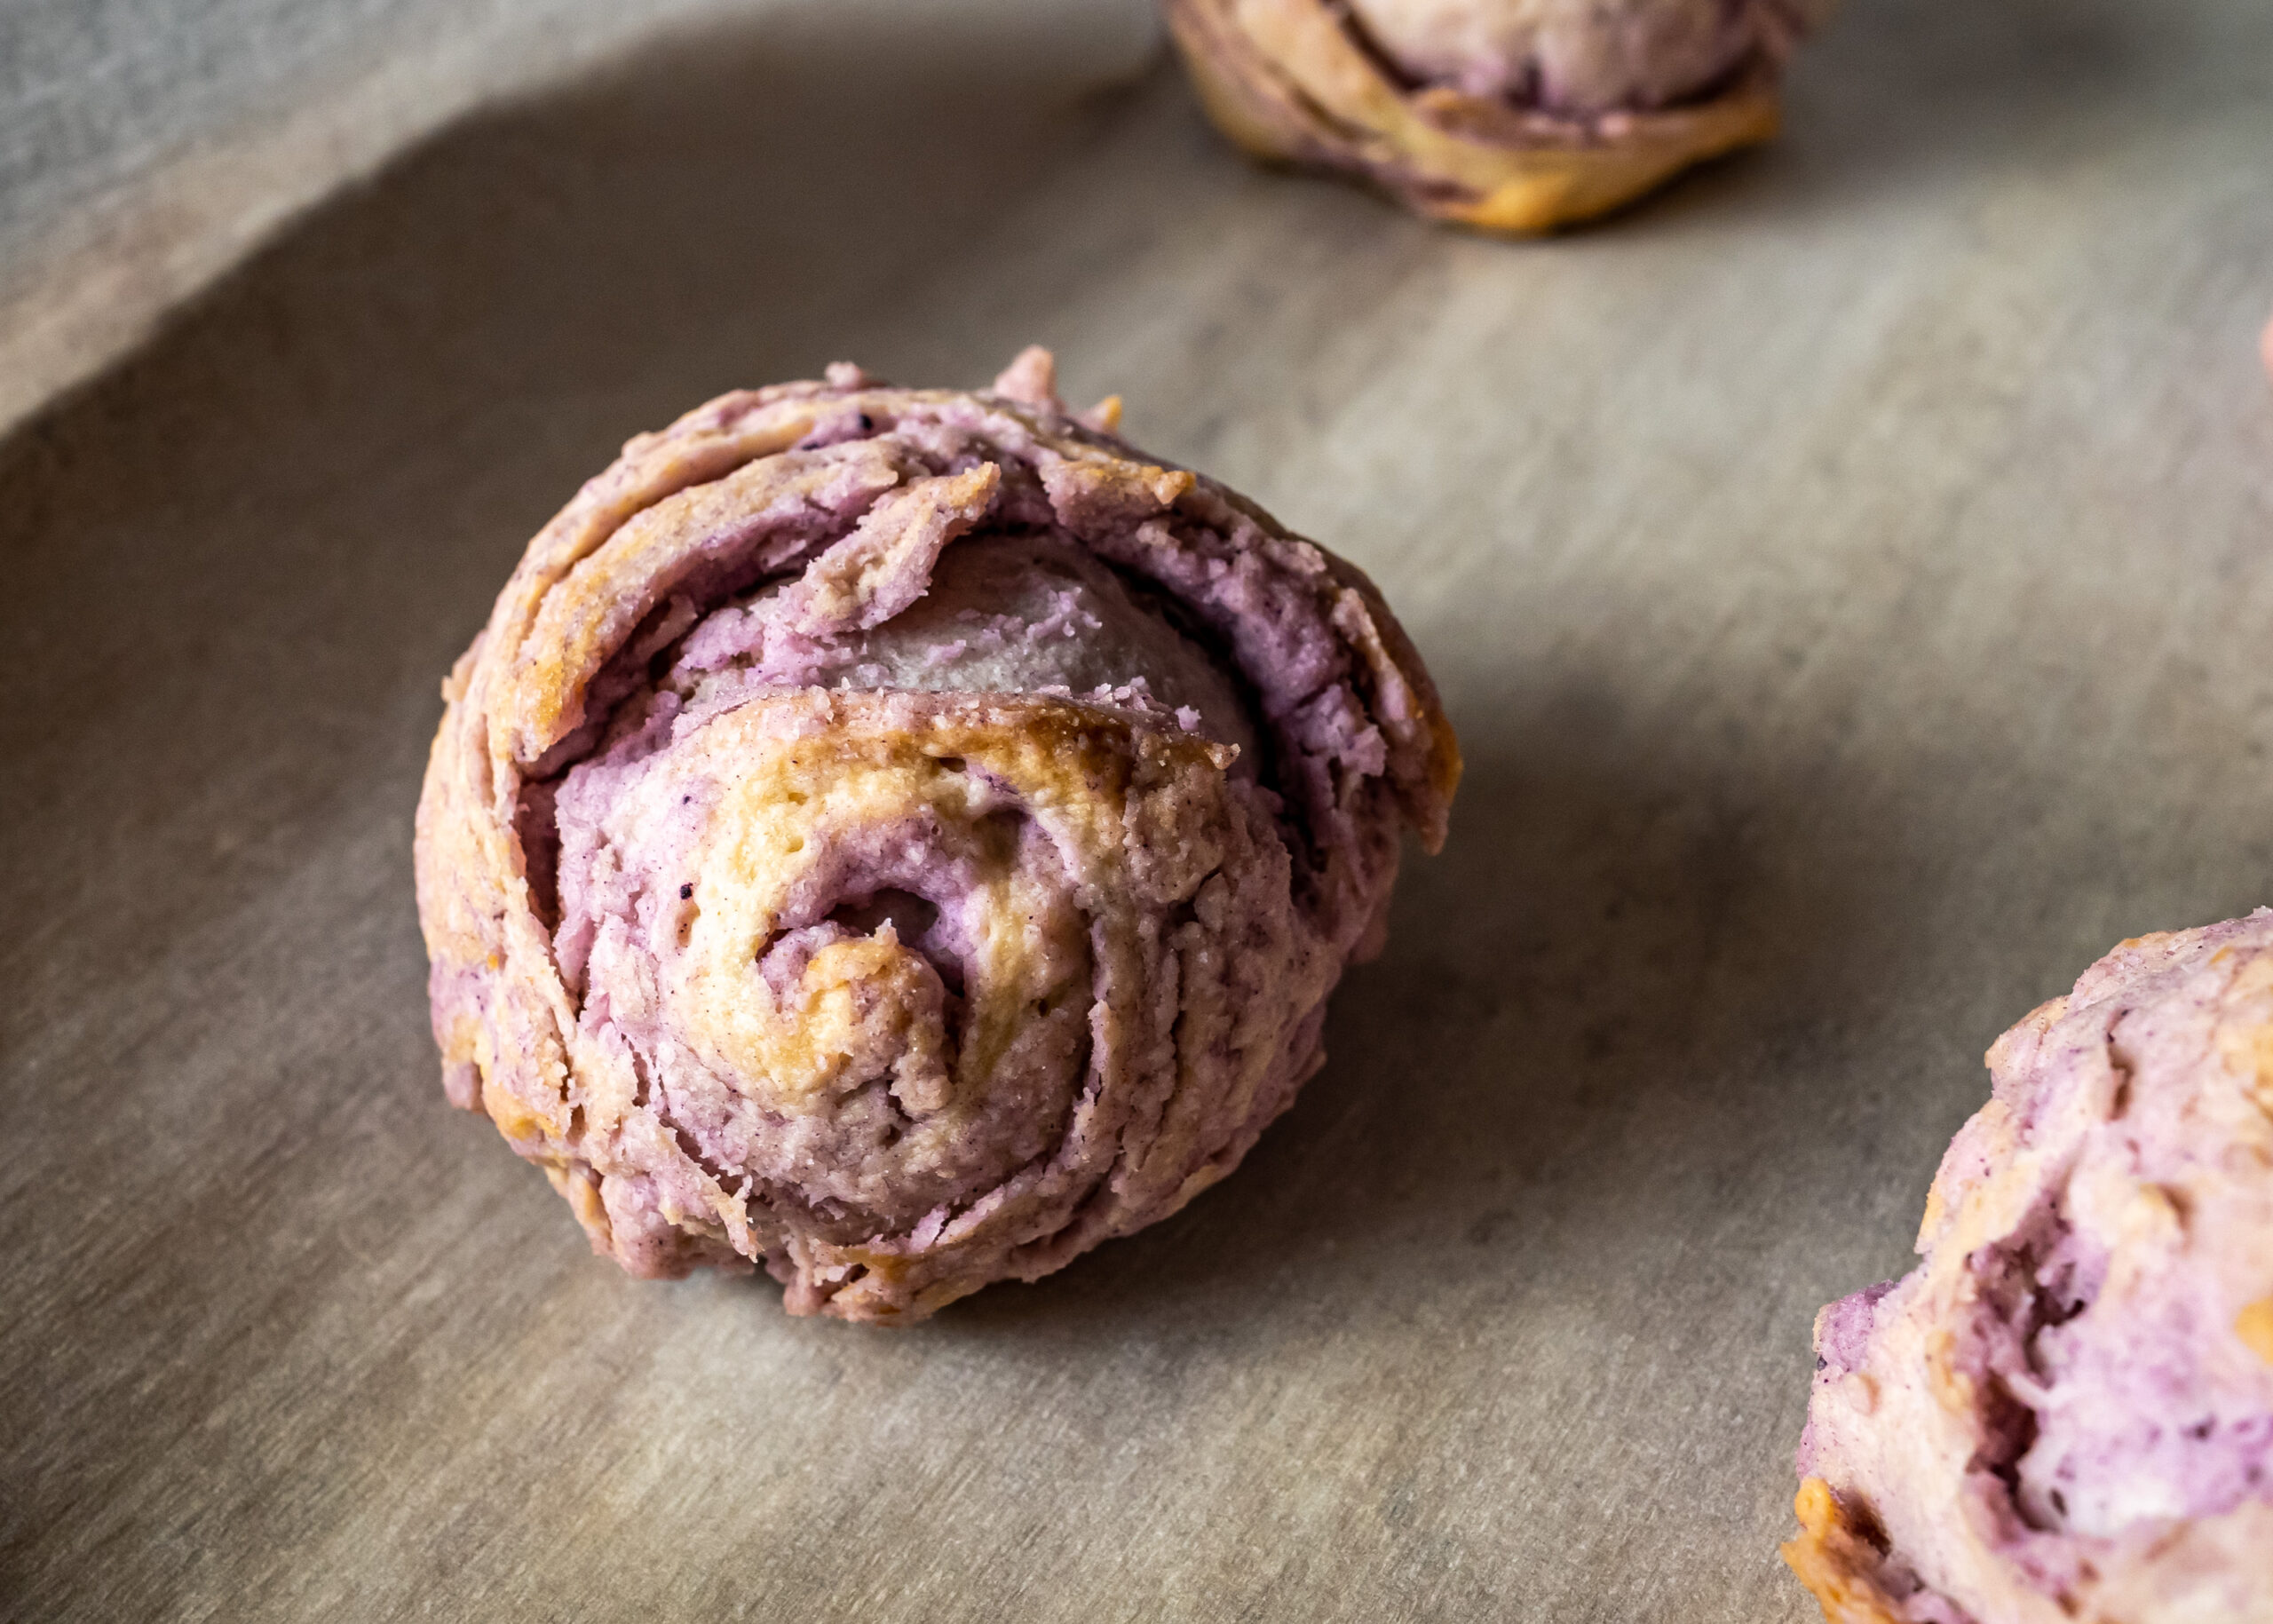
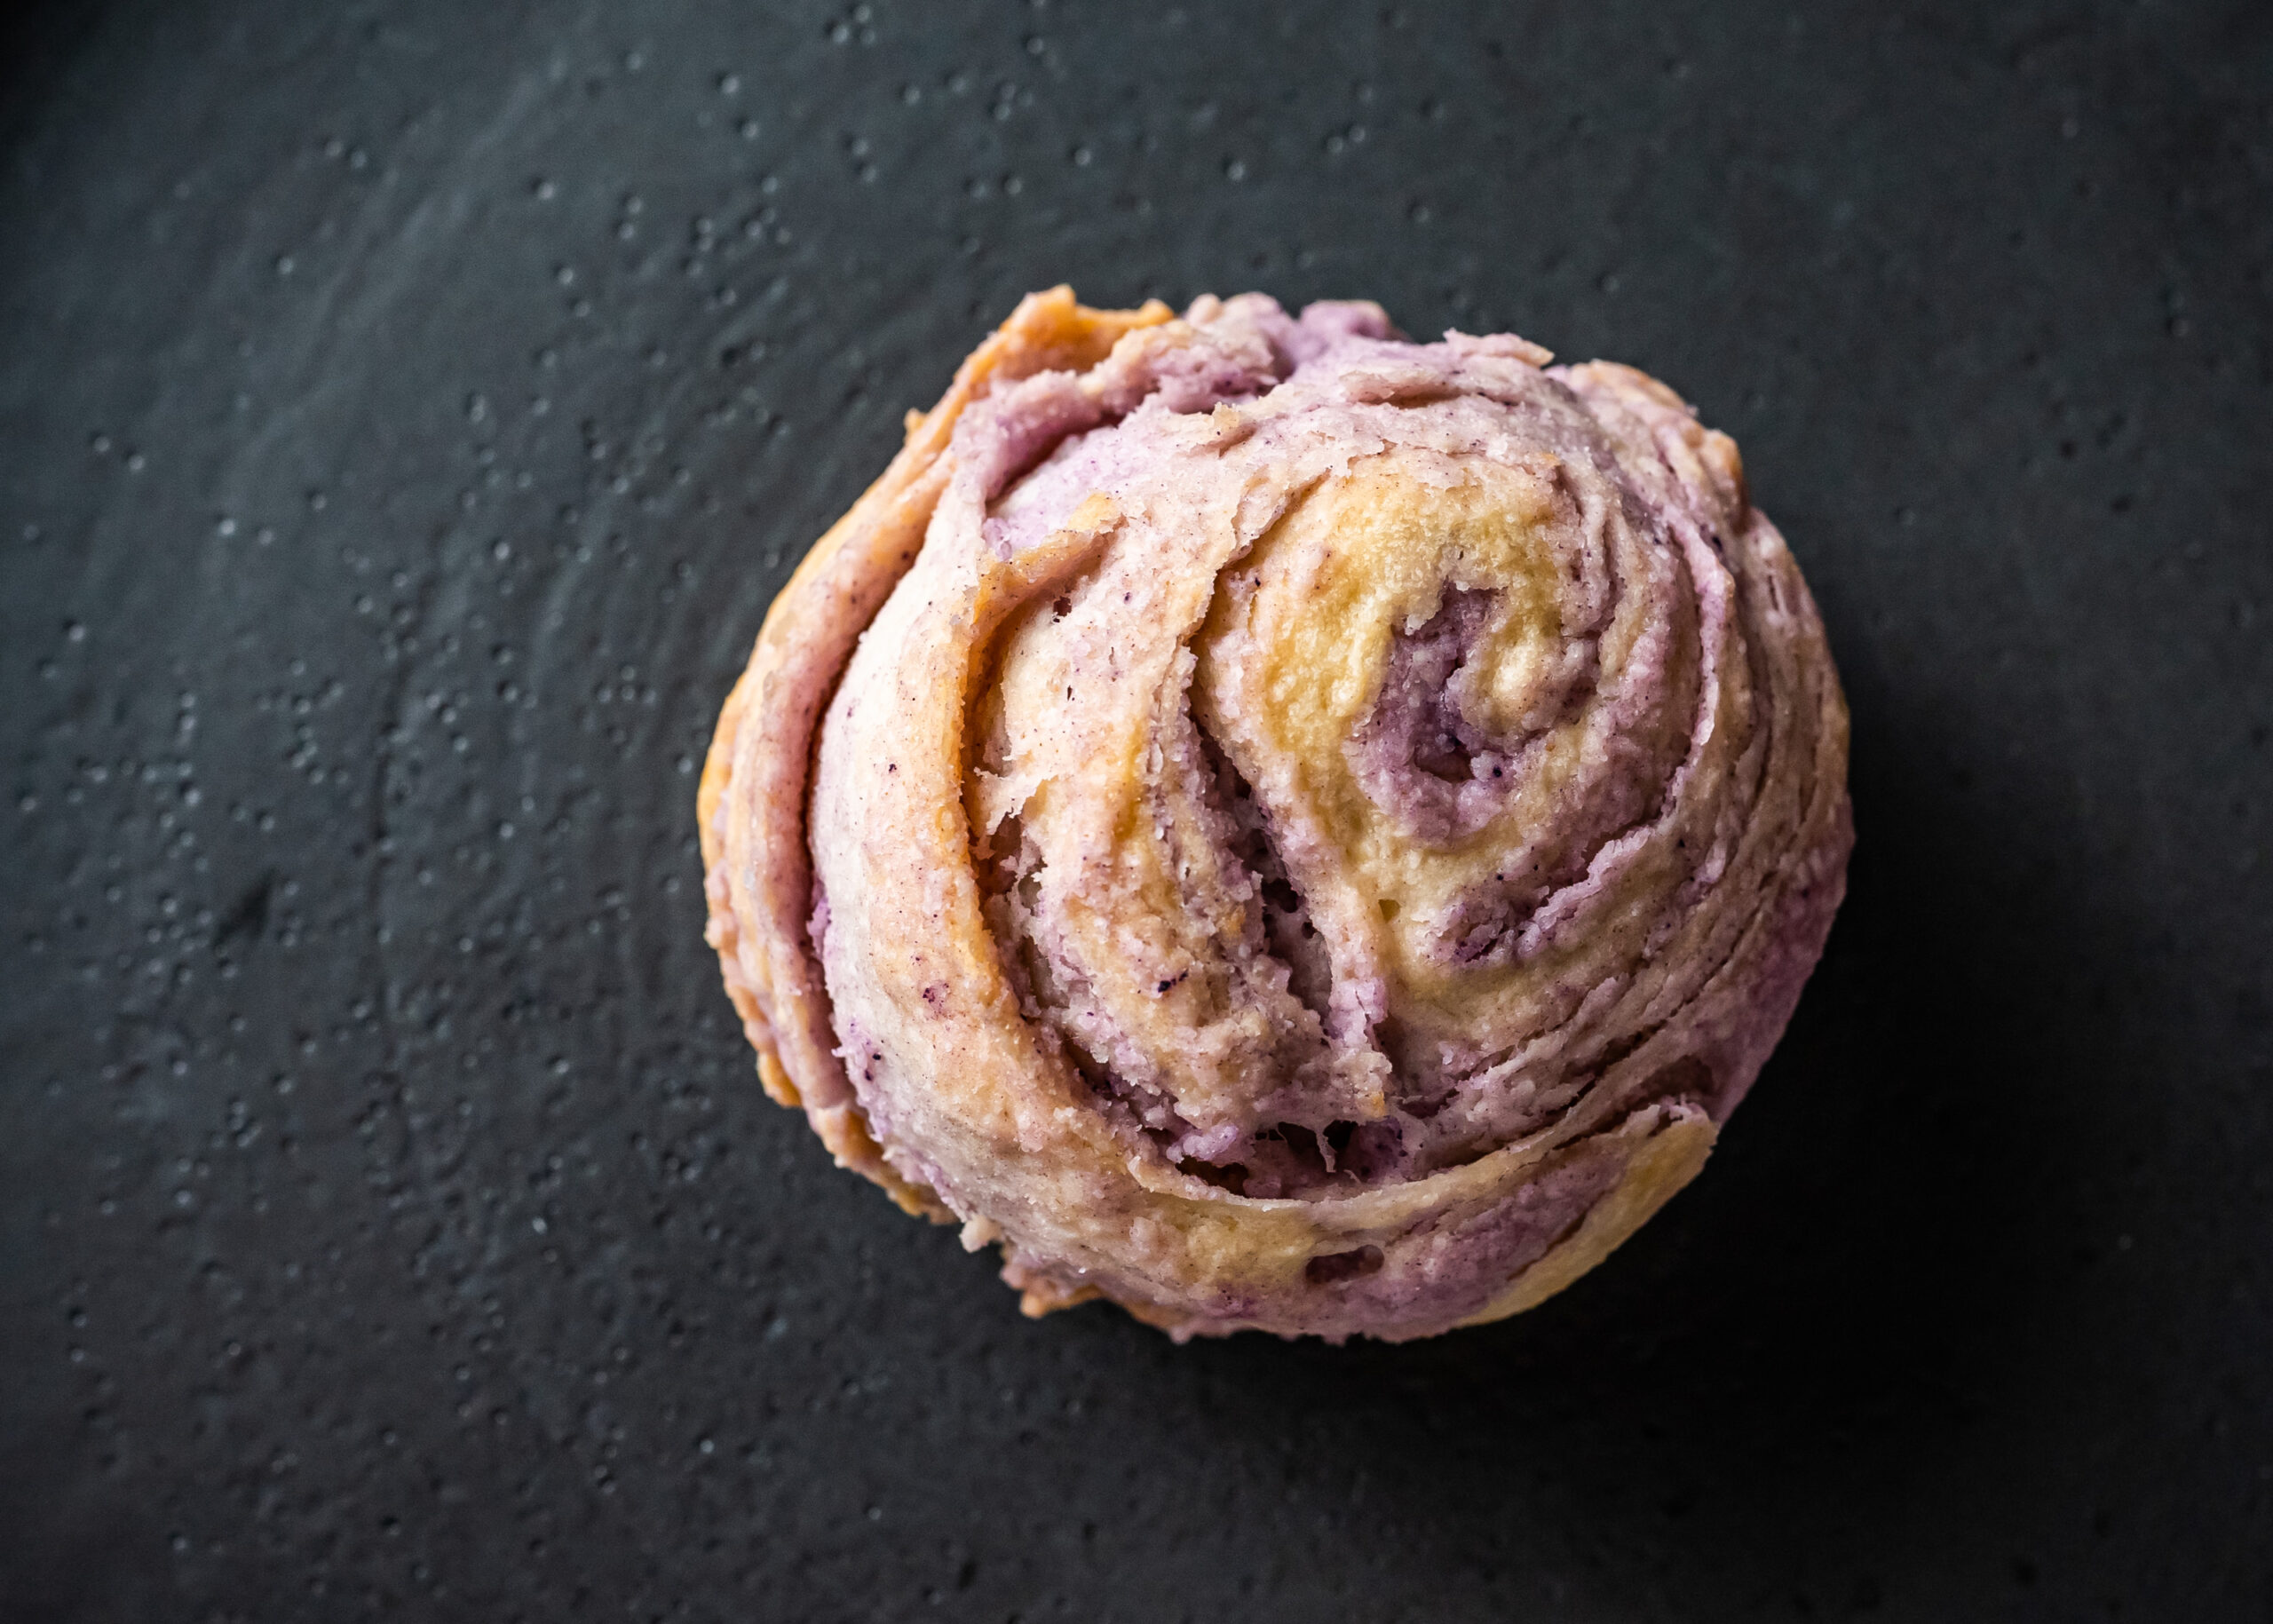
Place that seal-side down on a parchment-lined baking sheet, and look – cool patterns!
Repeat that for as many mooncakes as will fit on your sheet pan, and now it’s time to bake!
30 minutes at 350F is all it takes.
Let them cool a few minutes, and your mooncakes are ready to go.
And now, the best part… it’s time to taste.
If you’ve had mooncakes before, there’s a good chance that the kind you’ve eaten has a very soft crust – the kind with a pattern stamped on top.
In fact, I actually posted a video for those kinds of mooncakes last year on this YouTube channel, for the moon festival.
These are not those kinds of mooncakes.
While the filling is similar – taro paste, bean paste, lotus seed paste all have somewhat similar consistencies – the wrapper is completely different.
This wrapper is almost biscuit-like. It’s a harder wrapper, such as if you were to wrap the filling in a shortbread cookie.
But how does it taste?
Taro is a very light, delicate flavor.
Even though we added ube flavoring to the purple layer for the coloring, you can’t taste it too much – it doesn’t overwhelm the taro.
The traditional mooncakes with the brown, soft, cakey wrappers are a bit sweeter and richer, so it can be a bit more difficult to even eat a full mooncake at once, since they’re pretty heavy.
But these taro swirl mooncakes are just barely sweet, and much lighter, so they’re real easy to eat.
Not only are they easy to eat, but these are INFINITELY easier to make than the stamped cakey mooncakes, and don’t even require any special tools… which means, you’ve got no excuse.
2021’s Moon Festival is September 21st, so you’ve got just under 6 months to find yourself some taro!
Taro Swirl Mooncakes
very slightly adapted from The Cooking of Joy
Ingredients
For the taro paste
- 2 lbs taro root, peeled and cubed
- 1 tsp kosher salt
- 3/4 cup sugar
- 1/4 cup coconut oil
For the white dough
- 1 3/4 cup flour
- 1/4 cup powdered sugar
- 1/2 tsp kosher salt
- 6 tbsp coconut oil, melted
- 1/4 cup water
For the purple dough
- 1 1/2 cup flour
- 1/2 tsp kosher salt
- 7 tbsp vegetable oil
- purple food coloring
Cooking Directions
- Peel and cube the taro. Steam for about 30-40 minutes until the taro is fork tender. Use a ricer or mash the taro into a paste. Mix with the the salt, sugar, and coconut oil. Set aside to cool.
- Sift together the flour, powdered sugar, and salt for the white dough in a medium bowl. Add the coconut oil and water. Stir and add more water if necessary, a tablespoon at a time, until the dough comes together. Knead for a few minutes until smooth.
- In a separate bowl, sift together the flour and salt for the purple dough. Add the oil and a few drops of purple food coloring. Add more food coloring as necessary to get a pale but noticeably purple dough. This dough will look and act more like wet sand than pastry dough.
- Divide both doughs into 10 pieces and refrigerate for about 20 minutes to rest and chill slightly.
- Preheat the oven to 350°F.
- Roll one of the balls of white dough into a rough circle and wrap it around a ball of the purple dough, sealing it completely. Roll the combined dough into a long oval and then roll it up into a spiral. With the seam on the bottom, rotate the dough 90 degrees and roll out again into a long rectangle. Roll the rectangle up into a spiral again and slice in half. You’ll now have two pieces of dough with beautiful spirals showing on the cut sides.
- Place the cut side down and flatten the dough with your hands. Roll out into a rough circle. It’s okay if the layers tear a little through this whole process. Take a spoonful of the taro paste and place it in the center of the dough. Gently pull the dough upward and around the paste to seal it inside. Don’t worry if the edges don’t seal all the way; the dough doesn’t stick to itself very easily. Flip the ball over and gently reshape so that the spiral is centered on top and the bottom is slightly flattened.
- Place on a parchment-lined baking sheet and bake for 30 minutes. Remove from oven and allow to cool before eating.
Sub to my YouTube channel and follow me on TikTok or Instagram to get notified whenever we have new videos!
Links in this post may be affiliate posts. If you buy an item through an affiliate link, I get a small fee, which helps support this blog!
