The Nutcracker ballet will always have a special place in my heart. For me, it’s like the dishes you ate at home as a child – they may not have been your favorite at the time, but once you grow up, you realize they’ve become your comfort food.
And that’s how I feel about the Nutcracker – the same songs, the same costumes, the same choreography year after year after year. But now that it’s been so long since I’ve performed any classical ballet… the Nutcracker’s the one I miss the most.
The adrenaline rush of those first few bars of party scene music.
The magic of the snow scene at the end of the first act… and slipping and sliding on all that fake fog.
Sprinting around backstage between quick costume changes, and hoping nobody accidentally steals my Chinese costume again.
Reminding each other to take off our warmups after that one time my best friend went onstage with a legwarmer on.
Fluffing each others tutus before Waltz of the Flowers, the mess of clothing and makeup and flowers that would take over the dressing rooms, and finally going out to eat with everybody after the final show.
I may have missed out on a lot of teenaged things, but I don’t regret dancing, not a single bit.
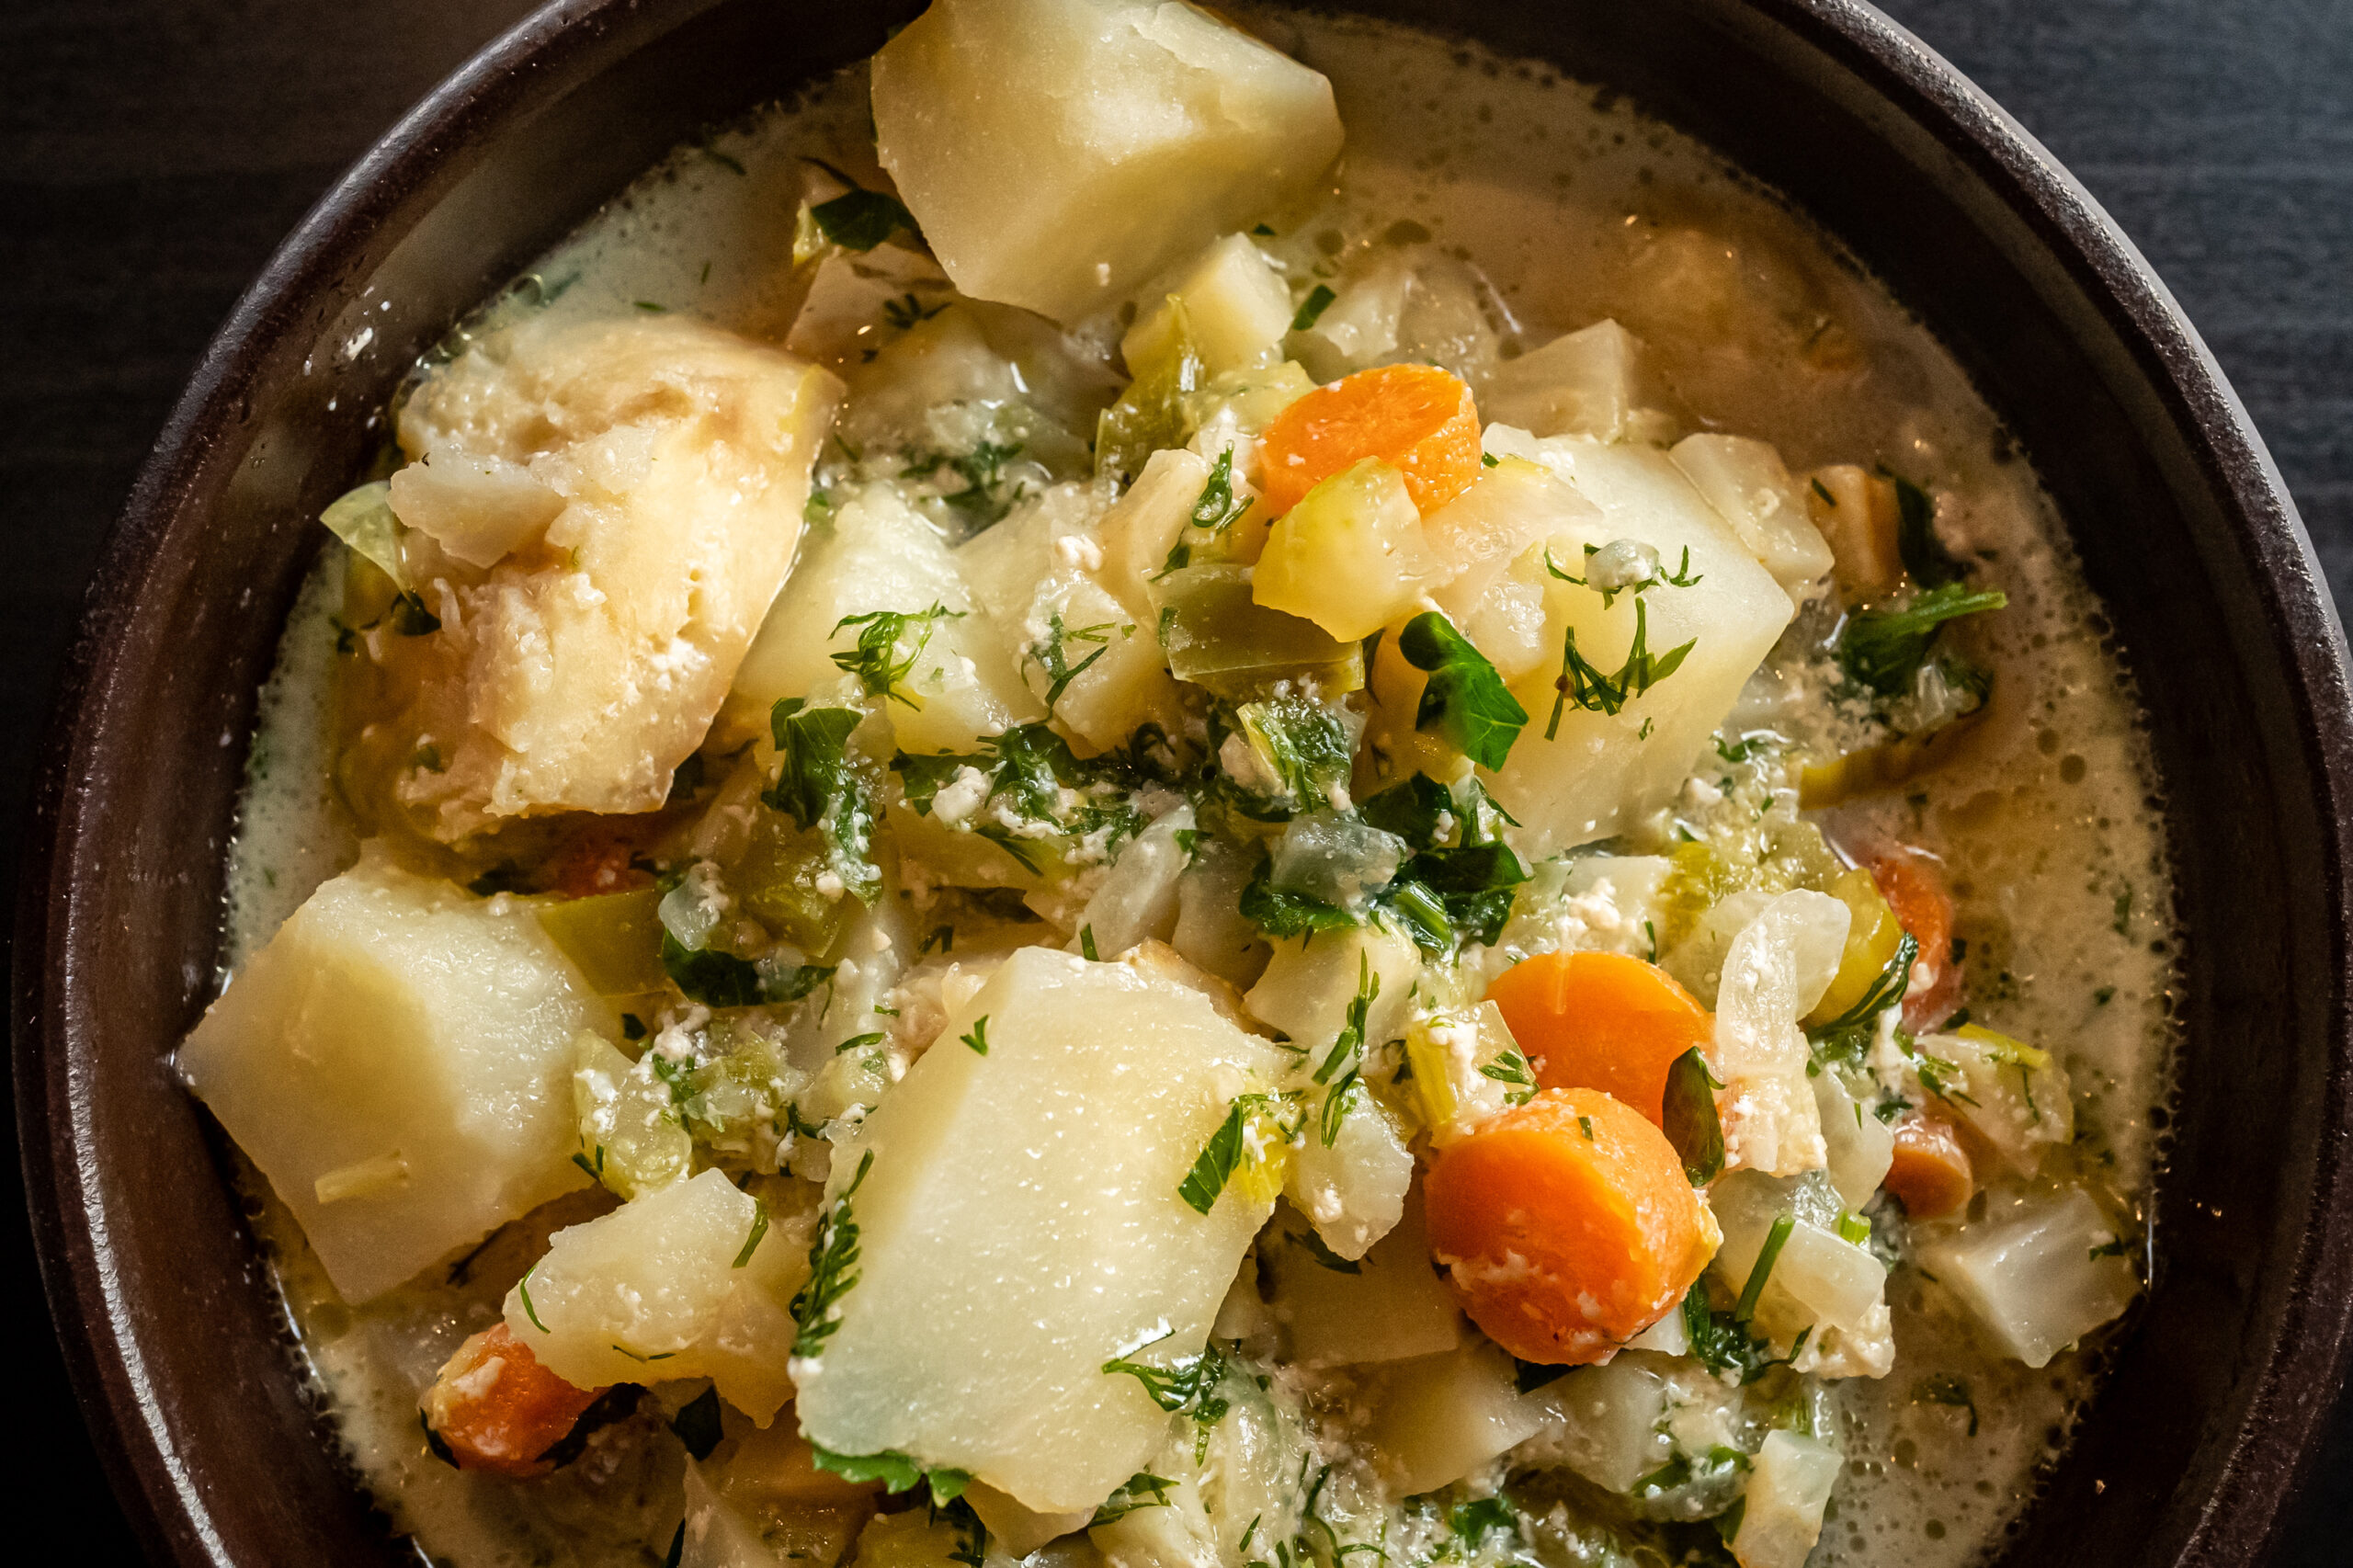
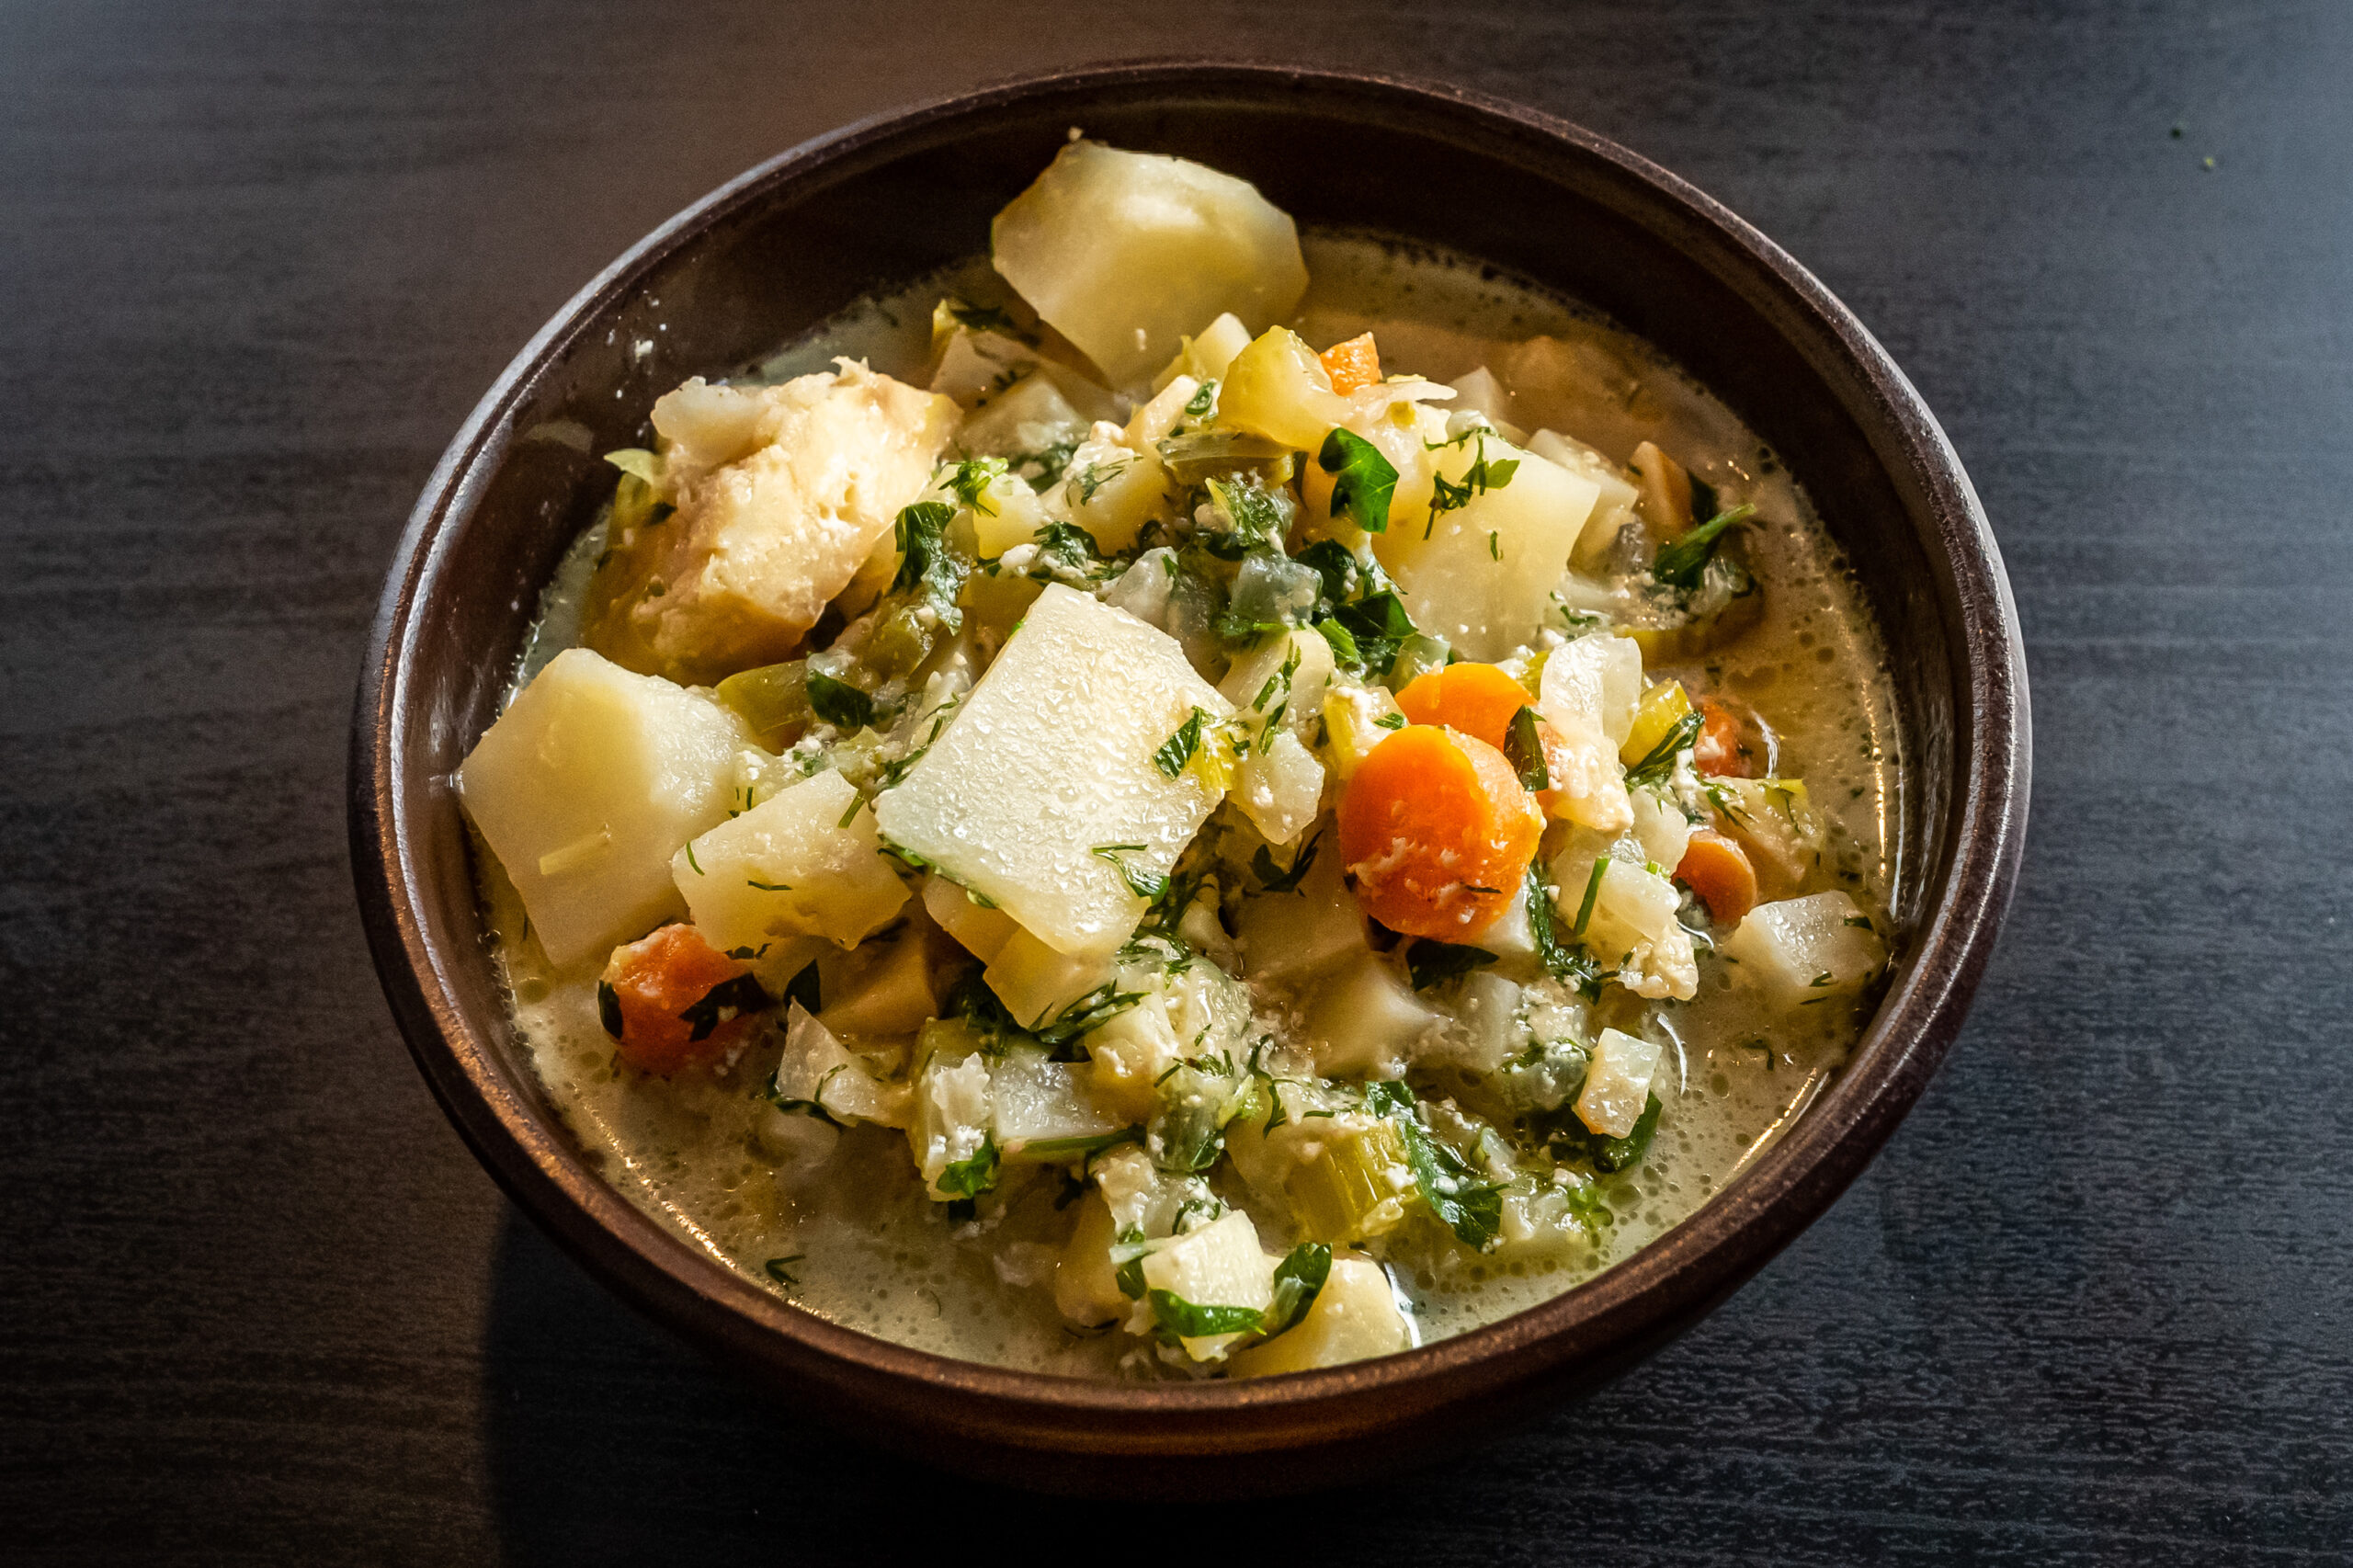
This is one of those dishes that’s super super simple, fairly healthy, but quite tasty and satisfying.
I ended up having to broil the fish for a good bit longer, due to only having a toaster oven to work with, so I imagine this would be even tastier if you had a true broiler to work with. Just make sure to keep an eye on it so you don’t burn anything!
Whisk garlic, lime juice, soy sauce, honey, 1 tbsp oil, and 1/2 tsp sesame seeds in a small bowl. Season salmon fillets with salt and place in a resealable plastic bag; add half of marinade. Seal bag, pressing out air, and let salmon sit 30 minutes. Reserve remaining marinade.
Preheat broiler. Toss scallions with remaining 2 tsp oil on sizzle platter; broil until lightly charred, about 3 minutes. Remove salmon from marinade and set on top of scallions. Spoon some reserved marinade over and broil until salmon is charred around edges, about 6 minutes (watch closely to keep from burning). Spoon more marinade over; top with chile. Broil until salmon is charred and medium-rare at thickest part, about 2 minutes. Sprinkle with more sesame seeds.
On the first day of first grade, I was standing in the playground during recess, next to the turning bar, and another girl walked up to me. “Do you want to be friends?” And just like that, we were friends.
We grew apart over the years, and I have no idea if she still remembers this, but it always stuck with me how simple it was – we declared each other friends, and that was that.
Of course, back then, friendship was as easy as seeing each other at recess everyday – no effort needed to keep in touch, no expectations, no life and work and family responsibilities getting in the way.
And even though I’m always hesitant to call anyone a friend these days – mostly because I know I’m a truly terrible friend and you all honestly deserve better – I miss those days when all you had to do to consider someone a friend was say hi to each other at school everyday.
4 medium new potatoes, peeled and cut into 1″ pieces
3 cups fish stock
2 cups milk
1 cup heavy cream
1 1/2 tbsp Worcestershire sauce
2 lb boneless, skinless cod fillet, cut into 2″ pieces
1/3 cup dill, chopped, plus more for garnish
1/4 cup parsley leaves, chopped
juice of 1 lemon
crusty bread, for serving
Cooking Directions
Heat butter in a 6-qt. saucepan over medium-high heat. Add garlic, celery, onions, peppers, and leeks, and season with salt and pepper. Cook, stirring, until soft, 8-10 minutes. Add carrots, parsnips, celeriac, potatoes, stock, milk, cream, and Worcestershire; bring to a boil. Reduce heat to medium, and cook, stirring occasionally, until vegetables are tender, about 25 minutes. Add cod, and continue to cook, stirring gently, until fish is cooked through, 6-8 minutes. Stir in dill, parsley, lemon juice, and salt and pepper. Serve with bread.
When I was three, as my mom was putting me to bed one night, I asked her – “What did you do when you were my age?”
She told me, dance, and piano, and gymnastics.
So I insisted I wanted to do them too, and my parents signed me up for lessons in all three.
I didn’t mind playing piano, but I hated practicing the boring, easy songs. That didn’t last long.
I liked tumbling, but chickened out pretty fast once we got past things like summersaults. I always wished I stuck with it longer, but y’all, flips are scary.
But dance? I LOVED dancing.
I did it all – tap and jazz, modern and ballroom, even a little hip hop although I’m quite terrible at it.
But my biggest love has always been ballet. Tutus and pointe shoes, classical and contemporary… I loved it all, and wanted nothing more than to be a ballerina when I grew up.
I’ve been in a comfort soup kind of mood, and this absolutely fits the bill.
Hot and creamy and just a little spicy, not to mention filled with hearty sausage and vegetables, this is exactly the kind of thing you want on a chilly winter day.
4 fresh sausage links (such as spicy Italian or garlic), casings removed
2 sweet onions, chopped
4 celery stalks, chopped
5 poblano peppers, stem and seeds removed, chopped
4 garlic cloves, minced
1/3 cup all-purpose flour
4 cups chicken broth, homemade or store-bought
1 cup whole milk
1 tsp ground cumin
1 tsp ground coriander
cayenne pepper, to taste
kosher salt and freshly ground black pepper, to taste
2 large russet potatoes, peeled and diced
3 cups corn kernels, frozen or drained, if canned
1/2 cup heavy cream
1/2 cup chopped fresh chives, plus more for garnish
1/2 cup chopped fresh cilantro, plus more for garnish
Cooking Directions
In a large pot, melt 2 tbsp of the butter over medium heat. Crumble the sausage into the pot. Cook, stirring occasionally and breaking the sausage up into bite-size pieces, until it is fully cooked through, 5 to 6 minutes. Remove the sausage with a slotted spoon and drain on paper towels, leaving the remaining fat in the pot.
Add the onions, celery, peppers and garlic to the pot and cook, stirring occasionally, until the vegetables begin to soften, about 4 minutes. Add the remaining 3 tbsp butter and stir until fully melted.
Sprinkle the flour over the vegetables and immediately stir to combine. Cook, stirring constantly, for about 1 minute, then add the broth and milk. Add the cumin and coriander, and season to taste with cayenne, salt and pepper. Bring the mixture to a simmer.
Stir in the potatoes and simmer until they are tender and the soup has developed good flavor, 15 to 20 minutes. Stir in the reserved sausage, the corn and the cream, and simmer for 10 minutes more. Adjust the seasoning to taste.
Just before serving, stir in the chives and cilantro. Garnish with more chives and cilantro immediately before serving, or refrigerate until ready to serve, for up to 5 days.
I got really into origami in elementary school, after we read Sadako and the Thousand Cranes. For a while I was known for folding paper cranes out of pretty much any paper I could get my hands on. After birthdays, or Christmas, my mom would save all the used wrapping paper – we all learned to be careful when opening gifts so as not to tear it too much – and cut it into squares for me to fold into origami.
In middle school I learned how to fold dollar bills. It became a family tradition that whenever we went out to eat at a sit-down restaurant, my parents would pass me the tip money after I finished my food, and I’d fold it into bowties or something, and leave it on the table for the waitstaff.
In high school I learned how to fold those little stars out of long strips of paper, and I started leaving little stars made out of straw wrappers on the table whenever we go out.
I still do it to this day – but now I have to keep them away from my husband… because Son LOVES to SQUISH them.
These blueberry cheesecake pancakes are SO decadently good.
I stumbled across this recipe a decade ago, and was instantly in love.
We don’t eat fancy pancakes or sweet breakfasts very often, but I’ve made these pancakes on several occasions since then, so you know it’s a good one since it’s on repeat.
The cream cheese adds a tasty tang to the pancakes. Combine that with the tart sweetness of the blueberry sauce, and you’ve got some amazing pancakes.
8 oz cream cheese, cut into 8 pieces and frozen overnight
amaretti cookies and/or graham crackers, crumbled, for topping
Cooking Directions
To make the blueberry syrup: Bring the blueberries, water, and sugar to a boil, reduce the heat and simmer for 5 minutes. Mix the water and cornstarch, mix it into the blueberry sauce and simmer until it thickens, about a minutes. Remove from heat and mix in the lemon juice.
To make the pancakes: Mix the milk, eggs, and butter in a large bowl. Mix in the flour, baking soda, baking powder, salt, and sugar.
Cut the frozen cream cheese into smaller pieces, and mix into the pancake batter.
Heat a pan over medium heat, and melt a touch of butter in it. Pour 1/4 cup of the batter into the pan and cook until bubbles begin to set around the edges and the bottom is golden brown, about 2-3 minutes. Flip the pancake and cook the other side until the bottom is golden brown, about 1-2 minutes. Repeat for the remaining batter.
To serve, divide the pancakes between 4 plates and top with the blueberry syrup and crumbled amaretti cookies.
When I was in third grade, my school spoke with my parents, and made the decision to take me out of class for an hour everyday, to go to speech therapy.
I thought I was perfectly fine and saw absolutely no reason for this injustice, but it seems I had a rather strong lisp.
And at the time, I would have rather kept the lisp, because I HATED getting pulled out of class.
I was lucky – I have no recollection of my classmates making fun of me for either the lisp or having to go to speech therapy, but you know how it is for kids – you don’t want anything that would make you seem different from the other kids.
Since then, I had almost completely forgotten I used to have a lisp… UNTIL NOW.
On my YouTube videos, I’m mostly using a lavalier mic – which doesn’t really pick up my lisp very much. But when I use the really nice mic – which is what I use for the voiceovers on these videos… can you hear it? There’s juuuust the slightest bit of a lisp.
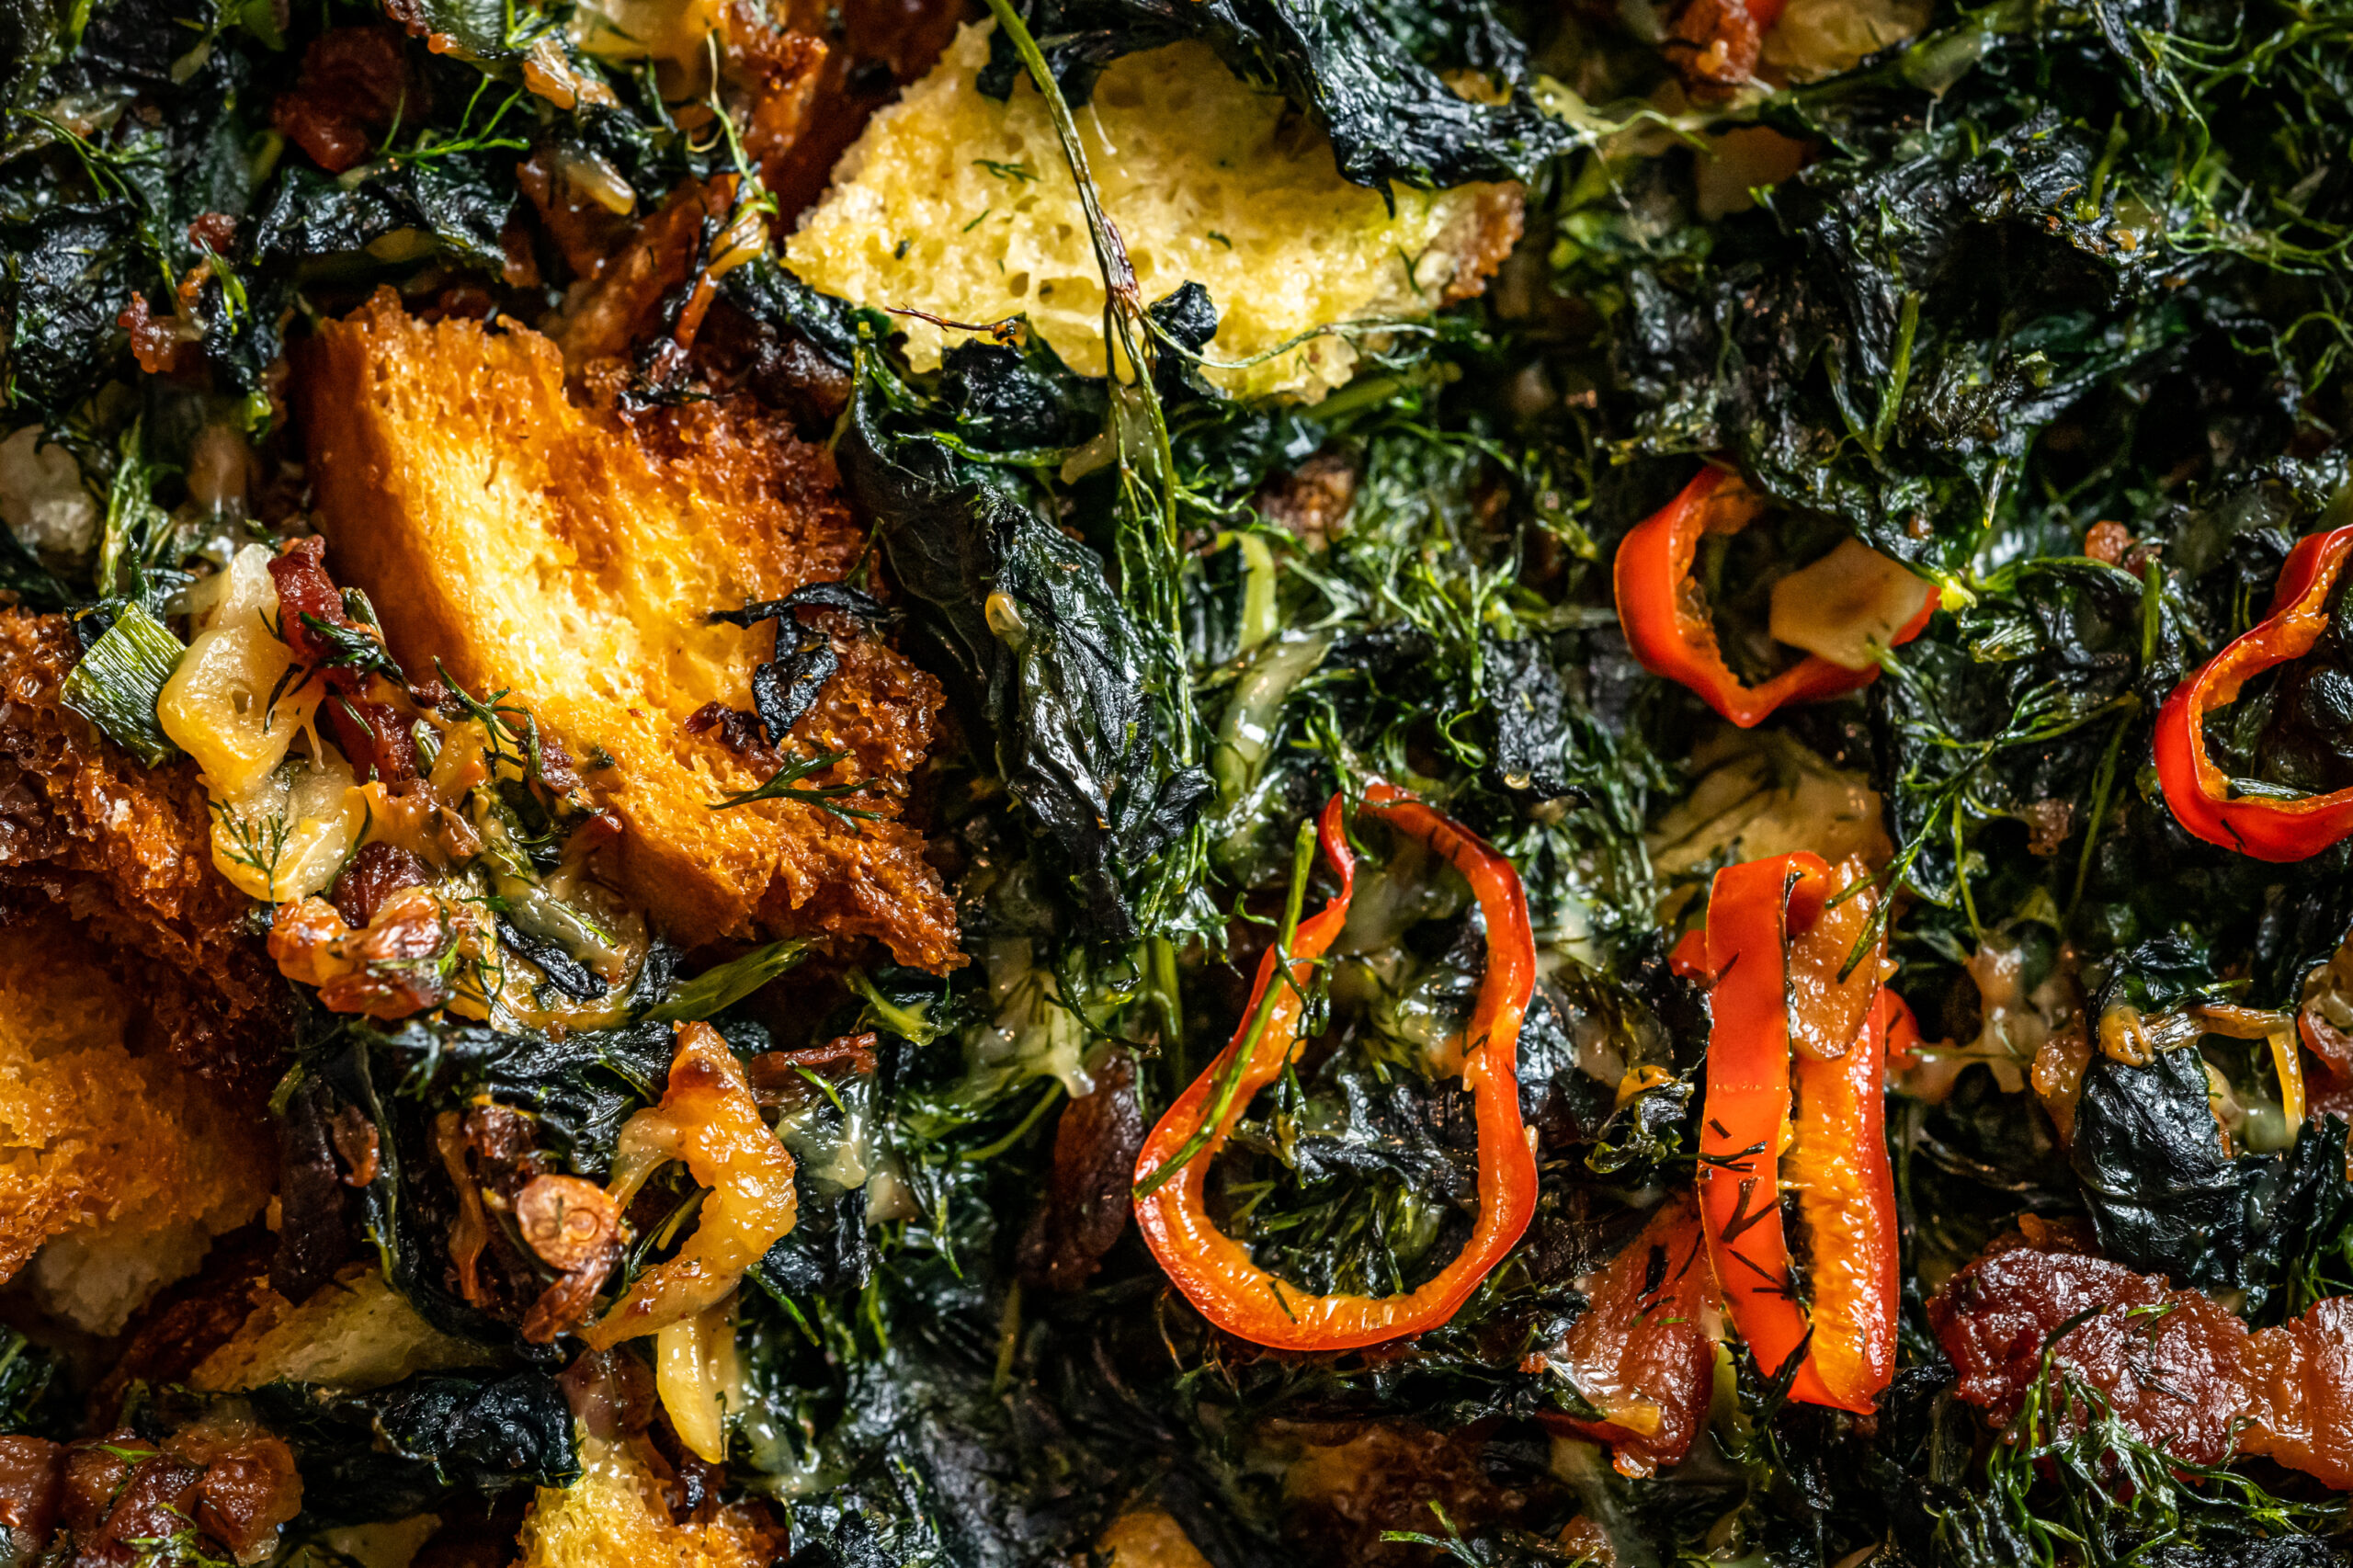
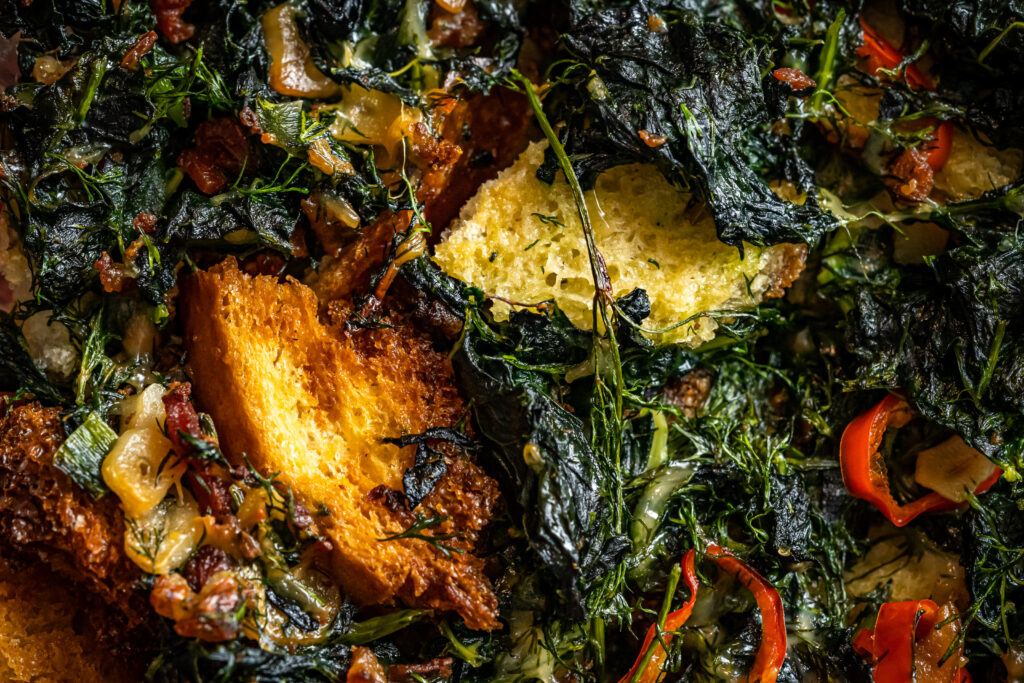
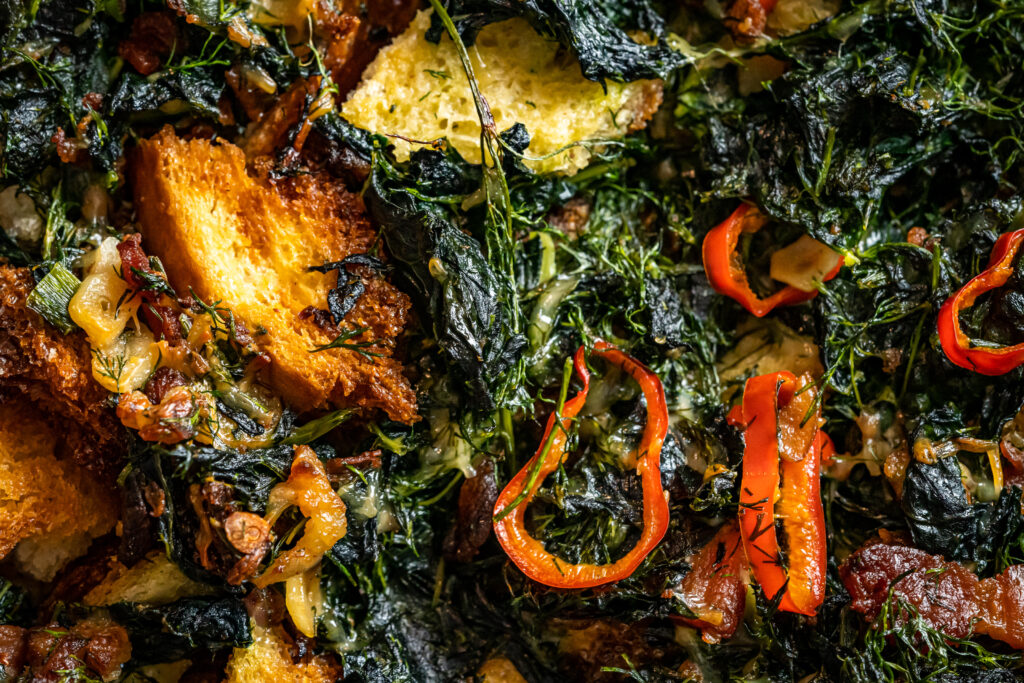
I have made this SO many times – it’s one of those dishes that is super tasty, but also healthy! Look at all those greens!
It does tend to be SUPER rich and fairly heavy, though, so I will often sub out some or all of the heavy cream for milk, and cut down or omit the croutons altogether.
Personally I am not a fan of baked egg dishes, especially when I’m NOT cooking for a crowd, because not only is it practically impossible to keep the yolks runny by the time the whites cook through, but if you’re not eating the entire dish in one sitting (and this is usually about 3 days worth of breakfasts for the two of us) then when you reheat the eggs you just get chalky hard-boiled blah. So I’d far rather do a little extra work and fry up fresh eggs every time we eat it.
2 lb greens (such as baby or mature spinach, kale, Swiss chard, and/or mustard greens)
12 oz thick-cut bacon, cut crosswise into 1 1/2″-thick pieces
12 scallions, thinly sliced
10 garlic cloves, thinly sliced
2 red Fresno chiles or jalapeños, thinly sliced, or 1 tsp crushed red pepper flakes
2 cups heavy cream
1/2 cup coarsely chopped dill
2 oz finely grated Parmesan (about 1/2 cup), plus more for serving
fried eggs, to serve
Cooking Directions
Place a rack in middle of oven; preheat to 400°F. Toss bread and oil in a 13×9″ baking dish; season with salt. Bake until golden brown and crisp, 18–22 minutes. Let cool. Reduce oven temperature to 325°.
Meanwhile, bring a large pot of heavily salted water to a boil. Remove tough ribs and stems from greens; discard. Add leaves to pot by the handful, pushing down with a spoon to submerge before adding more. Cook until all greens are just wilted, 1–2 minutes (it’s okay if the water does not come back to a boil). Drain in a colander, then rinse under cold running water until cool, about 30 seconds. Squeeze out as much water as possible with your hands. Transfer greens to a cutting board and coarsely chop.
Set pot over medium heat and cook bacon, stirring often, until golden brown and crisp, 10–12 minutes. Add scallions, garlic, and chiles and cook, stirring often, until scallions and garlic are softened but not browned, about 3 minutes. Add greens and 1 tsp salt and stir to coat. Remove from heat and mix in cream, dill, and 2 oz Parmesan.
Spoon greens mixture evenly over croutons, allowing some croutons to peek through. Drizzle any sauce left in pot over.
Bake casserole, rotating baking dish halfway through, 25–30 minutes. Let cool 5–10 minutes. Sprinkle with more Parmesan and top with fried eggs to serve.
We watched the man run his endless laps, anxiously waiting for him to leave.
When we were finally alone in the park, Son turned to me – “do I have to get down on my knee?”
I laughed and told him yes, but just as he was about to scoot off the bench-
WAAAAAAAA
One of the massive cruiseships from which plagues of tourists descend upon Venice everyday blasted its horn into the sunset, as a couple of small tugboats pulled it back out to sea.
But he knows me – and that I was never the kind of girl who would want a public proposal.
And besides – what’s a few more minutes after nine years of waiting?
So we sat on the bench, and laughed at how painfully slow the cruise ship was going…
and he got down on one knee as the sun set over the waters surrounding Venice.
Have you ever been disappointed by the pink doughnut?
It’s all razzle dazzle – beautiful colors, but no substance. A promise of excitement, but… the plainest of flavors.
Well… that ends today.
THE PINK DOUGHNUT DESERVES TO BE MORE THAN JUST A PRETTY FACE!
Popularized by The Simpsons, the pink doughnut is a classic. But many renditions of it are just a plain doughnut with a plain, pink-colored glaze.
What can we do to make it more interesting?
Well, first things first, we can take inspiration from a game.
You all know we love doing our little part to boost small indie game studios. And even though we’ve never been sponsored, aside from occasionally getting a free copy of a game, we like to do these because it’s a lot of fun to imagine up what a dish from a game would taste like IRL.
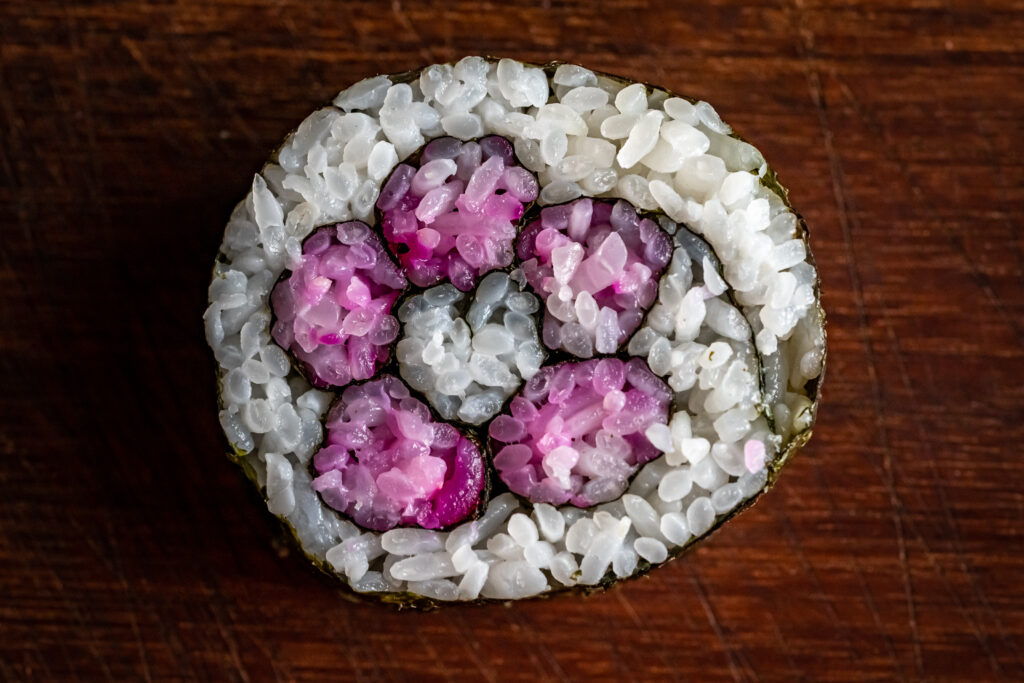
Just last week, Dummy Dojo and Abylight Studios released a free mobile game for iOS called Ninja Chowdown – in which Donatsu, a ninja in training at the Dough-Jo Donuttery, spends his time chasing pink doughnuts and fighting crime.
He’s a ninja – so it’s GOT to be a mochi doughnut.
But what “pink” flavor can we use?
Strawberry and raspberry and even beet… are tasty, but SO overdone.
But… dragonfruit? Sounds like a pretty “ninja” flavor to me.
So our quest for today is:
can we make dragonfruit-flavored mochi doughnuts?
are they better fried? or are they better baked?
and… can we get that vibrant pink color in the frosting?
I really want to use fresh dragonfruit in our doughnuts, since Son’s dad grows them at home, and he’s always sending some home with us, so we have a bunch that have been sitting in the fridge.
But I couldn’t find any recipes that used fruit puree – most of them use flavorings like extracts or cocoa powder.
Since we don’t care about the pon de ring shape, I’m going to try adapting this recipe from Half-Baked Harvest, that’s based on a recipe from Lady and Pups, that just has you roll it out and cut it into the classic doughnut shape.
Aside from the bit of milk used when you microwave the rice flour at the beginning…
I want to try replacing the rest of the liquid with mashed up dragonfruit. I’m not entirely sure if it’s going to work, but if it does, then this means you can probably sub in any sort of fruit puree you want!
Mochiko is the type of rice flour used to make mochi. It’s also known as sweet rice flour, or glutinous rice flour, and gives mochi or other baked goods that classic chewy mochi texture.
Sweet rice flour is not the same as regular rice flour! If it’s not labeled “sweet”, “glutinous”, or “sticky” then it’s likely regular rice flour, and will work more similarly to normal wheat flour in recipes.
When you’re talking about “mochi donuts”, most people immediately think of the “pon de ring” donut that American-turned-Japanese doughnut chain Mister Donut introduced in 2003.
However, while those doughnuts do have the “mochi mochi” texture, they are not actually made with rice flour – they use a mixture that includes tapioca flour for the chewy texture.
The concept of actual mochi doughnuts, on the other hand, originated in Hawaii in the early 90s. These tend to be much denser and chewier – closer to the texture of actual mochi.
Our doughnut dough is looking pretty good so far, so I’d say part 1 of our quest – can we make dragonfruit-flavored mochi doughnuts – is a success!
Now on to part two – to bake, or to fry?
The original recipe that I’m basing these off of is a frying recipe, so we’re going to try that first.
However, there are also a lot of baked mochi doughnut recipes out there, and nobody in this household is going to complain about extra doughnuts, so we’re going both ways, and comparing the two.
Lastly, the frosting part of today’s quest! I decided to use something called pitaya powder, aka dragonfruit powder, that you can buy online – both for the flamboyantly pink color, and for some extra dragonfruit flavor.
I know it looks overly dramatic, but this is actually fairly true to color – the dragonfruit we’re using are all white inside, but there are also dragonfruit that are even more vibrantly pink on the inside than they are outside – so this is perfect.
And now, it is finally time to answer our questions:
Does the dragonfruit flavor come through?
Do we prefer baked or fried?
Do we think this deserves the moniker of Dough-Jo Donuts?
So the thing about dragonfruit is that it’s a very subtle flavor. But a lot of the flavor is in the seeds. So even though they add black speckles that weren’t in the original design, we decided to keep the seeds in to add to the flavor.
I do think that the flavor does come through. It’s not a strong flavor, but it is there. And if you’re familiar with fresh dragonfruit at all, you’ll definitely recognize it.
As for baked vs. fried… this was a bit of a surprise.
Due to some poor scheduling on my part, we didn’t end up having baked and fried doughnuts at the same time – I actually made our fried doughnuts a month ago.
BUT the reason we decided to try baking our doughnuts is because we weren’t 100% happy with how the fried ones turned out.
The fried doughnuts are amazing straight out of the fryer – crunchy and chewy and oh so wonderfully good.
But the thing with doughnuts is that you need to let them cool before you glaze them, or all that gorgeous glaze will slide right off.
And once they cooled, the fried doughnuts lost their crunch and are just plain soggy.
The baked doughnuts, on the other hand, are almost hard right out of the oven – kind of like how some breads have that thick, hard crust.
But heat them in the microwave for 20 seconds or so (you’ll want to do this for both types, as they’re not the best at room temp) and you’ll get perfectly chewy, not at all soggy doughnuts.
I’m very surprised to say that I actually liked the baked version better… and, while we have yet to hear what everyone behind Ninja Chowdown thinks… I think I can confidently say that these 100% deserve the name of Dough-Jo Doughnuts.
Hold on… I’ve just been informed that Son is demanding this become an all mochido all the time channel? … and he wants us to open our own Dough-Jo Donnuttery. Er… Dummy Dojo? How do you feel about franchising opportunities…
1/2 cup mashed dragonfruit (about 1 medium dragonfruit – use extra milk if you don’t have enough)
1 egg
1/4 cup granulated sugar
3 tsp baking powder
3 tbsp unsalted butter, melted and cooled
1 tsp vanilla
Glaze
1 cup powdered sugar, packed
3 tbsp unsalted butter, melted
1 tsp pitaya powder
3 tbsp mashed dragonfruit (if you had any leftover) or warm water
Cooking Directions
In a microwave safe bowl, whisk together 1/4 cup mochiko and the milk. Microwave on high for 30 seconds, stir and then cook another 20-30 seconds longer or until the dough is cooked through, looks opaque and is bouncy, but not so cooked that it is dry. The mixture should still be moist. Set aside to cool slightly.
In the bowl of a stand mixer with the dough hook attached, add the remaining 1 3/4 cups mochiko, dragonfruit, egg, granulated sugar, baking powder, melted butter, and vanilla. Add the cooled, cooked sweet rice mixture.
Knead the dough on low speed until the dough comes together. Increase the speed to medium and knead until the mixture is completely smooth and mixed, about 3-5 minutes. The dough will be sticky.
Line a baking sheet with parchment paper.
Sprinkle a clean surface with mochiko and scrape the dough out onto the floured surface. Sprinkle the dough with enough mochiko to prevent it from sticking. Roll the dough out until it’s 1/2 inch thick. Cut out as many doughnuts as you can, using a 3 inch biscuit cutter. Use a 1 inch biscuit cutter for the doughnut holes. Place the doughnuts on the prepared baking sheet as you work. Gather any scraps of dough back into a ball and roll the dough out. Cut as many doughnuts as you can and repeat the process, you should get around 10 doughnuts + holes.
TO FRY: In a heavy bottomed pot, heat 3-4 inches of oil to 330F. DO NOT let the oil go over 350F or the doughnut will burn before the insides are fully cooked. Fry the doughnuts in batches for 2-3 minutes per side. Drain onto a paper towel lined baking trays. Repeat until all the doughnuts have been fried. Allow to cool slightly before glazing.
TO BAKE: Bake the doughnuts on the parchment-lined baking sheet at 325F for 20 min.
Let doughnuts cool completely before glazing.
GLAZE: In a bowl, whisk together the powdered sugar, melted butter, pitaya powder, and 1 tbsp dragonfruit. If the glaze isn’t thin enough, add more dragonfruit or water, 1 tablespoon at a time, until the glaze has reached your desired consistency (I usually end up using 2-3 tbsp). Dunk each doughnut in the glaze and allow any excess to drip off. Place the doughnut on a cooling rack and repeat with the remaining doughnuts.
If needed, once the glaze has dried, dip again for a more vibrant color!
Whenever my grandparents visited, we would all go to Coco’s. No matter the time of day, I would order pancakes – the kind that they plate to look like Mickey Mouse – with bacon, hash browns, and scrambled eggs.
I’ve always really loved breakfast foods.
On these outings, we always joked that my dad was a human garbage disposal. Half the time he wouldn’t order anything for himself – or something small – because he knew that with three young kids all ordering their own kid’s meal, there were going to be a LOT of leftovers.
I don’t recall ever actually bringing home leftovers from restaurants until we were much older, because my dad was always there to eat up anything we didn’t want or couldn’t finish.
And that was the case at home, too. Drop something on the floor? That’s okay, it’s “fresh-ground meat!” Burn something? Yum, extra flavor!
My dad loved food – and I miss getting to feed him.
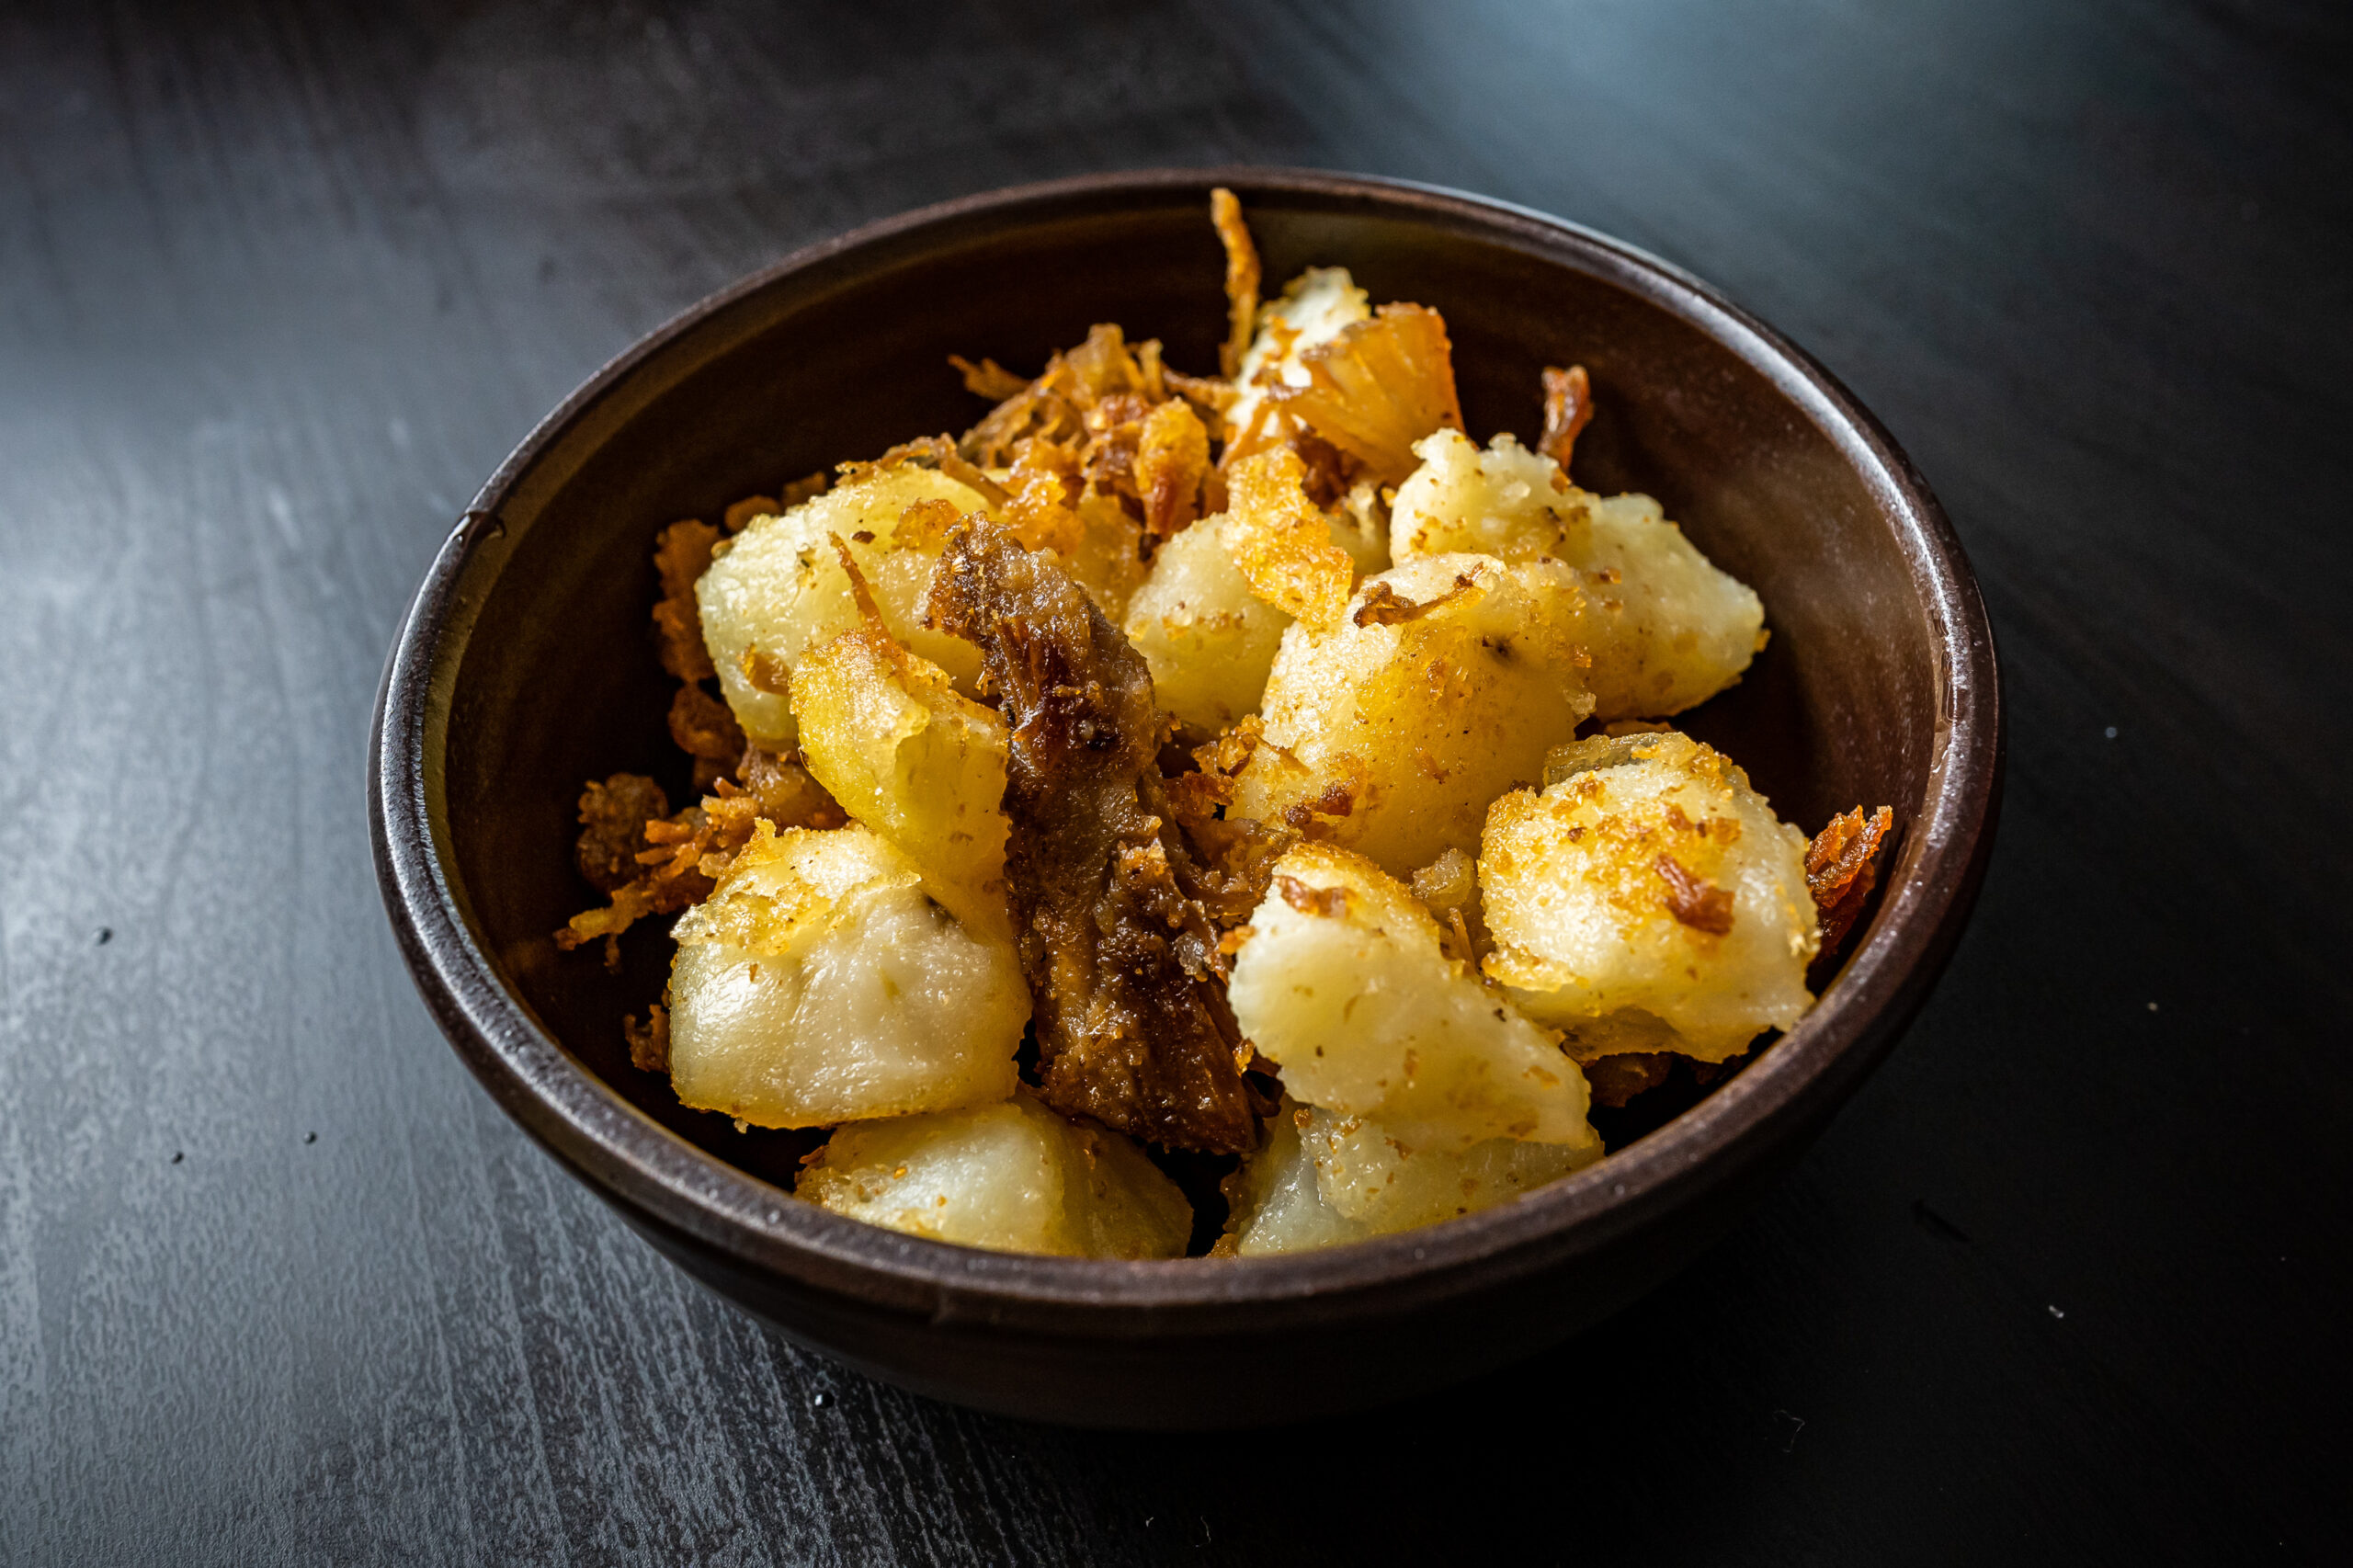
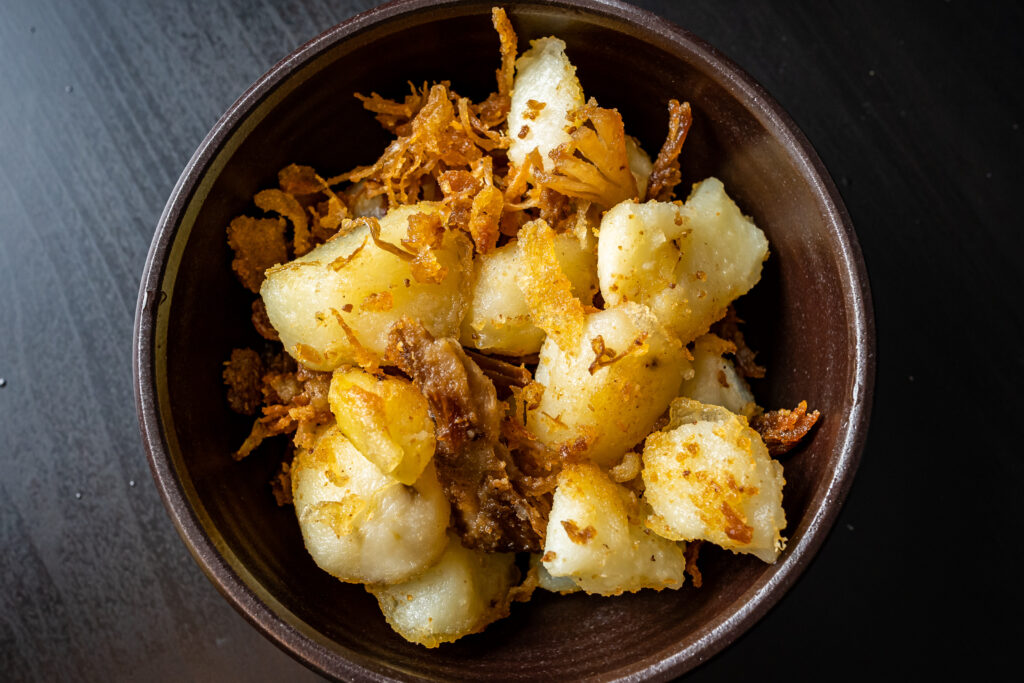
I’ve made this home fries recipe a number of times, and it never fails to be excellent.
It’s fairly straightforward to make, doesn’t take too long, and the potatoes get suuuuper crispy!
I happened to have some leftover roast pork butt from the roast pork butt sandwich recipe I posted recently, so I tossed that in to crisp up with the potatoes, and HOLY COW was that an excellent addition.
I have a feeling just about any sort of leftover meat would go great in this – bacon, sausage, pulled pork, rotisserie chicken… the possibilities are endless!
Place potatoes in a pot and cover with 2 quarts (2L) of cold water. Add kosher salt and vinegar. Bring to a boil over high heat and boil until potatoes are tender, about 5 minutes after they reach a boil. Drain. As soon as potatoes are cool enough to handle, split into quarters and toss with 1 tbsp vegetable oil in a bowl.
Heat the remaining 2 tbsp vegetable oil in a large nonstick or cast iron skillet over medium-high heat until shimmering. Add potatoes and cook, tossing, until crisp and golden brown on all sides, about 6 minutes.
Add meat, season with freshly ground black pepper, and cook until everything is crisp. Serve hot.