Categories
YouTube

Taro Swirl Mooncakes

Would you believe me if I told you these pretty, swirly taro mooncakes are WAY easier than they look?

No really. They are.
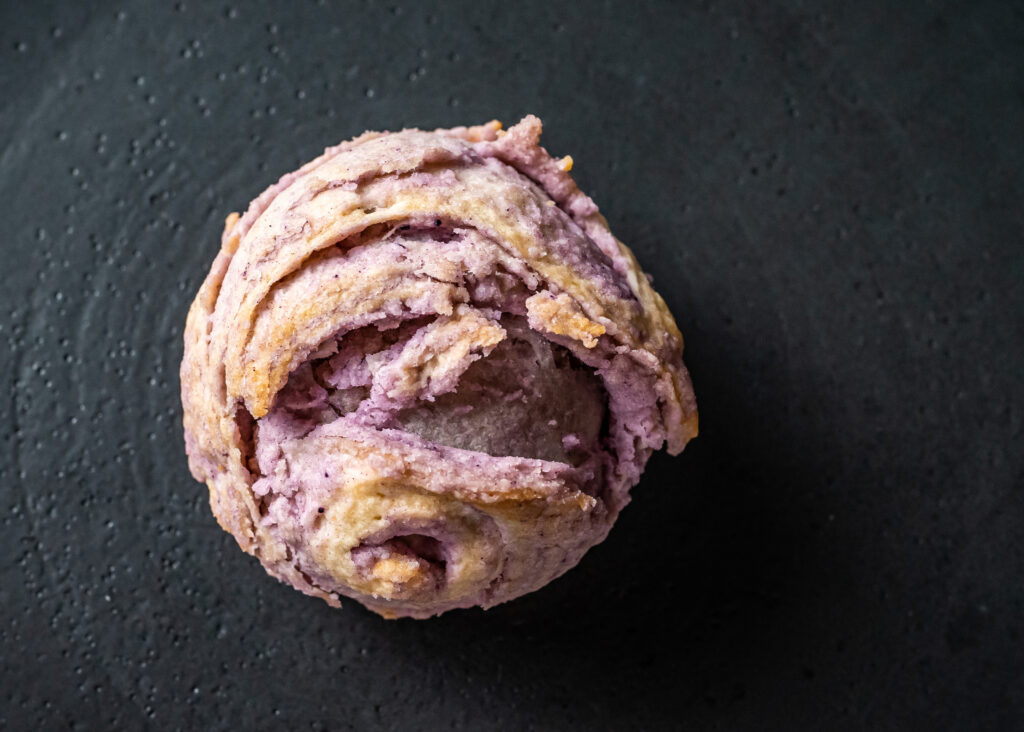
The hardest thing about making taro mooncakes is acquiring the taro.

If you have an asian supermarket near you, you might be able to find it fresh in the vegetable section, or frozen.

But – before we even get to the store, you’re probably wondering – what is taro?

A lot of people think that taro and ube and purple sweet potato are all the same thing.

But they’re not! These are three completely different root vegetables!

Ube is a type of yam, and it is similar to – but not the same as – okinawan purple sweet potatoes. Both pretty much look like sweet potatoes, typically with fairly vibrantly purple flesh on the inside.

Taro, on the other hand, looks NOTHING like a potato.

They’ve got this brown, sort of hairy skin on the outside, and can be quite a bit larger than your typical potato. And then once you peel the skin away, you find a mostly white flesh, that’s just lightly flecked with purple.

Totally different.

Okay – now that we know what taro is, and have our taro peeled, it’s time to make some mooncakes!
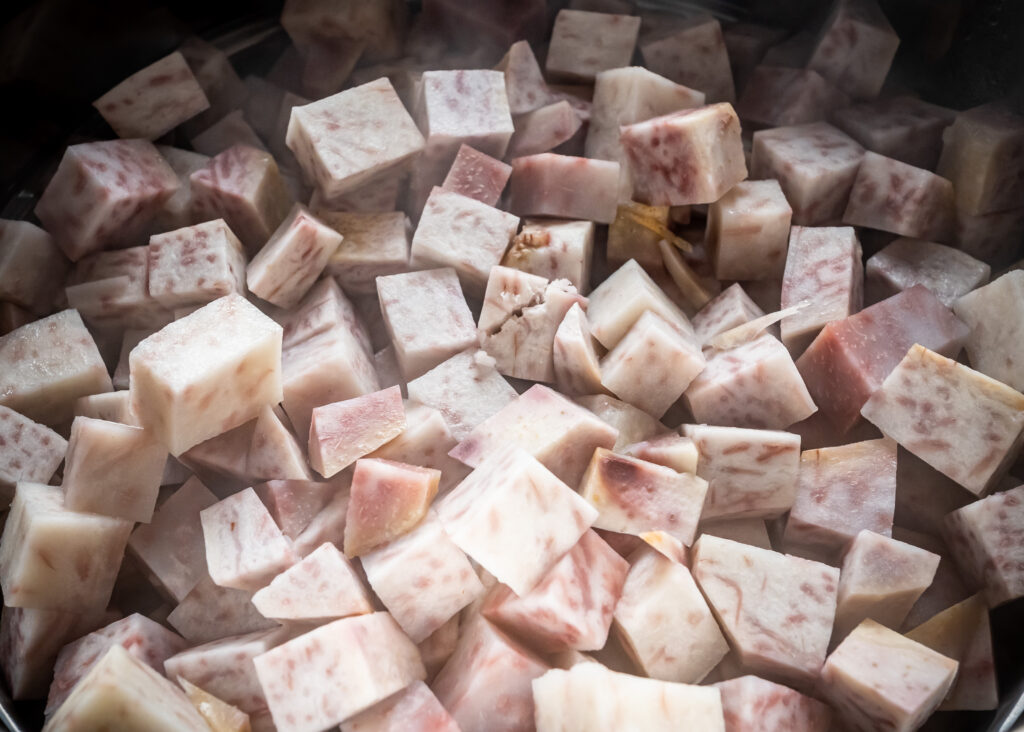
First off, we’re going to make the taro paste that will be the filling for the mooncake.

Peel and cube your taro – you’re looking to end up with about 2 pounds.

Then steam it for about 40 minutes – by the end, it should be so tender that it practically falls apart when you stick a fork in it.

To make the paste, add 1 teaspoon of salt, three-quarters of a cup of sugar, and one-quarter of a cup of coconut oil, and just mash it all together until it’s a smooth paste.

I told you it’s easier than it looks. That’s all there is to the filling, so stick that in the fridge until it’s totally cool.

On to the wrappers!

We are going to make some white dough, and some purple dough, which will combine to give us that pretty swirly pattern.

For the white dough, mix 1 3/4 cups of flour, 1/4 cup of powdered sugar, 1/2 teaspoon of kosher salt, 6 tablespoons of coconut oil, and 1/4 cup water

The thing with coconut oil is that its melting point is 78F.

So depending on how hot it is in your kitchen, it may or may not be liquid.

The recipe I used just said coconut oil, so I made the mistake of just putting it straight in, which would work GREAT… in the summer.

But if you’re a weirdo like me and you’re making mooncakes in the middle of winter, instead of during the moon festival in late summer? You really should melt it first.

I don’t think it affected the final product too much, but I definitely ended up with sharp little lumps of coconut oil in my dough. [facepalm]

Knead that until it’s nice and smooth, and then it’s time for your purple dough!

Mix together 1 1/2 cups of flour, 1/2 teaspoon of kosher salt, and 7 tablespoons vegetable or canola oil.

Then add just a little bit of food coloring. I used this purple ube flavoring, because you really can’t go wrong with a little ube in your taro. But normal purple food coloring is fine too. Add a few drops at a time and knead it in – you want a distinctly purple color, but it doesn’t need to be too dark.

Knead this one until it’s smooth too – it will have a totally different texture from the white dough, and that is perfectly fine.

Separate your two doughs into 10 balls each, and stick that in the fridge for about 20 minutes.

And then – it’s time to make your mooncakes!

Start by rolling out a white ball into a small circle. Place a purple ball in the center, and fully wrap the white dough around it.

Roll that out into a long oval, and then roll it up. It’s totally okay if the doughs tear a little.

Turn the roll 90 degrees, so one open end is pointing towards you, and then roll it out into a long oval and roll it up again.

Cut crosswise down the center, so you get two little spirals. This will make two mooncakes.

For each mooncake, set the dough cut-side down, and press it down with your hand. Then roll it out into a circle.

Place a ball of taro paste in the center, and carefully wrap the dough around the ball. It’s okay if it doesn’t seal fully.
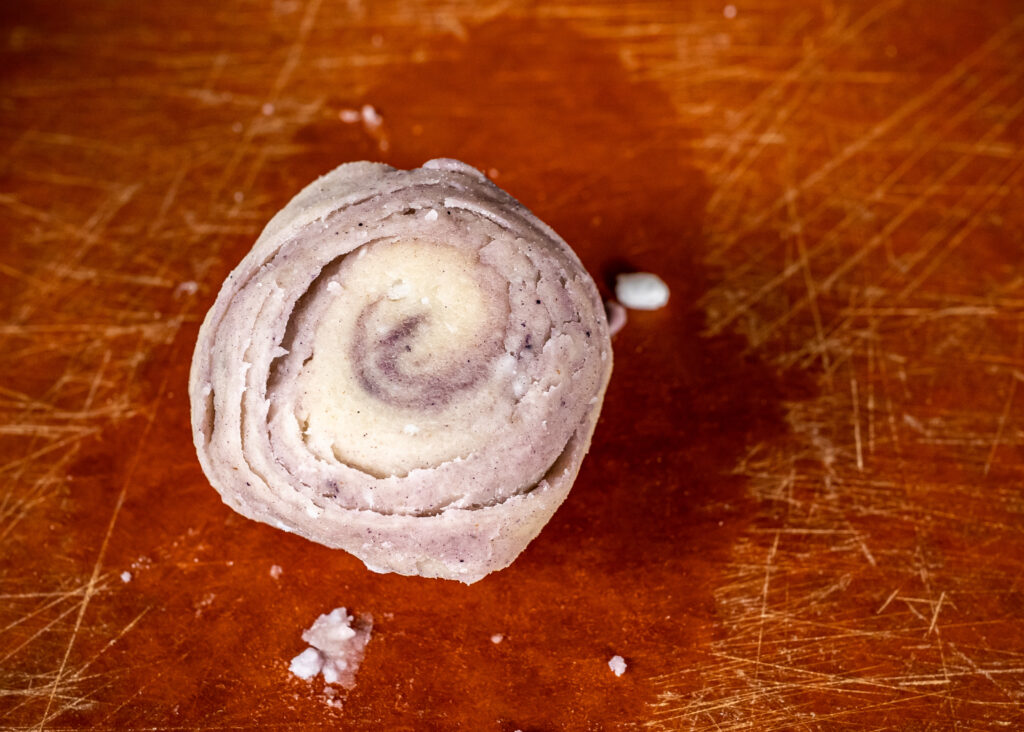
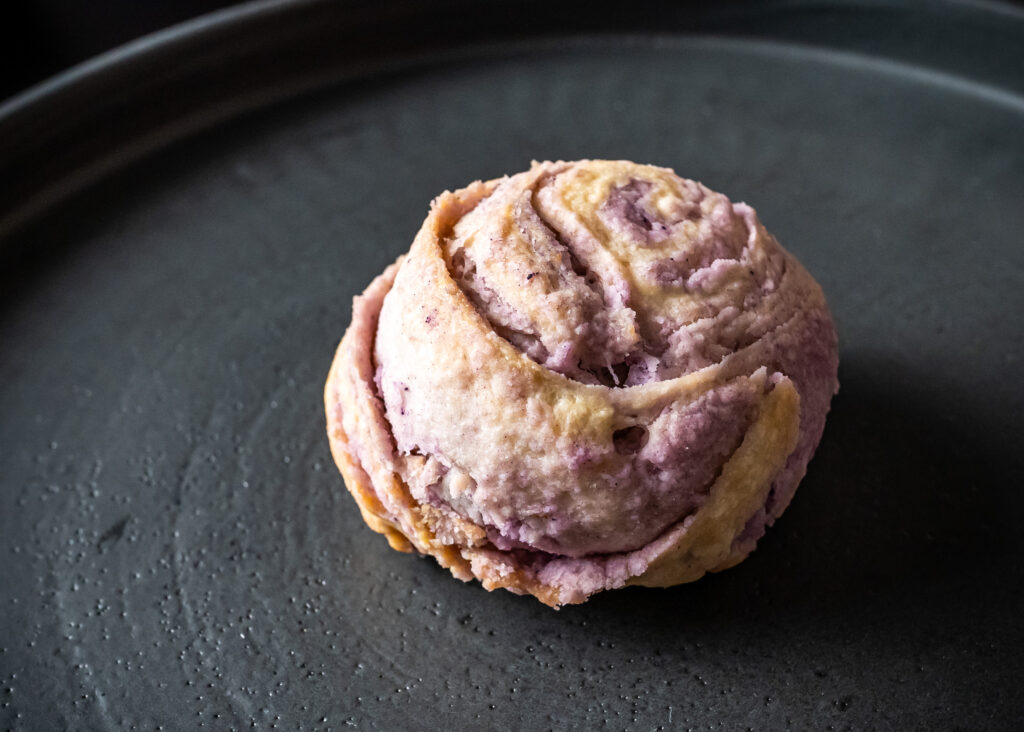
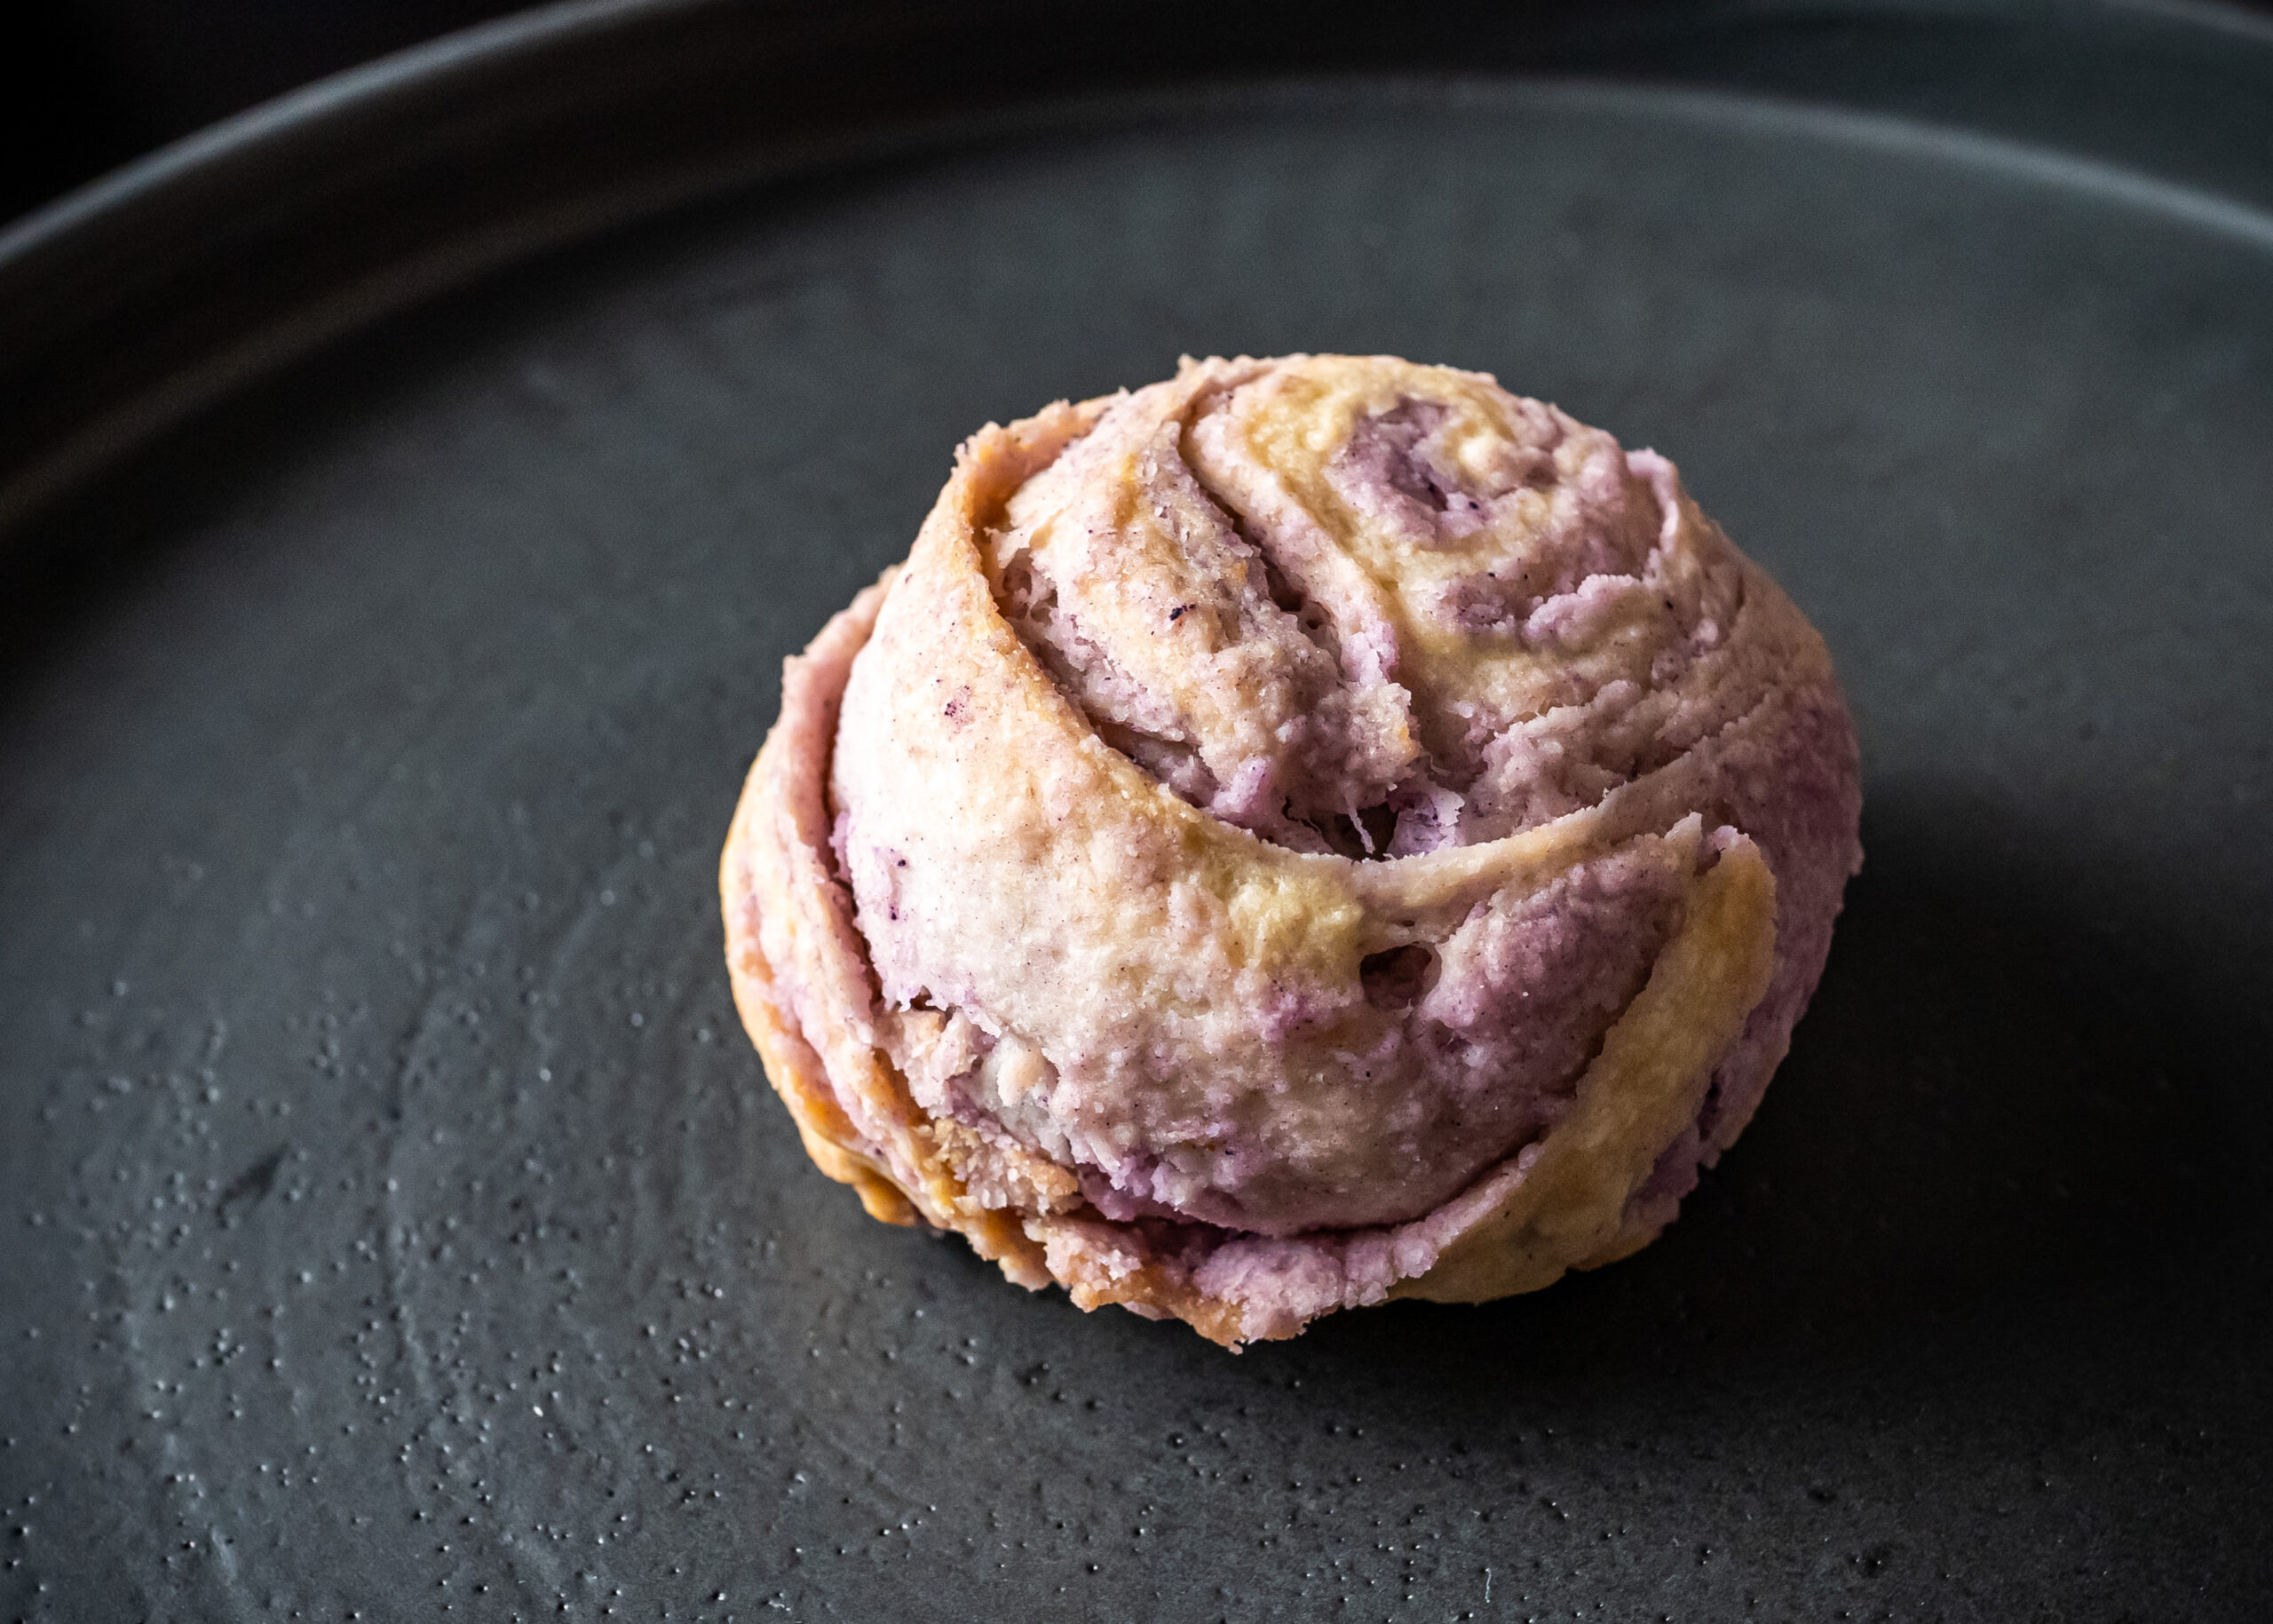
Place that seal-side down on a parchment-lined baking sheet, and look – cool patterns!

Repeat that for as many mooncakes as will fit on your sheet pan, and now it’s time to bake!

30 minutes at 350F is all it takes.

Let them cool a few minutes, and your mooncakes are ready to go.
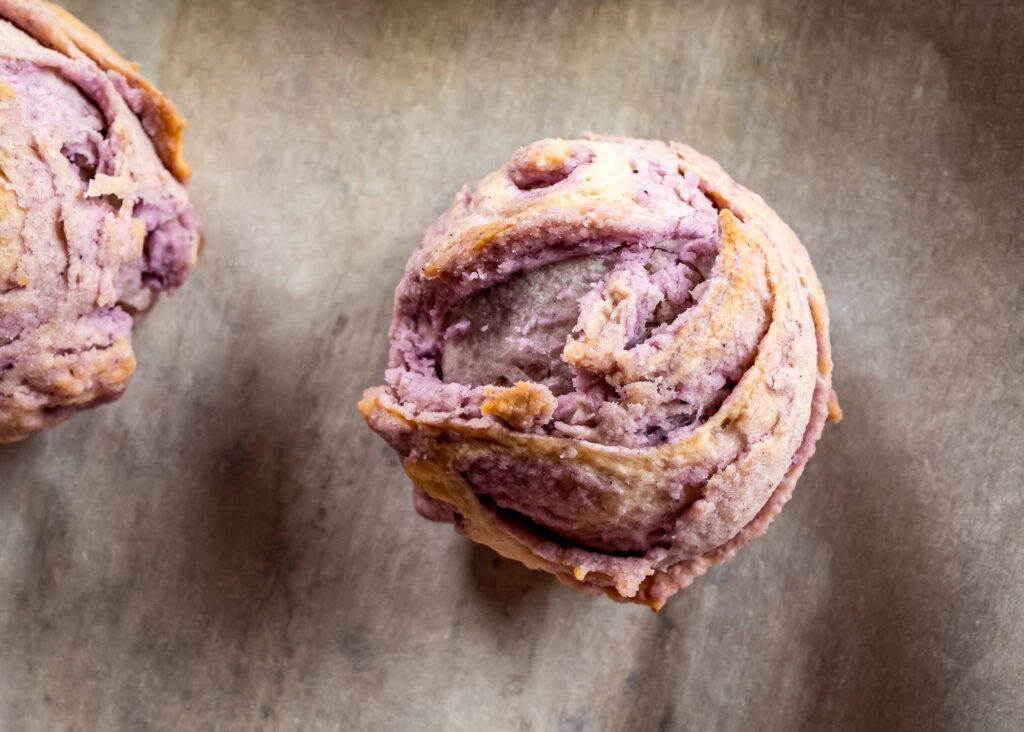
And now, the best part… it’s time to taste.

If you’ve had mooncakes before, there’s a good chance that the kind you’ve eaten has a very soft crust – the kind with a pattern stamped on top.

In fact, I actually posted a video for those kinds of mooncakes last year on this YouTube channel, for the moon festival.

These are not those kinds of mooncakes.

While the filling is similar – taro paste, bean paste, lotus seed paste all have somewhat similar consistencies – the wrapper is completely different.

This wrapper is almost biscuit-like. It’s a harder wrapper, such as if you were to wrap the filling in a shortbread cookie.

But how does it taste?
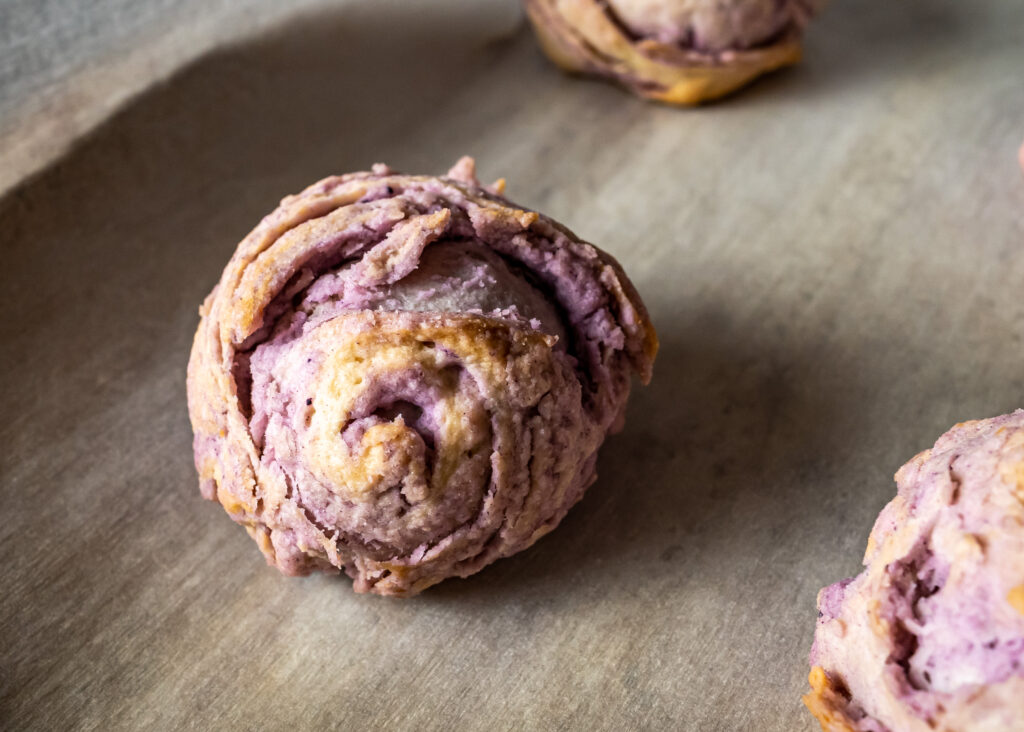
Taro is a very light, delicate flavor.

Even though we added ube flavoring to the purple layer for the coloring, you can’t taste it too much – it doesn’t overwhelm the taro.

The traditional mooncakes with the brown, soft, cakey wrappers are a bit sweeter and richer, so it can be a bit more difficult to even eat a full mooncake at once, since they’re pretty heavy.

But these taro swirl mooncakes are just barely sweet, and much lighter, so they’re real easy to eat.

Not only are they easy to eat, but these are INFINITELY easier to make than the stamped cakey mooncakes, and don’t even require any special tools… which means, you’ve got no excuse.

2021’s Moon Festival is September 21st, so you’ve got just under 6 months to find yourself some taro!

Taro Swirl Mooncakes

very slightly adapted from The Cooking of Joy

Ingredients

For the taro paste

  • 2 lbs taro root, peeled and cubed
  • 1 tsp kosher salt
  • 3/4 cup sugar
  • 1/4 cup coconut oil

For the white dough

  • 1 3/4 cup flour
  • 1/4 cup powdered sugar
  • 1/2 tsp kosher salt
  • 6 tbsp coconut oil, melted
  • 1/4 cup water

For the purple dough

  • 1 1/2 cup flour
  • 1/2 tsp kosher salt
  • 7 tbsp vegetable oil
  • purple food coloring
Cooking Directions
  1. Peel and cube the taro. Steam for about 30-40 minutes until the taro is fork tender. Use a ricer or mash the taro into a paste. Mix with the the salt, sugar, and coconut oil. Set aside to cool.
  2. Sift together the flour, powdered sugar, and salt for the white dough in a medium bowl. Add the coconut oil and water. Stir and add more water if necessary, a tablespoon at a time, until the dough comes together. Knead for a few minutes until smooth.
  3. In a separate bowl, sift together the flour and salt for the purple dough. Add the oil and a few drops of purple food coloring. Add more food coloring as necessary to get a pale but noticeably purple dough. This dough will look and act more like wet sand than pastry dough.
  4. Divide both doughs into 10 pieces and refrigerate for about 20 minutes to rest and chill slightly.
  5. Preheat the oven to 350°F.
  6. Roll one of the balls of white dough into a rough circle and wrap it around a ball of the purple dough, sealing it completely. Roll the combined dough into a long oval and then roll it up into a spiral. With the seam on the bottom, rotate the dough 90 degrees and roll out again into a long rectangle. Roll the rectangle up into a spiral again and slice in half. You’ll now have two pieces of dough with beautiful spirals showing on the cut sides.
  7. Place the cut side down and flatten the dough with your hands. Roll out into a rough circle. It’s okay if the layers tear a little through this whole process. Take a spoonful of the taro paste and place it in the center of the dough. Gently pull the dough upward and around the paste to seal it inside. Don’t worry if the edges don’t seal all the way; the dough doesn’t stick to itself very easily. Flip the ball over and gently reshape so that the spiral is centered on top and the bottom is slightly flattened.
  8. Place on a parchment-lined baking sheet and bake for 30 minutes. Remove from oven and allow to cool before eating.

Sub to my YouTube channel and follow me on TikTok or Instagram to get notified whenever we have new videos!

Links in this post may be affiliate posts. If you buy an item through an affiliate link, I get a small fee, which helps support this blog!
Categories
YouTube

Black Sesame Shortbread Cookies

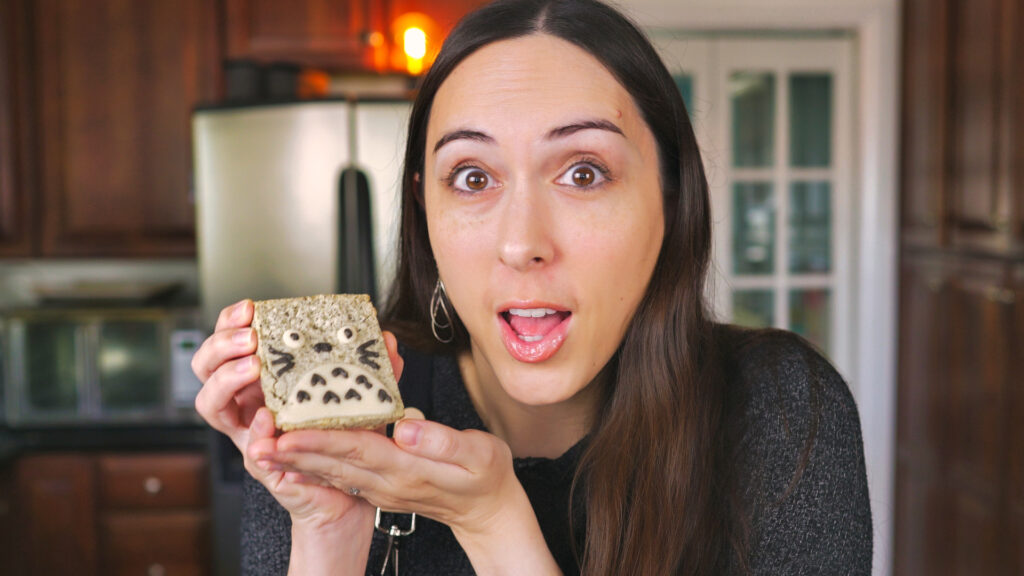
Totoro To-to-ro!

I love the ideas of “everyday sweets”.

Cupcakes and doughnuts and all things fancy and decadent are wonderful, but sometimes you want just a little something, not too sweet or heavy, that you can have with a cup of jasmine tea as a mid-afternoon snack.

And this is the “everyday sweet”.

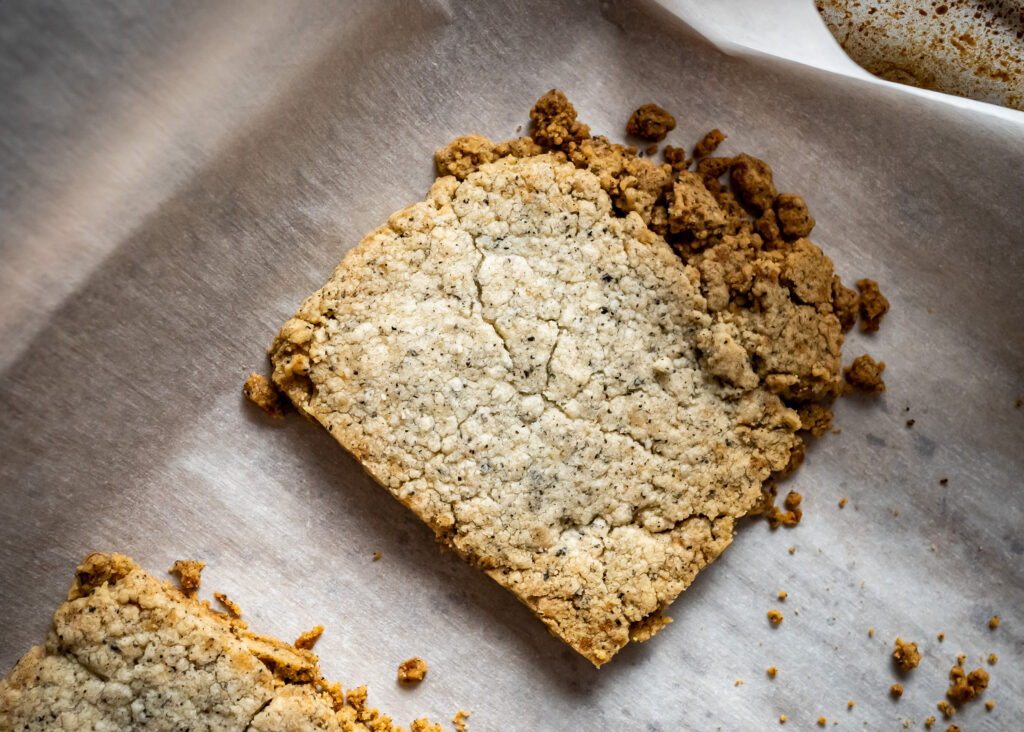
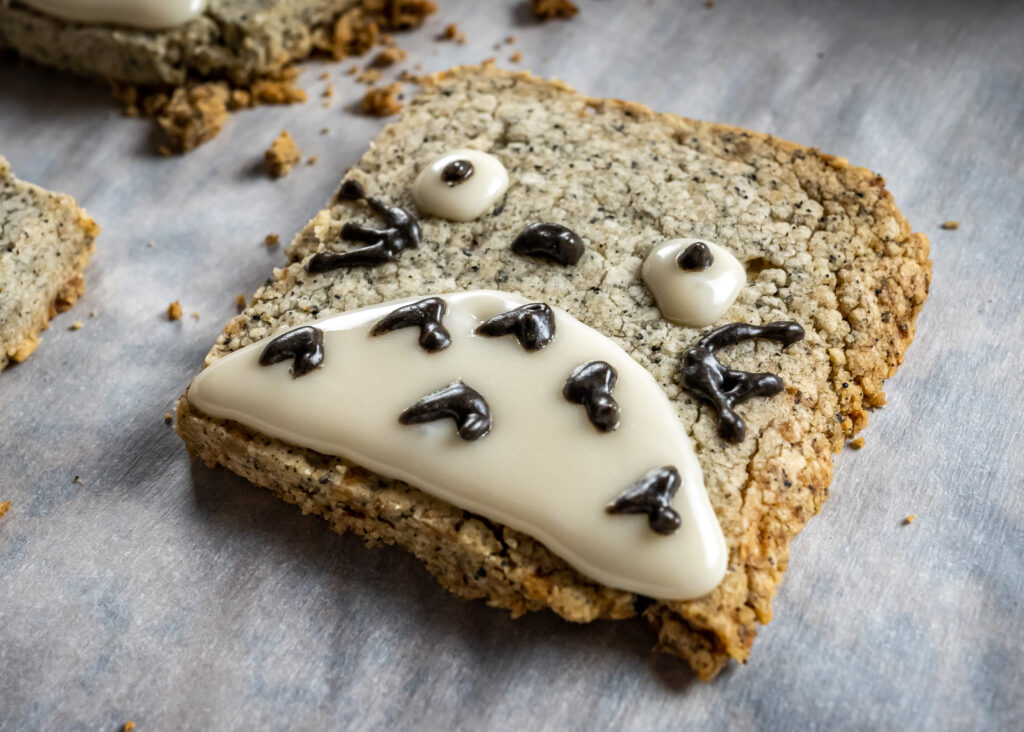
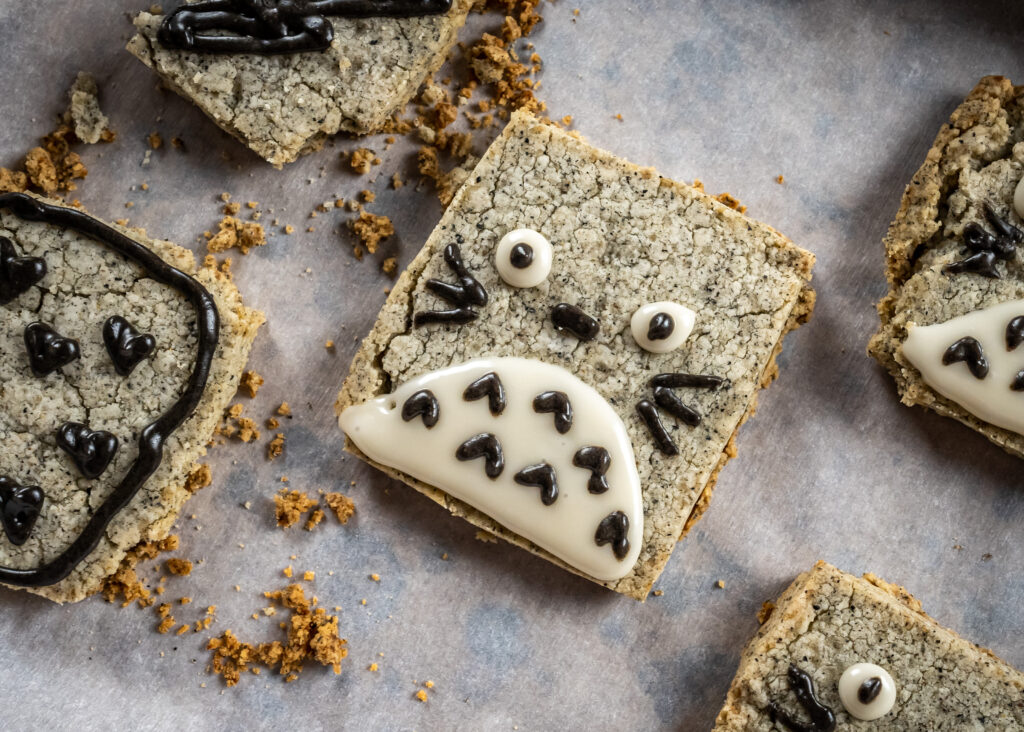
Today we’re making black sesame shortbread cookies.

They’re simple, they’re not too sweet, and shortbread cookies are just oh so good with a cup of tea.

Before we go any further in this video… go set out 2 sticks, aka 1 cup, aka 8 oz of unsalted butter, so it can come to room temperature – because you know you’re gonna want to make these.

You really cannot get any simpler than this recipe.

Once the butter has come to room temperature, you’re gonna want to take a hand mixer or stand mixer, and beat it until it’s nice and creamy.

Next, we’re going to add 1 cup of powdered sugar.

Powdered sugar… confectioner’s sugar, same thing.

So you’ve probably noticed, if you’ve watched any of my videos where I’m baking, that I never sift my flour, ’cause I’m lazy.

HOWEVER.

I always, always sift my powdered sugar. ALWAYS.

Powdered sugar really likes to clump. And while you might not notice it as much in the cookie, it’s super noticeable in icing – which we’ll be making in a bit.

You think it’s gonna mix in when you whisk that icing, but it never does, and you’ll end up with lumpy icing. Trust me, I’ve done it so many times.

So take it from this lazy baker… always sift your powdered sugar.

Add your powdered sugar and 1 teaspoon of kosher salt – Diamond Crystal, please – and beat that into the butter until it’s combined.

Then we’ll mix in 1 teaspoon of vanilla extract – I’m using homemade, but storebought is fine.

Add a third of a cup of ground black sesame seeds. I bought pre-ground because I use it a lot, but you can also use a spice grinder, coffee grinder, or even a food processor to grind it up. Just be careful not to overgrind, or you might end up with black sesame paste!

And lastly, 2 cups of all-purpose flour.

Mix that all together, and you’ll end up with kind of a sandy dough.

Now, this is a pretty cool trick, that I hadn’t heard before.

Normally, when you make like a cookie dough, or a pie crust, or something that needs to be rolled out, they’ll tell you to form it into a disk, wrap it with plastic wrap, and stick it in the fridge to chill for 30 minutes.

But that means when you take it out of the fridge, it’s gonna be hard as a rock and a pain to roll out.

However, in the recipe that I used for these cookies, which is from an unfortunately defunct blog called Hungry Girl Por Vida,

Shrimpy: give credit where credit is due, y’all!

she instructs you to put the dough in a ziplock bag, seal it, and then roll it out first BEFORE refrigerating it!

That way it’s already flat, it’s ready to go when you take it out of the fridge! How easy is that?

You can use either method, but either way, refrigerate your dough for at least half an hour. I left it in the fridge overnight, and that worked just fine.

Whenever you’re ready to bake, take your dough out of the fridge, preheat the oven to 300F, and line two baking sheets with parchment paper.

If you used the disk method, then unwrap it, roll it out, and cut out your cookies.

If you used the ziplock method, all you have to do is cut away the ziplock bag and cut your cookies. It’s so easy!

I know, I’m unreasonably excited about this.

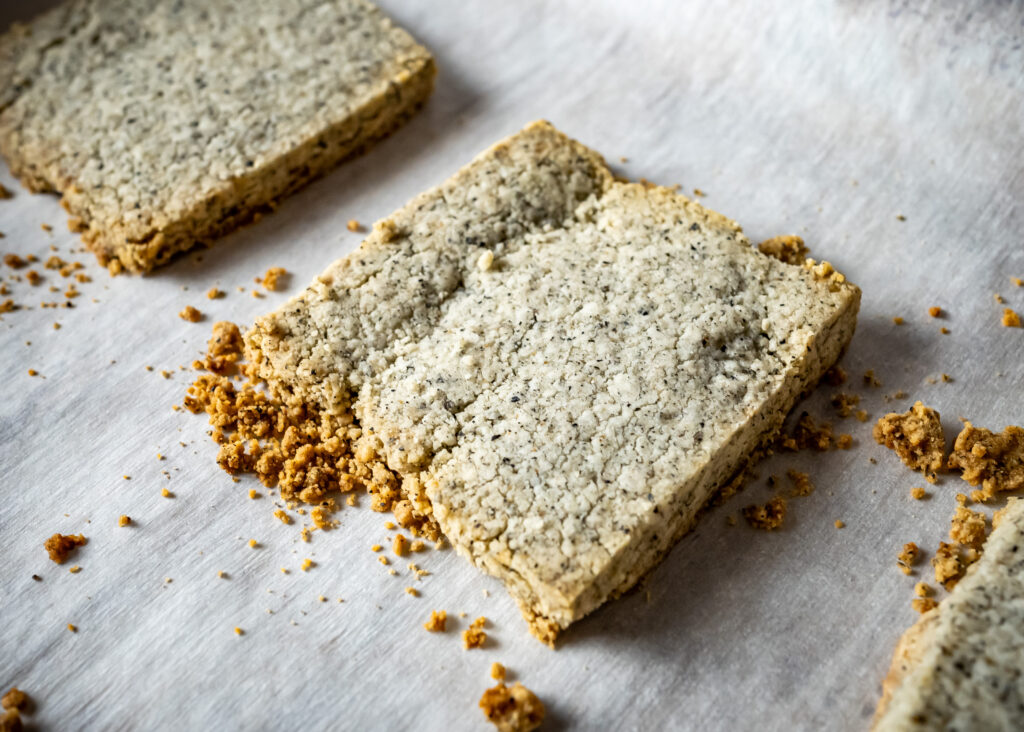
At this point, you can cut your cookies into any shape you like, but BEWARE, it is crumbly as heck. So maybe avoid tiny or delicate shapes.

I’m not that fancy, and don’t have cookie cutters in the shape that I wanted, so I just used a butter knife to cut my cookies into squares. I would’ve used a pizza cutter, but I seem to have lost mine.

However you cut them, I would highly, highly recommend using a spatula to transfer the cookies to your baking pans. Even after refrigeration, they are super crumbly.

But even if things are breaking apart, don’t worry. It will all bake together, so even if it looks like you already have a bunch of broken cookies pre-baking, they will all bake into solid cookies in the oven.

20 minutes at 300F and you’ve got your everyday cookies!

BUT! We couldn’t leave it at that.

I made the GLORIOUS mistake

*it wasn’t actually a mistake

of asking my followers on TikTok what anime I should watch.

And they had SO many suggestions.

So I’ve had anime on the mind.

… and also the original recipe was literally for Totoro cookies BUT THAT’S BESIDE THE FACT.

So. I decided I’d try my hand at icing.

Have I mentioned I’ve never actually decorated iced cookies before? This is not a skill I have.

First things first, let’s make some icing!

The original recipe used plain icing for the white bits, and melted chocolate for the dark bits.

But I love playing with flavors, so I wanted to find some flavors that compliment black sesame even better.

Remember what I said about sifting? No lumpy icing here!

We’re going to start off by sifting 1/2 cup of powdered sugar into one bowl, and a quarter cup of powdered sugar into another bowl.

For the white-colored icing, we’re going to make it ginger-flavored. So in the bowl with the half-cup of powdered sugar, add 1-2 tbsp of ginger syrup. Start on the lower end, and add more as needed – you want your icing to be pipeable, but not super liquidy.

For the dark-colored icing… well, this is black sesame shortbread. Why not take the opportunity to amp up the black sesame flavor even more?

To the bowl with the quarter-cup of powdered sugar, add a tablespoon of black sesame paste. This is going to be super thick, so add a teaspoon or two of milk until it’s just thin enough to mix together and pipe – but again, we don’t want it super liquidy.

If you don’t have ginger syrup or black sesame paste? You can totally make icing with just powdered sugar and milk, or use melted chocolate!

Now that we’ve got our icing, and our cookies have cooled completely… it’s time to decorate.

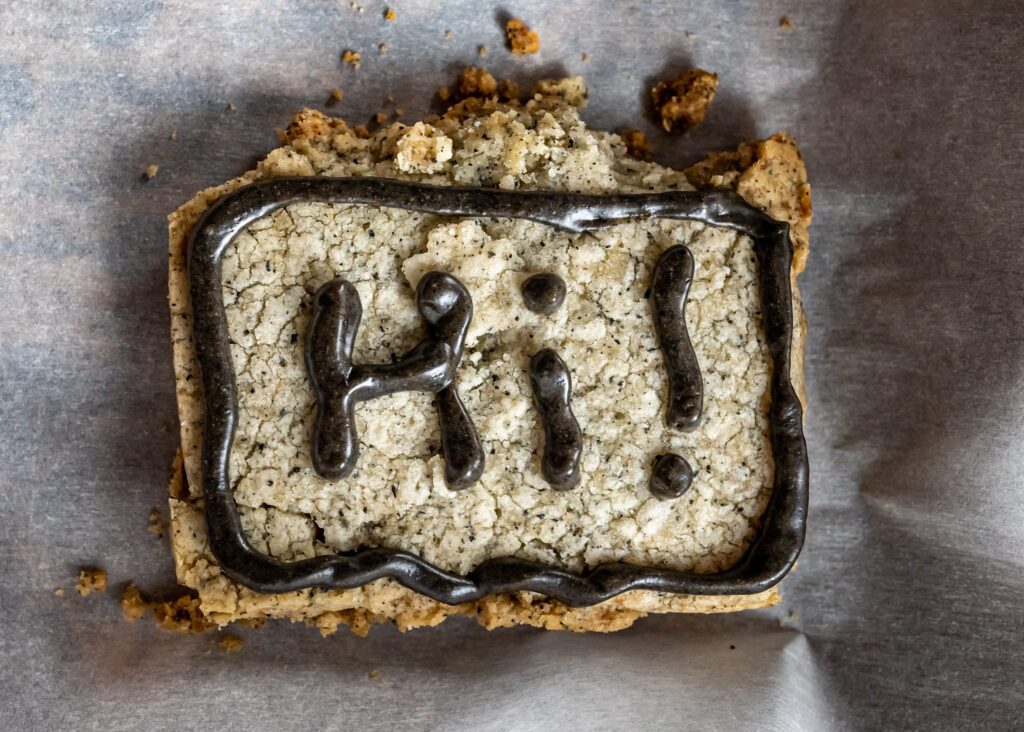
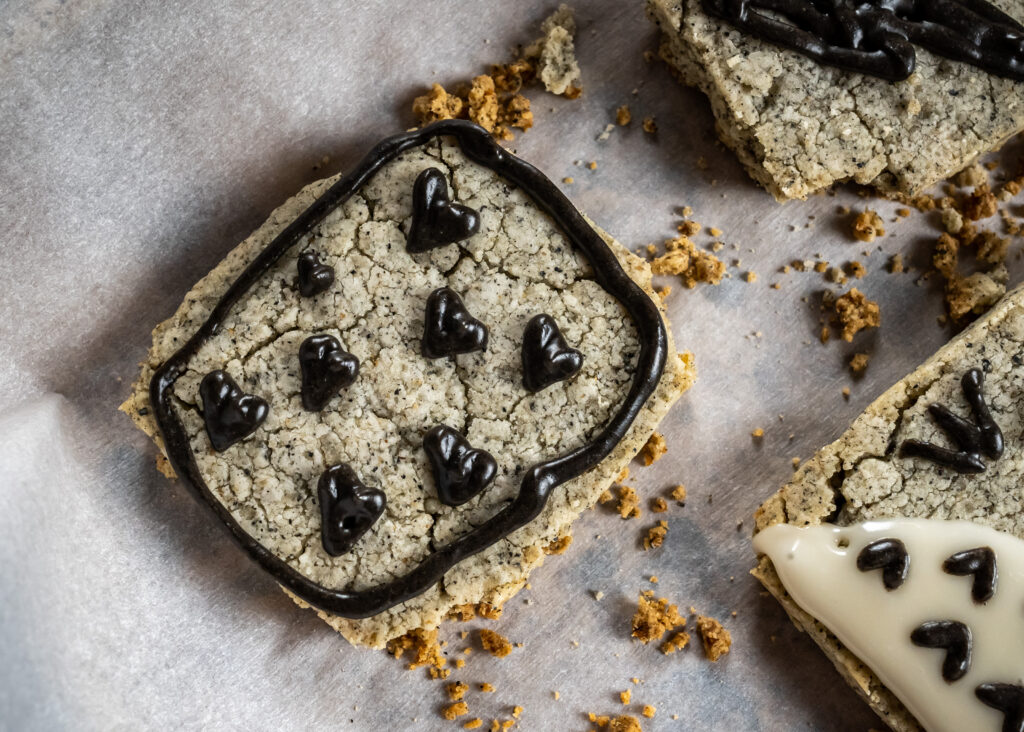
Please don’t judge my piping skills.

Pipe the white bit for the belly and the eyes on all the cookies first, and let it set for a few minutes.

Then you can use the dark icing to add the centers of the eyes, the whiskers, nose, and little carats on the belly.

LOOK! It’s Totoro!

(I’m taking artistic liberties here, okay?)

But the important question is, how does it taste?

If you’ve ever had that Chinese sweet mochi soup, where the mochi is filled with black sesame paste and the soup is flavored with ginger? This tastes JUST like that, but in cookie form.

The cookie is not too hard, not too soft, and perfectly crumbly, just the way you want shortbread to be.

By itself, the black sesame shortbread is not too sweet, so it would be easy to eat a whole bunch. But add the icing, and it’s just sweet enough to go perfectly with a cup of tea.

Maybe the Totoro icing is a bit much for “everyday” sweets. But you know what? Sometimes you just need a little extra kawaii in your “everyday”.

Black Sesame Shortbread Cookies

from Hungry Girl Por Vida (which unfortunately no longer exists)

Ingredients
  • 2 sticks (8 ounces) unsalted butter, softened
  • 1 cup powdered sugar
  • 1 teaspoon kosher salt
  • 1 teaspoon vanilla
  • 1/3 cup black sesame seeds, coarsely ground
  • 2 cups all-purpose flour

Ginger icing:

  • 1/2 cup powdered sugar, sifted
  • 1 – 2 tbsp ginger syrup

Black sesame icing:

  • 1/4 cup powdered sugar, sifted
  • 1 tbsp black sesame paste
  • 1 – 2 tsp milk
Cooking Directions
  1. Using a mixer, beat the butter until creamy. Add the powdered sugar and salt and beat until smooth and combined. Beat in the vanilla. On low speed, mix in the black sesame seeds and flour until combined well. Place the dough into a gallon zip-top bag and roll it out to fill the bag–the dough should be about 1/4-inch thick in an even layer (or pat the dough into a flat round and wrap well in plastic, roll out after chilled on a floured surface). Place the dough into the refrigerator to chill for at least 30 minutes.
  2. Preheat the oven to 300°F and line 2 baking sheets with parchment paper.
  3. If you roll out the dough in the gallon bag, just cut the bag away from the dough. Cut the cookies into your preferred shapes, using cookie cutters, a knife, or a pizza cutter. Gather the scraps, roll out again, and repeat. Place the cookies an inch apart on the prepared baking sheets and bake for about 20 minutes, just until the cookies are firm to the touch but don’t take on any color. Remove from the oven and cool 5 minutes on the sheets before cooling on a rack.
  4. To ice, mix the ingredients for the ginger icing and black sesame icing in separate bowls. Err on the side of a stiffer icing, only adding enough liquid to make the icing pipable. Transfer the icings to two quart-sized ziplock bags, and cut off just the tips. Pipe white bellies on the Totoro cookies and two white eyes. Pipe pupils onto the eyes, whiskers, an oval nose, and little carats on the bellies. Chill to set.

Sub to my YouTube channel and follow me on TikTok or Instagram to get notified whenever we have new videos!

Links in this post may be affiliate posts. If you buy an item through an affiliate link, I get a small fee, which helps support this blog!

Categories
TikTok YouTube

Sweet Potato Kimchi Hash

If the above video doesn’t load for you, click here to see it on TikTok!

I love kimchi. I love Korean banchan dishes. But somehow, I have the worst of luck when it comes to making them.

A few years ago, I made a big batch of kimchi. I set it out to ferment… and a couple days later came down with the worst case of the flu I’ve ever had. This was pre-Covid, and luckily I’ve never had to roll those dice, but I was bedridden, and completely out for several days.

I remember thinking, in one of my few moments of consciousness, that I need to tell my husband to put away the kimchi… but unfortunately that thought never quite made it out of my brain, and he was too busy taking care of me to remember the kimchi containers hanging out on the dining room table.

So the poor kimchi sat there… fermenting away… for DAYS.

We finally rescued it, but by then it was so overfermented that we struggled to eat it all… and then it molded before we got through it.

And this is why we never leave out our kimchi to ferment anymore. WE’VE BEEN BURNED.

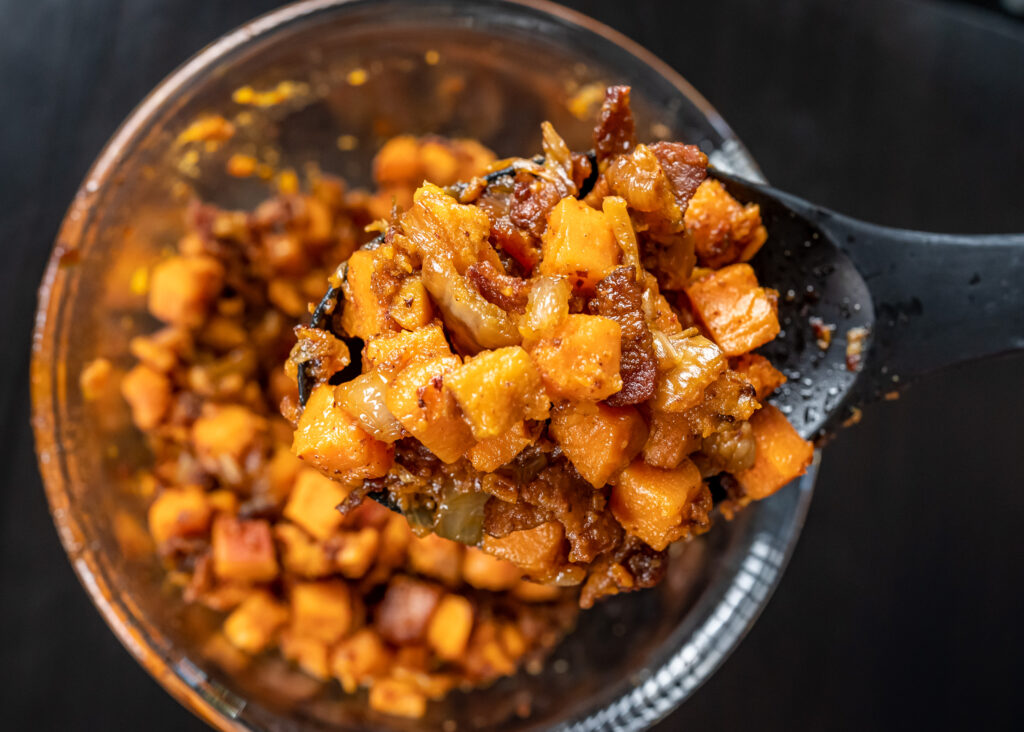
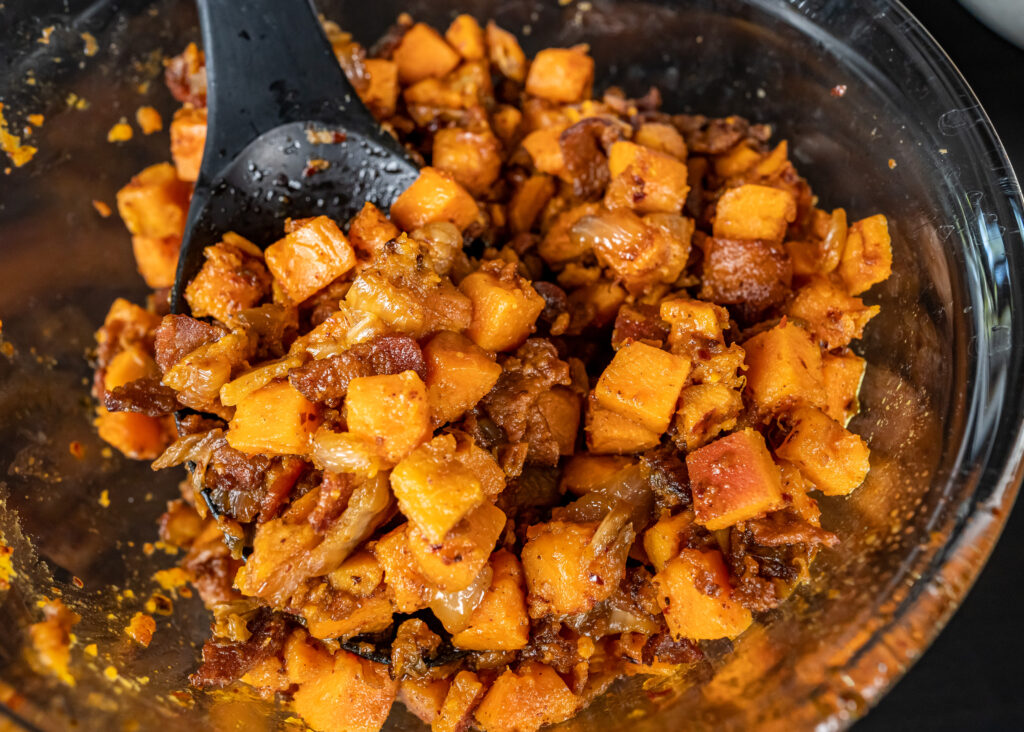
This was a totally spur-of-the-moment breakfast hash, because I found a bag of cubed sweet potatoes in the freezer. We also had some homemade kimchi on hand, so that kicked things up a notch.

This is a super satisfying, slightly spicy start to your day! I love anything where I can get some veggies in with breakfast, and the probiotics from the kimchi is an added bonus. And we all know I can never turn down bacon!

Sweet Potato Kimchi Hash

serves 4

Ingredients
  • 1 lb bacon, diced
  • 1 onion, diced
  • 1 cup kimchi, drained, chopped
  • 1.5 lb sweet potatoes, peeled and cubed (frozen is fine)
  • white or brown rice, to serve (optional, but we preferred it because the kimchi was spicy!)
  • 4 fried eggs
  • sliced green onions, to garnish
Cooking Directions
  1. Cook bacon in a skillet until starting to brown. Add in onions, cook until softening and browning. Add kimchi, and continue to cook until kimchi starts to caramelize. Remove from pan, keeping any rendered bacon fat in the pan.
  2. Add sweet potatoes to pan. Cook until fork-tender and browning. Add bacon mixture back to the pan, and toss to combine.
  3. Serve over rice, if using, and topped with fried eggs and green onions.

Sub to my YouTube channel and follow me on TikTok or Instagram to get notified whenever we have new videos!

Links in this post may be affiliate posts. If you buy an item through an affiliate link, I get a small fee, which helps support this blog!
Categories
YouTube

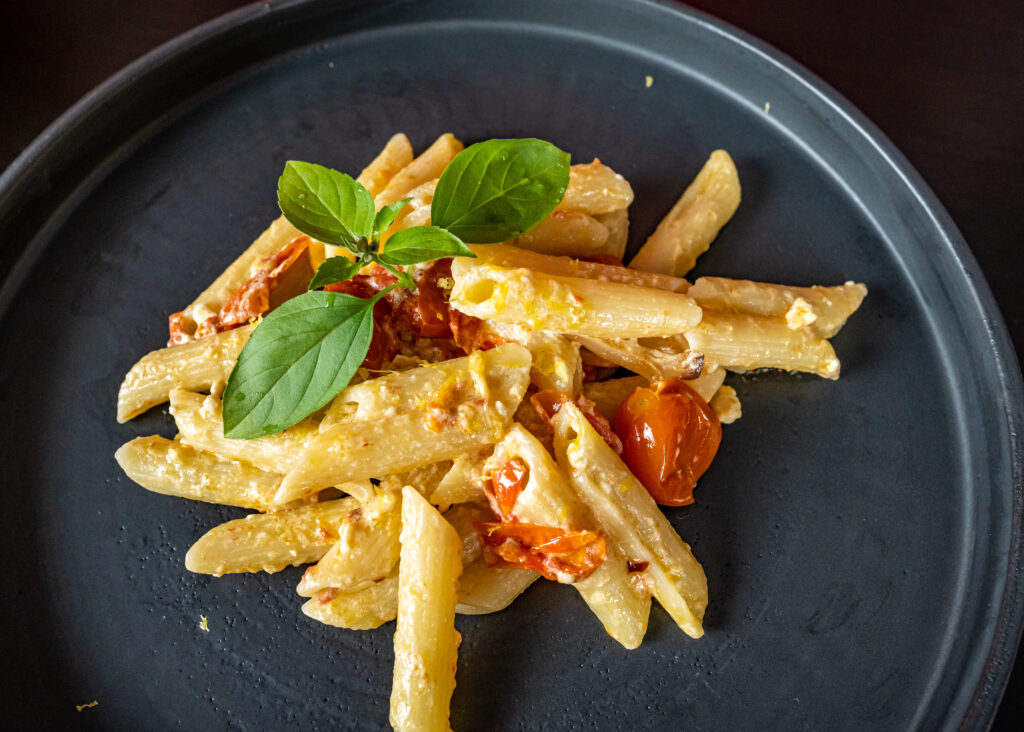
“The” TikTok Feta Pasta

You’ve probably heard of the TikTok feta pasta by now… I mean, haven’t we all?

But if you haven’t? You’re in for a treat!

The #fetapasta was trending on TikTok about a month ago, but I am perpetually late to trends! … I’ll get to dalgona coffee in a year or so.

Part of the draw is the simplicity of it

It’s just cherry tomatoes…

Wait, what’s the difference between cherry tomatoes and grape tomatoes?

Cherry tomatoes are round like cherries, and grape tomatoes are oblong like grapes – who woulda guessed – cherry tomatoes are sweeter and juicier, and grape tomatoes are a bit heartier and more tomatoey, but they generally can be used interchangeably.

The more you know!

Ok, back to the recipe

It’s just cherry tomatoes, olive oil, feta cheese, and pasta.

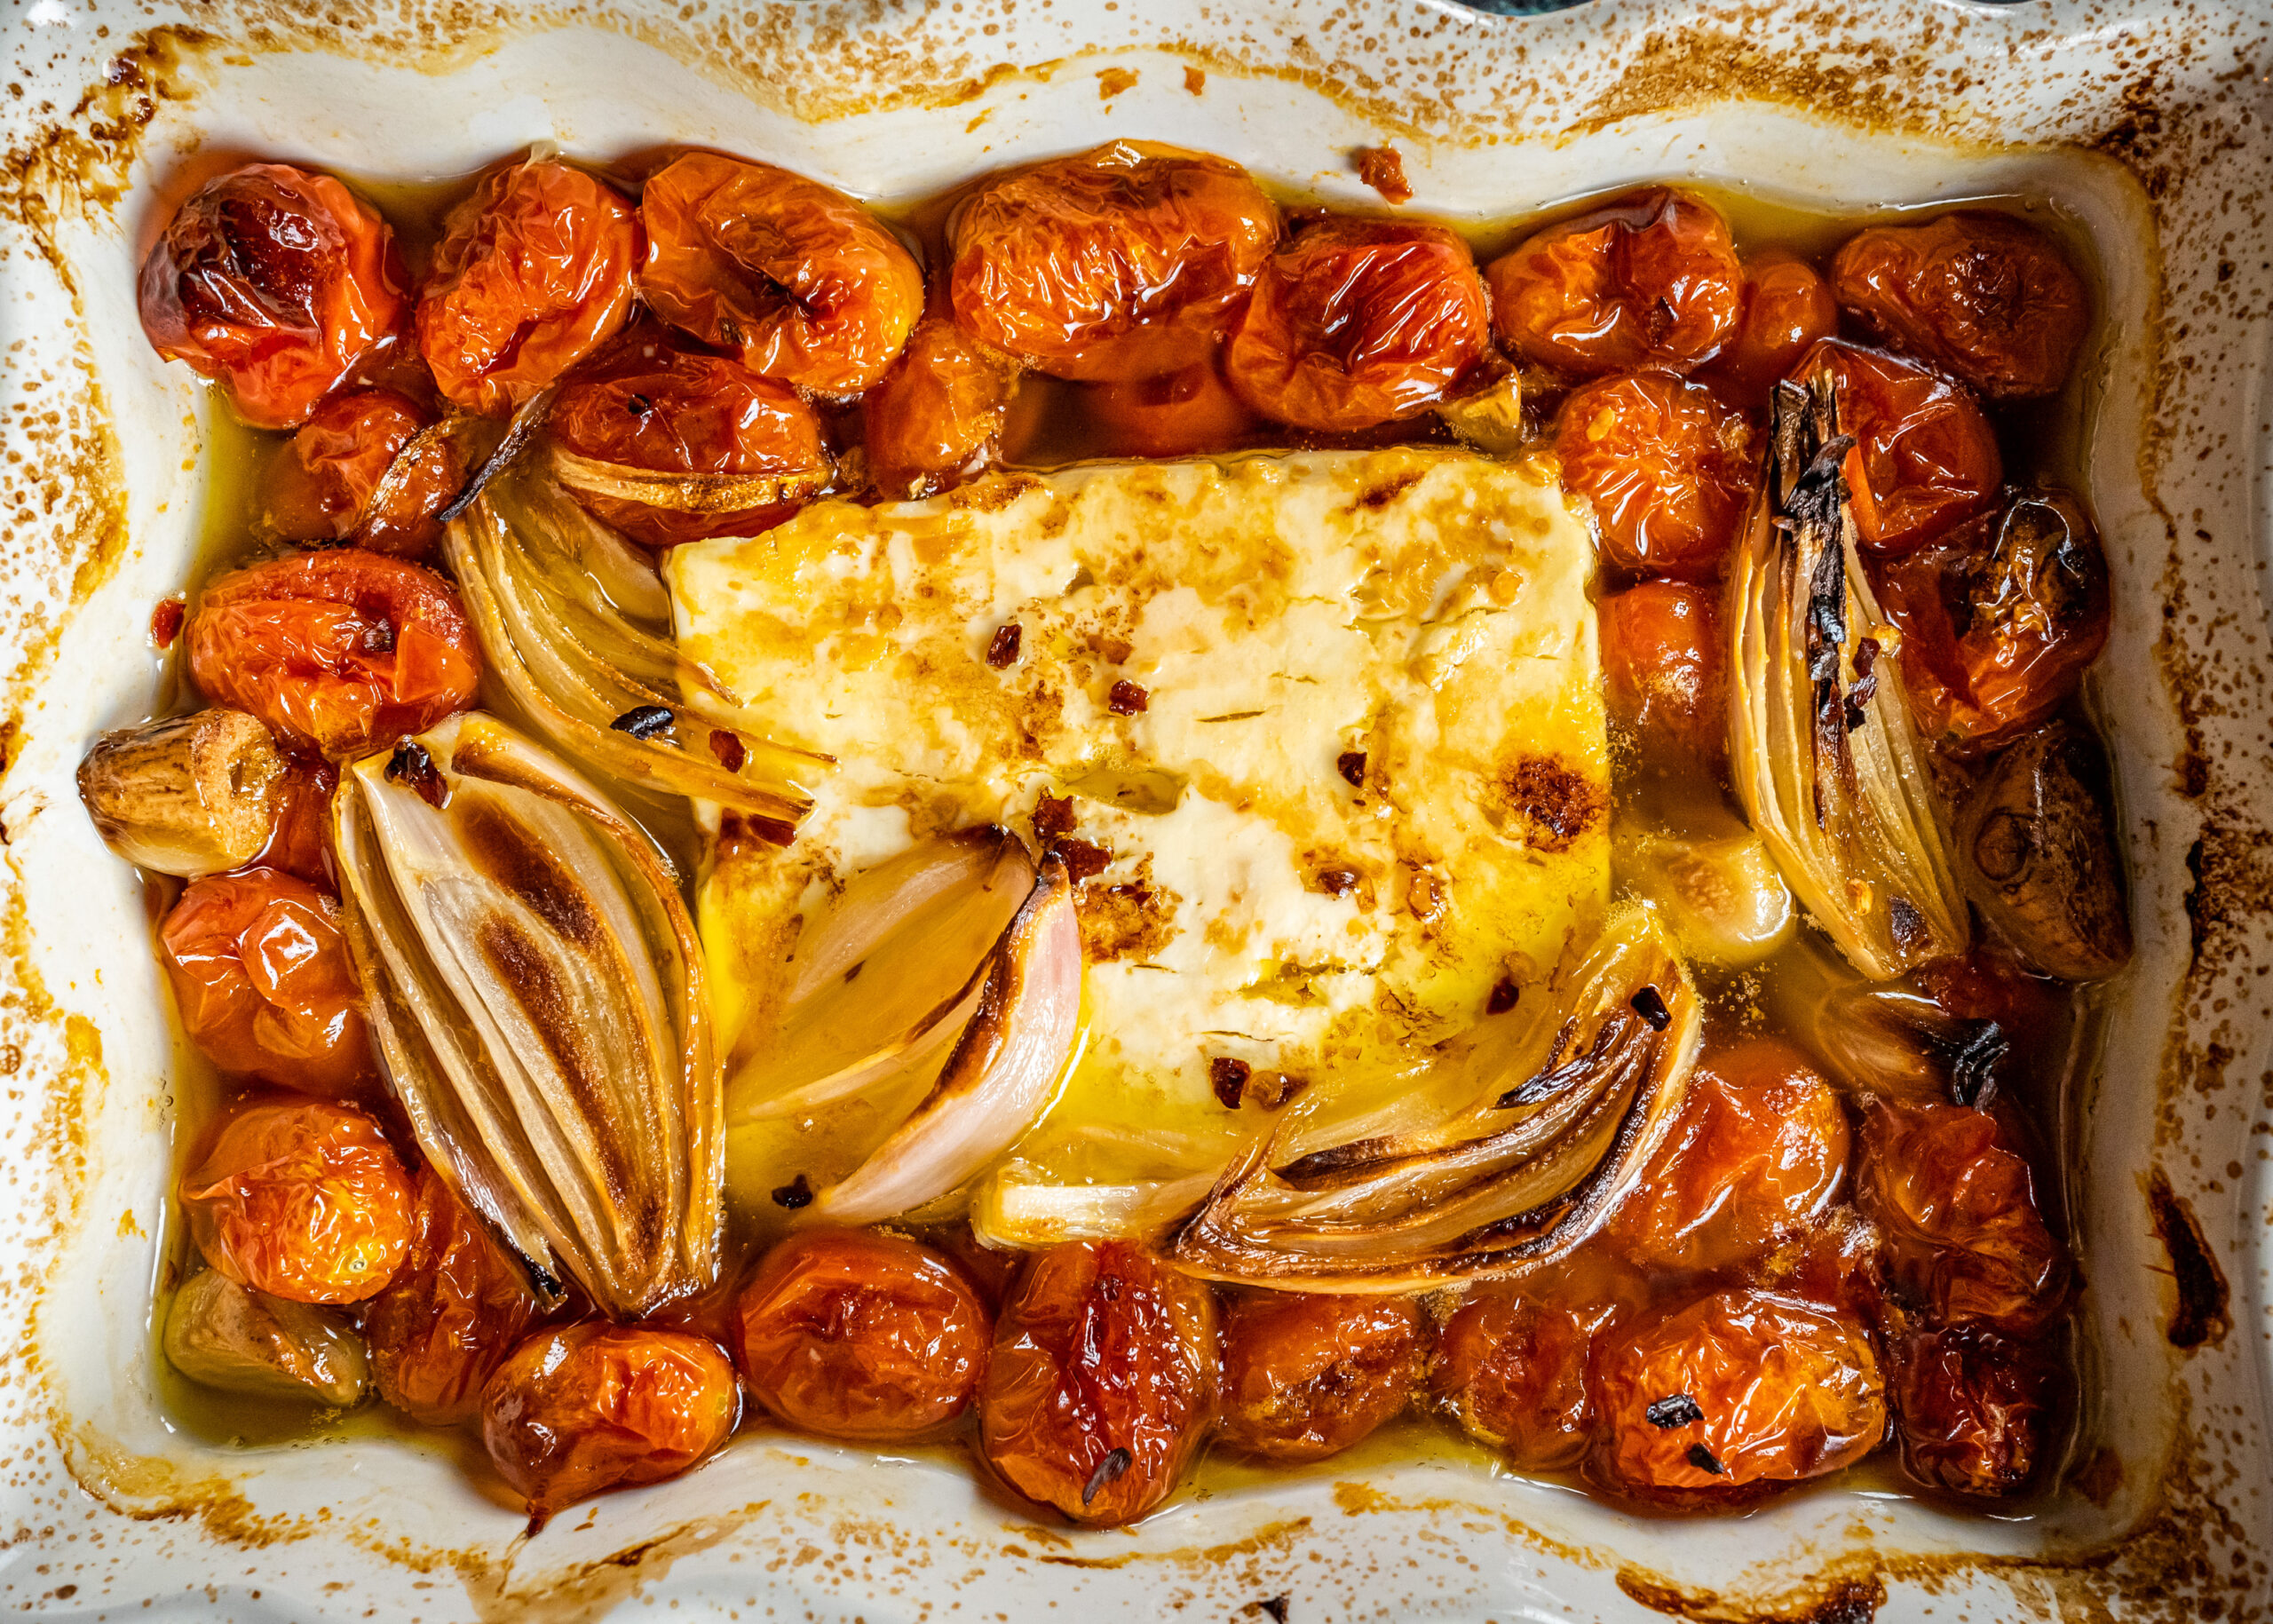
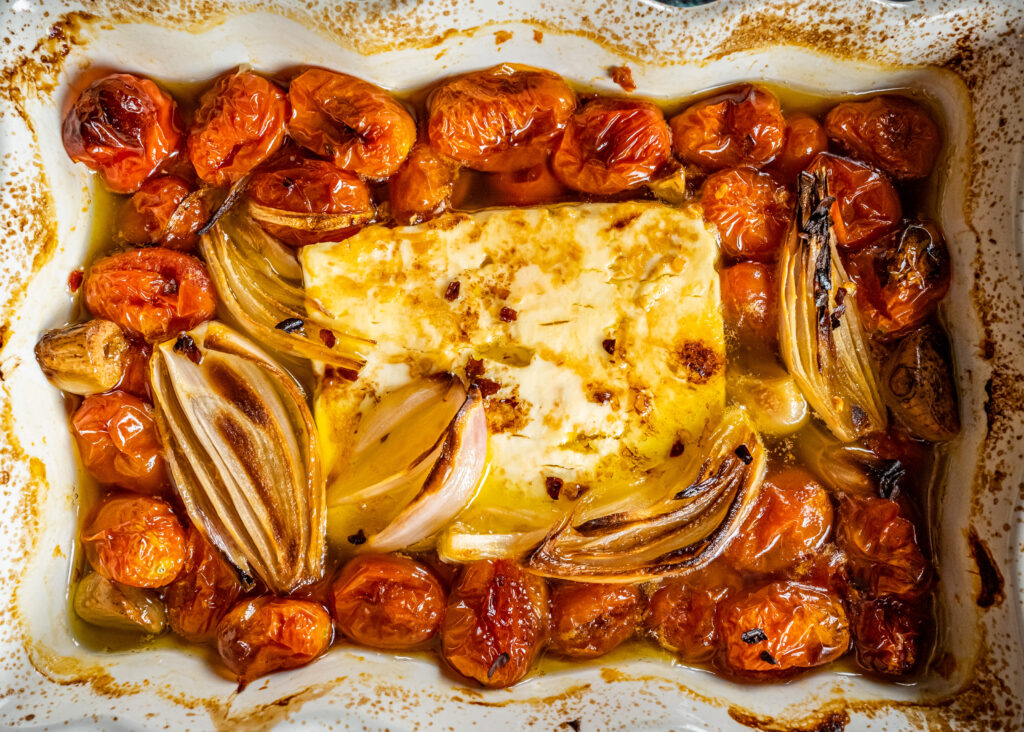
I was feeling a little fancy, so I threw in some quartered shallots and garlic cloves, because you honestly can never go wrong with shallots and garlic, and I sprinkled just a bit of red pepper flakes on top. You could also add a little pancetta, top it with some thyme… whatever your heart desires.

But seriously, that’s all there is to it.

Bake it at 400F for 45 minutes, then mix it all together to get a niiice good emulsification between that gooey cheese and the olive oil

And then you just toss it with some cooked pasta.

I said that’s it, but that’s not quite it

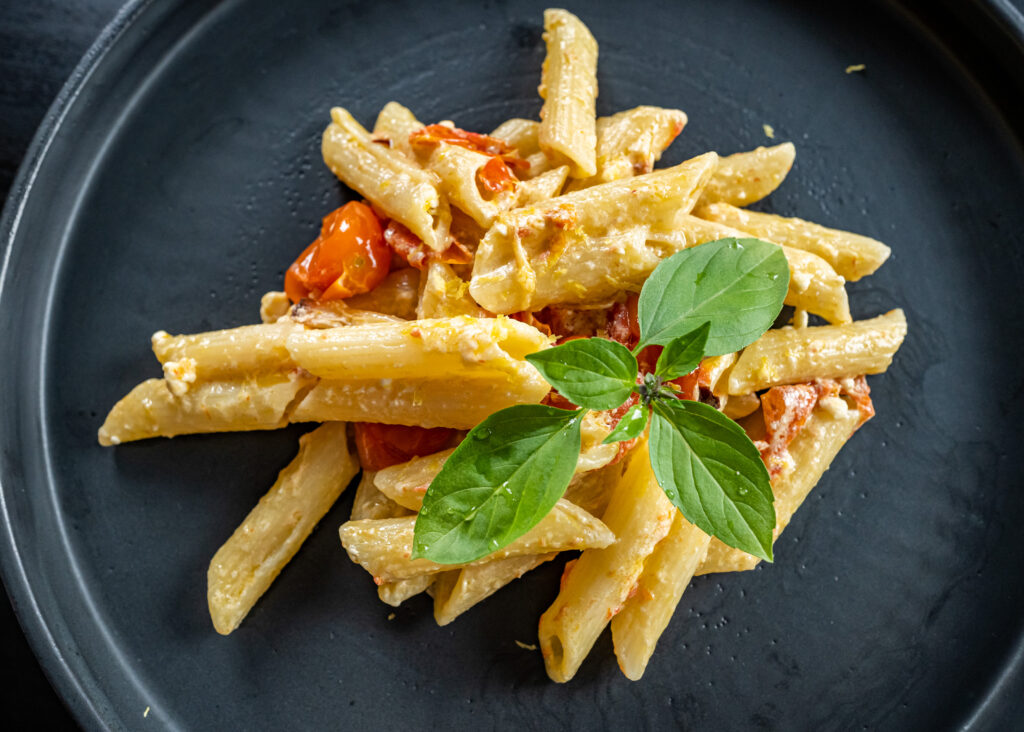
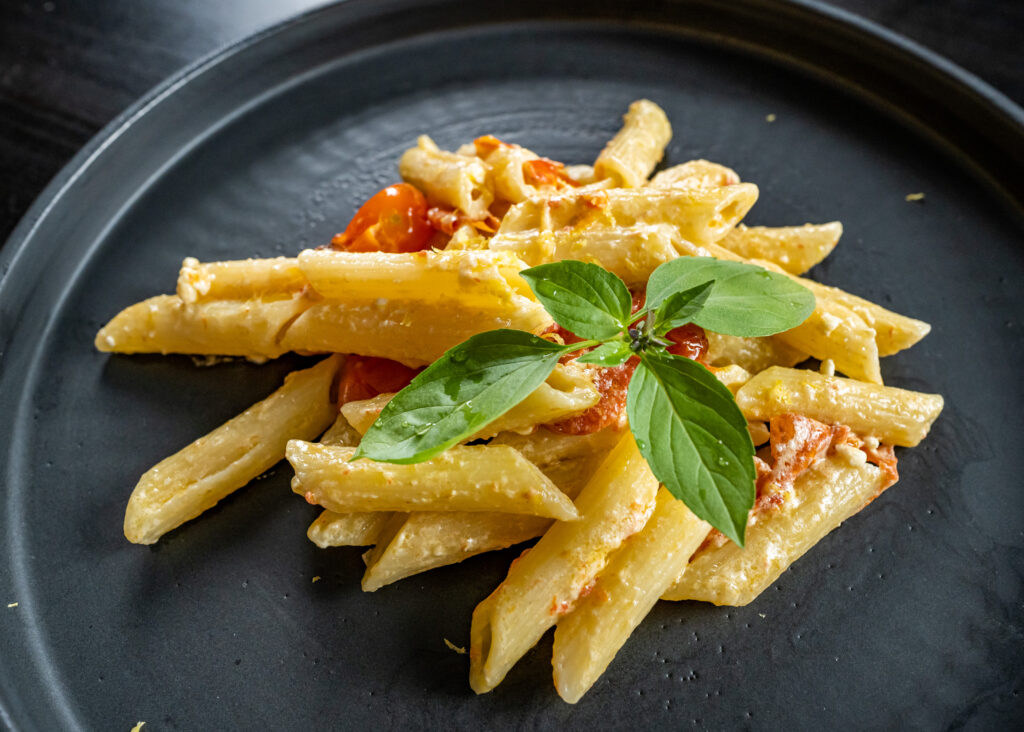
What you’re really gonna want to do to take it from yum to oooohhhhhh my goodness… is zest a little bit of lemon and tear a little bit of basil (we went with thai basil because look at these beautiful plants, why use normal basil when you’ve got these? … and also this is the only basil I have in the house, so.) aaaand sprinkle it all over the top

Ok I’m gonna be honest, I never intended to make this pasta

I don’t mind feta cheese, but it’s not one of those things that my brain looks at and thinks, “oooh I should make that.”

But I was talking to Son about TikTok trends and showed him how this was trending, and he was like, “oooh, you should make that!”

At its base, the combination of pasta, feta cheese, tomatoes, and olive oil is savory and salty, with just a slight pop of tartness from the tomatoes.

And even if you don’t add anything else? It’s good.

But the shallots and garlic get oooey gooey soft and just a little caramelized in the oven, and that lemon zest and basil at the end? Add the perfect bit of bright freshness to put this pasta over the top.

And now that I’ve tried it, I can confidently say… “oooh, you should make this.”

I always want to give credit where credit is due, so as far as I can tell the “TikTok” feta pasta actually originated here, on Instagram:

Feta Pasta

adapted from Delish

Ingredients
  • 2 pints cherry or grape tomatoes
  • 1 shallot, quartered
  • 1 head garlic, cloves separated and peeled
  • 1/2 cup extra virgin olive oil (or more – I accidentally poured in too much oil the first time I made this, but I actually ended up liking it better that way!)
  • crushed red pepper flakes
  • 1 (8oz) block feta cheese
  • 1 lb pasta
  • lemon zest
  • basil or thai basil
Cooking Directions
  1. Preheat oven to 400°F. In a large ovenproof skillet or medium baking dish, combine tomatoes, shallot, garlic, and olive oil. Season with red pepper flakes.
  2. Nestle feta in the center of the dish and flip to coat in oil. Bake for 40 to 45 minutes, until tomatoes are bursting and feta is golden on top.
  3. Remove from oven and stir, mashing tomatoes and garlic into the cheesey sauce.
  4. Meanwhile, in a large pot of salted boiling water, cook pasta according to package instructions.
  5. To skillet with mashed tomatoes and feta (or a separate bowl if needed), add cooked pasta and lemon zest. Stir until completely combined. Garnish with torn basil leaves before serving.

Sub to my YouTube channel and follow me on TikTok or Instagram to get notified whenever we have new videos!

Links in this post may be affiliate posts. If you buy an item through an affiliate link, I get a small fee, which helps support this blog!
Categories
TikTok YouTube

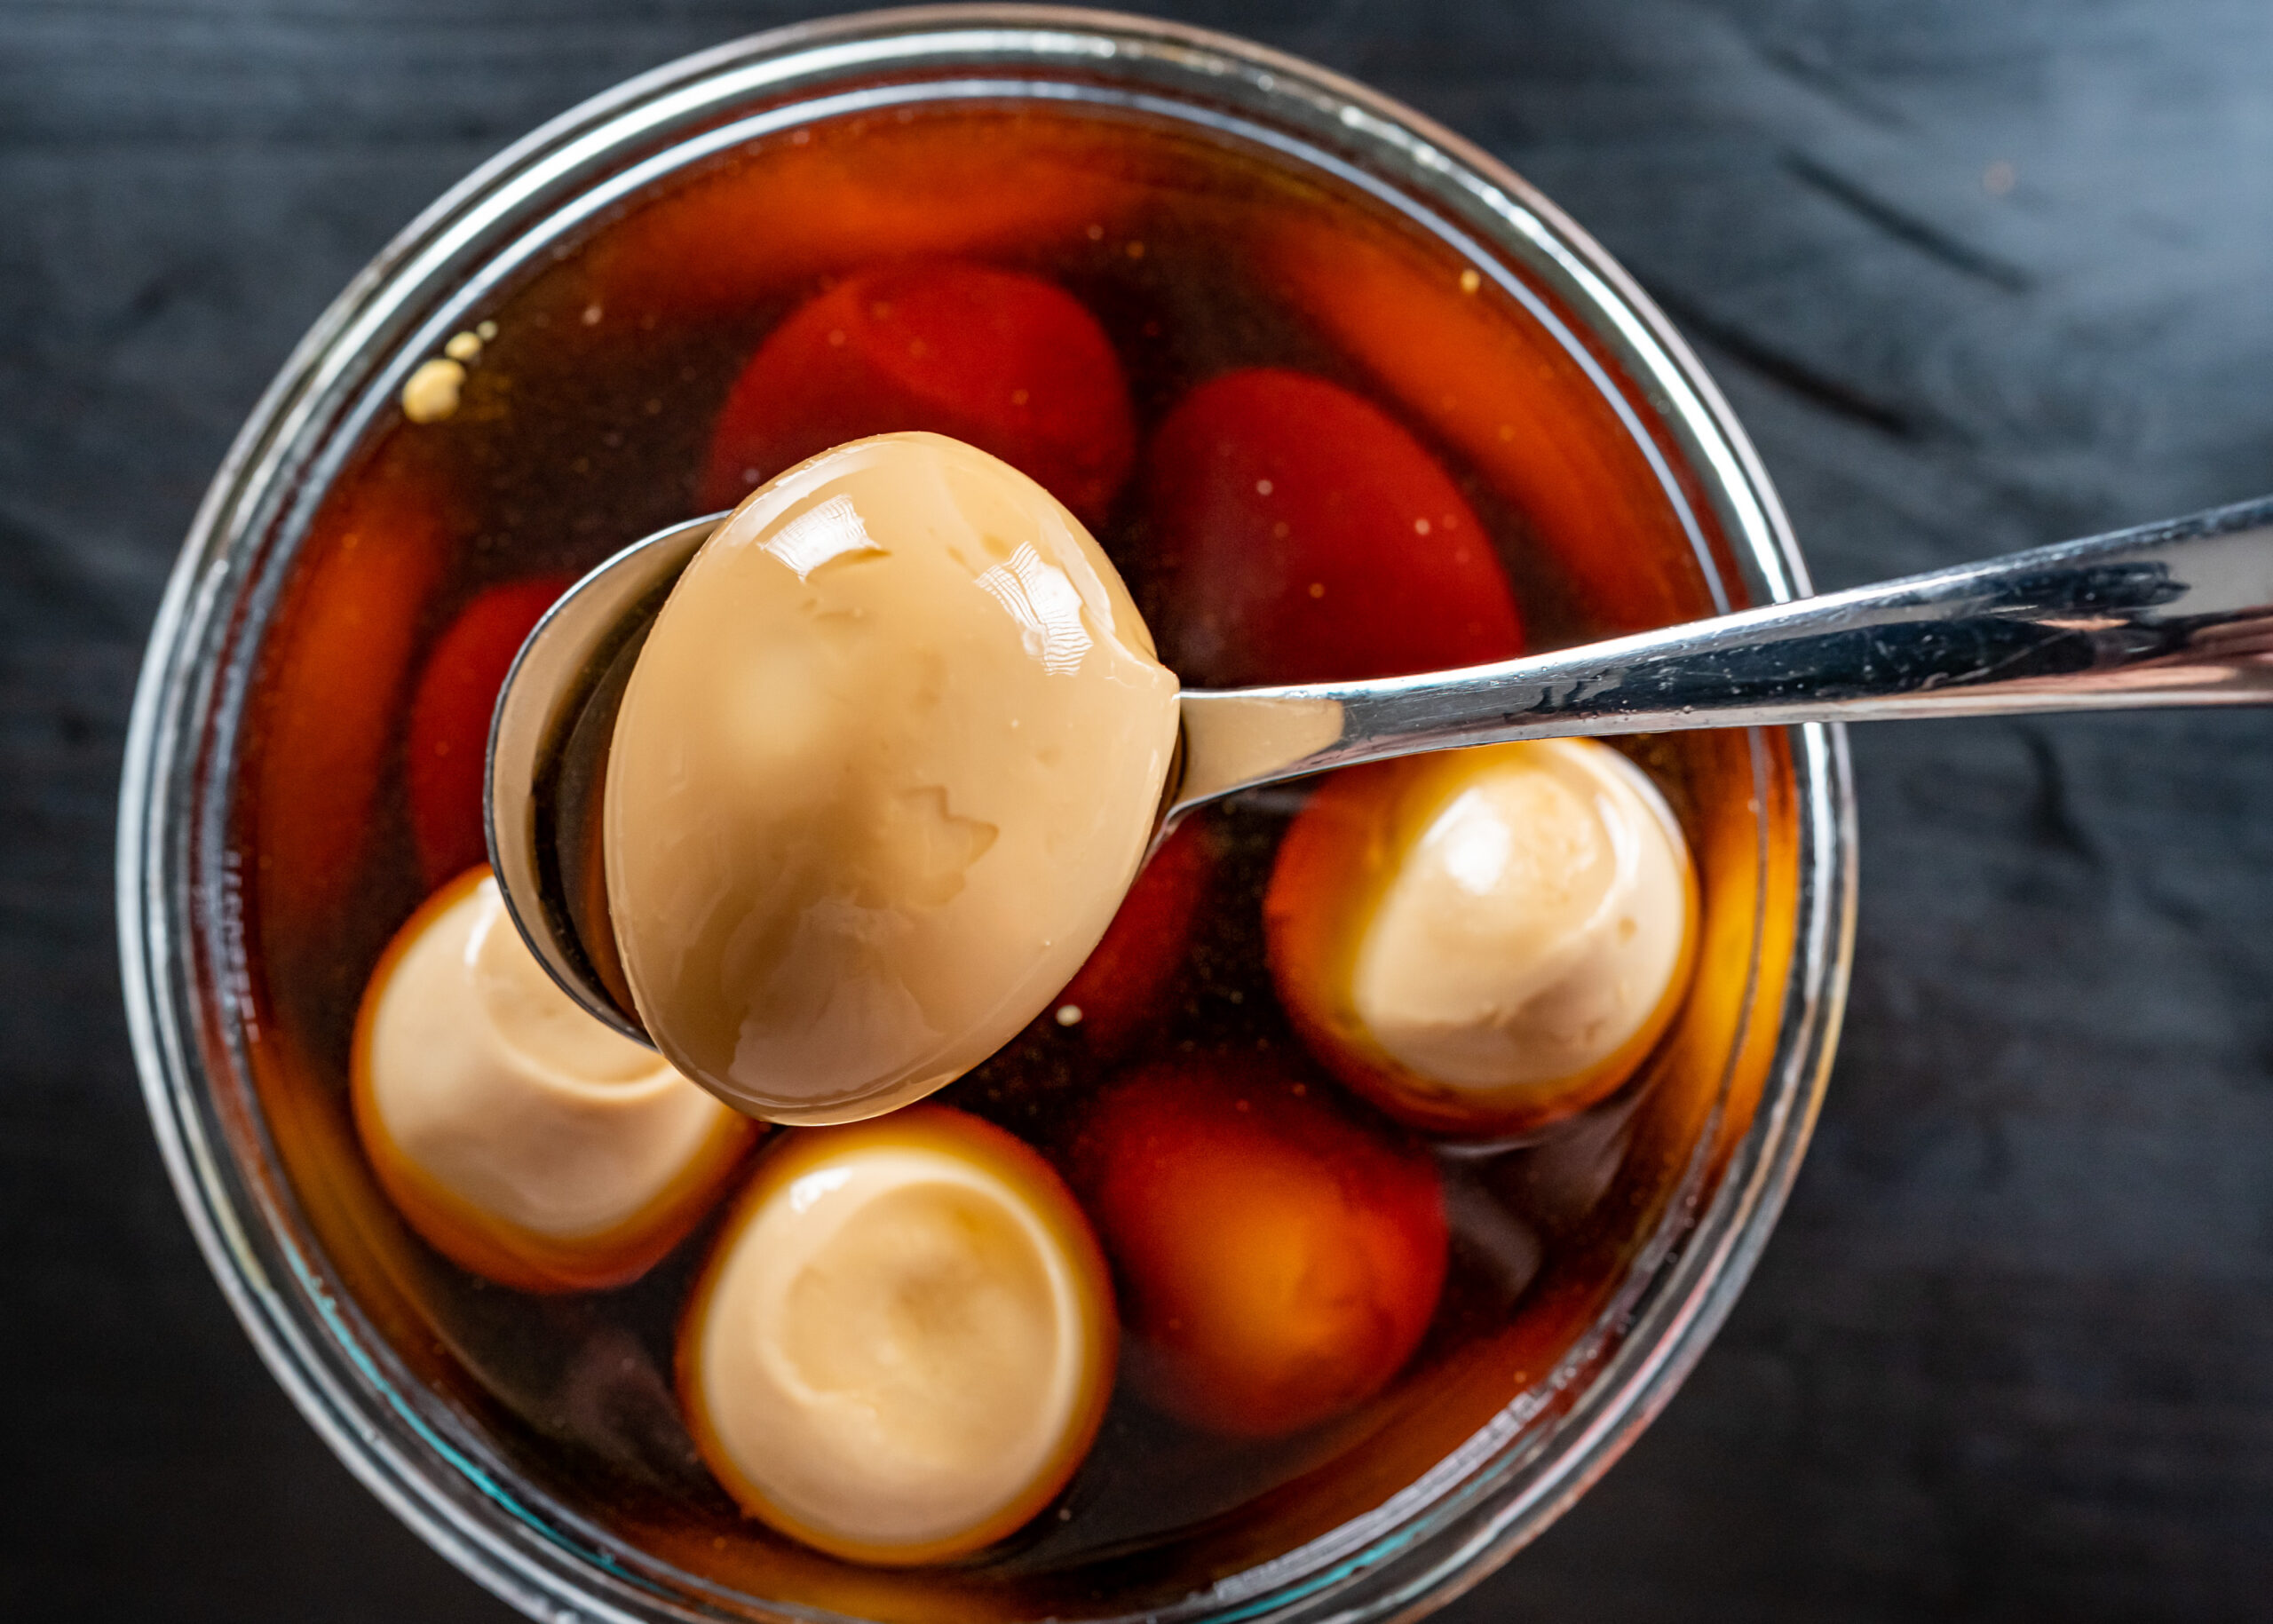
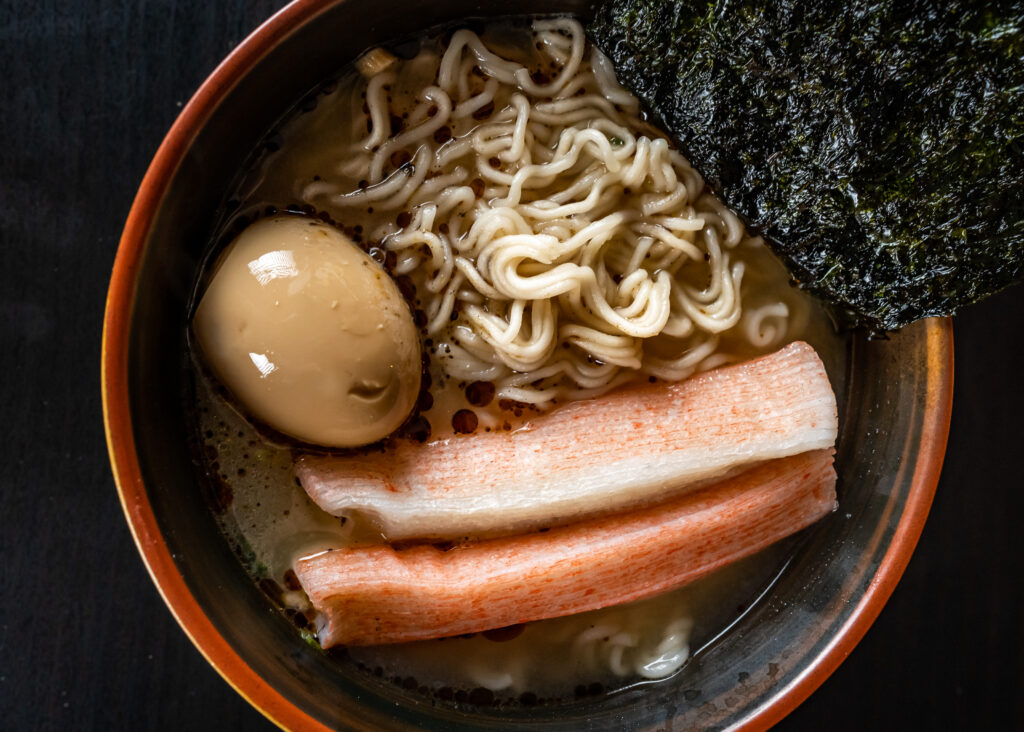
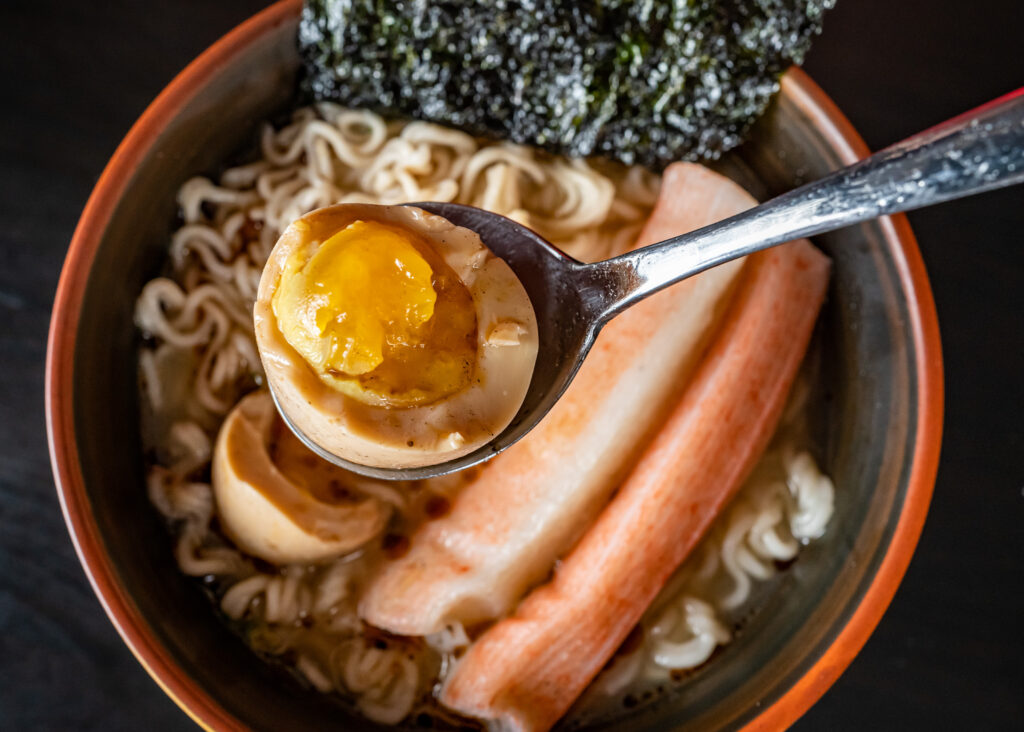
Ajitsuke Tamago (Ramen Eggs)

If the above video doesn’t load for you, click here to see it on TikTok!

“Do you watch anime and if so what’s your favorite one?”

(aka, in which I discover that an easy way to get a TON of engagement on TikTok is to ask them about anime)

So the thing is, these days I don’t watch much TV. I’m always pretty busy, and I’m generally more of a book reader than a TV-watcher.

That being said, I absolutely did grow up watching a little anime, and have watched a bit as an adult as well.

As a kid, Sailor Moon, Pokemon, Digimon, Dragon Ball Z, Yu-Gi-Oh… like all the shows that would be on Cartoon Network after school in the 90s. And, of course, all things Ghibli.

In the early years back when I started dating Son, we watched a ton of One Piece together, as well as HunterXHunter, a little Naruto, some Food Wars.

But I think out of all the anime we’ve ever watched, Sword Art Online is the only show we ever totally finished. Definitely never even got close to watching all thousand episodes of One Piece, although we did get pretty far in, and was just a little put off by the “meat juice!!!” in Food Wars, so we only got through a few episodes.

Do I enjoy anime? Yes! Do I get overwhelmed by ALL THE OPTIONS? Also yes! So if you’re an anime fan, tell me – what anime do you love, and what should I watch?

Ajitsuke Tamago (Ramen Eggs)

slightly adapted from Closet Cooking

Ingredients
  • 1 cup dashi
  • 1/2 cup shoyu
  • 1/2 cup sake
  • 1/2 cup mirin
  • 1/4 cup sugar
  • 12 soft-boiled eggs, peeled
Cooking Directions
  1. Heat the dashi, shoyu, sake, mirin, and sugar in a sauce pan until the sugar has dissolved. Cool completely.
  2. Place the eggs and cooled marinade in an airtight container, making sure the eggs are fully submerged. Refrigerate overnight.
  3. Enjoy in your favorite ramen, over rice, as deviled eggs

Sub to my YouTube channel and follow me on TikTok or Instagram to get notified whenever we have new videos!

Links in this post may be affiliate posts. If you buy an item through an affiliate link, I get a small fee, which helps support this blog!
Categories
YouTube

Breakfast Sandwich

Question: “what’s your main dish for breakfast?”

I LOVE breakfast foods. If it’s a breakfast food, pretty much guaranteed I’m into it. If I go to a restaurant and there’s a breakfast menu, there’s a pretty good chance I’m ordering off of it, even if it’s dinnertime.

But when we’re talking about normal, everyday breakfasts, I’m a little pickier.

As much as I love pancakes and waffles and doughnuts and french toast and all sweet breakfast foods, I can’t eat them as breakfast. I’ll happily eat them for dessert, but if they’re the first thing I eat in the morning I’ll get a headache or indigestion. And even with cereal, I tend to get hungry again pretty quickly if I only eat sweet foods for breakfast.

A few months ago, I posted a video of breakfast “tacos” with eggs and spinach and such. That, for a very long time, was what I ate every single day for breakfast. It’s filling, it’s satisfying, it gets me a few veggies first thing in the morning.

These days, since I’m cooking so much for TikTok and YouTube, I’m tending to eat leftovers for breakfast more often – we definitely ate sweet and sour chicken for breakfast a few days ago.

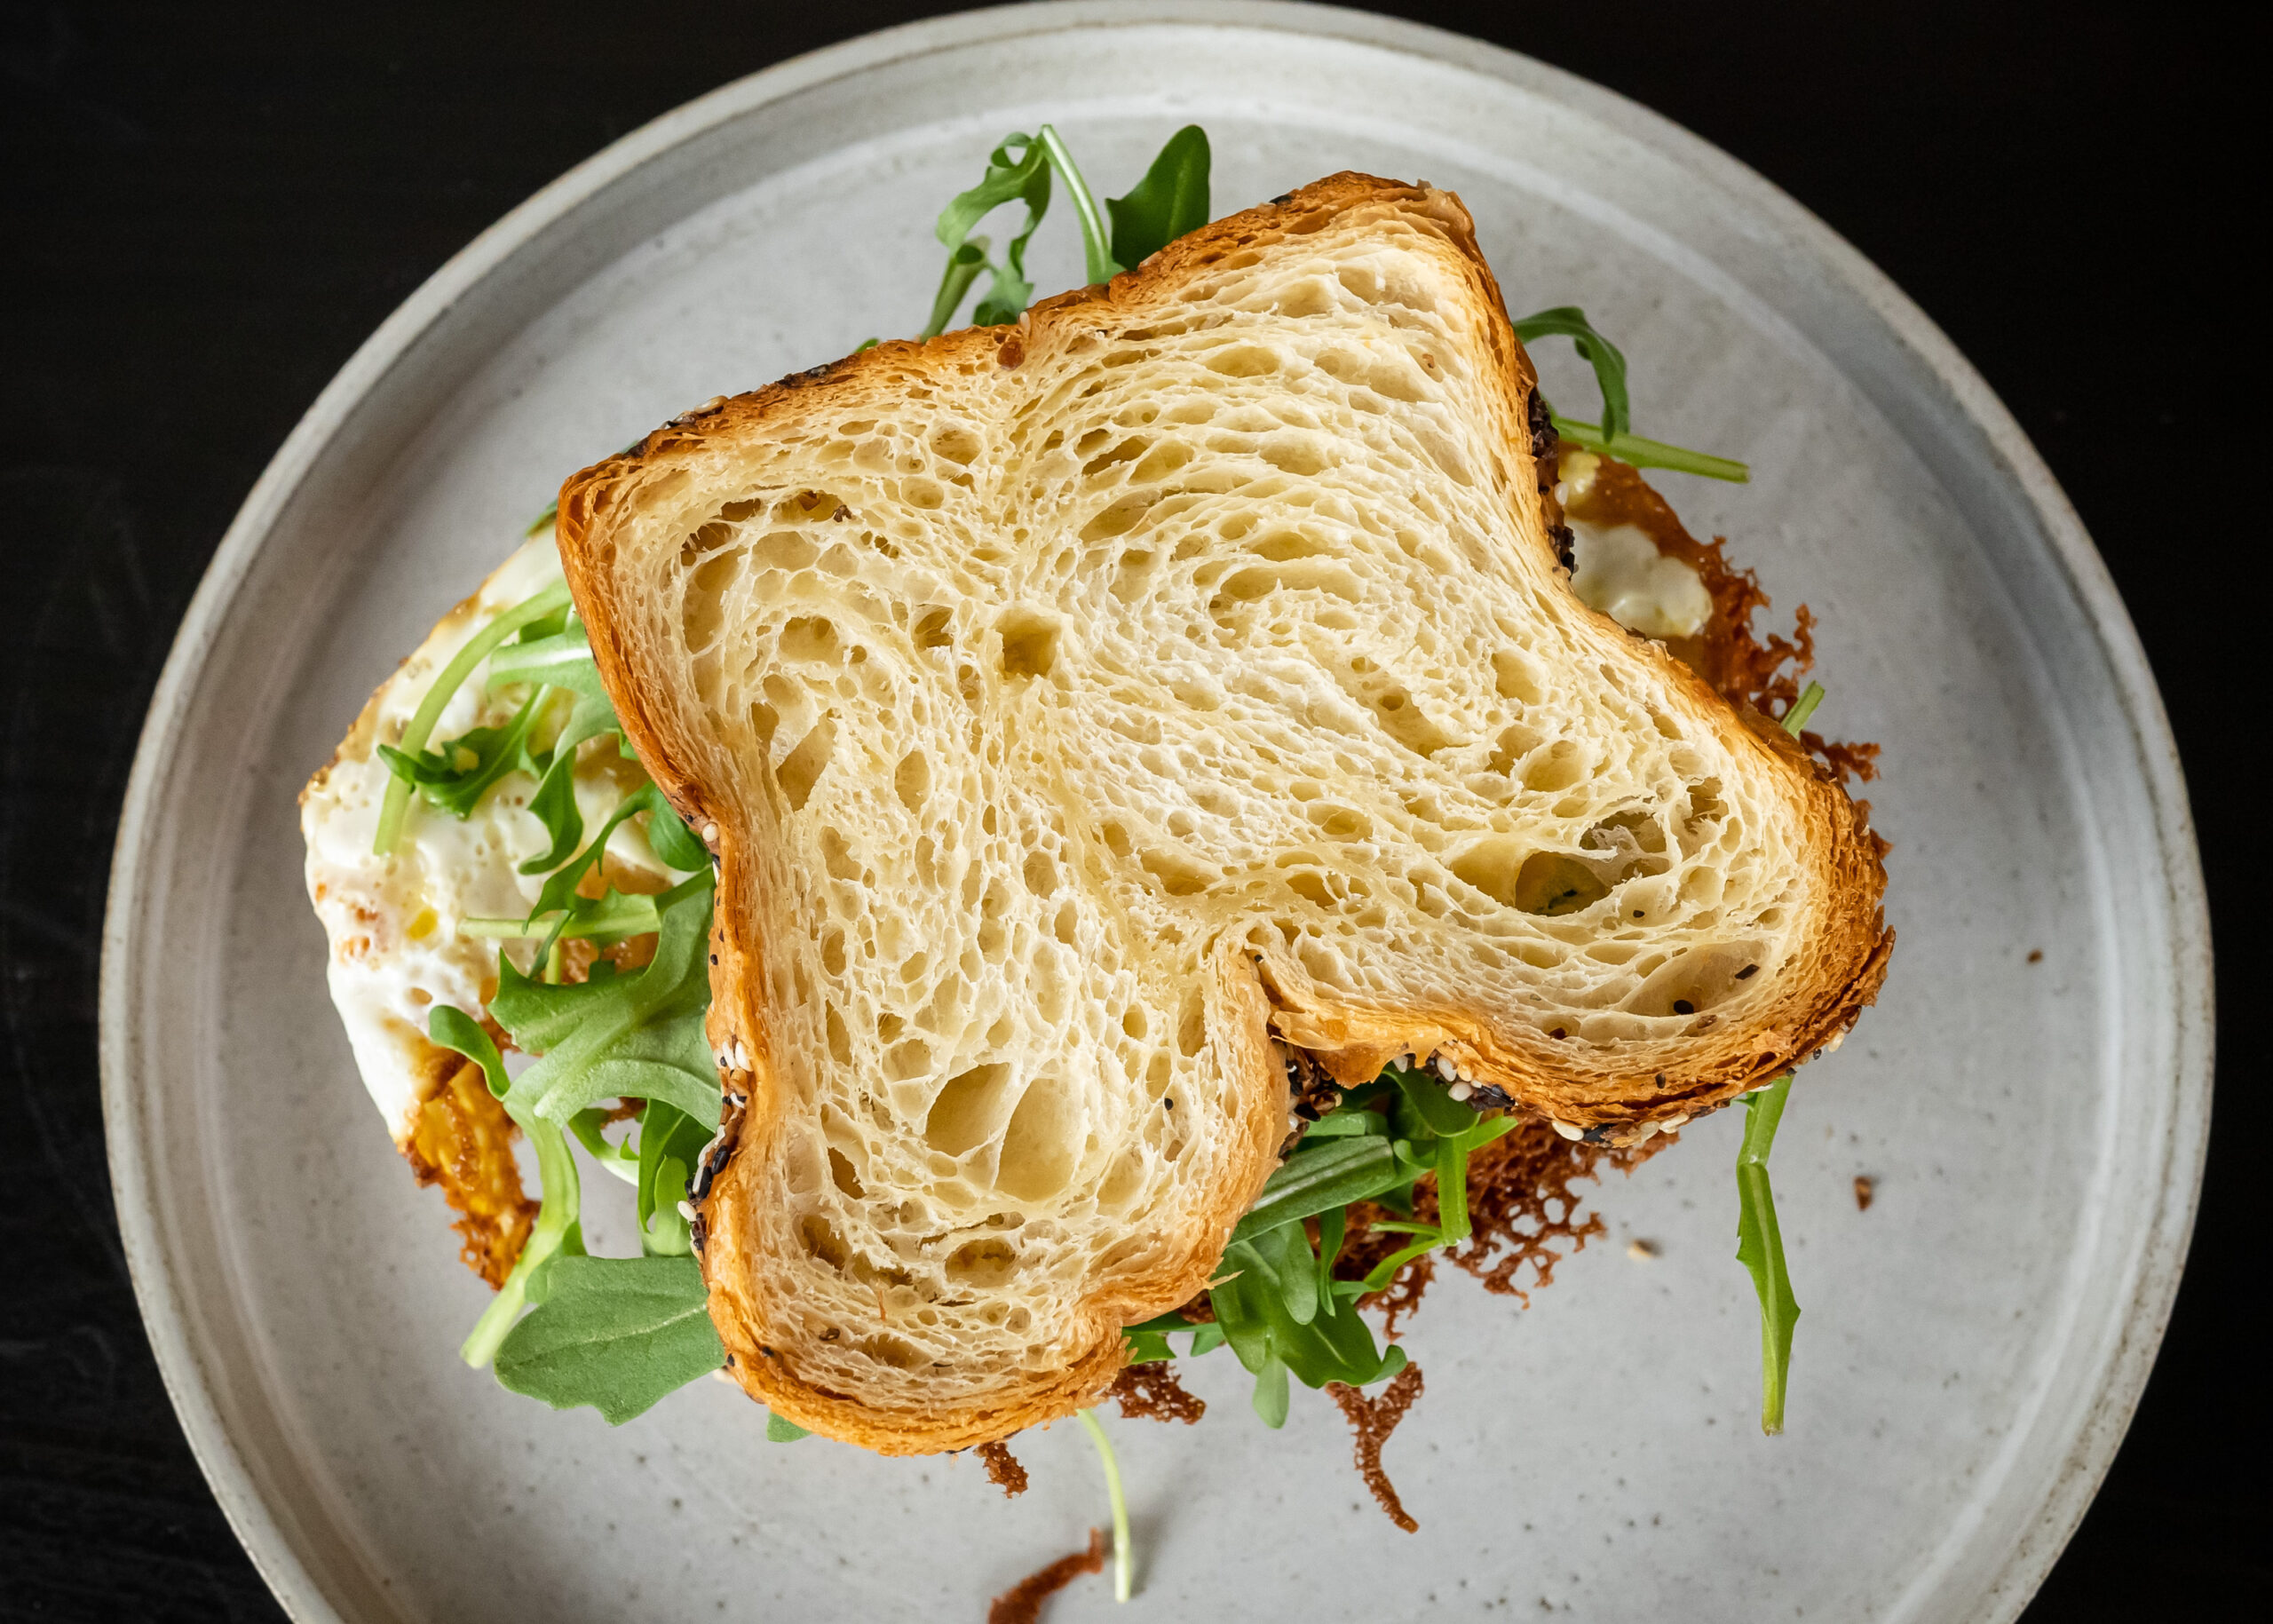
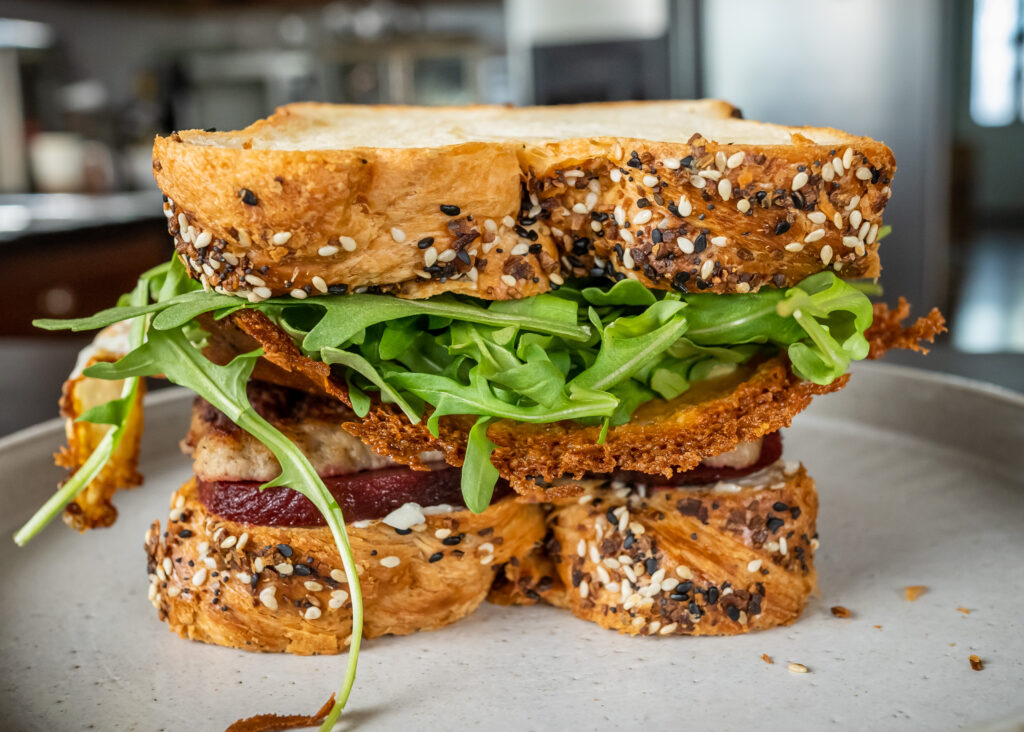
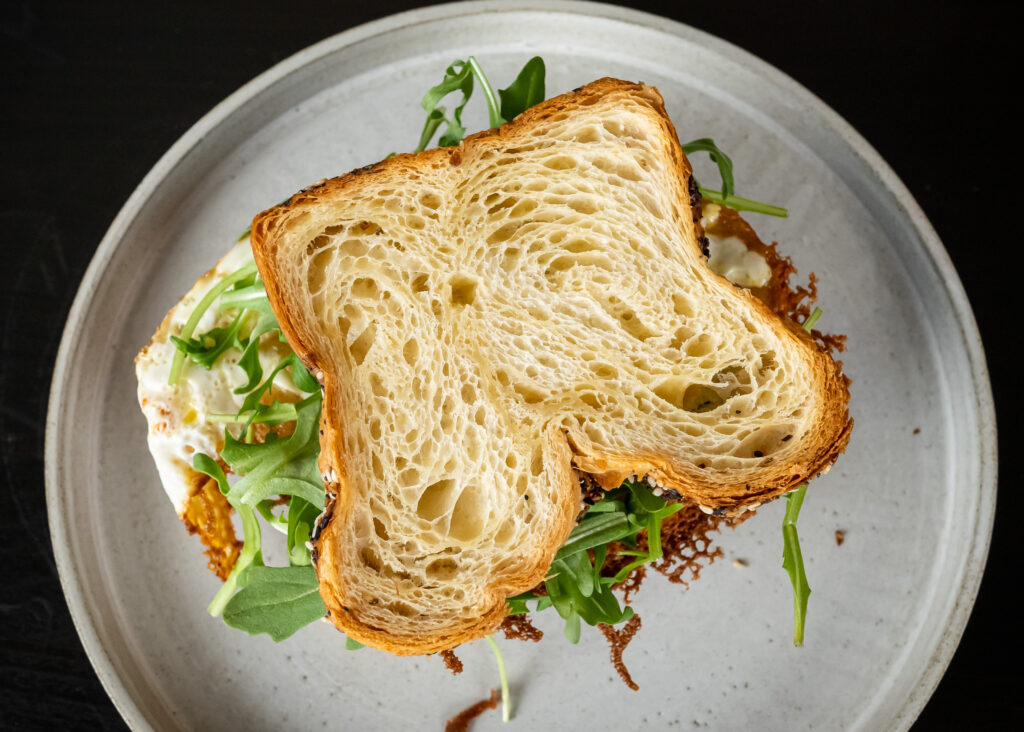
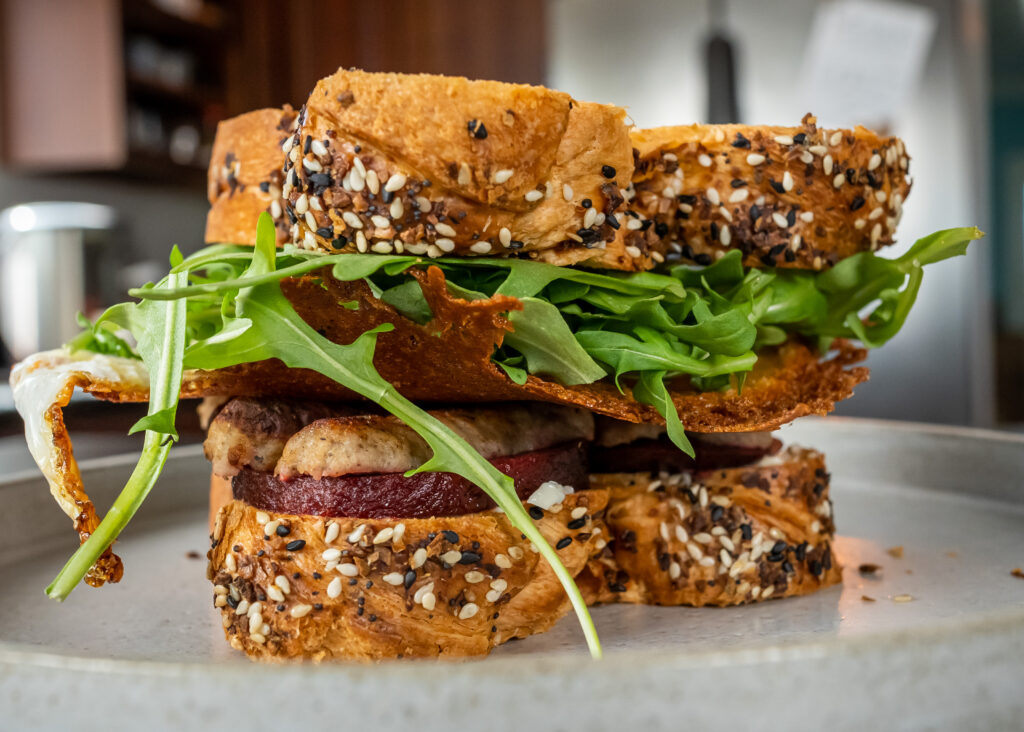
But if I don’t have any leftovers and need something to eat, I’ve been making this breakfast sandwich a lot lately: a buttered english muffin with beets, sausage, frico eggs, and arugula.

It’s tasty, it’s filling, it’s got some veggies, and it is a very, very good breakfast.

Breakfast Sandwich

Ingredients
  • breakfast sausage
  • small handful of shredded cheese
  • 1 large egg
  • english muffin or 1 slice of bread
  • unsalted butter
  • 1 cooked beet, sliced
  • small handful of arugula
Cooking Directions
  1. In a skillet over medium heat, brown the breakfast sausage until cooked through and browned on both sides. Set aside.
  2. Add the cheese in a mound to the skillet, and let melt. Crack egg over cheese, trying to center the yolk over the melted cheese. Cook until the white is set.
  3. Lightly toast the english muffin or bread, then butter while still hot.
  4. Make the sandwich with the sliced beets, frico egg, sausage, and arugula.
  5. Enjoy!

Sub to my YouTube channel and follow me on TikTok or Instagram to get notified whenever we have new videos!

Links in this post may be affiliate posts. If you buy an item through an affiliate link, I get a small fee, which helps support this blog!
Categories
YouTube

Tamago Breakfast Sandwich

Question: “has anything happened that has made you question continuing tiktok or any mean comments?”

Surprisingly, not at all! Y’all have been the most supportive, wholesome, wonderful people and I’m really grateful that I’ve gotten so many sweet comments from you all.

Occasionally someone wants to be rude, but the thing is, I’ve been making content on the internet for almost 15 years now, so I’m kind of used to not letting it get to me too much.

The first time I ever got really mean comments was right after I started my blog, and I posted a tamago recipe. Some man got An-Gry that it wasn’t a rolled tamagoyaki recipe, and completely tore me apart in the comments. And I’m just here like, bro this is my mom’s recipe, she’s Japanese, what do you want. And second of all, sir, this is a tamago recipe? Why are you so angry?

When I was a Twitch streamer, people would comment on my appearance, people would get mad at how I cook… I made a lot of amazing friends through Twitch but HOLY FUDGE are there a lot of trolls.

And on YouTube… you always get that one person who has to downvote every single video, and Shrimpy gets so much hate! How can you hate Shrimpy? He is a sassy, delightful shrimp sous chef!

So… no. You’ve all been so supportive, and kind, and I’m very much loving being here.

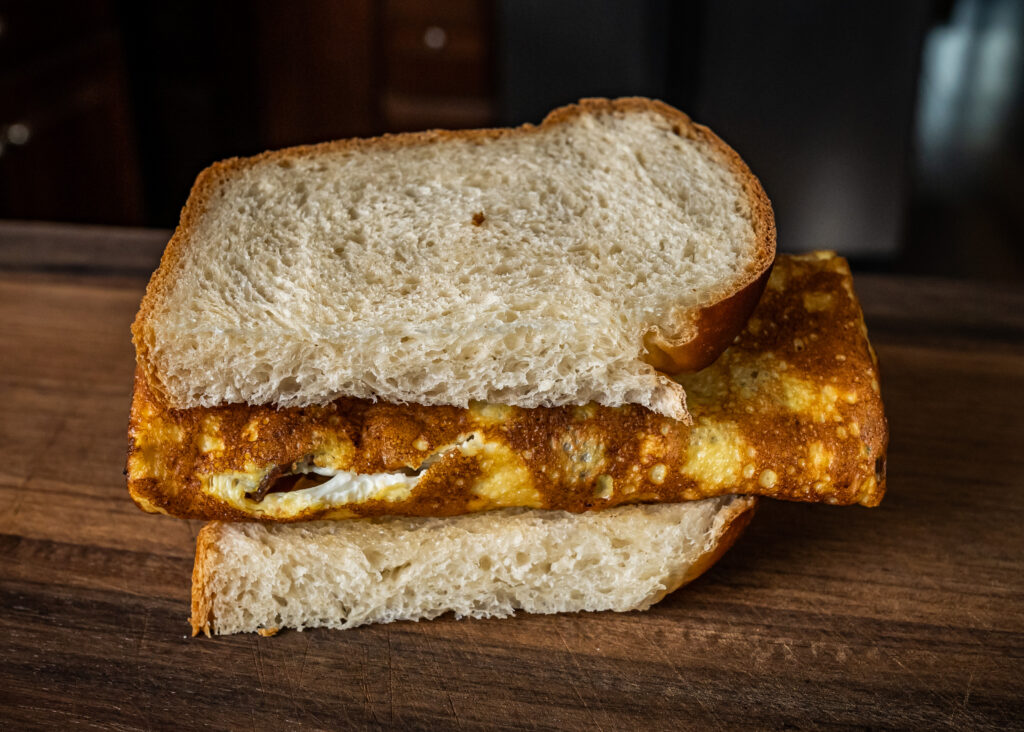
I’ve been wanting to try making a tamago breakfast sandwich for a while, and with a fresh loaf of hokkaido milk bread on hand, this seemed like the perfect opportunity.

If you’re a fan of sweet-savory breakfasts, sandwiches, and ooey gooey cheese, then you’ll love this sandwich! Both the tamago and milk bread are slightly sweet, but the cheese and bacon keep the sandwich from being a sugar overload. It’s a stick-to-your-ribs kind of breakfast, but not so heavy that it demands a nap immediately after. And if you cook up a bunch of bacon ahead of time and keep it in the fridge, this is fairly quick and easy to make!

Tamago Breakfast Sandwich

Ingredients
  • 6 eggs
  • 1/2 tsp mirin
  • shoyu (optional)
  • american cheese
  • cooked bacon crumbles
  • hokkaido milk bread
  • salted butter
Cooking Directions
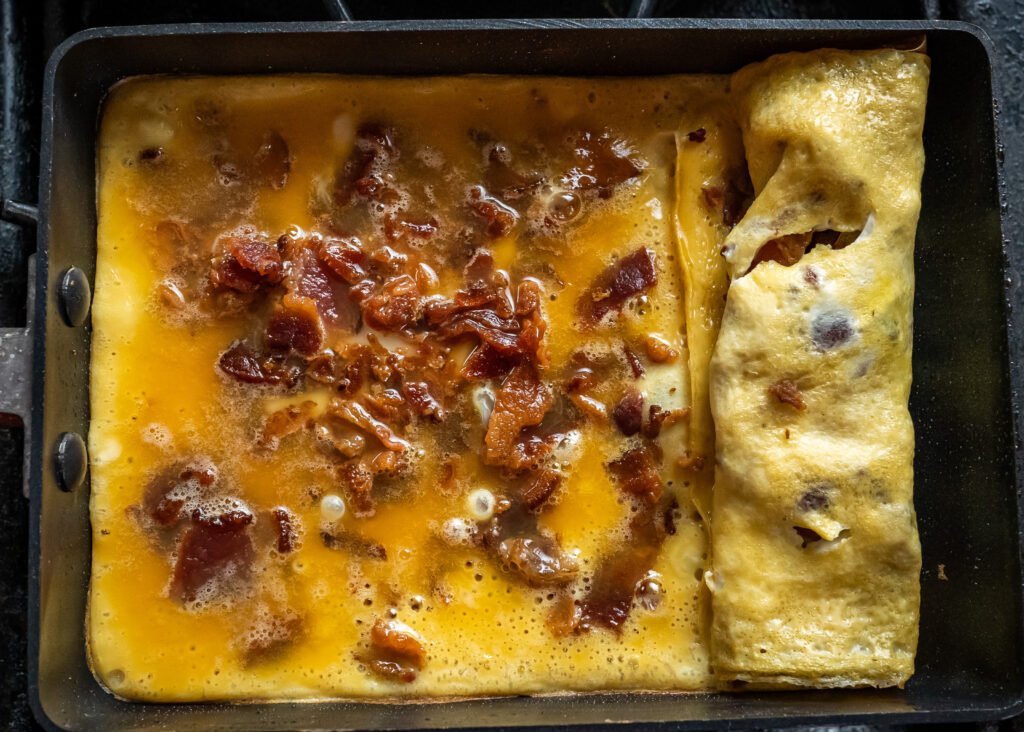
  1. Whisk together the eggs, mirin, and a dash of shoyu. Lightly oil a hot tamago pan. Pour in a thin layer of egg, to cover the pan. Let set, then use cooking chopsticks to roll it up.
  2. Add another thin layer of egg, lifting the roll to let egg go underneath. Add american cheese and bacon crumbles, then let set. Roll, and repeat with another layer of egg, cheese, and bacon. Once the egg is set and rolled, remove from the pan and set aside.
  3. Repeat with remaining egg, cheese, and bacon.
  4. Toast a slice of hokkaido milk bread, and butter. Make a sandwich with the cooked tamago. Enjoy!

Sub to my YouTube channel and follow me on TikTok or Instagram to get notified whenever we have new videos!

Links in this post may be affiliate posts. If you buy an item through an affiliate link, I get a small fee, which helps support this blog!
Categories
YouTube

Soft-boiled eggs

Today’s Q&A question is, “any food you just can NOT eat?” and this is pretty similar to that “what foods do you hate” question, but I realized, there was a food I forgot about.

Like I mentioned last time, I can eat just about anything. Even balut, I’ve eaten it before, I could eat it again, I just generally prefer not to.

But. Super super spicy foods… I just can’t. Like, my body can’t handle it, it’s just super unpleasant.

But the one food that I just find really, really unpleasant? Is natto.

I want to like it. I’ve tried it. My husband loves it.

But I just… ugh I’m not a fan.

It’s the sliminess, the bitterness, the look of it… any of those by itself would be fine – I like okra, I like bitter melon, I eat plenty of foods that literally look like shit…

But all of it combined, I just really extremely do not enjoy natto.

I won’t even let my husband kiss me if he’s been eating natto.

I guess you could say that when it comes to natto… I’m natto fan. snort

Soft-boiled eggs

Ingredients
  • eggs
  • water for boiling
  • water + ice for ice bath
Cooking Directions
  1. Bring a pot of water large enough to submerge your eggs to a boil. Add the eggs and boil for 6 1/2 minutes. Immediately transfer the eggs to an ice bath, and let cool. Refrigerate until ready to use.

Sub to my YouTube channel and follow me on TikTok or Instagram to get notified whenever we have new videos!

Links in this post may be affiliate posts. If you buy an item through an affiliate link, I get a small fee, which helps support this blog!
Categories
YouTube

Hokkaido Milk Bread

Today’s Q&A question is, “what is your favorite color?”

I always find “favorite” questions to be difficult, because I’m one of those people who’s like, “I dunno, it depends!”

In general, I’d probably go with purple. Like a soft, pastel, lavender type of purple, or purples with warmer tones. If we’d had a wedding with, like, wedding colors and stuff, I would have gone with that color… but we had a super-casual potluck, so, you know, that didn’t happen.

That being said, I don’t tend to wear a lot of purple, because I always find it difficult to find purple clothing that I like… and also I hate shopping, so I tend to go for the easiest clothing options I can manage.

People have told me over the years that I look good in red, and as an extremely not stylish human being, by default I assume that everyone’s more fashionable than I am. So do I wear a lot of red.

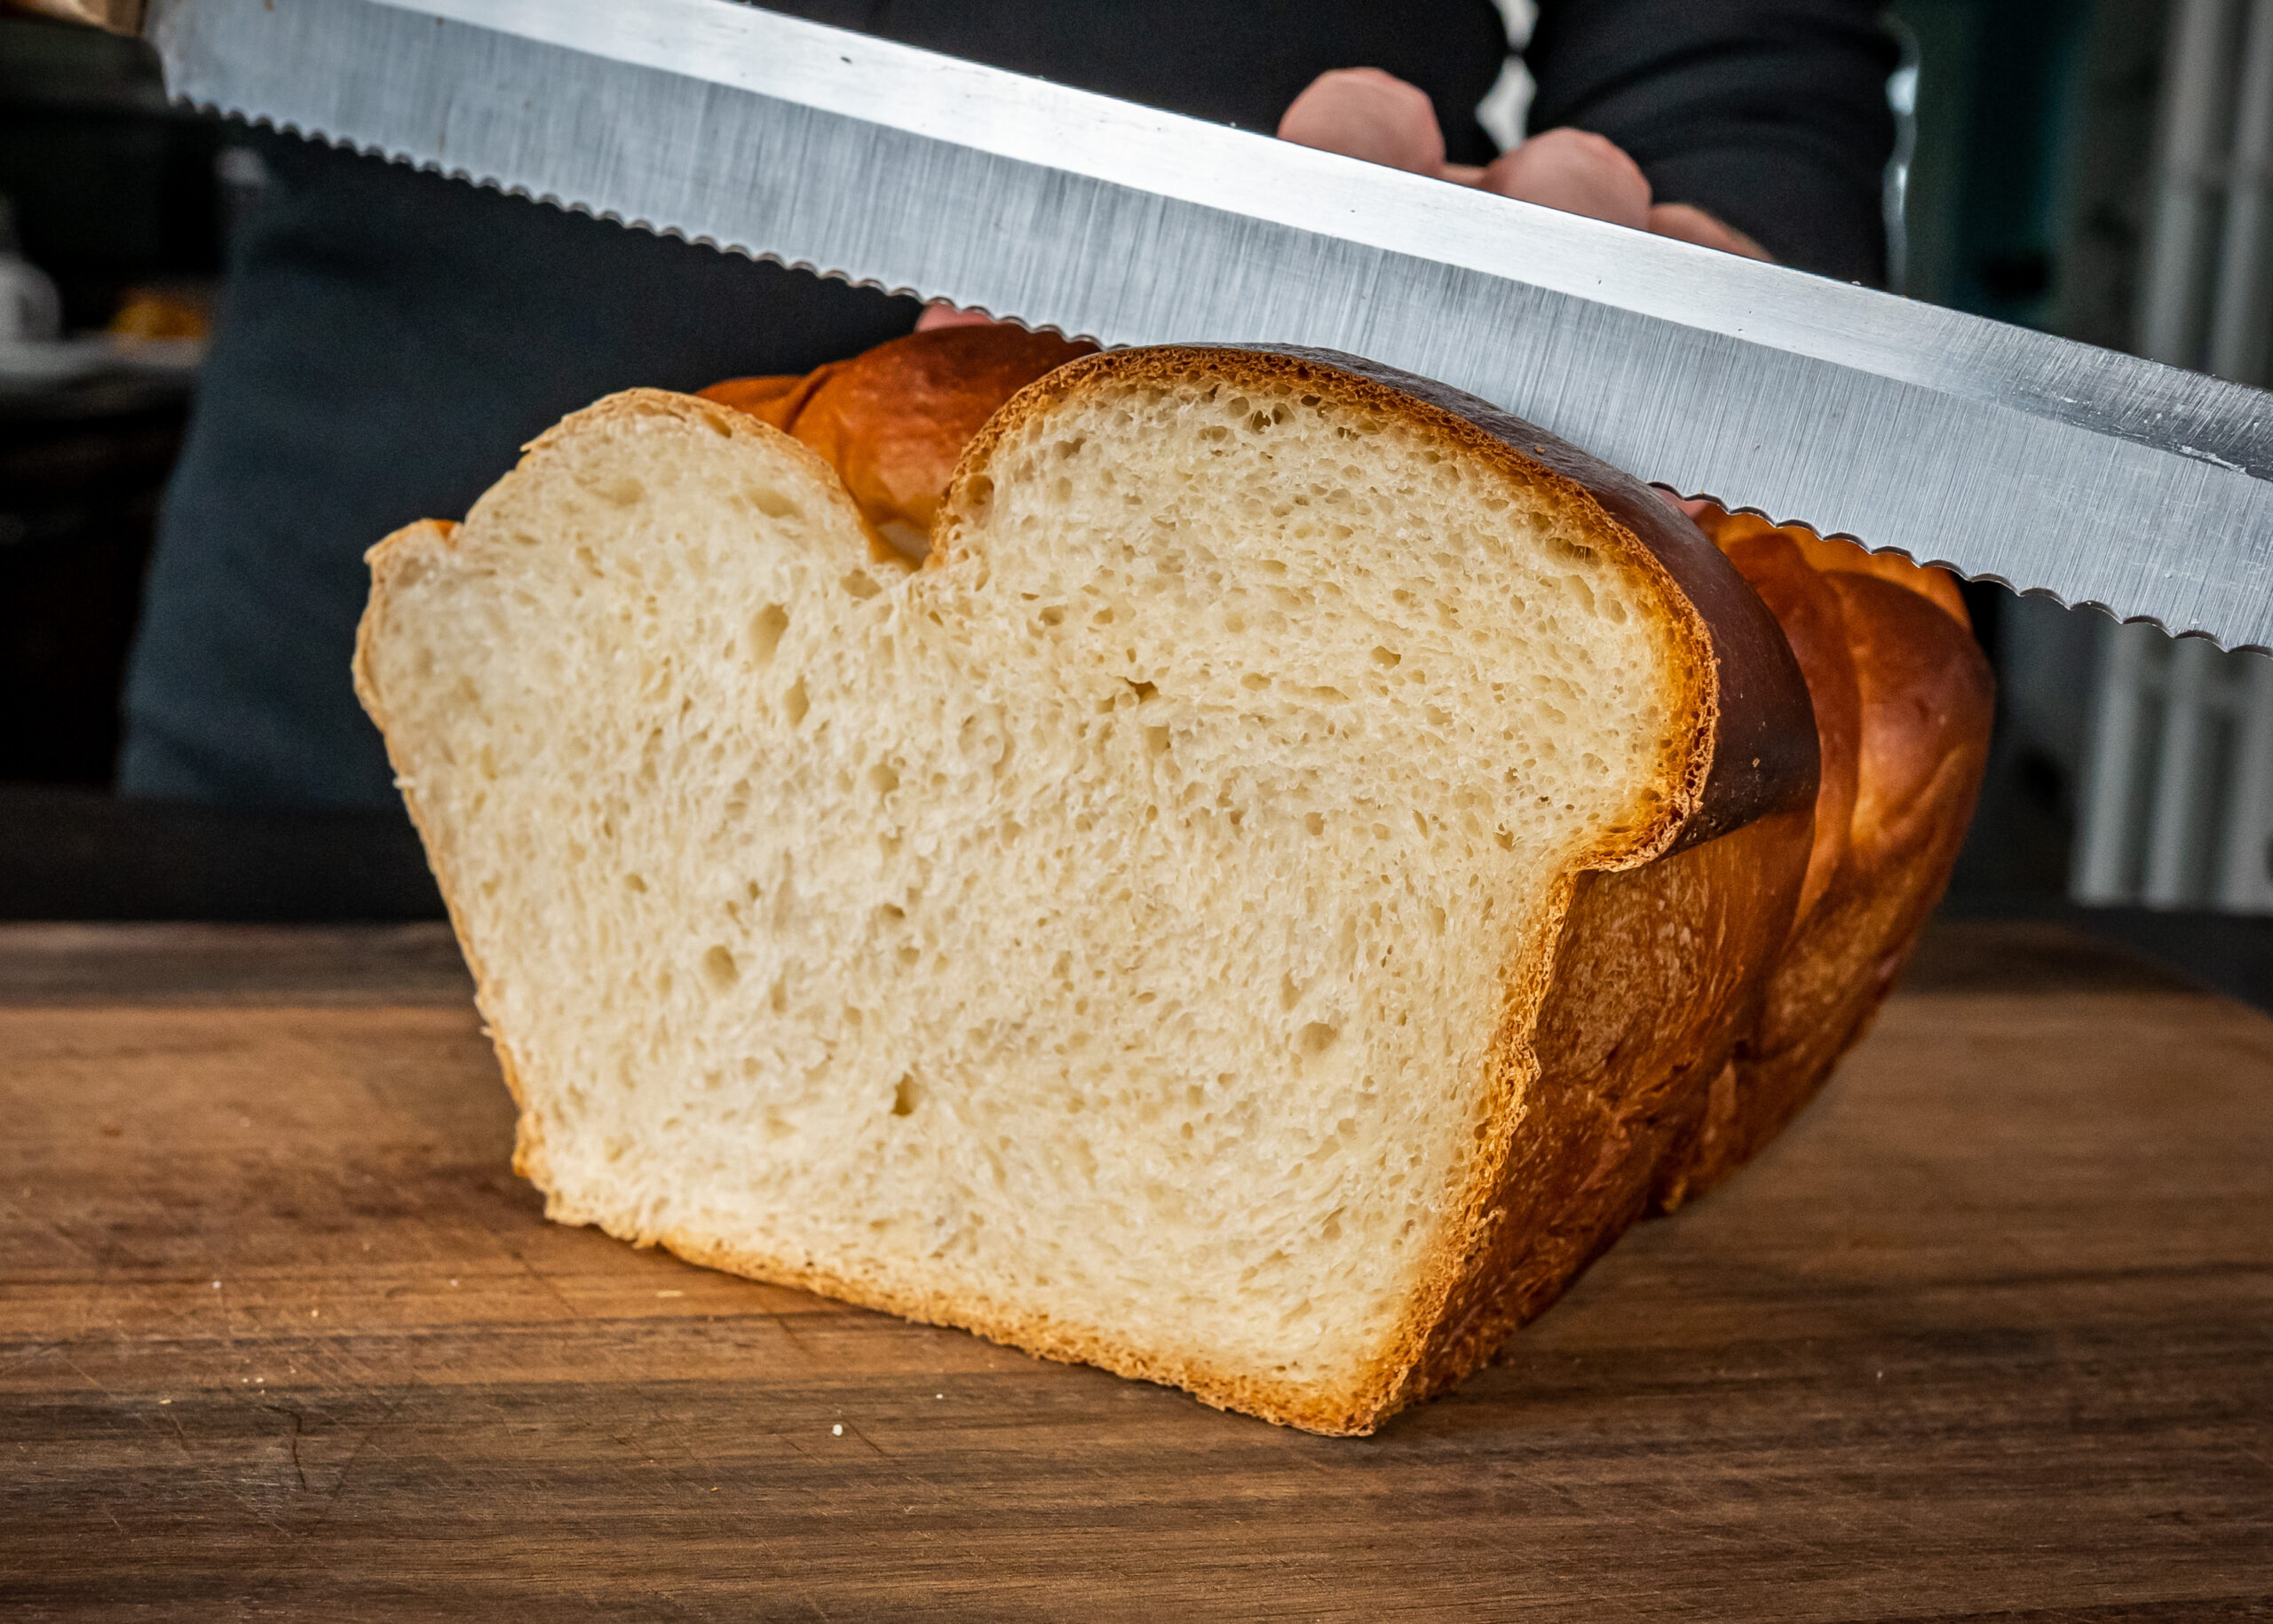
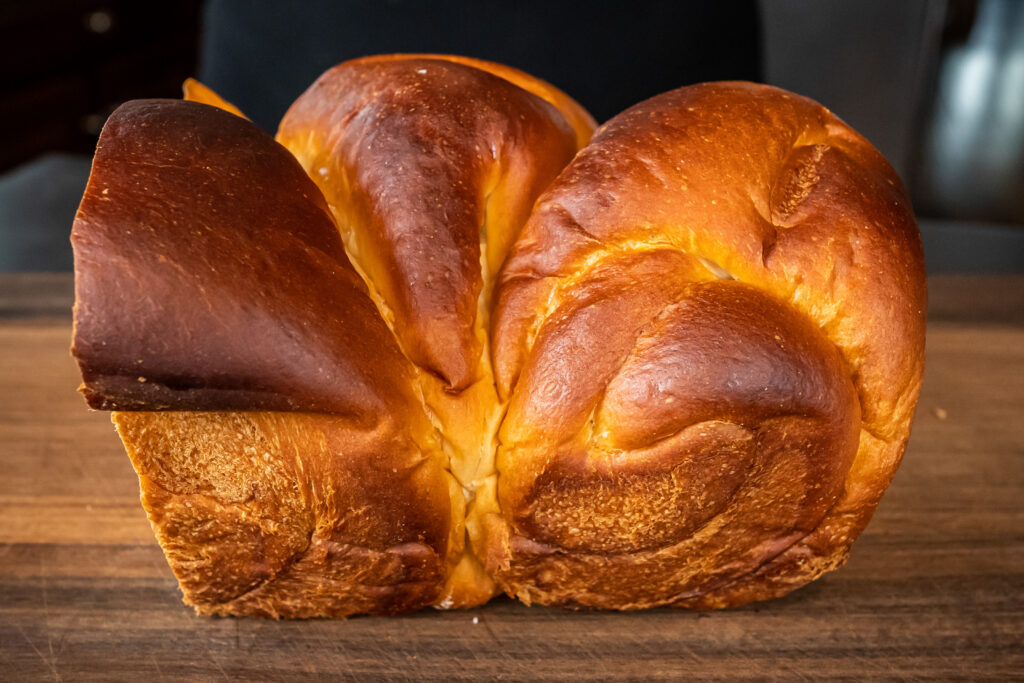
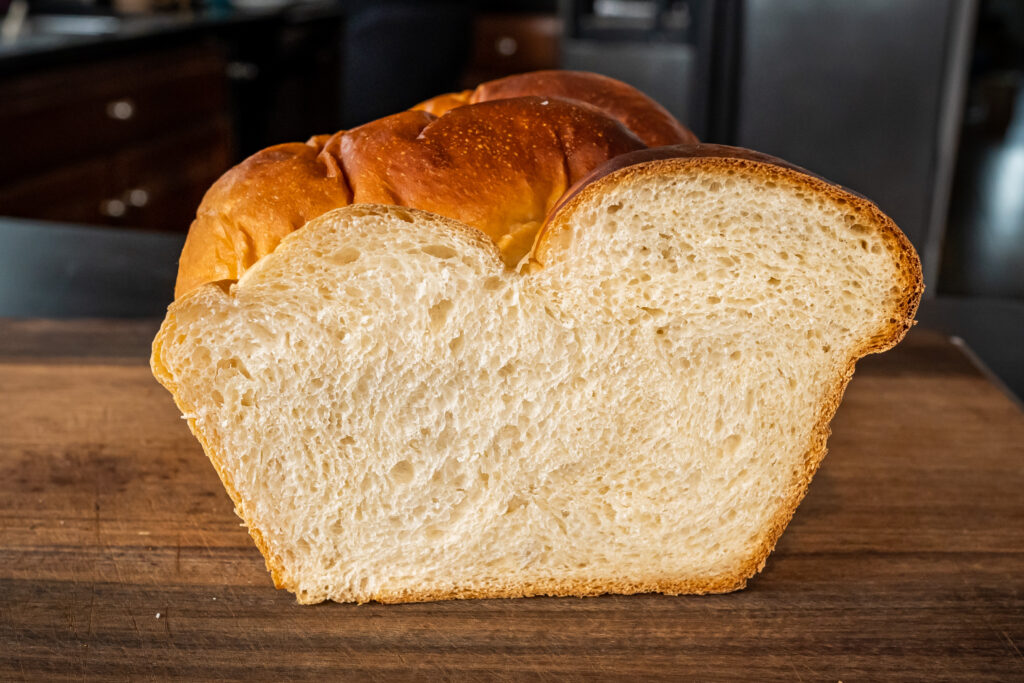
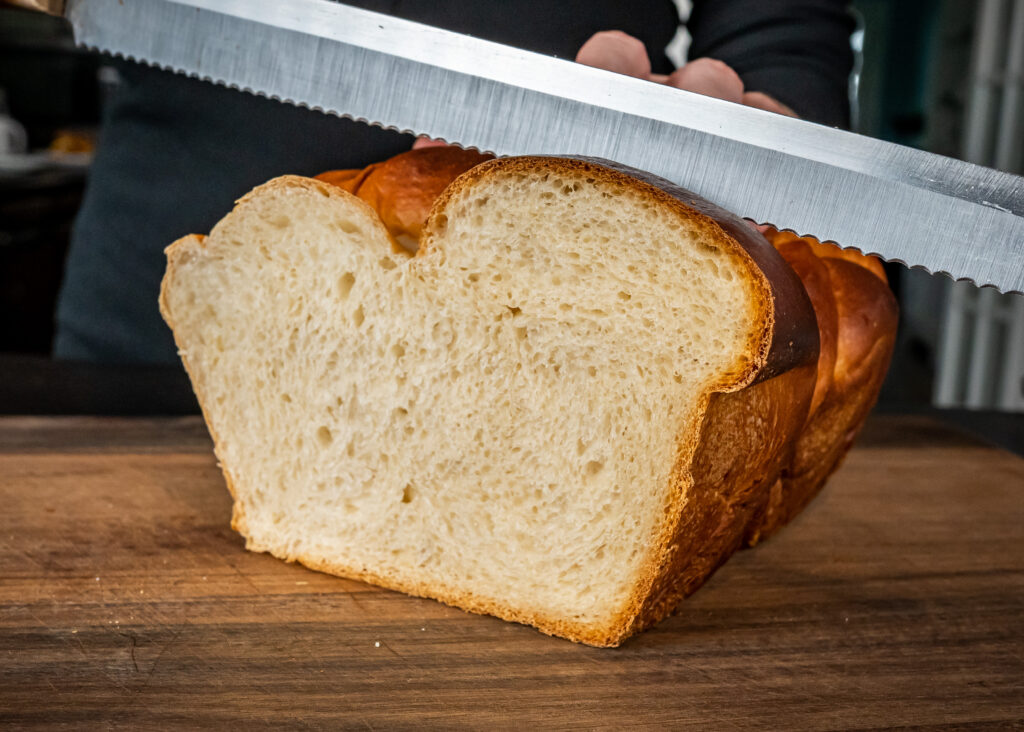
Despite my many years of avoiding bread-making due to dramatic failures and many resulting crackers, I’ve finally succeeded at a bread recipe! And look how FLUFFY it is!

This milk bread recipe turns out sweet and fluffy and is delightful for both sandwiches and toast… and works well enough that even I’ve been able to manage it, on multiple successful occasions!

Hokkaido Milk Bread

Ingredients
  • 20g + 350g bread flour
  • 100ml water
  • 7g fast action yeast
  • 1 tsp salt
  • 60g sugar
  • 1 tbsp milk powder
  • 2 eggs
  • 120ml milk
  • 30g softened butter
Cooking Directions
  1. Whisk the 20g bread flour and water together in a small pot, then cook over medium-low heat, continuing to whisk, until it reaches a paste-like consistency. Transfer to a bowl and cover with plastic wrap, then let cool.
  2. In the bowl of a stand mixer, combine the 350g bread flour, yeast, salt, sugar, and milk powder. In the bowl with the flour/water paste, add one of the eggs and the milk and whisk together, then combine with the dry ingredients. Using the dough hook attachment, knead this mixture 5-10 minutes, until the dough comes together.
  3. Letting the stand mixer continue to run, add the butter in tablespoons, integrating each tablespoon fully before adding the next. Once all the butter is added, knead for another 20 minutes, until the dough is very elastic. Transfer to a greased bowl, and cover with plastic wrap. Let the dough rise until doubled..
  4. Punch the risen dough down, then divide into four pieces. Using a rolling pin, roll each piece out into a long oval, then fold the long sides over each other (it will look like a very skinny burrito). Then roll up each piece into a spiral, like you’re making a cinnamon roll.
  5. Place all four spirals in a row in a greased loaf pan, with their ends tucked underneath. Cover and let rise until doubled. While the bread is rising, preheat the oven to 350F. Beat the remaining egg with a splash of milk, and brush the top of the risen dough with the egg wash.
  6. Bake for 40 minutes at 350F, or until the internal temperature of the bread reaches 200F with a probe thermometer. If the crust is darkening too quickly, you can cover the bread with foil while it bakes. Once it’s done baking, turn the bread out onto a wire rack (use a table knife to loosen it from the pan if needed) and let cool completely.

Sub to my YouTube channel and follow me on TikTok or Instagram to get notified whenever we have new videos!

Links in this post may be affiliate posts. If you buy an item through an affiliate link, I get a small fee, which helps support this blog!