Categories
YouTube

Thai iced tea

Who else absolutely has to get Thai iced tea every time you go out for Thai food? I LOVE Thai iced tea!

But did you know – because I certainly did not – that Thai iced tea is not actually very Thai?

Apparently tea didn’t even make it to Thailand as a common drink until China brought in tea as a cash crop in the 1980s… which means that my husband is older than Thai iced tea. WHAT.

In Thailand they drank black tea with sweetened condensed milk, but it was Thai chefs in American Thai restaurants trying to appeal to American sensibilities who added orange food coloring, a bunch of spices, and made it way sweeter.

Here we’re all thinking the orange color is some traditional ingredient, and instead they’re just trying to make their drinks Instagrammable before Instagram even existed.

And then it got so popular… that now you can find the American version in Thailand.

What is your favorite Thai food?
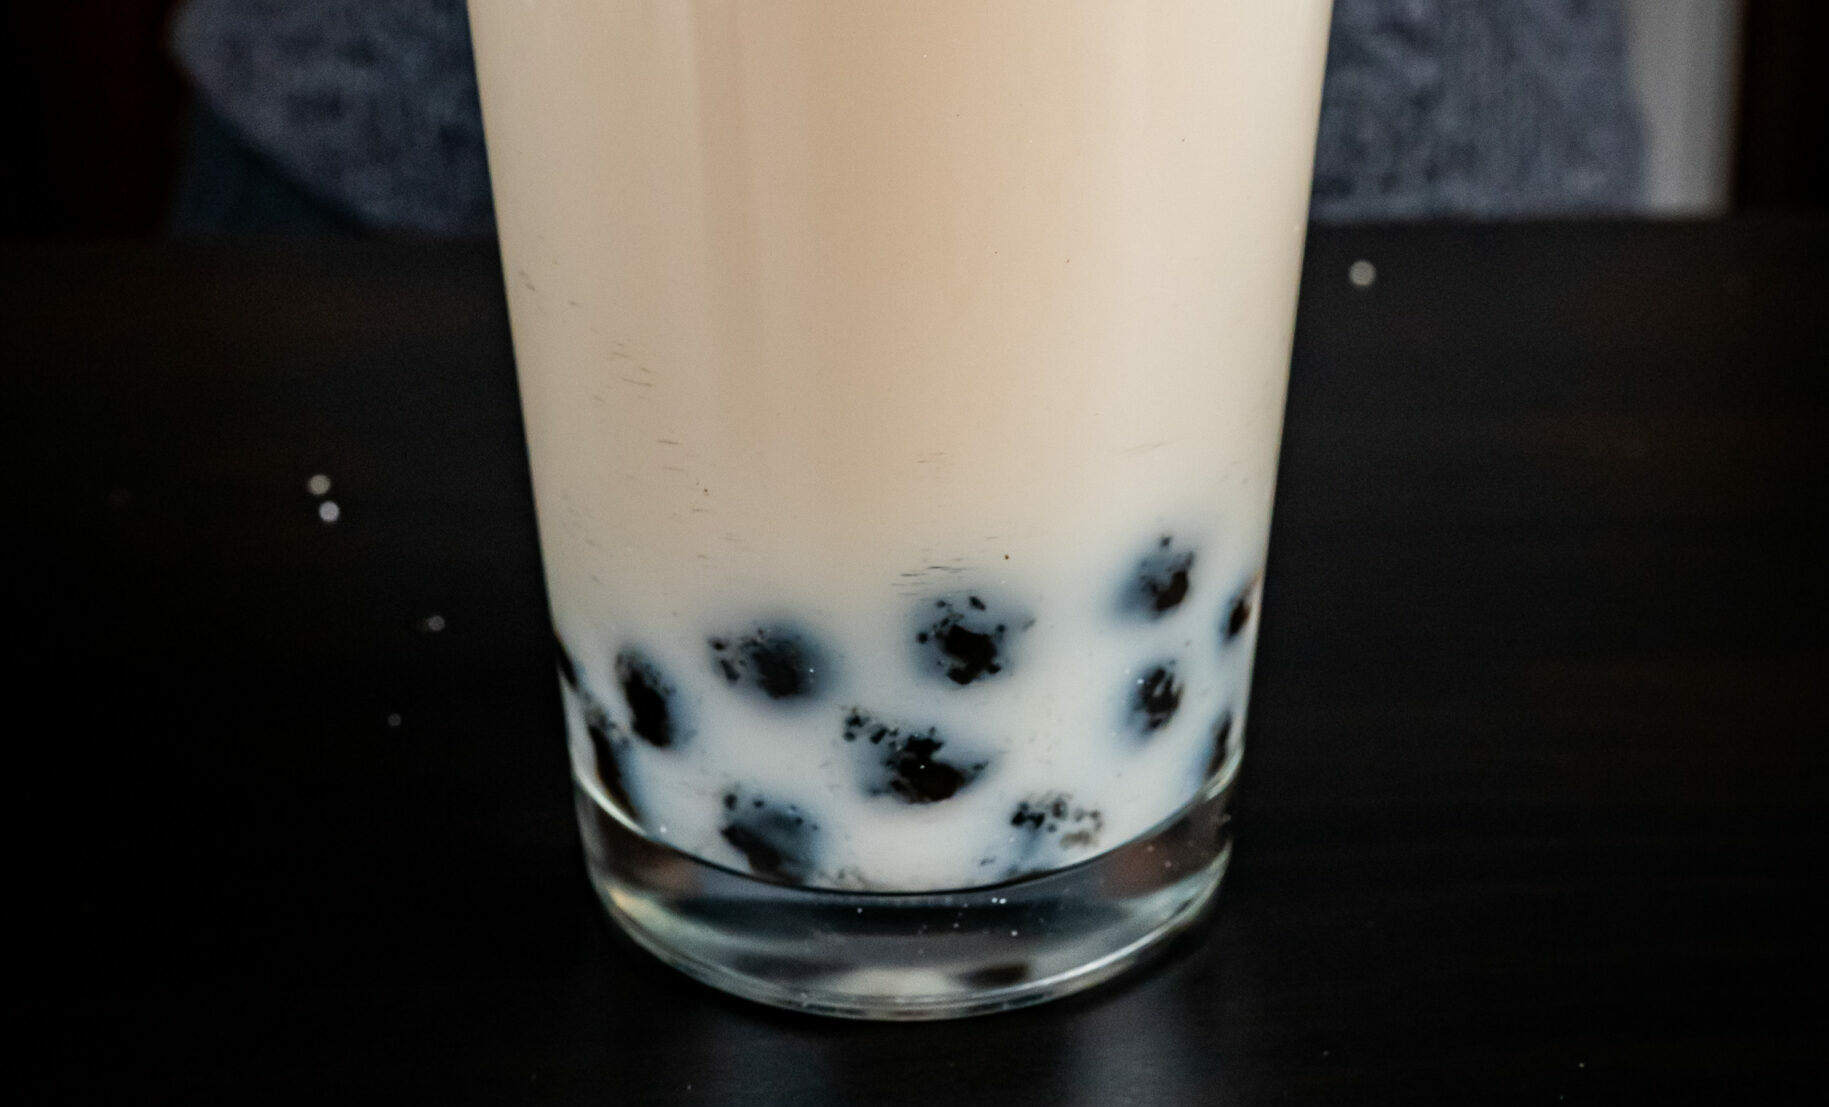
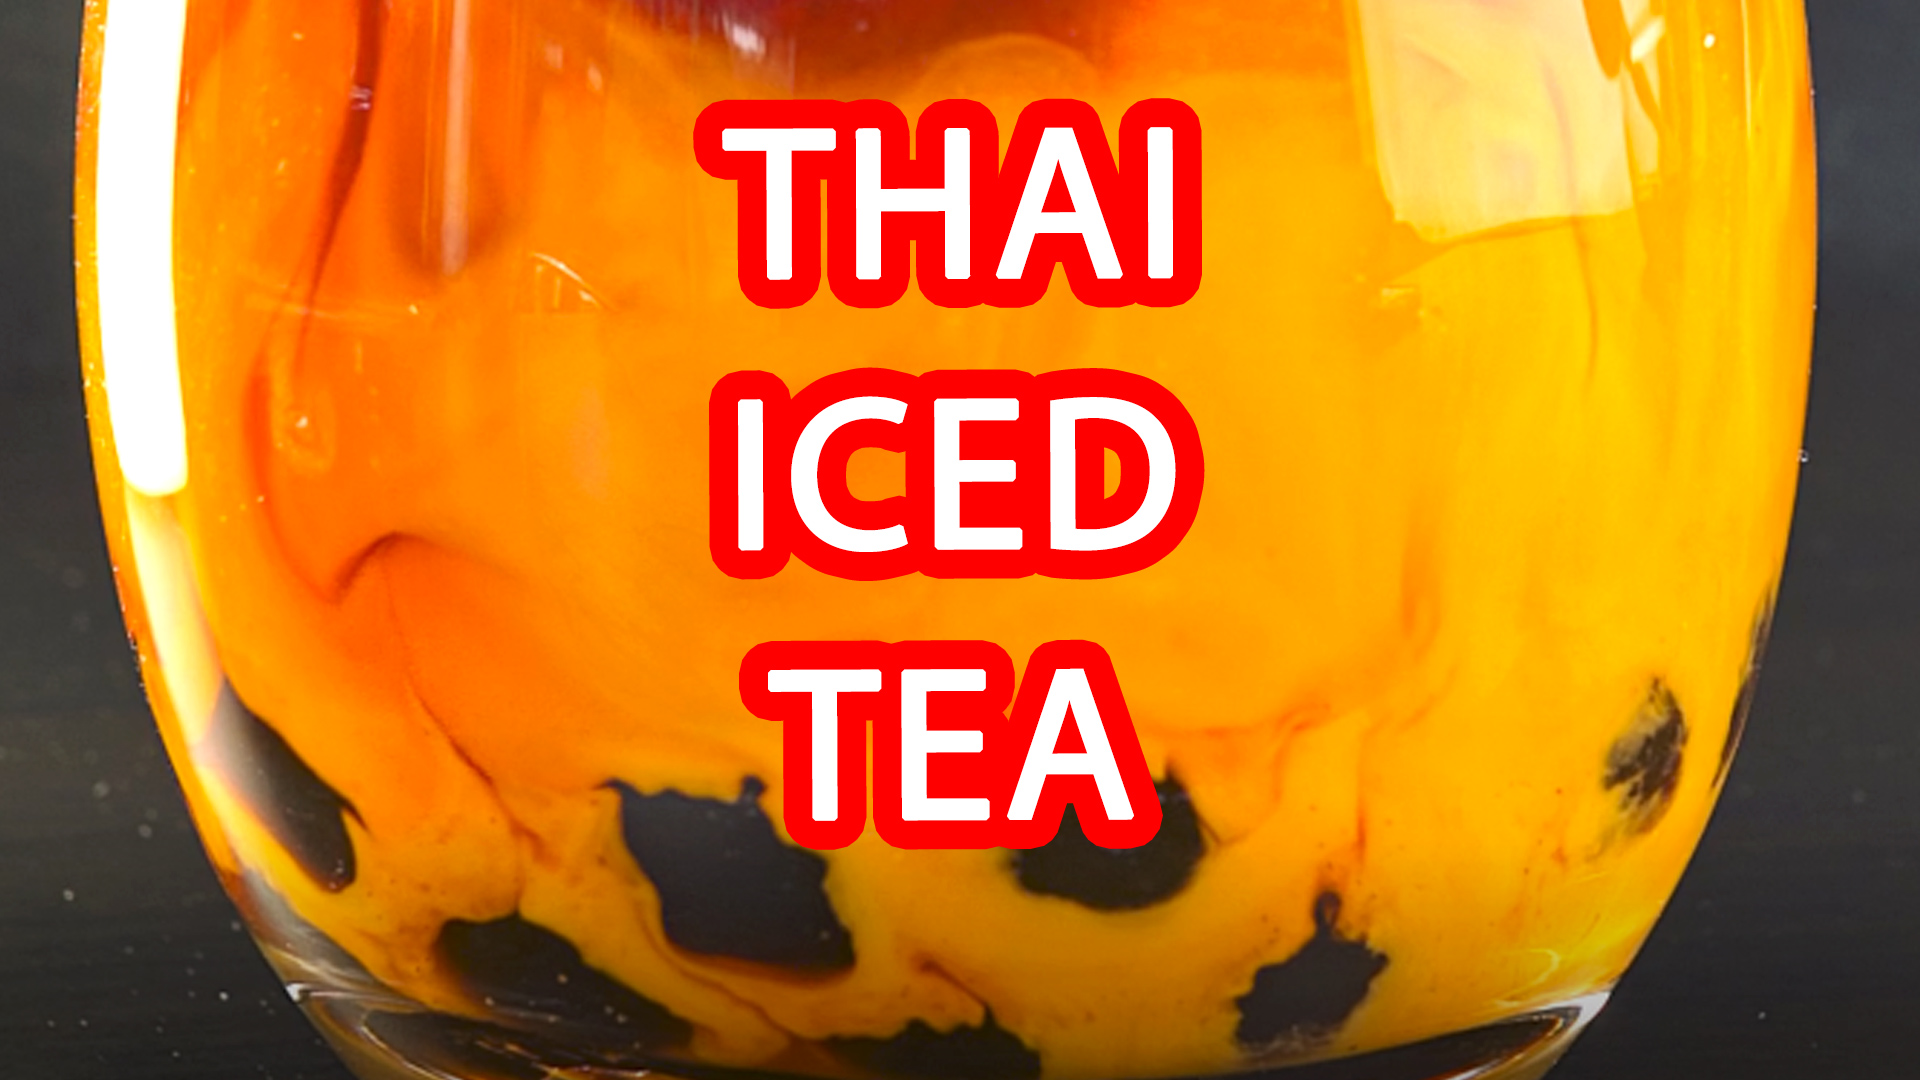
Thai Iced Tea

slightly adapted from White on Rice Couple

Ingredients
  • 4 cups water
  • 3/4 cup sugar
  • 1 cup thai tea mix
  • ice
  • boba (optional)
  • a few tbsp half and half, to taste
Cooking Directions
  1. Bring the water to a boil. Place the sugar and tea in a cheesecloth bag and add to the boiling water.
  2. Boil for 3 minutes, then remove from heat and let steep 30 min.
  3. To serve, pour into a glass with ice and/or boba. Add a few tablespoons of half and half, to taste.

Sub to my YouTube channel and follow me on TikTok or Instagram to get notified whenever we have new videos!

Links in this post may be affiliate posts. If you buy an item through an affiliate link, I get a small fee, which helps support this blog!

Categories
YouTube

Homemade Boba

Where all my boba lovers at? We LOVE boba.

Pre-pandemic, every time we’d need to run errands, or visit the in-laws… OH LOOK there’s a boba shop on the way, guess we should stop for boba.

Obviously there are a lot of big things I miss from before Covid, like family, and traveling… but the little thing I miss most from the beforetimes is going out for boba.

Luckily, it’s super easy to make boba at home! And yes, of course I bought the 6-pound bag of tapioca balls, don’t judge me.

This recipe comes from the Boba cookbook that was written by the people behind The Boba Guys. I’ve tried a lot of boba recipes, and this one’s my favorite of the recipes that use these premade, dried tapioca pearls.

It takes an hour and a half, but that’s mostly hands-off… but at the end? You get boba. So it’s absolutely worth the wait.

I’ve got a drink to go with the boba coming up in our next video, but I want to know… what is your favorite boba drink? What drinks should I try to make?

Boba

from The Boba Book

Ingredients
  • 2 cups filtered water, plus more as needed
  • 1/4 cup dried boba balls
  • 1 tbsp dark brown sugar, packed
  • 1 tbsp white sugar
  • 1 tbsp boiling-hot filtered water
Cooking Directions
  1. In a medium saucepan, bring the water to a rolling boil over high heat. Add the boba and cook for 30 minutes, stirring frequently during the first 10 minutes of cooking to prevent the boba from sitting at the bottom of the pot and burning. Cover the pot so the water doesn’t evaporate, and stir occasionally for the remainder of the time. Add more hot water if necessary to keep the boba covered.
  2. After the 30 minutes of cooking, take the pot off the heat and let the boba rest for another 30 minutes. Meanwhile, mix the sugars and hot water in a bowl large enough to hold your cooked boba.
  3. After the resting time, strain the boba in a colander or a strainer, discarding the water, and pour them into a mixing bowl. Stir in the syrup. After an additional 30 minutes (so 1 1/2 hours total from the time you started cooking), the boba should have absorbed the sweetness; it won’t get any sweeter if it continues to sit longer.
  4. Now your boba is ready to serve; hold it warm or at room temperature (our preference). When you add it to drinks, scoop some of the balls out with a little strainer to leave the syrup behind. The boba keeps for about 4 hours before it starts to lose its texture.

Sub to my YouTube channel and follow me on TikTok or Instagram to get notified whenever we have new videos!

Links in this post may be affiliate posts. If you buy an item through an affiliate link, I get a small fee, which helps support this blog!

Categories
YouTube

Spinach and Chickpeas

It was on an art walk, the first time I ever saw an aerial arts studio. A couple of months later, I came across a Groupon deal for the same studio and thought… huh. This might be fun.

I’m ordinarily not the kind of person to dive headfirst into unfamiliar things, so I don’t know what got into me, but I signed up for the first class I could get into – an aerial silks class.

I have never been so sore in my entire life – I could barely move my upper body at all for the next few days – but I was head over heels in love.

I signed up for all the classes I possibly could – lyra and aerial yoga, hammock and pole – it was everything I loved about dancing, but… what’s this? I’m actually developing upper body strength for the first time in my life? I was able to do a pullup?!?!

… and then I got injured. And busy. And Covid happened. And I haven’t been able to go to the studio for a while.

Now, I know my injury-prone ass is never going to be a professional circus artist, BUT just for a little while, I could almost pretend that my Cirque dreams were not so out of reach.

This has been, and continues to be, a favorite easy, healthy meal.

I’ll make a batch of the mumallaengi muchim and then eat this on repeat until they run out.

It’s hearty and delicious, and absolutely one of those dishes that I crave constantly.

Spinach and Chickpeas

adapted from What’s Cooking Good Looking

Ingredients
  • 2 cans chickpeas
  • 6 – 8 oz spinach
  • olive oil
  • salt
  • pepper
  • fried eggs (optional)
  • mumallaengi muchim
Cooking Directions
  1. Preheat the oven to 425F.
  2. Drain and rinse the chickpeas (freeze the aquafaba for another use). Pour them into an 8×8″ baking dish.
  3. Top the chickpeas with the spinach. Drizzle with olive oil, and then sprinkle with salt and pepper.
  4. Bake for 15 minutes. Top with fried eggs and the dried radish kimchi. Enjoy!

Sub to my YouTube channel and follow me on TikTok or Instagram to get notified whenever we have new videos!

Links in this post may be affiliate posts. If you buy an item through an affiliate link, I get a small fee, which helps support this blog!

Categories
YouTube

Mumallaengi-muchim (seasoned dried radish strips)

I never much cared for the circus, as a kid. My parents took us to see the Ringling Brothers once or twice, but… it just wasn’t really my thing.

I’d much rather see ice skating or ballet or musicals… those were more my style.

But the first time I saw Cirque du Soleil… I was obsessed.

The sets, the costumes, the artistry, the talent… I couldn’t get enough.

I’ve seen almost all of them at this point, but the first Cirque show I fell in love with was Varekai. I wanted nothing more than to be Olga Pikhienko, the contortionist and handbalancer who played the lead role of La Promise.

Never mind that I had no clue how to even train contortionism, and even for a dancer, I’m pretty darn inflexible.

For the last decade or two, my family has gone to see every Cirque show that comes through Southern California.

But, I was always so stuck on the idea of being a dancer, that it never even occurred to me to seek out somewhere I could train in the circus arts.

I’ve posted this before and I’ll probably post it again, because I love this so much and we continue to eat it all the time.

We always eat it with that spinach and chickpeas dish, but honestly it’s good with rice and just about anything!

The spicy, savory, crunchiness of it is a great addition to any meal.

Mumallaengi-muchim (seasoned dried radish strips)

from Maangchi

Ingredients
Cooking Directions
  1. Wash and drain the dried radish strips in cold water a few times. Soak in cold water for 7-8 minutes.
  2. Strain and squeeze out excess water.
  3. Heat a pan over medium high heat and sauté the dried radish strips with 1 tsp vegetable oil for 1 minute. Remove from heat and set aside.
  4. Combine garlic, green onion, gochugaru, sesame seeds, fish sauce, and rice syrup in a mixing bowl and mix well.
  5. Add the dried radish strips and mix well by hand.
  6. Serve as a side dish with rice. The dried radish kimchi can be stored in the fridge for up to 1 month.

Sub to my YouTube channel and follow me on TikTok or Instagram to get notified whenever we have new videos!

Links in this post may be affiliate posts. If you buy an item through an affiliate link, I get a small fee, which helps support this blog!

Categories
YouTube

Tortilla Pizza

Sitting on a bench outside our local library, watching the clouds go by, we pondered on regrets.

So many people, at the end of their lives, talk about how they regret not living their lives more.

My dad, when he was sick before he passed away, told me he regretted that he didn’t travel more – that he just spent all his time working and saving up for a retirement that he never got to have.

And it’s just as easy for my husband and I to look back at our own lives, and see all the opportunities we didn’t take – because we were scared, because we were lazy, because we had misplaced priorities, because we took things for granted.

So we’ve been trying to imagine we’re five, ten years in the future. Look back at right now, what are you glad you’re doing? What would you wish you’d done differently?

They always say to live a life with no regrets… how would you live your life, to make that happen?

This tortilla pizza is something my family’s been making ever since I was a kid. Most of the time I keep it simple – just sauce, mozzarella cheese, and pepperoni.

But if I happen to have onions, mushrooms, or any other tasty toppings on hand, those go great too!

A few years ago I discovered that I REALLY like putting avocado on top of my pizza (pretty much all pizza is better with avocado on it). And then more recently, I tried some pizza from a local restaurant where they put arugula (dressed with olive oil and lemon juice) on top, and we discovered we quite like that as well.

If you’re veggie-averse, do whatever you want, but for everyone else, I highly recommend those additions!

Tortilla pizza

Ingredients
  • 1 tortilla
  • 1 tbsp pizza sauce
  • 1/4 – 1/2 cup mozzarella cheese
  • pizza toppings of your choice (pepperoni, sauteed mushrooms, sliced red onion, etc.)
  • 1/2 avocado, sliced
  • handful of arugula
  • olive oil
  • flaky sea salt
  • fresh ground black pepper
Cooking Directions
  1. Evenly top the tortilla with the pizza sauce, mozzarella cheese, and toppings. Toast in a toaster oven or in a 350F oven until the cheese is melted and tortilla browns around the edges, about 5 min (keep an eye on it).
  2. Remove from the oven and top with sliced avocado and arugula. Drizzle with olive oil, and sprinkle with salt and pepper. Enjoy!

Sub to my YouTube channel and follow me on TikTok or Instagram to get notified whenever we have new videos!

Links in this post may be affiliate posts. If you buy an item through an affiliate link, I get a small fee, which helps support this blog!

Categories
TikTok

Beet Tostadas

Did any of you – particularly those of you who live in drier climates – ever carry around a coin to diffuse static charges?

This is something I always associated with my grandparents on my dad’s side. This wasn’t usually an issue in Southern California, where I grew up, but they live in a desert region, and had a house filled with carpet.

Of course, socks on carpet in dry air, you’re absolutely going to build up a static charge and then get zapped when you touch a doorknob.

So I remember when we were really, really little, my dad taught us to always carry around a coin when we were visiting our grandparents. Touch the coin to the doorknob (or any other metal things you needed to touch), and voila! Now you can open the door without an unpleasant shock.

What little life lessons did your parents teach you as kids?

I didn’t used to be a huge beet fan, but about a year ago I happened to have some beets on hand that I needed to use up.

I tried out this recipe on my old Twitch stream, and I’ve been craving it again ever since.

The earthiness of the beets go perfectly with the chorizo flavorings, and add a crunchy tostada, fried egg, and all the toppings and it is SO addictively good.

Plus, it’s vegetarian (vegan if you skip the egg), and filled with vegetables, so it’s absolutely one of those super healthy things that doesn’t taste healthy at all.

In fact, I’m already craving it again…

Beet Tostadas with Fried Eggs

slightly adapted from Bon Appetit

Ingredients
  • 1 1/2 lb red beets (about 2 large), peeled, cut into 1/4″ pieces
  • 2 garlic cloves, finely grated
  • 2 tbsp ancho chile powder
  • 1 tsp crushed dried oregano, preferably Mexican
  • 1 tsp paprika
  • 3/4 tsp ground cumin
  • 1/2 tsp freshly ground black pepper
  • 1 tbsp Diamond Crystal or 1 1/2 tsp Morton kosher salt, plus more
  • 2 1/3 cups plus 3 tbsp vegetable oil, divided
  • 1 large white onion, halved through root end, sliced 1/4″ thick
  • 6 medium serrano chiles, quartered lengthwise, leaving stems and seeds intact
  • 1/3 cup sage leaves
  • 6 6″-diameter corn tortillas
  • 6 large eggs
  • salsa, to serve
Cooking Directions
  1. Place a rack in middle of oven; preheat to 350°. Toss beets, garlic, chile powder, oregano, paprika, cumin, pepper, kosher salt, and 1/3 cup oil in a medium bowl until beets are coated. Scrape onto a foil-lined rimmed baking sheet; bake, tossing every 15 minutes, until beets are tender and spices are very fragrant and smell slightly toasted, 35–45 minutes.
  2. Meanwhile, heat 2 cups oil in a large saucepan over high until oil bubbles immediately when the edge of a tortilla touches the surface. Carefully fry onion, adding a little bit at time to avoid too much spattering and reducing heat as needed, until tender and beginning to brown, about 5 minutes. Transfer to a paper-towel-lined baking sheet. Repeat process with chiles, about 5 minutes. Transfer to same baking sheet. Fry sage leaves until crisp, about 30 seconds. Transfer to baking sheet. Working one at a time, fry tortillas, turning once, until crisp, puffed in places, and deep golden brown, about 1 minute per side. Transfer tostadas to baking sheet.
  3. Heat remaining 3 tbsp oil in a large nonstick skillet over medium-high. Crack eggs into skillet, leaving space around each one, and cook until whites are set and edges are crisp, about 4 minutes. Season with salt.
  4. Spoon beet mixture onto tostadas, dividing evenly, and top each with an egg, then fried onion, chiles, sage, and salsa.

Sub to my YouTube channel and follow me on TikTok or Instagram to get notified whenever we have new videos!

Links in this post may be affiliate posts. If you buy an item through an affiliate link, I get a small fee, which helps support this blog!

Categories
YouTube

Slow cooker “Vietnamese” chicken and bok choy

I grew up in Southern California, so I had a lot of friends who were fluent in both English and Spanish. I always thought being multilingual was the coolest thing ever!

But… I am very bad at languages.

In my GATE class in 5th grade, we had a section where we were learning French. I was a straight-A student and that was the first time in my life I had ever failed a test. In fact, I failed all the French tests.

In high school I took 2 years of Spanish – because my parents were like, this is LA, it’s kind of an important language to know – and then 2 years of French, because I was always a little bit of a Francophile thanks to ballet.

Another year of French in college… and do I remember any of it? No I do not.

They always tell you that the best way to learn a language is to practice with native speakers… and therein lies the problem. I’m an introvert. A shy, awkward introvert. I don’t even want to talk to people in English, never mind another language I’m terrible at!

You want me to learn a programming language? I got you. But a spoken language… I wish I could, but not so much.

Is this really a Vietnamese dish? lol, no.

Does my Vietnamese husband absolutely love it, and request it at least once a year? YES!

Sooo, we’re not nitpicking about the name. It has fish sauce, Vietnamese people love it, we’ll let it slide.

This really is a comfort food dish for us though. Like I said, I’ve made it at least once a year for YEARS… possibly for nearly a decade.

We turn the amount of bok choy way waaaay up, because it’s delicious in this dish, and then will eat leftovers for days over rice. (Also tasty in sandwiches.)

Plus, like most slow cooker recipes, it’s super easy to make. Just dump everything in and let it cook, then switch the chicken out for the bok choy at the very end. Easy and delicious!

Slow cooker “Vietnamese” chicken and bok choy

adapted from Yankee Kitchen Ninja

Ingredients
  • 10 bone-in chicken thighs
  • 1/4 cup fish sauce
  • 1/4 cup shoyu
  • 1 tsp white pepper
  • 8 cloves garlic, minced (I usually add more because we really love garlic)
  • 2 tbsp canola oil
  • 1/4 cup brown sugar
  • lots of bok choy (I usually go with 5lbs or so; other greens can also be used)
Cooking Directions
  1. Put everything except the bok choy in the slow cooker. Cover and cook on low for about 6 hours.
  2. Wash the bok choy, discard the last inch of the base. When the chicken is finished cooking, carefully transfer it to another bowl. Place the bok choy in the slow cooker, stirring to make sure it is coated with the sauce. Replace the lid, and cook on high for another half hour or so, until the bok choy is wilted and soft.
  3. Serve over white or brown rice. Enjoy!

Sub to my YouTube channel and follow me on TikTok or Instagram to get notified whenever we have new videos!

Links in this post may be affiliate posts. If you buy an item through an affiliate link, I get a small fee, which helps support this blog!

Categories
YouTube

Spicy Shrimp Inari Sushi

What is your favorite kind of sushi?

I think when most people ask this, they often mean sashimi, and are expecting to get a response like tuna or salmon.

But if you ask me, my favorite type of sushi is inari sushi.

Sweet fried soybean curd pockets, filled with sushi rice. It’s often known as a “kids'” sushi, because children tend to like the sweet, plain sushi.

Sometimes the rice is mixed with things like adzuki beans, other times it can be topped with things like shrimp… and spicy mayo… like this one. But even plain, it’s been my favorite sushi ever since I was a child, and I just never outgrew it.

If I had to choose only one type of sushi to eat for the rest of my life? It would absolutely be these spicy shrimp inari sushi.

Ingredients
  • 1 package inari age (inari pouches)
  • 3 cups sumeshi
  • 12 medium cooked shrimp
  • 1/4 cup mayonnaise
  • 1 tbsp Sriracha sauce
  • 3 stalks green onion, chopped
  • 1 tbsp sesame seeds
Cooking Directions
  1. Cook sushi rice.
  2. Prepare the inari according to the directions on the package. (Some require no preparation, while some say you should boil the pouch of inari for a few minutes before using them.)
  3. Mix the mayonnaise and Sriracha sauce until well blended.
  4. Stuff each pouch of inari with about 1/4 cup of rice.
  5. Push a shrimp into the middle of each stuffed inari.
  6. Scoop a little spicy mayonnaise over the shrimp.
  7. Sprinkle chopped green onion and sesame seeds over the sauce.
  8. Enjoy!

Sub to my YouTube channel and follow me on TikTok or Instagram to get notified whenever we have new videos!

Links in this post may be affiliate posts. If you buy an item through an affiliate link, I get a small fee, which helps support this blog!

Categories
TikTok

Curry Beef

I know it’s completely impractical and there are lots of things I wouldn’t want on film, but.

Sometimes, I wish there were a way to magically have video recordings of any point in your life.

I’m sure a lot of people would love this for sentimental reasons, or to prove something happened, but…

Y’all, I just want it for the blooper reel. I mentioned recently that I’m super clumsy. I have had some of the most spectacular, ridiculous falls, and I just wish I could show you all a video of them.

There was the time I literally bellyflopped HARD on stage, then got up and finished the dance, and ended up with the most flamboyant bruise I have ever seen.

Or the time I overbalanced doing a backbend with my leg in the air, and a friend’s mom told me it was the most graceful fall she’d ever seen because my leg stayed straight up the entire time I was falling.

Then there was the time I was wearing heels and jazz pants at an event where I was performing, caught my heel in my pants going down the stairs, and nearly took out a bunch of rich people like a bougie bowling ball.

I’ve fallen down stairs.

I’ve fallen up stairs.

Moral of the story is, I pretty much need to be put in a bubble, for my own safety and everyone else’s.

This curry beef is one of those meals that came about because, “I have ground beef that’s been sitting in the fridge too long, and potatoes that are starting to go green around the edges, what can I make to use that all up?”

I happened to have this curry beef recipe bookmarked from The Woks of Life, and man is it good.

I doubled the potatoes and peas (more veggies is never a bad thing) and the spice level will vary depending on what curry powder you use – we used Vietnamese curry powder, so it was definitely on the spicy side.

This is a hearty, delicious, total comfort food kind of meal. I absolutely would make this again!

Curry Beef

slightly adapted from The Woks of Life

Ingredients
  • 3 tbsp oil
  • 1 large onion, finely diced
  • 2 cloves garlic, minced
  • 2 large russet potatoes, cut into a 1/2-inch dice
  • 1 lb ground beef
  • 2 tbsp curry powder
  • 1 1/2 tsp turmeric
  • 1/2 tsp cumin
  • 1/4 tsp sugar
  • 1/4 tsp black pepper
  • 1 tsp salt
  • 1 1/2 cups beef broth
  • 1 tbsp cornstarch
  • 2 cups peas (optional)
Cooking Directions
  1. In a skillet or wok, heat the oil over medium high heat. Add the onions and garlic and cook until translucent and just slightly caramelized. Add the potatoes. Let cook for 10 minutes, turning the heat down if the potatoes are crisping too much.
  2. Add the ground beef, breaking it up with a spatula, and cook the beef until browned. Next, add the curry powder, turmeric, cumin, sugar, black pepper, and salt. Stir to combine.
  3. Make a cornstarch slurry by mixing the beef broth with 1 tablespoon of cornstarch. Add it to the beef mixture and bring to a boil. Simmer for a few minutes until the entire mixture has thickened. You’ll know it’s ready when there’s no more pooling liquid––just a very viscous curry beef!
  4. Add the peas (if using). Let the entire mixture simmer, covered, for 10-15 minutes, until the potatoes are fork tender. Season with additional salt to taste, if necessary. Spoon over a bed of rice to serve!

Sub to my YouTube channel and follow me on TikTok or Instagram to get notified whenever we have new videos!

Links in this post may be affiliate posts. If you buy an item through an affiliate link, I get a small fee, which helps support this blog!