Categories
YouTube

Sweet and Sour Chicken

We have a recipe request!!! Actually, we have a LOT of recipe requests, I’m just suuuuuper slow and I’m so sorry, but I am trying to get to them! … eventually.

This request was actually perfect, because I’ve been CRAVING American-style Chinese food lately, but I keep doing the whole, should I? I shouldn’t. Should I? I shouldn’t…

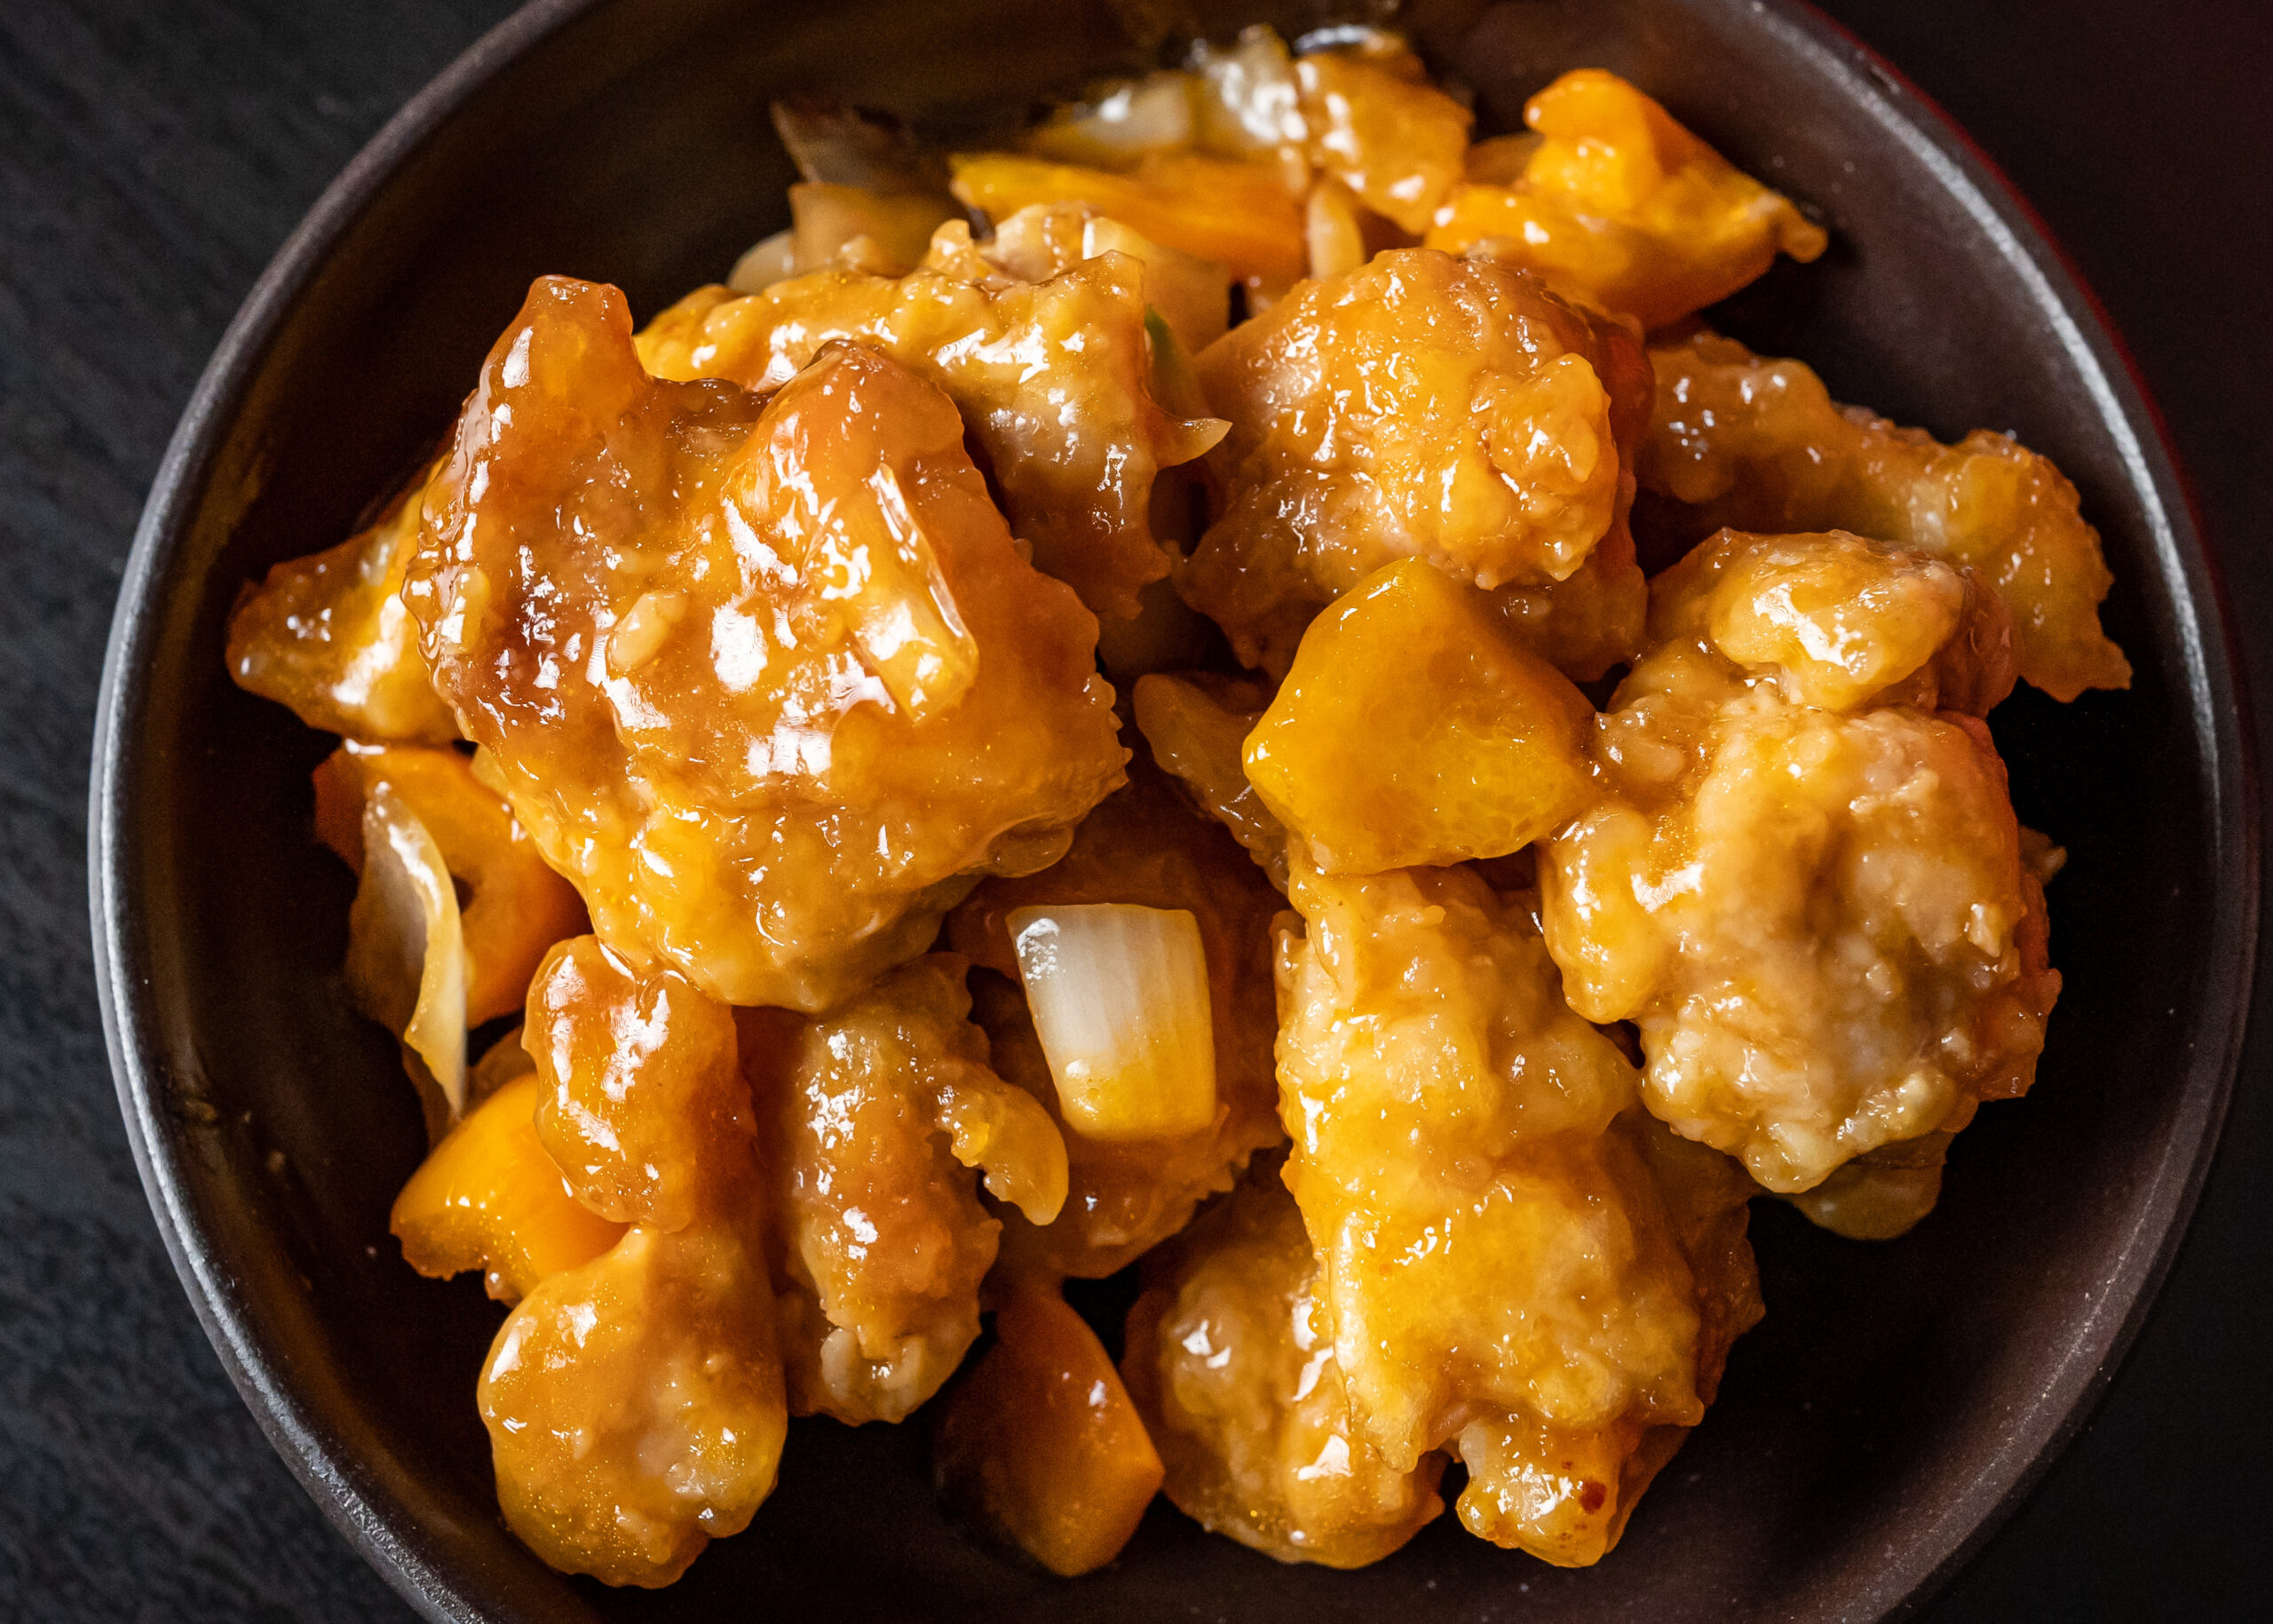
So a recipe request for sweet and sour chicken? TWIST MY ARM why don’t you.

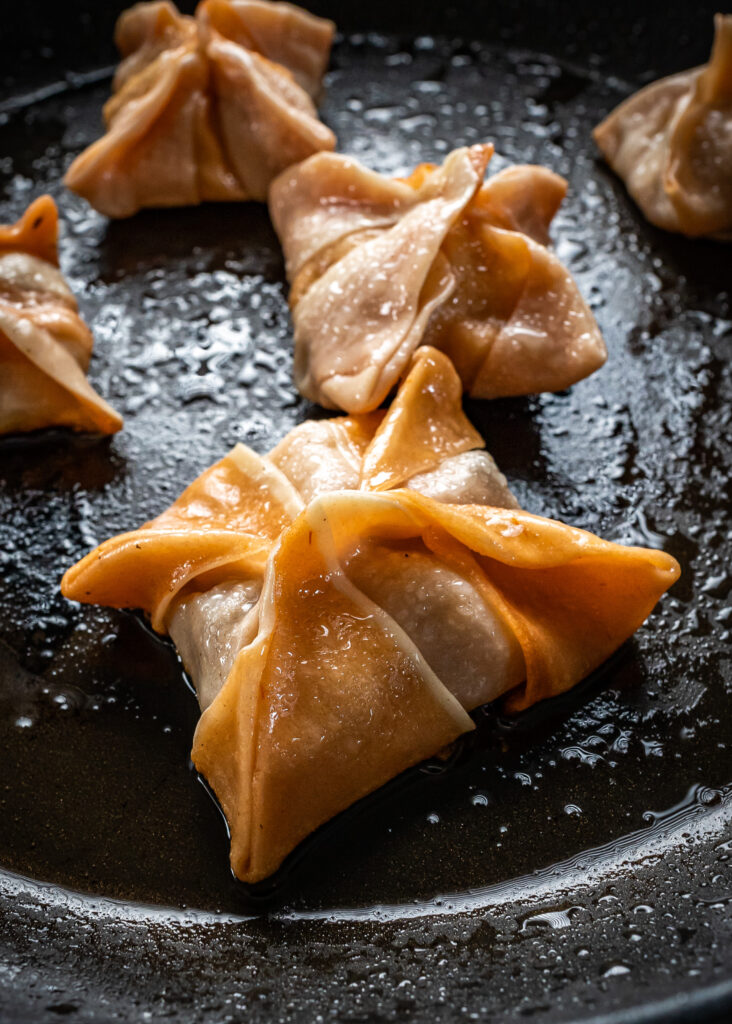
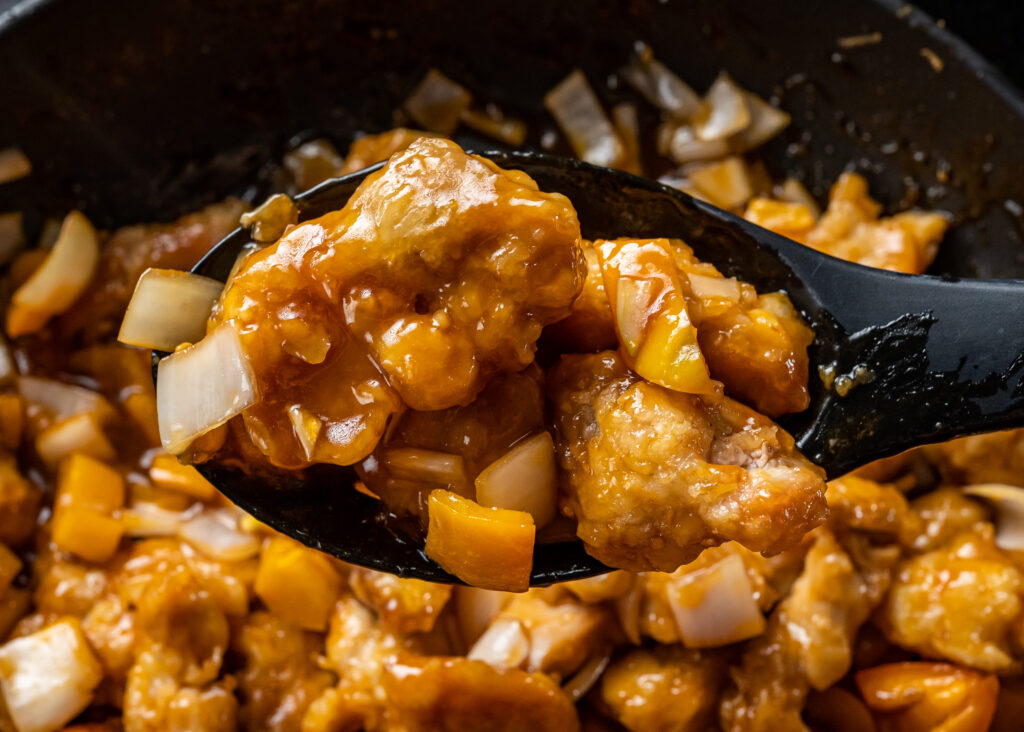
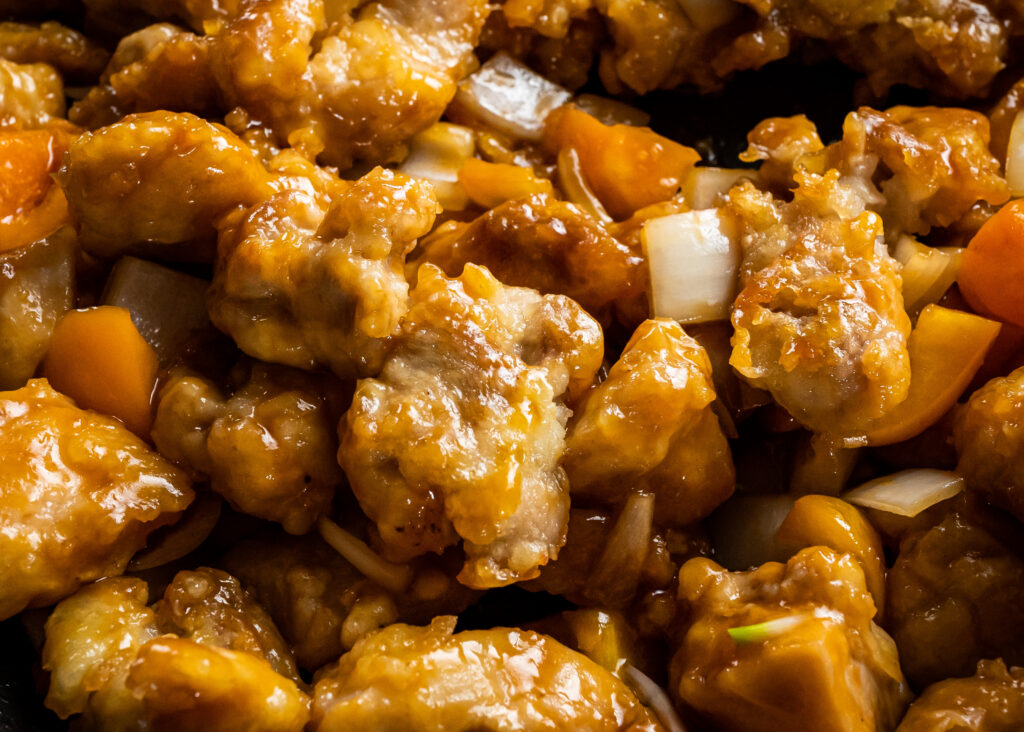
I didn’t want to bother with deep frying and I was too lazy to bring out the wok, so this pan-fried version was perfect. We were really, really happy with how it turned out.

I’d say craving satisfied, but… now my husband wants me to make it again. Sooo… I guess we’ll have some orange chicken coming up soon?

Sweet and Sour Chicken

from Omnivore’s Cookbook

Ingredients
  • 1 lb boneless skinless chicken thighs, cut into 1″ pieces
  • 1 tbsp vegetable oil
  • 1/2 teaspoon salt
  • 2 tbsp ketchup
  • 2 tbsp Shaoxing wine
  • 2 tbsp rice vinegar
  • 2 tbsp soy sauce
  • 3 tbsp brown sugar
  • 2 tbsp water
  • 1/2 tbsp cornstarch
  • 1 egg, beaten
  • 1/2 cup cornstarch
  • 1/3 cup vegetable oil
  • 2 cloves garlic, minced
  • 1/2 onion, chopped
  • 1 bell pepper, chopped
Cooking Directions
  1. Combine the chicken, 1 tbsp vegetable oil, and salt. Mix well, then let marinate 10-20 min.
  2. Mix the ketchup, shaoxing wine, rice vinegar, soy sauce, brown sugar, water, and 1/2 tbsp cornstarch until fully combined. Set aside.
  3. Add the beaten egg to the bowl with the chicken. Stir to mix well. Then add the 1/2 cup of cornstarch and stir to coat chicken.
  4. Heat 1/3 cup vegetable oil in a heavy-duty skillet or wok until almost smoking. Add the chicken, spread it into a single layer, and cook 2-3 minutes, until golden-brown on the bottom. Flip, and cook another 2-3 minutes, until browned. Transfer to a plate, and set aside.
  5. Add the garlic to the pan and cook until fragrant, then add the sauce mixture. Cook, stirring, until the sauce thickens enough to draw a line through it.
  6. Add the cooked chicken, onion, and bell pepper to the pan with the sauce. Stir to coat, about 30 seconds. Transfer to a serving plate.
  7. Serve with steamed white rice.

Sub to my YouTube channel and follow me on TikTok or Instagram to get notified whenever we have new videos!

Links in this post may be affiliate posts. If you buy an item through an affiliate link, I get a small fee, which helps support this blog!

Categories
YouTube

Pork and Shrimp Dumplings

Our second Q&A question is in, and this time you want to know, what is my favorite food?

This one’s a hard one, because… I just really like food.

But there are definitely some foods I gravitate towards more… and they all feel totally cliche so don’t judge me.

Bacon. I LOVE bacon. There’s definitely a time and a place – when it was “in” a decade ago, there were definitely some bacon concoctions that… just weren’t that great. But perfectly crispy bacon is a wonderful, wonderful thing.

I’m a huge fan of all dumplings, but I really love xiao long bao.

And same goes for sandwiches – I love them all, but if I had to choose one, it’s bánh mì all the way.

Inari sushi is my favorite sushi and I absolutely could survive on that alone.

And I would be remiss if I didn’t bring up boba.

But oddly enough, if I had to choose one dish, and one dish alone to eat for the rest of my life? It wouldn’t be any of those. Hands down it would be that spinach and chickpeas dish I posted a couple of weeks ago.

I recently came across the Little Fat Boy blog and instagram, and I’m obsessed with how amazing his dumplings look.

Do mine look nearly as good? Nope.

Did the color add anything flavor-wise, beyond aesthetics? Also no.

Is it worth doing for someone like me, who just doesn’t have the patience or artistic ability to be one of those popular kawaii food instagrammers? Hahahahahaha no.

But was it fun to try anyways? Yes!

Pork and Shrimp Dumplings

recipe from Little Fat Boy

Ingredients
  • 1 lb finely minced napa cabbage, finely shredded
  • 1/2 tsp salt
  • 1 cup dried shiitake mushrooms
  • 1/2 lb ground pork shoulder
  • 1/2 lb ground shrimp
  • 3 green onions, finely chopped
  • 1 tbsp minced garlic
  • 1 tsp minced fresh ginger
  • 1 tsp kosher salt
  • 4 tsp brown sugar
  • 1 tsp white pepper
  • 1 tsp sesame oil
  • store-bought dumpling wrappers or homemade dumpling dough
  • vegetable oil, for cooking
  • water, for cooking
  • optional condiments for serving: chili oil, soy sauce, black vinegar, chinese mustard
Cooking Directions
  1. Mix the cabbage with the salt, and let sit 15 minutes. At the end of 15 minutes, squeeze out the excess water and set aside. Soak the shiitake mushrooms in water for 20 minutes, then finely chop.
  2. Combine the remainder of the ingredients, mixing until everything is evently distributed.
  3. Using store-bought wrappers or homemade dough, form your dumplings in whatever shape you desire, making sure the edges are completely sealed.
  4. To cook: pan-fry the dumplings in vegetable oil for 1-2 minutes over medium heat. Add 1/2 cup of water and immediately cover the pan. Let steam 5-6 minutes. Remove the lid, and let the dumplings continue to cook until all the water has evaporated, then remove from pan.
  5. Serve with chili oil, soy sauce, black vinegar, and/or chinese mustard.
  6. Enjoy!

Sub to my YouTube channel and follow me on TikTok or Instagram to get notified whenever we have new videos!

Links in this post may be affiliate posts. If you buy an item through an affiliate link, I get a small fee, which helps support this blog!

Categories
YouTube

Spicy Mushroom Inari

I just got the new TikTok Q&A thing, so if you have any questions you want me to answer, feel free to ask! I’m always happy to answer your questions, as long as, you know, they’re not creepy or rude.

The very first question is asking, do I still do the sushi day thing?

I’m not sure whether that’s referring to my YouTube channel, or to making sushi on TikTok, but either way my answer is the same: yes, but very slowly.

I kind of hit a wall in the last month. My mental health has been total trash, and I burned out real hard. I actually ended up taking an unintentional break – I’ve barely been on social media, I’ve cooked a few repeat things that I’ve already posted so I haven’t been filming… it was a much needed break.

I’m working on dragging myself out of my funk and getting myself back in gear, which means, yes! There will be more YouTube videos, and there will be more sushi videos on TikTok coming up soon!

Spicy Mushroom Inari Sushi

Ingredients
  • 1 package inari pockets
  • 1 batch sumeshi
  • 5 oz portobello mushrooms, sliced
  • 1 tbsp olive oil or butter
  • 1/4 cup kewpie mayonnaise
  • 1 tsp sriracha
  • 2 stalks green onions, green part only, washed and sliced
Cooking Directions
  1. Sautee the mushrooms in olive oil or butter over medium heat, until browned. Set aside.
  2. Mix the mayonnaise and sriracha sauce, transfer into a squeeze bottle if desired.
  3. Carefully open each inari pocket, and stuff with sushi rice. Top with a piece of mushroom, drizzle or dollip with spicy mayo, and sprinkle green onions on top.
  4. Enjoy!

Sub to my YouTube channel and follow me on TikTok or Instagram to get notified whenever we have new videos!

Links in this post may be affiliate posts. If you buy an item through an affiliate link, I get a small fee, which helps support this blog!

Categories
YouTube

Jammy Cream Cheese Danishes

I don’t care for it much as an adult, ’cause we don’t really do anything, but as a kid, Valentine’s Day was probably my favorite holiday.

I know everyone things of Halloween as the “candy” holiday, but hear me out.

Valentine’s Day has better candy.

Fewer spooky scary things.

Plus you don’t have to go through all the work of dressing up and going door to door begging strangers for candy, which was always super stressful for a shy, self-conscious introvert like me.

But I absolutely loved the tradition of giving out Valentines to all of my classmates. Every year we’d pick out a pack of Valentine’s cards at the store, address one to every classmate, tape a piece of candy to them, and give them all out on Valentine’s Day.

As with a lot of things, I definitely grew up assuming everyone did this, but I actually have no idea if this was just a regional thing, so let me know what Valentine’s Day traditions were like where you grew up.

These puff pastry danishes are SUPER simple to make, but look so elegant (and taste wonderful!)

They’re great for parties or holiday breakfasts or as a treat to give out to friends and family.

Jammy Cream Cheese Danishes

Ingredients
  • 8 oz cream cheese, softened
  • 1 tsp vanilla bean paste
  • 2 sheets puff pastry, defrosted
  • 6 tbsp jam (any flavor, but stronger flavors work better!)
  • 1 egg, whisked
  • powdered sugar for dusting, optional
Cooking Directions
  1. Blend cream cheese and vanilla paste until smooth and fluffy. Set aside.
  2. Cut each sheet of puff pastry into 9 squares. Fold the corners of each square in.
  3. Top each square with 1 tbsp cream cheese mixture, then top with 1 tsp jam. Brush puff pastry with egg wash.
  4. Bake at 400F 15-20 min. Serve warm, dusted with powdered sugar if you’d like.
  5. Enjoy!

Sub to my YouTube channel and follow me on TikTok or Instagram to get notified whenever we have new videos!

Links in this post may be affiliate posts. If you buy an item through an affiliate link, I get a small fee, which helps support this blog!

Categories
YouTube

Breakfast Nachos

My husband and I were in college, when we first started dating.

So fancy steakhouses, Michelin-starred restaurants… yeah, that wasn’t really our style. Remember, poor college students.

For my birthday, he’d take me to a restaurant that was like the sushi equivalent of PF Chang’s, but that was absolutely as fancy as we got.

But for us, going out was usually more like, hey let’s go to Costco and get the $1.50 hot dog and soda, AND get a slice of everything pizza!

Or we can go pick up some kubideh from the to-go counter in the grocery store… or maybe pancakes at IHOP…

But if we’re really feeling like something special? Del Taco nachos.

We never went to Del Taco for anything else, but those nachos? We loved them so much.

Nachos are one of our go-to easy meals when there’s nothing else to eat. At the very least, we always have tortilla chips, shredded cheese, and canned black beans on hand (we especially like these Fiesta Beans!), so it’s an easy, satisfying, somewhat healthy meal.

And if you have more toppings – like bacon, sausage, ground meat, cilantro, salsa… then it’s super easy to jazz up to your liking!

Breakfast Nachos

Ingredients
  • tortilla chips
  • mexican cheese blend
  • a can of cooked black beans
  • cooked, crumbled bacon
  • fried eggs
  • cilantro
  • sour cream
  • cilantro
Cooking Directions
  1. On a parchment-lined baking sheet, layer tortilla chips, cheese, and black beans. Toast in a toaster oven until bubbly.
  2. Top with crumbled bacon, fried eggs, cilantro, sour cream, salsa, or any other toppings of your choice.
  3. Enjoy!

Sub to my YouTube channel and follow me on TikTok or Instagram to get notified whenever we have new videos!

Links in this post may be affiliate posts. If you buy an item through an affiliate link, I get a small fee, which helps support this blog!

Categories
TikTok

“OMG” Garlic Bread

I am of the opinion that you can never go wrong with garlic bread. Never. All garlic bread is good garlic bread, there is no such thing as bad garlic bread.

However, all that being said… some garlic breads are better than others.

And this recipe? Is BY FAR my absolute favorite.

I came across this recipe a few years ago on a blog called Kitchen Konfidence (with a K).

It is a garlic-lover’s DREAM.

Imagine the lusciousness of roasted garlic – except instead of roasting the garlic, you’re making a garlic confit in butter – so instead of just roasted garlic, you’ve got roasted garlic AND garlicky butter.

Then mix that with plenty of cheese, a little basil – Thai basil also works wonderfully here – lemon zest, and red pepper flakes. You may be tempted to skip the lemon zest or red pepper flakes but LET ME TELL YOU, they are the je ne sais quois that take this garlic bread from average to amazing.

Bring out the good bread for this one, and if you can get some fancy three-cheese bread? I couldn’t find any this time, but trust me, get the cheesy bread.

And all that, altogether, you can quote me on this, will be the best garlic bread you have ever in your life had. Ever.b

“OMG” Garlic Bread

slightly adapted from Kitchen Konfidence

Ingredients
  • 1 cup garlic cloves
  • 1/2 cup unsalted butter
  • 1/2 cup grated parmesan cheese
  • 1 tbsp chopped fresh basil (Thai basil also works)
  • 1 tsp grated lemon zest
  • 1/2 tsp red pepper flakes
  • kosher salt
  • 6 thick slices artisan bread
Cooking Directions
  1. Place garlic and butter in a small saucepan over medium-low heat, and cook until garlic is tender and golden-brown (15-18 minutes). If you notice the garlic is turning brown, but the cloves are not softening, turn heat down and continue cooking. Pour garlic and butter into a medium bowl, and let cool.
  2. To the bowl with the garlic and butter, add parmesan cheese, basil, lemon zest, red pepper flakes, and pinch of kosher salt. Using a fork, mash the ingredients to combine. Season to taste with additional kosher salt. Let sit for 5 minutes.
  3. Preheat a broiler to high. Place bread on a baking sheet, and toast under the broiler until golden (about 2 minutes). Flip the slices, and broil the other side until golden (another 2 minutes). Remove the baking sheet from under the broiler, and let the bread cool slightly. Once cool enough to handle, slather the top of each slice of bread with the garlic-butter mixture, and return underneath the broiler. Cook until the cheese is golden and bubbling (about 2 minutes). Let cool for a moment then enjoy!

Sub to my YouTube channel and follow me on TikTok or Instagram to get notified whenever we have new videos!

Links in this post may be affiliate posts. If you buy an item through an affiliate link, I get a small fee, which helps support this blog!

Categories
YouTube

Mushroom bolognese

I mentioned recently that I used to be a super picky kid, but now I’ll eat just about anything. And somebody asked in the comments, what foods do I hate?

That’s a really interesting question, because… there are a lot of things I won’t eat, but I wouldn’t say I hate them.

Take spicy foods, for example. If you take away the heat, a lot of spicy foods have good flavor. And there are a lot of spicy foods that I think are tasty, BUT I don’t have a high spice tolerance, so I won’t eat them.

I never developed a taste for alcohol, so I don’t really drink. But I wouldn’t say I hate it, because I’ll happily try a sip here and there. I just never really like it enough to take more than a single sip.

There is one thing, that my husband absolutely loves, that I cannot do, and that is balut. But the thing is, I’ve tried it a number of times, and it’s tasty! But mentally, I just can’t quite get past it.

So I wouldn’t say I hate any foods… but yeah. I can’t do balut.

In my neverending quest to eat healthier (and also to help Son’s dad eat healthier), I decided to try this mushroom bolognese recipe.

And it was a success!

I’m not one of those people who has to have meat for every meal, so I may not be the best judge here, but I really didn’t miss the meat in this dish. Healthy, full of vegetables, and tasty? A definite win.

Mushroom Bolognese

from Everyday Annie

Ingredients
  • 3 tbsp unsalted butter
  • 2 lbs mushrooms, chopped
  • 1 carrot, peeled and chopped
  • 1 onion, peeled and chopped
  • 1/2 oz dried porcini mushrooms, rinsed and minced
  • 3 cloves garlic, minced
  • 1 tsp sugar
  • 2 tbsp tomato paste
  • 1 cup red wine
  • 1 (28 oz) can whole peeled tomatoes
  • 1/2 cup vegetable broth
  • 1 tbsp soy sauce
  • 1/2 tsp kosher salt
  • 1/4 tsp pepper
  • 3 tbsp heavy cream
  • 1 lb pasta of choice
  • parmesan, for serving
Cooking Directions
  1. Melt the butter in a large Dutch oven over medium heat. Add the chopped vegetables along with the porcini mushrooms. Cover and cook, stirring occasionally, until they release their liquid, about 5 minutes. Uncover, increase the heat to medium-high and cook until the liquid has evaporated and vegetables begin to brown, 12-15 minutes.
  2. Add the garlic and sugar to the pot and cook until fragrant, about 30 seconds. Stir in the tomato paste and cook for 1 minute. Gradually stir in the wine, bring to a simmer and let cook until nearly evaporated, about 5 minutes. Stir in the processed tomatoes, vegetable broth, soy sauce, salt, and pepper and bring the mixture to simmer. Reduce the heat to medium-low and cook until the sauce has thickened but is still moist, about 8-10 minutes. Remove from the heat and stir in the cream.
  3. Meanwhile, bring a large pot of water to boil and cook the pasta according to the package directions just until al dente. Drain, reserving 1/2 cup of the pasta water. Return the pasta to the pot. Toss with the sauce until well combined. Season to taste with additional salt and pepper and adjust consistency, if needed, with the reserved pasta water. Serve warm with freshly grated Parmesan.

Sub to my YouTube channel and follow me on TikTok or Instagram to get notified whenever we have new videos!

Links in this post may be affiliate posts. If you buy an item through an affiliate link, I get a small fee, which helps support this blog!

Categories
YouTube

Takuan

As a child, I hated pickles. All of them. There was not a single type of pickle I would willingly eat.

Whenever my family would go to McDonald’s, I’d get a burger, with the pickles… and then pick every single pickle off my burger and transfer them to my mom’s. She LOVED pickles, and would happily eat the extra ones, while I was perfectly content to do with out.

And then… adulthood happened.

I went from being the ABSOLUTE pickiest kid, to being someone who will eat just about anything. Granted, the transition took about a decade, but now there are very few foods I’ll turn down.

These days? I love pickles. Bread and butter pickles, Japanese tsukemono, Vietnamese do chua, I love them all.

There is only one downside to this. These days – at least, pre-pandemic – when my mom and I go on our occasional McDonald’s dates? She doesn’t get my pickles anymore. Sorry mom.

Takuan are one of my favorite pickles, they go so well with so many things!

Most of the time I buy them at the store, but mid-pandemic when it’s a little less desirable to go out to the grocery store unnecessarily, I figured I’d try making my own.

Overall, I was pretty happy with these! It’s still easier to go to the store when I can, but these are a great alternative that don’t require food coloring – they just take time.

Takuan

recipe from Food Land

Ingredients
  • 2 lbs daikon radish
  • 1 tbsp salt
  • 1 cup sugar
  • 1 cup water
  • 1 cup rice vinegar
  • 2 tbsp sake
  • 10-20 annatto seeds, for color
  • 2 tsp shoyu
Cooking Directions
  1. Peel the daikon and cut in half lengthwise. Cut each half into slices 1/4-inch thick.
  2. Place daikon in a bowl and toss with the salt and allow it to pull out the moisture for approximately 2 hours.
  3. In a pot, combine the sugar, water, rice vinegar, sake, and annatto seeds. Bring to a boil and stir until the sugar completely dissolves and the liquid is a bright yellow color. Remove from heat, remove the annatto seeds, and cool.
  4. After the 2 hours, squeeze the daikon to remove as much moisture as possible and place into a 1 quart jar.
  5. Pour over the cooled liquid, add in the shoyu, cover and refrigerate.
  6. Allow to sit for at least 2 days before eating. As they continue to age, the flavor will continue to develop.

Sub to my YouTube channel and follow me on TikTok or Instagram to get notified whenever we have new videos!

Links in this post may be affiliate posts. If you buy an item through an affiliate link, I get a small fee, which helps support this blog!

Categories
TikTok

Carrot Cake Bran Muffins

I have a problem, and it’s called buying in bulk.

It’s sooo much cheaper to buy a bunch all at once… and now I have five bags of wheat bran AND WHAT THE HECK AM I GOING TO DO WITH FIVE BAGS OF WHEAT BRAN?

Luckily, I found this muffin recipe.

I’ve made bran muffins before – I mean, what else are you gonna do with wheat bran? – but it’s always been kind of hit or miss. A lot of the times they’re just… really dense. And not always particularly flavorful.

Like, I try to eat healthy most of the time, but I draw the line at cardboard.

These muffins, however… are really freaking good. Like, I’ve already made a second batch because I liked them so much, that’s how good they are.

The original recipe is vegan, because I’ve been trying to find ways to use up all the aquafaba that I have leftover from making that spinach and chickpeas dish a whole bunch. But, if you’re not vegan, you can totally use regular ingredients instead of the vegan ones.

In my endless quest to use up random ingredients, I also subbed in 1/4 cup of oat flour for 1/4 cup of the all-purpose flour, and mixed in some chopped pecans as well.

It all worked out wonderfully – if you’re looking for some healthy, hearty, and most importantly, tasty breakfast muffins? I highly recommend you try these.

Carrot Cake Bran Muffins

slightly adapted from Simply CeeCee

Ingredients
  • 1 1/2 cups wheat bran
  • 1 cup buttermilk, or vegan buttermilk replacement
  • 1 egg, or vegan egg replacement (I used 3 tbsp aquafaba)
  • 1 tsp vanilla
  • 1/2 cup brown sugar
  • 1/3 cup neutral oil
  • 1 cup all-purpose flour (I replaced 1/4 cup of this with oat flour)
  • 1 tsp baking soda
  • 1 tsp baking powder
  • 2 tsp cinnamon
  • 1/2 tsp salt
  • 1 cup carrots, grated
  • 1/2 cup raisins, more to taste
  • 1 cup walnuts or pecans, chopped
Cooking Directions
  1. Preheat oven to 400F. Line muffin tins with paper liners.
  2. Add bran to buttermilk, and let it soak. Meanwhile, beat together egg, vanilla, sugar, and oil. Stir in the bran-milk mixture. Add the dry ingredients and mix together. Add carrots, raisins, and nuts. Spoon into prepared muffin tins.
  3. Bake in preheated oven for 15-20 minutes, until tops are nicely golden-brown.
  4. Serve warm, with butter!

Sub to my YouTube channel and follow me on TikTok or Instagram to get notified whenever we have new videos!

Links in this post may be affiliate posts. If you buy an item through an affiliate link, I get a small fee, which helps support this blog!