Categories
Other Recipes

How to Make Tempura

[HDR-IMG]

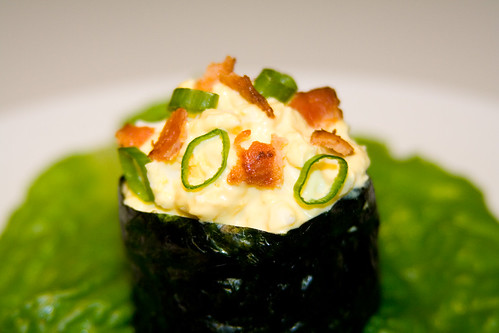
Several people have requested a tempura recipe, so here you go! This will work for most any type of tempura, from shrimp to vegetables, and even bananas!

Ingredients
  • assorted ingredients to tempura (shrimp, onion, carrot, broccoli, banana, etc.)
  • 1 cup ice cold water
  • 1 large egg
  • 3/4 cup flour
  • 1/8 tsp baking soda
  • cooking oil
Cooking Directions
  1. In a medium bowl, mix the water and the egg.
  2. In a separate bowl, mix the flour and baking soda.
  3. Stir the flour mix into the egg mix. It’s okay if the batter is a little lumpy.
  4. Stick the batter in the fridge while you prepare the other ingredients.
  5. If you are using shrimp, peel, de-vein, and wash it. Make some small cuts across the belly of the shrimp, to keep it from curling when you cook it. (Thanks hien and Rei for the tips!)
  6. If you are using vegetables, clean them and cut them into your desired size. Try not to use very soft ingredients, as they will soften as they cook (softer ingredients tend to fall apart when you take it out of the oil).
  7. Heat the oil in a frying pan. The oil should be hot enough that when you drip batter in it, the drops come to the top immediately.
  8. Coat your ingredients in the batter. Place the coated ingredients in the hot oil, turning when the bottom side is browned.
  9. Place the fried ingredients on a paper towel to drain. Remove any skewers. Serve immediately.

Serving Size: 1 batch

  • Calories:413
  • Fat: 6g, 9% DV
  • Saturated Fat: 2g, 8% DV
  • Cholesterol: 211mg, 70% DV
  • Sodium: 225mg 9% DV
  • Total Carbohydrates: 72g, 24% DV
  • Dietary Fiber: 3g, 10% DV
  • Sugars: 1g
  • Protein: 16g, 32% DV
  • Vitamin A: 5%
  • Vitamin C: 0%
  • Calcium: 5%
  • Iron: 29%
  • Magnesium: 7%
  • Potassium: 5%

Percent Daily Values are based on a 2000 calorie diet. These values are only estimates based on the individual ingredients, and not meant to replace the advice of a medical professional.

Categories
Maki Recipes

Deviled Egg Sushi

[HDR-IMG]

The deviled egg. A popular party appetizer. Delicious, everyone loves them, but they are so difficult to transport! They slip and slide around the container and make a huge mess! So what are we to do? Make Deviled Egg Sushi, that’s what! It’s flat on the bottom so it won’t roll around, and tastes just as good (if not better) than any regular deviled egg!

Hehe I should do commercials. 😛 Just kidding! Well, I got my brownies (much thanks to Tim for sending me to a wonderful brownie recipe!) and I am feeling much better!

I can’t believe this quarter is going by so fast! We have already finished the third week of school and midterms are already almost here! It scares me how fast time is flying by… before I know it I’ll be done with school and out into the real world! (scary!) Time for me to slow down and enjoy the roses… or brownies. 😀

This recipe is from the book, “Sushi American Style” by Tracy Griffith. (I promise I’ll have a review of the book up eventually!)

Makes 6 pieces.

Ingredients
  • 2 sheets nori
  • 1.5 cups sumeshi
  • 3 raw eggs
  • mayonnaise
  • dijon mustard
Cooking Directions
  1. Cook sushi rice.
  2. Bring a large pot of water to boil, add a little salt, and place the eggs in the water. Boil the eggs for 8-10 minutes.
  3. Peel the eggs.
  4. Place the eggs into a bowl and mash into bits with a fork. Mix in the mayonnaise and mustard, to taste.
  5. Form a small ball of rice with your hands or use a round cookie cutter to make a small circular rice shape about 1″ tall and 2 inches in diameter.
  6. Cut the nori into 2″ strips. Wrap a strip of nori around the circumference of each rice ball.
  7. Place a scoop of the egg mix on top of each ball of rice.
  8. Garnish with green onions, bacon, or any other toppings you desire.
  9. Enjoy!

Serving Size: 1 piece

  • Calories:187
  • Fat: 13g, 19% DV
  • Saturated Fat: 2g, 11% DV
  • Cholesterol: 110mg, 37% DV
  • Sodium: 511mg 21% DV
  • Total Carbohydrates: 13g, 4% DV
  • Dietary Fiber: 0g, 1% DV
  • Sugars: 8g
  • Protein: 4g, 8% DV
  • Vitamin A: 4%
  • Vitamin C: 1%
  • Calcium: 1%
  • Iron: 3%
  • Magnesium: 1%
  • Potassium: 1%

Percent Daily Values are based on a 2000 calorie diet. These values are only estimates based on the individual ingredients, and not meant to replace the advice of a medical professional.

More Pictures
Categories
Maki Recipes

Steak and Potato Sushi

[HDR-IMG]

More steak!! Yum! So now all you people who won’t eat sushi because you don’t like fish or any of that… you have no excuse!!!! Hehe. This uses the same flank steak recipe as the last post, so if you have leftovers, you can use them for this!

By the way, this is completely off topic (but it’s my blog so I can do that 😀 ) but does anyone have any good brownie recipes? It’s just been one of those months where I really need some good brownies. Lay in bed and eat brownies… wouldn’t we all just love that? Unfortunately life goes on… I want brownies. Or ice cream. But it’s too cold for ice cream, so brownies. Please? 😀

Makes 6 rolls, or 36-48 pieces.

Ingredients
  • 6 sheets nori
  • 3 cups sumeshi
  • 1 1.5 pound flank steak
  • 1 clove garlic, halved
  • salt, pepper, garlic powder
  • 1 tbsp butter
  • 1 medium potato
  • olive oil
  • 1 onion
Cooking Directions
  1. Cook sumeshi.
  2. Trim any excess fat from the flank steak.
  3. Pat the surface of the flank steak dry with a paper towel, then rub with the cut side of the clove of garlic. Season with salt, pepper, and garlic powder.
  4. Melt the butter in a skillet that is big enough to hold the flank steak. Put the flank steak in the skillet, and cook over medium-high heat until it is browned on the outside but still pink in the center.
  5. Remove the flank steak from the skillet and cover loosely with foil.
  6. Preheat the oven to 400 degrees Fahrenheit.
  7. Wash and peel the potato, and slice into 1/4″ x 1/4″ strips.
  8. Place the strips on a baking sheet and brush with olive oil.
  9. Sprinkle with salt and garlic powder.
  10. Bake for 25 minutes, rearranging the french fries halfway through so they don’t burn.
  11. Or if you prefer, you can go buy some fries from your favorite fast food restaurant. Works just as well. 🙂
  12. Slice the onion into rings, cut these in half.
  13. Roll the sushi, using a couple of strips of flank steak, onion, and french fries as your fillings.
  14. Serve with BBQ sauce. Enjoy!

Coming Soon!

More Pictures
Categories
Maki Recipes

Flank Steak Sushi

[HDR-IMG]

This flank steak recipe is one that my mom has used for ages, and I have always loved it! I used to always ask my mom to make it for dinner, but now that I’m all grown up I don’t get her home cooked dinners anymore! I have my own kitchen of course, but making it myself seemed a little daunting. Hehe let’s just say it never comes out as good as mom makes it… but it’s still so good! So of course I was excited to try one of my favorite meals as sushi! And might I say yum yum YUM!! (Yeah, I know I’m tooting my own horn but it’s so GOOD!)

Makes 6 rolls, or 36-48 pieces.

Ingredients
  • 6 sheets nori
  • 3 cups sumeshi
  • 1 1.5 pound flank steak
  • 1 clove garlic, halved
  • salt, pepper, garlic powder
  • 1/4 cup butter
  • 3 cups sliced mushrooms
  • 6 stalks green onion
Cooking Directions
  1. Cook sumeshi.
  2. Trim any excess fat from the flank steak.
  3. Pat the surface of the flank steak dry with a paper towel, then rub with the cut side of the clove of garlic. Season with salt, pepper, and garlic powder.
  4. Melt 1 tablespoon of butter in a skillet that is big enough to hold the flank steak. Put the flank steak in the skillet, and cook over medium-high heat until it is browned on the outside but still pink in the center.
  5. Remove the flank steak from the skillet and cover loosely with foil.
  6. Melt the remaining 3 tablespoons of butter in the pan drippings. Saute the mushrooms until they have shrunk to about 2/3 their original size.
  7. Slice the flank steak across the grain.
  8. Roll the sushi, using a couple of strips of flank steak, mushrooms, and a stalk of green onion as your fillings.
  9. Serve with hoisin sauce. Enjoy!

Coming Soon!

More Pictures
Categories
Other Recipes

Plenty of Oshizushi

[HDR-IMG]

So now that you know how to make oshizushi, it’s time to make some! You can use most ingredients in oshizushi, although squishier ingredients work better since they can compress very nicely. Here are some of the creations we tried:

Island Oshizushi

For one oshizushi (4-6 pieces, depending on how you cut it), use about 1 cup sumeshi, a 7″x2″ piece of pineapple, and a 7″x2″ piece of unagi. Be careful, because the pineapple will leak juice into the rice so the rice falls apart if it isn’t packed tightly enough!! (For directions for making oshizushi, click here)

Son’s Fun Oshizushi

This is the oshizushi shown in the How To post. This one has a little bit of everything in it. We used smoked salmon, liverwurst, avocado, and tobiko, then tied it in a green onion stalk. We were being a little random with this one! 😀

Frisky Oshizushi

This is similar to the Frisky Roll. Once you have compressed the sumeshi, place a long slice of cucumber on top of the sumeshi, and try to compress it as much as possible. It probably won’t compress much, since it’s a pretty hard ingredient. Then place alternating strips of avocado and unagi on top of this similar to how it was done in the Frisky Roll recipe.

A Little Bit of Everything Oshizushi

This is another oshizushi that has a bit of everything in it. First after the sumeshi is compressed, put down a layer of avocado and compress it. Next is a layer of unagi, then green onion. Compress these, then add a layer of smoked salmon on top. Compress it all, then eat it! (It tastes better than it sounds!)

Categories
Other Recipes

How to make Oshizushi

[HDR-IMG]Oshizushi is a type of sushi that uses a small wooden box to press the sushi into little rectangles. It’s a lot of fun to press the sushi, especially since there are so many different combinations you can make (As you will see, we went a little overboard 😉 ).

  1. When you get your box, you will see there are three pieces that make up the box. There should be one box-like piece with vertical slits on the side, and two flatter pieces with wooden feet.Oshizushi box
  2. One of these flat pieces should have feet that extend beyond the edges of the flat piece of wood. Place this on your workspace, flat side up.
  3. Place the box on top of this flat piece, with the vertical slits opening upwards.
  4. Place a large piece of plastic wrap in this, pressing it to the bottom and sides so the entire inside surface is covered. The plastic wrap should extend an inch or two over the edges of the box.
  5. Wrap the second flat piece of wood in plastic wrap. This will keep it from getting too dirty.
  6. Fill the plastic wrap-covered box about 2/3 full with sumeshi.Oshizushi
  7. Press the plastic wrap-covered flat piece of wood flat side down in the box to compress the rice.OshizushiOshizushi
  8. Place your ingredients, one layer at a time, into the box. Compress with the piece of wood between each layer. If you are small and/or not one with much arm strength (like me!), it helps to have someone heavier or stronger (or both) to help compress it for you. If not its fine, it’s just that when it’s compressed more it sticks together better when you are eating it. I used Son for all my sushi pressing!Oshizushi
  9. Once all of your ingredients have been placed on the sushi and compressed, use a sharp knife to cut the sushi through each of the vertical slits in the box. Also cut through the plastic wrap.Oshizushi
  10. Using the plastic wrap that you had put in the box, lift out the sushi. I prefer to do it this way, just because it keeps the box from getting too dirty.OshizushiOshizushi
  11. Replace the plastic wrap in the box with a new sheet before you make another batch.
  12. Eat your freshly pressed oshizushi!
Categories
Maki Recipes

BLT Maki

This roll is my sushi version of the classic BLT sandwich. I used to love BLT sandwiches, except that I don’t like tomato – so mine always ended up being BL_ sandwiches. 😛 This roll turned out tasting pretty darn good! I think it’s even better tasting than the sandwich… but then of course, I’m also a bit biased. 😉

By the way, if you haven’t voted yet, head on over to the Well Fed Network and vote for SushiDay! Thanks to everyone who has already voted – I really appreciate it! 😀

Makes 6 rolls, or 36-48 slices.

Ingredients
  • 6 sheets nori
  • 3 cups sumeshi
  • 12 strips uncooked bacon
  • 1 head lettuce
  • 1 medium tomato
Cooking Directions
  1. Cook sushi rice.
  2. Slice the uncooked bacon in half, so the strips are half as long as they originally were. This makes the bacon easier to cook, but if you prefer to cook whole slices of bacon, that’s fine too.
  3. Fry the bacon. You don’t need to use any oil or butter or anything, because the fat in the bacon is more than enough to fry the bacon. I prefer to fry my bacon until it’s really crispy, but that of course, is completely up to you! 🙂
  4. Place the cooked bacon on some paper towels to soak up the remaining grease.
  5. Wash the lettuce.
  6. Separate 6 or so leaves from the head of lettuce.
  7. Cut the tomato into thin strips
  8. Roll the sushi. For your fillings, place a lettuce leaf on the sumeshi-covered nori, then place the tomato strips and about 4 pieces of bacon on top of the lettuce – then roll the sushi as you normally would.
  9. Serve with mayonnaise. Enjoy!

Categories
Maki Recipes

Frisky Roll

How was everyone’s New Year Celebration? Mine was pretty quiet – I spent New Year’s Eve with my family eating lots and lots of food like we do everywhere (I’m not much of a party girl… I prefer to stay home… and eat! 🙂 ) We stayed up late eating (spinach dip, shrimp, stuffed mushrooms, bacon wrapped asparagus – my mom made all this from scratch! My amazing mom 🙂 ) and drinking Martinelli’s sparkling cider.

Unfortunately, I had to get up early the next day to make sushi for our New Year’s celebration before we headed to my uncle’s house. You might remember me writing about this earlier, but if not, here’s a quick recap: Every year it is a tradition for us as a somewhat Japanese family to eat sushi on New Year’s. Typically, we buy all of our sushi, but this year, since the creation of SushiDay, it was a little different. We still bought California Rolls, Inari-Zushi and Futomaki (a vegetarian roll), but my family also requested that I make a few rolls.

Frisky roll

I ended up making 9 of the Crunchy Shrimp Rolls (about 72 pieces) and 5 of the Kappa Maki Rolls (about 40 pieces). The Crunchy Shrimp Rolls were a HUGE hit with my extended family – they ate as much as they possibly could and then took the rest home for the next day’s lunch! I was very happy about that. 😀

This roll is amazingly delicious! I love tempura shrimp, avocado, and unagi, and together they taste so good! In addition, the roll ends up looking very nice, so it seems even more mouth watering. 🙂 I’m really not sure how the roll got its name, and I have never before heard of the roll, but according to the Sushi Chart, this is another of the popular rolls (that nobody really knows about 😉 )!

Frisky roll

Makes 6 rolls, or 36-48 slices.

Ingredients
Cooking Directions
  1. Cook sushi rice.
  2. Bake tempura shrimp as directed on the package. (I haven’t had time to make homemade tempura shrimp so I can get you a good recipe for that… don’t worry, it will come as soon as I can try it!) You can also fry the tempura shrimp if you choose, but baking it is healthier, and you can prepare other things (such as the sumeshi) while it’s baking.
  3. Cut tails off the tempura shrimp.
  4. Cook the unagi as directed on the package.
  5. Cut the unagi into 1-1.5 inch wide by 2.5 inch long slices.
  6. Cut the avocados in half, discarding the pit.
  7. Cut off the hard skin and discard.
  8. Slice the first avocado into thin sticks.
  9. Slice the second avocado into thin slices, although not so thin that they easily tear if you try to pick them up.
  10. Cut the cucumber into thin strips.
  11. Roll the sushi inside-out, using several avocado sticks, 2 pieces of tempura shrimp and a stick of cucumber as your fillings.
  12. Lay alternating pieces of unagi and avocado on top of the inside-out roll.
  13. Use your plastic wrap-covered rolling mat to squeeze the unagi and avocado into the roll so they won’t fall off.
  14. Carefully cut the roll, trying to keep the toppings from falling off the sushi.
  15. Serve with shoyu, wasabi, and ginger if desired. Enjoy!
Categories
Other Sushi Randomness

Happy New Year!

Happy New Year everyone! I hope everyone has a safe and happy New Year’s celebration!

My SushiDay New Year’s resolution is to make lots of new and different sushi, and to try to prepare and use some raw fish in my sushi this year! My personal resolutions are to do really well in school and get back in shape. 🙂

So what are your New Year’s resolutions? Hopefully they include eating and making a lot of sushi! 😀